manuals.online logo
Brands
  1. Home
  2. •
  3. Brands
  4. •
  5. Panasonic
  6. •
  7. VCR System
  8. •
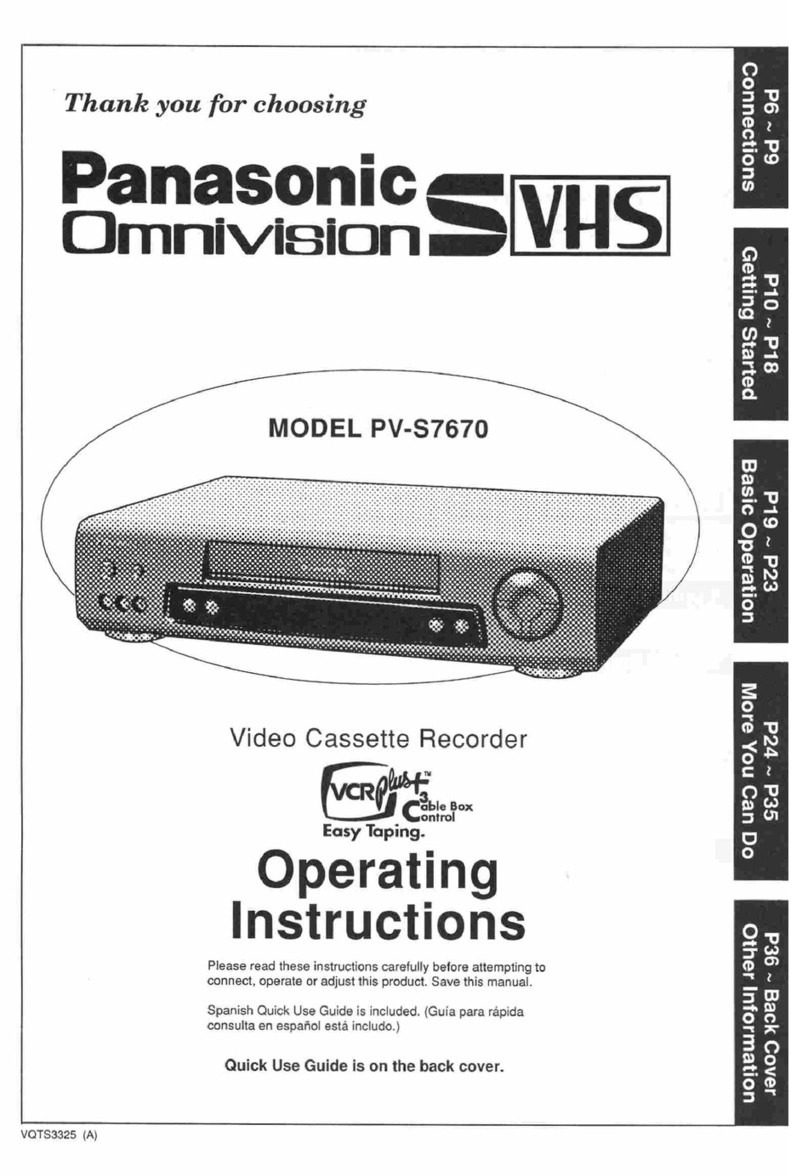
  9. Panasonic Omnivision PV-2905 User manual

Panasonic Omnivision PV-2905 User manual

Other Panasonic VCR System manuals

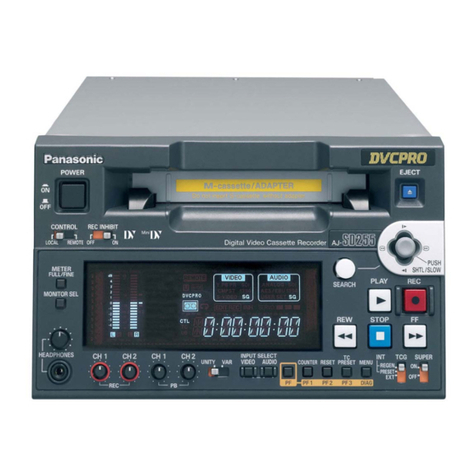
Panasonic AJ-D230H User manual

Panasonic

Panasonic AJ-D230H User manual

Panasonic NV-SJ3MK2AM User manual

Panasonic

Panasonic NV-SJ3MK2AM User manual

Panasonic AG5710P - SVHS User manual

Panasonic

Panasonic AG5710P - SVHS User manual

Panasonic PV-V4525S User manual

Panasonic

Panasonic PV-V4525S User manual

Panasonic AJHD2700P - D5 HD VTR User manual

Panasonic

Panasonic AJHD2700P - D5 HD VTR User manual

Panasonic Omnivision PV-V4660 User manual

Panasonic

Panasonic Omnivision PV-V4660 User manual

Panasonic AG-MD835P User manual

Panasonic

Panasonic AG-MD835P User manual

Panasonic NV-SD420 Series User manual

Panasonic

Panasonic NV-SD420 Series User manual

Panasonic NV-HV61EB User manual

Panasonic

Panasonic NV-HV61EB User manual

Panasonic NV-MV21GN User manual

Panasonic

Panasonic NV-MV21GN User manual

Panasonic AGRT650P - TIME LAPSE VTR User manual

Panasonic

Panasonic AGRT650P - TIME LAPSE VTR User manual

Panasonic AJD850 - DVCPRO STUDIO VTR User manual

Panasonic

Panasonic AJD850 - DVCPRO STUDIO VTR User manual

Panasonic Omnivision PV-V4622 User manual

Panasonic

Panasonic Omnivision PV-V4622 User manual

Panasonic AJ-HD3700B User manual

Panasonic

Panasonic AJ-HD3700B User manual

Panasonic PV-V462 User manual

Panasonic

Panasonic PV-V462 User manual

Panasonic Omnivision PV-V4540 User manual

Panasonic

Panasonic Omnivision PV-V4540 User manual

Panasonic NV-HS1000 User manual

Panasonic

Panasonic NV-HS1000 User manual

Panasonic AGDS840 - SVHS VIDEO PLAYER User manual

Panasonic

Panasonic AGDS840 - SVHS VIDEO PLAYER User manual

Panasonic Omnivision PV-4657 User manual

Panasonic

Panasonic Omnivision PV-4657 User manual

Panasonic NV-SD230A User manual

Panasonic

Panasonic NV-SD230A User manual

Panasonic Omnivision PV-9668 User manual

Panasonic

Panasonic Omnivision PV-9668 User manual

Panasonic PV-8660 User manual

Panasonic

Panasonic PV-8660 User manual

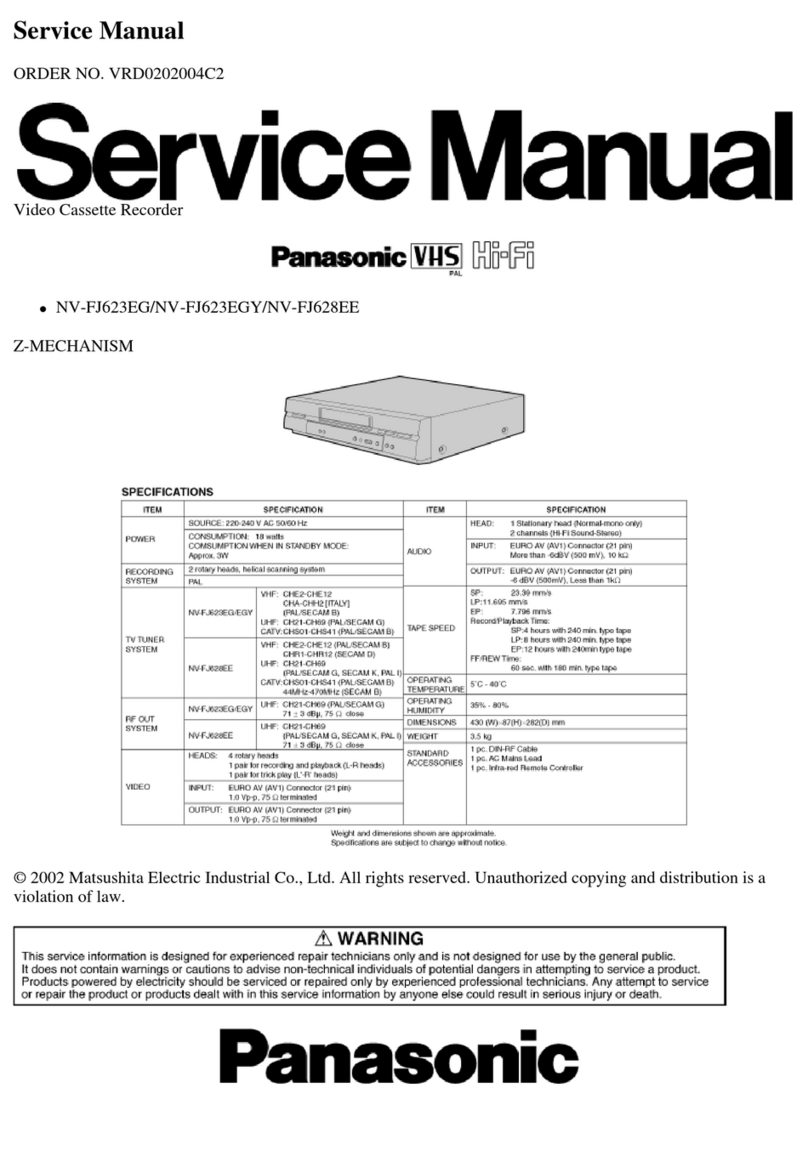
Panasonic NV-FJ623EG User manual

Panasonic

Panasonic NV-FJ623EG User manual

Panasonic Omnivision PV-7664 User manual

Panasonic

Panasonic Omnivision PV-7664 User manual

Popular VCR System manuals by other brands

RCA VR678HF user guide

RCA

RCA VR678HF user guide

Zenith VRL4270HF Operating guide & warranty

Zenith

Zenith VRL4270HF Operating guide & warranty

Akai VS-606EA Operator's manual

Akai

Akai VS-606EA Operator's manual

FUNAI 27C-450 Service manual

FUNAI

FUNAI 27C-450 Service manual

Sanyo VHR-M262EV Service manual

Sanyo

Sanyo VHR-M262EV Service manual

Sony SLV-X37 operating instructions

Sony

Sony SLV-X37 operating instructions

JVC SR-VS20U - Dual Format S-vhs/minidv Recorder instructions

JVC

JVC SR-VS20U - Dual Format S-vhs/minidv Recorder instructions

Grundig GV 7400 EURO Service manual

Grundig

Grundig GV 7400 EURO Service manual

Zenith VCM321 Installation and operating guide

Zenith

Zenith VCM321 Installation and operating guide

JVC HR-A43U, HR-A63U instructions

JVC

JVC HR-A43U, HR-A63U instructions

Aiwa VX-S135U operating instructions

Aiwa

Aiwa VX-S135U operating instructions

RCA VR725HF user guide

RCA

RCA VR725HF user guide

JVC 0703-AH-PJ-BJ instruction manual

JVC

JVC 0703-AH-PJ-BJ instruction manual

TruTech ZV450TT8 owner's manual

TruTech

TruTech ZV450TT8 owner's manual

JVC HR-DVS1EK instructions

JVC

JVC HR-DVS1EK instructions

Sensory Science DDV2120 user guide

Sensory Science

Sensory Science DDV2120 user guide

JVC HR-VP78U instructions

JVC

JVC HR-VP78U instructions

RCA VR611HF user guide

RCA

RCA VR611HF user guide

manuals.online logo
manuals.online logoBrands
  • About & Mission
  • Contact us
  • Privacy Policy
  • Terms and Conditions

Copyright 2025 Manuals.Online. All Rights Reserved.

Operating
Instructions
Panic r,,,,,-1
Omnlvision IWH3_J
PV-2905
Video Cassette Recorder
FEATURES
•HC (High Quality) Systenn
•Digital Quartz Tuning with Auto Set Feature
• On Screen Display Programming
•Special Effects Playheck
Fast Search
Double Speed Playback
Still Picture
Slow-Motion
•One Touch Recording
•Unattended (Timer) Recording
•Auto Operation Functions
•Wireless Remote Control
TABLE OF CONTENTS
TO GET STARTED .............................. 1
TO PLAYBACK ................................. 2
USING THE VCR/TV SELECTOR .................. 2
DESCRIPTION OF CONTROLS .................... 3
CLOCK ADJUSTMENT ........................... 7
CHANNEL MEMORY ............................. 8
SPECIAL EFFECTS AND OPERATIONS ............ 9
TO RECORD ................................... 10
ONE TOUCH RECORDING ....................... 11
TIMER RECORDING ............................. 13
HELPFUL HINTS ................................ 15
RE-RECORDING
TAPE COUNTER CONTROL
VIDEO CASSETTE
NOTES ON OPERATIONS
BEFORE REQUESTING SERVICE ................. 18
ACCESSORIES .......................... Back Cover
ISPECIFICATIONS ......................... Back Cover
iBefore at_tempting_1oconnect, operate or adjust this product, please read these instructions completely. va'r_ _
(ACCESSORIES INCLUDED IN THE CARTON_
To GET STARTED \ARE SHOWN ON THE BACK COVER /
INTRODUCTION
We are pleased to introduce you to one of the most sophisticated entertainment products available today. Shown below are
the two steps necessary for playback• To watch TV and record, additional connections are needed; see the separate Connections
Guide accompanying this manual. Keep this manual near your VCR for quick refereece.
ONE TIME SET-UP STEPS
Setting the clock is not actually necessary for playback, but is necessary for all types of timer recording. Please refer to page 7 to
set the clock.
1 VCR TO TV CONNECTION
A Connect to a TV that has a VHF 75 ohm Post
Back of TV (example only)
VHF
(OUT TO TV) Back of VCR
RF Coaxial Cable (supplied)
B Connect to a TV that has VHF 300 ohm Twin screws
(OUT TO TV) Back of VCR
(A UHFNHF Sand Separator can also
be added. See the separate "Basic
Guide For VCR Connections".) RF Coaxial cable (supplied)
75 ohm - 300 ohm
Transformer
(not supplied)
SELECT VCR CHANNEL (CHANNEL 3 OR 4)
Your VCR translates video and audio signals from the VCR into standard signals that your TV can receive on CH3 or CH4•
This signal will be broadcast to the TV through the RF Coaxial Cable.
You decide which TV channel to use by selecting either channel 3 or 4 with the CHANNEL 3/4 Switch on the back of the
VCR. The CHANNEL 3/4 Switch should be set to the channel that is not normally occupied by a TV broadcast in your area,
to avoid local interference.
TO WATCH CHANNEL SELECTED AT THE VCR
First connect the VCR and "IV power plugs
to AC outlets. Then tune your TV to the
VCR CHANNEL, the same channel that you
selected with the CHANNEL 3/4 Switch /_, H•X
Select channels using the CHANNEL I_ a a .. -I
UP/DOWN Keys or the Remote Oontrol IT,d
NUME ,C<oys<seepageor,)• BaokofVCR
VCR CHANNEL
3/4 Switch
I I17: gl
CH4, []
WARNING: TO PREVENT FIRE OR SHOCK HAZARD, DO NOT EXPOSE THIS EQUIPMENT TO RAIN OR MOISTURE.
This video recorder, equipped with the HQ System, Is compatible with existing VHS equipment.
Only use those tapes with the _mark. It is recommended that only cassette tapes that have been tested and
inspected for use in 2, 4, 6, and 8 hour VCR machines be used.
I
C_UtKJN:TO_rxx_ T_ RISKO__LWR_
r.o _,oT FIll4OW cov_l Ioq SI_:KI
140 L_R._R'_3EABLI_ pARr s I_DE
• I
This symbol warns the user that uninsulated voltage within the unit
may have sufficient magnitude to Cause electric shock. Therefore, it is
dangerous to make any kind of contact with any inside part of this unit.
This symbol alerts the user that important literature concerning the
operation and maintenance of this unit has been included. Therefore,
it should be read carefully in order to avoid any problems.
To PLAYBACK 2
Be sure the PREPARATIONS on page 1 have been completed before proceeding to step 1 below,
AT THE "IV
1 Turn the "rv ON and
/select its VCR
channel.
The TV's VCR Channel is
either channel 3 or 4.
AT THE VCR
Insert a cassette.
The Power will come ON
automatically.
If the Record Tab (page 16) is
removed, playback will start
automatically, (In this case
skip step 3.)
llf a cassette is already in the
'VCR, just press the POWER
ButtonON.
START PLAYBACK
Press the PLAY
Button.
The VCR Indicator will light.
This automatically sets the
VCR mode (see below).
For SpecialEffectssee
page 9.
STOP pLAYBACK
_L Press the STOP
-.lr Button.
•Pressthe EJECT Buttonto
removethe cassette.
1POWER ON;
SELECT THE
VCR CHANNEL
CASSETTE VCR INDICATOR
"VCR"
4 STOP/EJECT4
BuI-rON
USING THE VCR/TV SELECTOR
BuTroN
After you have a cable system or antenna connected to your VCR and the "TO GET STARTED" connections on page 1 are
complete, you can begin to watch TV broadcast channels using your VCR or TV tuner.
ANTENNA (or CABLE)
TRemote Control VCR/t'V Selector TV
VCR Indl "VCR"
TO SELECT CHANNELS AT THE VCR FOR VIEWING OR RECORDING
gis necessary to place the VCR in the "VCR" mode, Be sure that the TV is tuned to the same channel which was selected
for the VCR channel (CH3 or 4) above.
1) WHEN YOU TURN ON YOUR VCR
The "VCR" mode is automatically selected, just turn the TV power ON and select the VCR CHANNEL,
2) WHEN THE VCR POWER IS ALREADY ON
The VCR indicator should show on the front panel.
If the VCR Indicator is not showing, select the "VCR" mode by pressing the VCR/TV SELECTOR Button once,
Select channels using the VCR REMOTE CONTROL CHANNEL UP/DOWN Keys or the NUMERIC Keys.
TO SELECT CHANNELS AT THE TVFOR VIEWING
In "TV" mode no "VCR" indicator shows on the front panel.
1) WHEN THE VCR iS TURNED OFF
The "TV" mode is automatically selected, just turn the TV power ON.
2) WHEN THE VCR I?OWER iS ALREADY ON
If the VCR Indicator is showing and the TV is already ON select the "TV" mode by pressing the VCR/TV SELECTOR
Button once. The VCR Indicator should NOT show on the front panel.
Select channels using the TV channel controls.
3 DESCRIPTION OF CONTROLS
N;I;[e]_tl
CASSETrE COMPARTMENT
VCR/TVSELECTOR Bu'rroN_
WIRELESS REMOTE \
SENSOR
POWER BUTTON ........
CHANNEL
UP_OWN KEYS
PAUSE/STILL BUTTON
\\\
,I
/
,-- REWIND/(_) SEARCH
_BUTTON
FAST FORWARD/
_SEARCH _ BU'FrON
---MULTI FUNCTIONDISPLAY (Page 5)
RECORD BUl"FON
PLAY/X2BU'n'ON
'_----STOP_JECT BUTTON
POWER BUTTON
-To turn the VCR on and off.
-To set the VCR for unattended
recordings after timer programming
have been completed.
PLAY/X2 BUTTON
To play back a tape.
In SLP playback, tap this button once
more for arapid search at twice normal
speed.
STOP/EJECT BUTTON
To stop the tape. TO remove acassette
in the stop mode.
I;I:Y'J;!
VHF/UHF ANTENNA OUTPUT-
TERMINAL (OUT TO TV SET)
VHF/UHF ANTENNA INPUT
TERMINAL (IN FROM ANTENNA)
CHANNEL 314 SWITCH
-',_\,_ / VIDEO INPUT CONNECTOR
.........uoo... co_o
J= ,uoooo,,o,co_c,o.
'/ _ VIDEO OUTPUT CONNECTOR
CHANNEL 3/4 SWITCH
Set to channel 3 or 4(whichever is not
used for regular TV broadcasting in
your area) to use your TV as a VCR
program monitor.
See "TO GET STARTED" on page 1.
ivAUI;1:11:1."_1:1 _nLvj[O]IIlO,[O] _II:[o| I I
Various VCR function controls are conveniently available with your Wireless Remote Control.
4
POWER BUTTON
VCR/TV SELECTOR BU'I-I'ON
CHANNEL MEMORY BUTI'ON
ADD/DELETE BU'R'ON
RECALL BUTTON
TAPE SPEED SELECTOR BUTTON
(SP/LP/SLP)
STOP BUTTON
PLAY BUTTON
REWIND/(_ SEARCH BUTTON _-/"
TRACKING CONTROL"
(UP/DOWN)
FAST FORWARD/SEARCH
BUTTON
UP/DOWN KEYS
PROG/CLOCK BUTTON
MEMORY BUTTON
ONE TOUCH RECORD (OTR)
BuI-rON
BUI-I'ON
_RECORD BUTTON
PAUSE/STILL BUTTON
SLOW BUTTON
VCR/TV SELECTOR BUTTON
Selects the signal source that your TV
receives.
VCR position: To view playback or to
monitor video
recordings. "VCR"
appears on the Multi
Function Display.
TV position: To Watch TV or to view
one program while
recording a different
program. When this is set
to TV, there is no
indication on the Multi
Function Display.
CHANNEL MEMORY BUTTON
ForCHANNELMEMORYprogramming,
pressthisbuttontousetheAUTO SET
fe_ure.
ADO/DELETE BU'I-rON
Used to add or delete a selected
CHANNEL.
RECALL BUTTON
Press this button to display or clear the
tape counter, date, time, function and
channel number.
TAPE SPEED SELECTOR
(SP/LP/SLP) BUTTON
Setthis selectorforthe desired
recording speed.
REWIND/SEARCH BUTTON
TO rewind tapes. Also. during playback
press this button to view the picture in
rapid reverse.
TRACKING CONTROL
Use this control during playback or
double speed playback if the image is
partially obscured by bands of noise.
FAST FORWARD/SEARCH BUTTON
TO rapidly advance the tape. Also,
during playback press this button to do
rapid forward visual search.
CLEAR/RESET BU'I-rON
CLEAR BU'I-FON
Press this button to clear the settings
for the displayed program contents.
While setting the clock or a program,
each press of this button starts the digit
to the left flashing for correction.
RESET BUTTON
Resets the Tape Counter when it is
displayed.
PROG/CLOCK BuI-rON
Used for setting the clock, programming
the timer and displaying acalendar.
MEMORY BUTTON
Turns the Memory Stop feature on and
off.
ONE TOUCH RECORD (OTR)
BUTTON
Select the channel and press the ONE
TOUCH RECORD Button to start
recording immediately for 30 minutes to
4 hours, or until the tape ends. in any
case, power shut off is automatic.
STANDBY BUTTON
Usedalongwiththe OTR Buttonto set
delayed (Standby)OTR's.
PAUSE/STILL BUTTON
To temporarily stop the tape during
recording or to view a still picture during
playback.
SLOW BU'I-rON
Press the SLOW Button during
playback for slow motion on tapes
recorded in SLP speed.
5 DESCRIPTION OF CONTROLS (CONTINUED)
hV_LIIIII II ;III _tq life]_IIH KI"JW.,!
CASSETrE-IN
INDICATOR "G_ "
VCR/TV INDICATOR
"VCR"
FUNCTION INDICATOR
MEMORY INDICATOR
"M"
CLOCK DISPLAY
\
-TIMER INDICATOR
SPEED INDICATOR
"SP""LP""SLP"
-CHANNEL DISPLAY
CASSE'n'E-IN INDICATOR "r_ ,,
The three variations in this indication show the following
conditions.
No "rm_,' displayed: There is no cassette in the unit.
"_ "displayed: There is a cassette in the unit and some
interval to the end of the tape.
Flashing " rm_"display: The Automatic Rewind took place at
the end of the tape during playback, recording or fast forward.
The indicator continues flashing until the next mode is
selected.
Also flashes if you attempt any recording when the cassette
record tab is missing.
VCR/TVINDICATOR "VCR"
Appeam whenthe VCR/TV Selectorissetto VCR.
FUNCTION INDICATOR " =a
Shows the operation mode of VCR (PLAY, DOUBLE SPEED
PLAY, REW, REC, FF, PAUSE, STILL, SEARCH, SLOW etc.)
MEMORYINDICATOR "M"
Indicates Memo_ control in use.
CLOCK DISPLAY
Displays the current time.
TIMER INDICATOR " _] "
Indicates the VCR is set for unattended recording.
SPEED INDICATOR "SP" "LP" "SLP"
Shows the tape speed duringrecordingand playback,
CATV INDICATOR
CATV indicates ANTENNA SYSTEM is set to the Cable TV
mode.
CHANNEL DISPLAY " _','.;,'"
The CHANNEL number selected is displayed.
An "L" will appear to let you know you have selected a Line
input.
IIjill _[q II[o)_I I_IH[el,_1KS]:lk't'd ;Jl:[e] I&l
The following symbols will appear on the Multi Function Display to indicate the current mode or operation of the VCR.
Some of these modes will also be momentarily displayed on the TV screen when you press the Operation Buttons (see page 6).
PLAY, REW, REW SEARCH FF, FF SEARCH REC
DOUBLE SPEED PLAY
REC PAUSE STILL EJECTSLOW
ii> I
\. o,
-!!-
/:1:\
6
Whenever you turn on the VCR with the TV on, when a function button (STOP, FF, etc.) is pressed, or when you change
channels, a 3 second OSD appears. The function name and the channel number (if tuned) are displayed as a large overlay
for 1 second, then again for 2 seconds in a smaller overlay.
F F 10 I 1 second
FF
i
10 2 seconds NO DISPLAY
When the RECALL Button is pressed the sequence of overlays shown below will be displayed with what you have been viewing,
as long as the arrow appears in the lower right (for about the first 5 seconds). After the arrow disappears, the overlay you
have selected will remain on the screen until it is removed by the next press of the RECALL Button.
CH_2 O:05AU
WITHIN
co_,_ 23,5 _ 5SEC.
To operate the
tape counter
at this time,
see page 16.
Coup] 23_5
_I J^,l e9sA o:_sAs I PRE_
WITHIN I_ I WITHI
,SECL
AFTER / 0:0_=
5SEC. I__ /
[
Press the RECALL Button while the arrow is displayed to progress to the next overlay.
To see the calendar for this month and next month, press the PROG Button (on the Remote Control) while you are watching
"IV. The MENU screen will appear; press key 3. The calendar for the current month appears. Press key 1 to change between
this month and the next. Press the PROG Button to return to the screen.
I,Eft,. T,.:.,M I
SELECT MODE
Pus,KEY*,Z OR3 Press key 3
tSET CLOGK 4_-
ZSET PROGRAM
3CALENDAR
EXIT. PROG KEY
MENU screen
FE9 lga9
SU _ I_ WE TH FR SA
_ 2 3 4
j,_ ,,,1o,,
14 lS 15 17 I_
19 2O 21 2_ 23 24 25
MONTH¸ I [Xqr. P_OG
If a blank section of the tape is encountered inthe play mode or the channel you select has no broadcast, the TV screen will
change to a solid blue field.
The screen will remain blue until a recorded signal is again detected or an active channel is selected.
CLOCK ADJUSTMENT
REMOTE CONTROL
/NUMERIC KEYS
/CLEAR BUTTON
/PROG/CLOCK
BUTTON
Accurate clock time is a must for alltypes of timer recording. Your VCR will
aCCurately maintain its calendar up to Dec. 31, 2007, 11:59 PM once you
have set the present day and time.
RECALL BUTTON
SELECT THE CLOCK SET THE MONTH & SET THE HOUR &
SET MODE DAY MINUTE AND AM OR PM
Press the PROG/
CLOCK Button.
TO SET THE CLOCK
When the VCR and TV are turned on for the first time, the clock set guide
will appear on the TV screen.
If the guide disappears, press the PROG/CLOCK Button to recall it.
Be sure that the VCR/TV Selector is set to the VCR position.
The Clock Set Guide
shown in step 2
appears.
When setting the clock
for the first time, entdes
that don't match the
calendar will cause a
"?" to appear.
Enter two digits
for the month,and
two digits for the
day.
Forexample,for Feb9,
press _) (_) _) (_) .
...... :-- I
I
SET MONTH
WITH NUMERIC KEy
EXIT PAOG KEy
o_0t2-_'-- --:--
SEI YEA_
WITH NUMERIC KEY
EXIT¸ .pft_ KEY
SET THE YEAR
Enter two digits
for the year.
For example, for 1989,
press(_)_).
02 0_-_ --:--
_EI YEAR
WITH NUMERIC KEY
EXlT. pRoG KEy
SEI HOUR
WlIH RUMERIC KEY
EXrT. pRoG KEy
Enter two digits
for the hour, two
digits for the
minute(s), and "1"
for AM or "2" for
PM.
For example, for 10:30
PM, press
®@ ®.
SET HOUR
WITH NUMERI_ KEY
EXIT.PRC_KEY
PUSH pROG K_y
AT EXACT TIME
START THE CLOCK
5Pmss the PROG!
CLOCK Button,
Clock starts.
The TV screen will
return to the channel
selected at the VCR.
• When in the clock adjustment mode, be sure to enter the first digit within 30 seconds, or the VCR will automaticany leave
this mode.
•Be sure to enter "0" before single-digit numbers.
TO MAKE CORRECTIONS IN ON-SCREEN ENTRIES
To make corrections after entering a number, press the CLEAR Button to move the flashing indication one space left. Enter
the correct number. The flashing indicator will then move one space right.
TO DISPLAY THE DATE AND TIME
...... s, B:0IA, I Press the RECALL Button three times to show the date and time overlay on the TV screen.
ISee "VCR STATUS DISPLAY" on page 6 for details.
TO RESET THE CLOCK
iSET CLOCK
_ET P_0GAAM
3 CALENDAR
EXiT PROG KEY
If you want to reset the clock at some later time, press the PROG/CLOCK Button while you are watching
TV. The MENU screen shown at left will appear; press key (T) and follow the clock set guide to re+enter
the new date and time.
CHANNEL MEMORY 1
The CHANNEL UP/DOWN Keys may be set to stop only on the available channels
in your area assigned to them from the 155 Channel Memory. th Channe_ Memory
mode you can select "CATV" to receive Cable channels or leave "TV" selected to
receive Broadcast channels. The AUTO SET feature assigns channels receivable CHANNEL
fromeitherbandinyourareatotheCHANNELUp/DOWNKeysandskipstheothers. MEMORY
With the ADD/DELETE Button you can add or delete any channel from the CHANNEL SU'('rON
UP/DOWN Keys operation in either bend.
ADD/DELETE*_
SUTTON
AAUTOMATIC SETTING
PREPARATIONS on page 1 and basic instaUation steps must be completed first.
SELECT CHANNEL MEMORY
"_ Press the CHANNEL
MEMORY Button.
The Channel Memory Guide
appears.
CH 02(ADOI TV
A_TENNA SYSTEM
_..SHIFT TV _ CMV
+
i
,._. PUSH KEY 1OR 2
EXIT. CH yEI_ORy KEy
_----_.---_-II.,SHIFT ¢MV _ T¥ 3
To exit from the Channel
Memory mode press the
CHANNEL MEMORY Sutton.
SELECT THE ANTENNA SYSTEM
(A) TO CHANGE THE
CURRENT BAND
Press Key t_) to change
from "TV" to "CAW"
or
from "CAW" to "TV".
"TV" Position- HOME
ANTENNA
SYSTEM I
L
I
"CATV" Position - CABLE TV
SYSTEM I
I
I
Changing bands cancels I
I
)revious channel memory t
assignments. I
After Key(_) or (_) is pressed
: (e) TO KEEP THE
: CURRENT SAND
Press Key (_).
i
=Use when the band selected
:already matches your
IAntenna System.
I
i
r
i
the Auto Set Guide appears.
REMOTE CONTROL
,NUMERIC
KEYS
-CHANNEL
UP/DOWN
KEYS
c_ O2{AOD) W
AUr0 SET
pUSH KEy I
FOR AUTO SET
OR
EXlT.,CH _E_Ry KE_
START AUTO SET
Press Key (_).
This startsthe Auto Set
Channel Scan in the selected
band.
AUT_ SET
PRO¢fE0_NG
02
After Auto Set, the lowest
numbered channel assigned
to the CHANNEL UP/DOWN
Keys will appear on screen.
BUSING THE ADD/DELETE BUTTON
ADD OR DELETE THE CHANNELSELECT A CHANNEL
1Select the channel to be added or
mdeleted.
The Channel can be selectedwiththe
CHANNEL UP/DOWNKeysorthe NUMERIC
Keys.
10
2Press the ADD/DELETE Button.
This screen appears for afew seconds to
indicate that the channel has been added or
deleted.
CH IOqOLT) _V
i°rI
IADO) CATV
"(ADD}" indicates the channel has been added.
"(DLT)" indicates the channel is deleted from
CHANNEL UP/DOWN Key selection. The
channet number wilt flash on the Multi Function
Display just to indicate that this channel has
been deleted. It also flashes when you select
the deleted channel with the NUMERIC Keys.
CHANNEL UP/DOWN KEYS
Any time the CHANNEL
MEMORY Button is OFF, you
can select assigned channels
sequentially using the
CHANNEL UP/DOWN Keys.
Unassigned channels will be
s_K_ppedover in sequence.
NOTE: After adding a channel, confirm its status by selecting itwith the CHANNEL UP/DOWN Keys. After deleting a channel,
the CHANNEL UP/DOWN Keys should skip it. To select a channel that has been deleted, use the NUMERIC Keys.
*Use apen point to press the ADD/DELETE Button.
SPECIAL EFFECTS AND OPERATIONS
After your VCR is connected to your TV (see page 1, To Get Started) and you know how to play back a tape (see page 2,
Playback), you are ready to enjoy the special effects on this page.
SPECIAL EFFECTS IN PLAYBACK MODE (BEST IN SLP SPEED: SOUND IS MUTED)
TO RAPIDLY LOCATE A PARTICULAR
SEGMENT
•Press the SEARCH Button.
This starts a rapid forward or reverse
visual search.
•Press the SEARCH Button again or
the PLAY Button to return to playback.
;EARCH SPEED
SLP Search is about 21 times normal
speed
TO VIEW A DOUBLE SPEED
PLAYBACK PICTURE
•During playback, tap the PLAY Button
again on the VCR.
•Press the button once more to release
the tape from a doub(e speed
playback.
AUTO OPERATION FUNCTIONS
1. Auto Playback
Cassette insertion --
(Auto) Power On --
Auto Playback
(without Record Tab*)
2. Rec Auto Off
Manual Record to Tape end --
Auto Rewind -- Eject --
Power Shut Off
3 Playback Auto Stop
Playback to Tape end --
Auto Rewind --
Eject (without Record Tab*) --
Stop Mode
4. Auto Rewind
Playback or Fast Forward to
Tape end -- Auto Rewind --
Stop Mode
5. Eject Cassette
with Power ON or OFF
*For record tab information refer to
page 16.
TO VIEW A STILL PICTURE
(DURING PLAYBACK)
•Press the PAUSE/STILL Button,
A freeze frame picture of the playback
image appears.
•Press the button once more to release
the still and continue playback.
TO VIEW A SLOW MOTION PICTURE
•Dudng playback, press the SLOW
Button on the Remote Control
•Pressthe PLAY Buttonto release
SLOW.
PAUSE/STILL_ [
BUTTON --4
PLAY
BurroN
SEARCH _-_
BUTTONS
TRACKING --
CONTROL
SLOW
BUTTON
TRACKING CONTROL
A certain amount of "noise" may appear
in the picture when a VHS video tape
recorded on one VCR is played back on
adifferent one. You may adjust the
TRACKING CONTROL (UP/DOWN) on
your Remote Control to minimize this noise
in normal playback, double speed
playback and slow motion playback. The
normal position is automatically set when
a cassette tape is inserted.