manuals.online logo
Brands
  1. Home
  2. •
  3. Brands
  4. •
  5. Panasonic
  6. •
  7. VCR System
  8. •
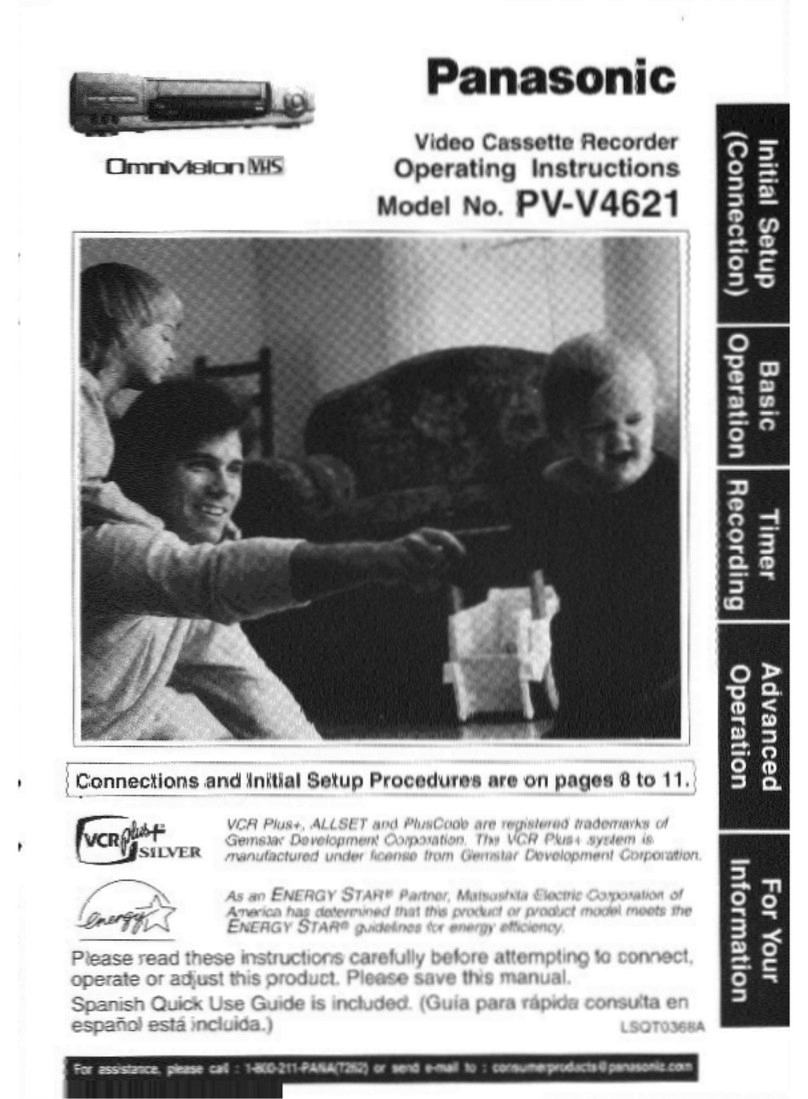
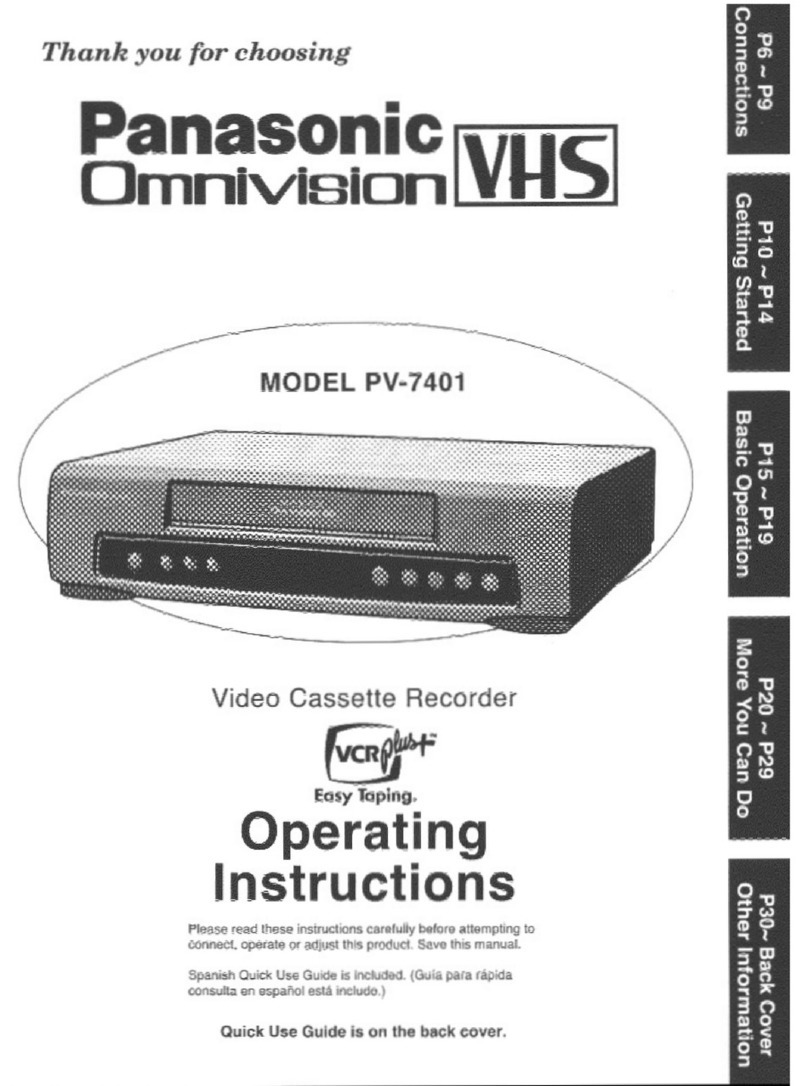
  9. Panasonic Omnivision PV-V4530S User manual

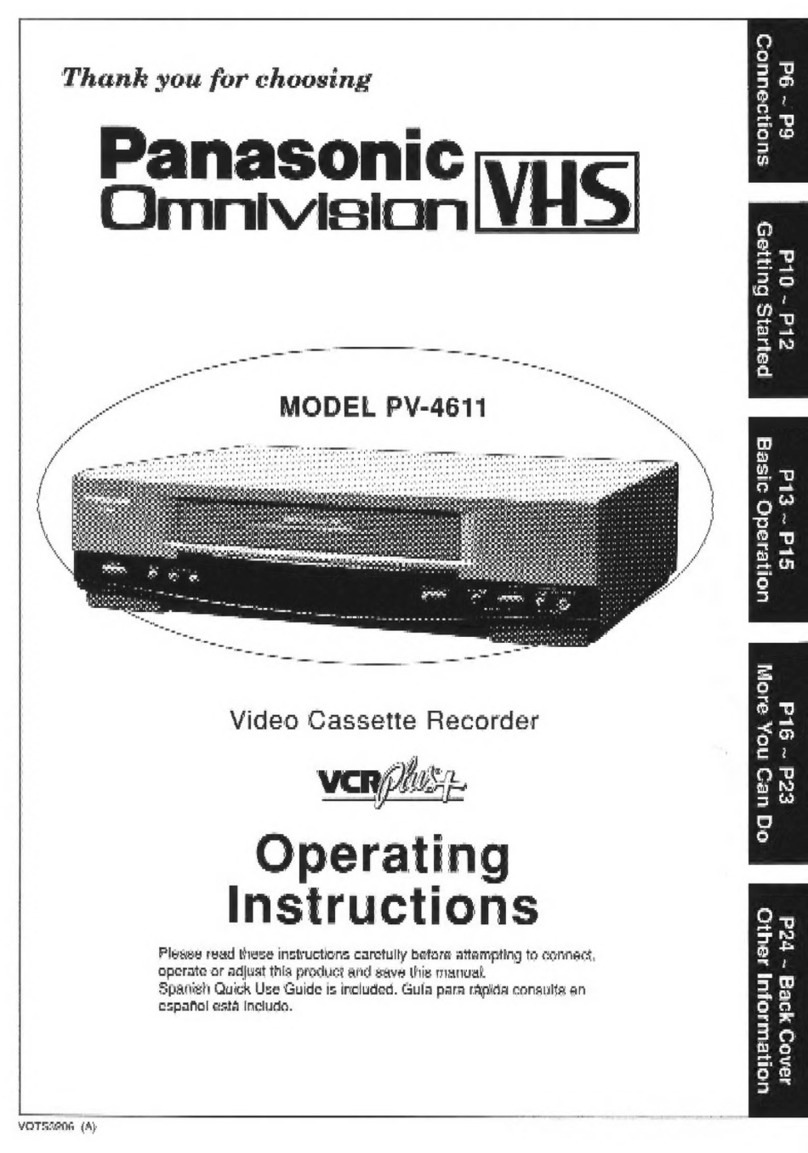
Panasonic Omnivision PV-V4530S User manual

Other manuals for Omnivision PV-V4530S

1

Other Panasonic VCR System manuals

Panasonic Omnivision PV-1540 User manual

Panasonic

Panasonic Omnivision PV-1540 User manual

Panasonic Omnivision PV-VS4821 User manual

Panasonic

Panasonic Omnivision PV-VS4821 User manual

Panasonic Omnivision PV-7667 User manual

Panasonic

Panasonic Omnivision PV-7667 User manual

Panasonic NV-SD435EE User manual

Panasonic

Panasonic NV-SD435EE User manual

Panasonic AG-TL750 User manual

Panasonic

Panasonic AG-TL750 User manual

Panasonic AJ-SD930BE User manual

Panasonic

Panasonic AJ-SD930BE User manual

Panasonic NV-HD630 series User manual

Panasonic

Panasonic NV-HD630 series User manual

Panasonic Omnivision PV-4657 User manual

Panasonic

Panasonic Omnivision PV-4657 User manual

Panasonic NV-MV21GH User manual

Panasonic

Panasonic NV-MV21GH User manual

Panasonic NV-HS830EG User manual

Panasonic

Panasonic NV-HS830EG User manual

Panasonic NV-SD230 User manual

Panasonic

Panasonic NV-SD230 User manual

Panasonic NV-FJ630AM User manual

Panasonic

Panasonic NV-FJ630AM User manual

Panasonic NV-L25EG User manual

Panasonic

Panasonic NV-L25EG User manual

Panasonic Omnivision PV-V4611 User manual

Panasonic

Panasonic Omnivision PV-V4611 User manual

Panasonic AJD780P - 4X DVCPRO VTR User manual

Panasonic

Panasonic AJD780P - 4X DVCPRO VTR User manual

Panasonic NV-SD260 User manual

Panasonic

Panasonic NV-SD260 User manual

Panasonic PV-V4524S Assembly Instructions

Panasonic

Panasonic PV-V4524S Assembly Instructions

Panasonic AJ-D230H User manual

Panasonic

Panasonic AJ-D230H User manual

Panasonic AJ-D950 User manual

Panasonic

Panasonic AJ-D950 User manual

Panasonic AG7450AP - HI-FI VCR/BRC User manual

Panasonic

Panasonic AG7450AP - HI-FI VCR/BRC User manual

Panasonic Omnivision PV-840F User manual

Panasonic

Panasonic Omnivision PV-840F User manual

Panasonic Omnivision VHS PV-9405S User manual

Panasonic

Panasonic Omnivision VHS PV-9405S User manual

Panasonic AJ-HD3700B User manual

Panasonic

Panasonic AJ-HD3700B User manual

Panasonic Omnivision PV-9455S User manual

Panasonic

Panasonic Omnivision PV-9455S User manual

Popular VCR System manuals by other brands

RCA VR678HF user guide

RCA

RCA VR678HF user guide

Zenith VRL4270HF Operating guide & warranty

Zenith

Zenith VRL4270HF Operating guide & warranty

Akai VS-606EA Operator's manual

Akai

Akai VS-606EA Operator's manual

FUNAI 27C-450 Service manual

FUNAI

FUNAI 27C-450 Service manual

Sanyo VHR-M262EV Service manual

Sanyo

Sanyo VHR-M262EV Service manual

Sony SLV-X37 operating instructions

Sony

Sony SLV-X37 operating instructions

JVC SR-VS20U - Dual Format S-vhs/minidv Recorder instructions

JVC

JVC SR-VS20U - Dual Format S-vhs/minidv Recorder instructions

Grundig GV 7400 EURO Service manual

Grundig

Grundig GV 7400 EURO Service manual

Zenith VCM321 Installation and operating guide

Zenith

Zenith VCM321 Installation and operating guide

JVC HR-A43U, HR-A63U instructions

JVC

JVC HR-A43U, HR-A63U instructions

Aiwa VX-S135U operating instructions

Aiwa

Aiwa VX-S135U operating instructions

RCA VR725HF user guide

RCA

RCA VR725HF user guide

JVC 0703-AH-PJ-BJ instruction manual

JVC

JVC 0703-AH-PJ-BJ instruction manual

TruTech ZV450TT8 owner's manual

TruTech

TruTech ZV450TT8 owner's manual

JVC HR-DVS1EK instructions

JVC

JVC HR-DVS1EK instructions

Sensory Science DDV2120 user guide

Sensory Science

Sensory Science DDV2120 user guide

JVC HR-VP78U instructions

JVC

JVC HR-VP78U instructions

RCA VR611HF user guide

RCA

RCA VR611HF user guide

manuals.online logo
manuals.online logoBrands
  • About & Mission
  • Contact us
  • Privacy Policy
  • Terms and Conditions

Copyright 2025 Manuals.Online. All Rights Reserved.

Ornnlvl81on
Panasonic
Video Cassette Recorder
Operating Instructions
Model No. PV-V4530S
Please read these instructions carefully before
attempting to connect, operate or adjust this
product. Please save this manual.
Spanish Quick Use Guide is included. (Guia
para r_ipida consulta en espaSol est& incluida.)
As an ENERGY STAR _Partner,
Matsushita Electric Corporation of
Amedca has determined that this product
or product model meets the ENERGY
STAR ®guidelines for energy efficiency.
Quick Use Guide is on the back cover.
Easy Taping.
LSQT0241A
Important Safeguards and Precautions
iIOUTDOOR ANTENNA INSTALLATION I
1 SAFE ANTENNA AND CABLE CONNECTION
=Sconnected {O fh_ equapmenf _ ,'_¢_
Pe sure the anlenna or cable system _.'_
ESgroL_rlded SO as tO provide sonqe
protecllon aga=nsf bu=lt Up static
charges and voltage surges _.,,.,_ ,
Sect on 8 0o he Na end _'_- _'
Electnc._l Code ANSI/NFPA 70 _ _ ...........
Electrical Coder provides Inforrnahon e_,,,.__....._...j._ _ _ .....
w_th respect to proper grounding Of th
mast and suppotlmg structure ground,rig _;_;_;.,','_'_-.t.'_.,._", _''_
o_ the lead-in wire to an antenna dpScharge unit
SIZe of grounding conductors, !ocat,on of antenna discharge unJt conndetlOn
to grounding electrodes and requ_remenls for the grounding electrode
2 KEEP ANTENNA CLEAR OF HIGH VOLTAGE POWER LINES
OR CIRCUITS
An outs=de antenna system should De located we_I away Irem power hnes
eleclnc hght or power orcults and where =twll! never come _nto contact Wdh
these power sources ,f ,t should happen to fall When =ns{alhng an outs,de
antenna extreme care should be taken 1o avoid foucnlng power hnes
orcdlts or other power sources as Ihls Could be falaJ Because of the
hazards involved antenna mstaJfaborl should be left to a professiona_
FOR YOUR SAFETY, READ AND
RETAIN ALL SAFETY AND OPERATING
INSTRUCTIONS. HEED ALL WARNINGS
IN THE MANUAL AND ON THE UNIT
IINSTALLATION I
1POWER SOURCE CAUTION
Operate only from a power source md_cated on the umt or m
th=s manual If necessary have your Electnc Utlhty Senf_ce
Company or V_deo PrOducts Dealer verify the power source
in your home
2 POLARIZED OR GROUNDING PLUG
AS asafety feature th_s V_deo product comes wdh e_ther
a polarized power cord plug (one blade ,s w=der than the
other) or a three-wire grounding type plug
POL..__RIZE O PL_U_Cz_CA_UT!D_
Th:s plug will 0ely fa mid an outlet one way If you cannot
fully resort the plug try reversing _t If _t SfHI will net ht
have an electrician install the proper wall outlet
DO not defeat the safety fea(ure by tampenng w_th the plug
G_&O_UN_q_&U T__LO__N
This plug w,II oniy fit ,nto a three-hole ground:rig outlet
Itnecessary have ar_ electr,oan ,nstallthe proper outlet
DO not defeat the safety faaturo bv tampenng wdn the plug
3 POWER CORD
Make sure power cords are routed so that t_ey are not kkety
tO have anything rest on thorn roll over them or be _n the
way of walk=rig traffic If an extens=on cord _s used make
sure ,t also has e=ther a polanzed or grounded plug and that
the cords can be securely connected Frayed cords, damaged
plu_gs and damaged or cracked w=re msulahon are hazardous
andshould be replaced by a qua!,f=ed Service techn,oan
Overloaded outlets and exter=s_on cords are Ere hazards and
should be avOWed
4 DO NOT BLOCK VENTILATION HOLES
Venldabon openings _n the cabinet retez_se heat generated
dunng operaf=on If they are blocked heat build-up =ns_de the
un=t can cause failures that may result =n ahre hazard or
heat damage to cassettes
For protecbon, fOllow these rules
aNever cover veetJlaeon Slots or the unit
whde muse or operate the und when placed
on abed, sofa. rug, or o_er sob sudace
bAvoid budt-m installation, such as abook case
or rack, unless proper verltlfatlOn is provided
5 AVOID EXTREMELY HOT LOCATIONS OR
SUDDEN TEMPERATURE CHANGES
Do not p_ce the Urld over or t_ear any kind Of heater
or regulator, in d_rect sunhght, ms,de a closed veb=cle etc
DO not move the umt sudOenly between areas ot extreme
temperature vanaflon If the und _s suddenly moved from a
cold place to a warm place, mo=sture may condense _n the
unit and on the tape
6 TO AVOID PERSONAL INJURY
•Do not place unsecured equipment on a sloping surface
•De not place th_S unit on any support
that _s not firm, level and adequately
strong The umt could fall eaus=ng
serious iniul_/to a child or adult and
damage to the unit
•An apel,ance and cad combination
Should be moved with care
Ou_ck stops, excesswe force, and
uneven surfaces may cause the
appJ,ance aed cad comb_nahon to overturn
•Catetulty follow hi} operahng _nstrucf_ons and use
the manufacturer Srecommef_ded accessories when
operating Ih=s un=t or connecting # to any other equipment
IUSING THE VIDEO UNIT I
If the unit has been in storage or moved tO anew Iocabon
refer first to the _NSTALLAT_ON section of these safeguards
1 KEEP THIS VIDEO UNIT AWAY FROM WATER OR
MOISTURE OF ANY KIND.
2 IF EQUIPMENT IS EXPOSED TO RAIN, MOISTURE, OR
STRONG IMPACT, unplug the umf and have _t _nspected Dy a quahhed
setv=ce technician before use
3DURING AN ELECTRICAL STORM
During a hghtnlng storm, whet_er _ndoors or outdOOrs or before leaving the
und unused for extended penods of t_me, d:sconnect a_l equipment from The
power source as well a_s the antenna and cable System
4 WHEN THE UNIT IS PLUGGED IN
•Never expose the und to ra=n orwaler DO NOT OPERATE
_f hqu_d has been spdled fRte the unit Immediately unplug the umt.
and have d respected by aseP_ce technic:an F=re and shock hazards
can result from electncal shorts caused by hqu=d contact ms=de
•Never drop or push any oD]ect through o_en_ngs =nthe un_ Some internal parts
carry hazardous vOltages and conta_ can cause ale€the shock or fire haZard
•Avo=d plac=ng the unit dzreCtly above or below your TV set as th=s may cause
electncal interference Keep al_ mariners away from electronic equipment
5 USING ACCESSORIES
Use only accessones recommended by the manufacturer to avo=d nsk of fire
shock, or other hazards
6CLEANING THE UNIT
Unplug the und Then use a clean, dry, chemically untreated cloth to gently
remove dust or debns DO NOT US_ cleaning fluids, aerosols or forced a=r
that could over-spray or seep _nto the und and cause etecmcat shOCk
Any substance such as wax adhesive tape etc may mar the cabinet surface
ExPosure 1o greasy, humid or dusty areas may adversely affect internal parts
I SE.V,CE I
1 DO NOT SERVICE THIS PRODUCT YOURSELF
If after carefully following the dctaded oper:lt_ng :nslruchons, th_s V_deo
product does not operate proper_y O0 rlot attempf to opera or remove
Covers or make an]y ad ustments not descnbed tn the manual
Unplug the unit a_dcontact aqua __ed service techn:c:an
2IF REPLACEMENT PARTS ARE REQUIRED
Make sure the service eahn_c_an uses only parts Sp_c:f[ed by the manufacturer
or thOSe hawng the same safety eharactenstK;s as the ong_r,al parts The use of
unauthorlzo_ SUbSbtUteS r'n,&,y r_sult rn fife ele_c S_k Or o_her h_a_s
3 HAVE THE SERVICE TECHNICIAN PERFORM A SAFETY CHECK
After any service or repairs to the umt request the service teehnloan to
Safety Precautions conductathroughsafet checKasdescr,bedmthemanufacturesserv,ce
llterafure to insure that t_e video Unit _Sin safe op_raflng condition
Warning: To prevent fire or shock hazard, do not expose this equipment to rain or moisture.
CAUTION: To prevent electric shock, match wide blade of plug to wide slot, fully insert.
Attention: Pour eviter les cho_s electriques, introduire la lame/a plus large de la fiche dans la
borne correspondante de la prise et pousser jusqu'au fond.
Ii _,_ _£_. ]ThLS symbol warns the user It,at un_Sulated voltage w_,n the unit may have _ magnlude to ca--
_ electacsbec_ Therefore.¢ _G_ngerousto make any k_nclof contaclw_ any _,s_e _rf _ _ u_
• _ been _n_udocl Therefore. _t should be read carefully ,n order to a'..,o_ any problems.
2
Table of Contents
Use
Now!
Important Safeguards and Precautions ....................................... 2
Accessories ............................................................................................. 4
Loading the Batteries ........................................................................... 4
Basic Connections (Antenna, VCR, TV) ............................................. 4, 5
One Time VCR Setup (Language,VCR'sOutputChannel,Channel,Clock)..6, 7
Playback a Tape (Still picture, Frame by Frame picture, Stow Motion) ......... 8
Record On a Tape .................................................................................. 9
•OneTouch Recording ................ 9
Enjoy
more!
Advanced Connections (Cable/DSS) ............................................... 10
Copying Your Tapes (Dubbing) .......................................................... 11
Timer Recording ........................................................................... 12, 13
• Timer Recording •Review, Replace or Clear
Using VCR Buttons ................. 12 Program Contents .................... 13
Timer Recording Using VCR Plus+® System .................. 14 ~ 17
• Choose your connection type .. 14 •VCR Plus+System Chanr_ Setup .. 16
•Cable Box Setup ...................... 15 •VCR Plus+ System Programming .. 17
Multi-Brand Control Feature ..................................................... 18, 19
Tape Operation (Search System) ............................................... 20 ~ 23
•Program End Search ............... 20 • Repeat Play ............................. 23
•Index Scan .............................. 21 - Zero Search ............................. 23
• Auto Operation Functions ........ 21 • Commercial Skip ..................... 23
• Direct Access .......................... 22
MTS Broadcast/VHS Hi-Fi Stereo System ......................... 24, 25
•Stereo/SAP/Mono Broadcast., 24 • Select Audio Mode .................. 25
Special VCR Features ................................................................. 26, 27
•Tape Position Display .............. 26 •Weak Signal Display ON/OFF .. 27
•RemoteWamingON/OFF ........ 26 • Auto Shut-Off ........................... 27
•VCR Lock ................................ 26 • Shuttle Variable Speed Search .. 27
Other
Information!
Reset Language, Channels, Clock, VCR's Output Channel ... 28, 29
VCR & Cassette Information ........................................... 30, 31
•ResetAIIVCRMemoryFunctk_ns... 30 •HeadCleaning ......................... 31
•DST (Daylight Saving Time) .... 30 •Cleaning the VCR .................... 31
•Prevent AccidentaITape Erasure .. 30 -Specifications .......................... 31
•Record/PlaybackTime ............ 30 •Features for a Quality Picture .. 31
On Screen Displays (OSD) .................................................... 32
•Function & Channel Display .... 32 -Blank Tape/No Video Signal
• VCR Status & Clock Display ... 32 Indication ................................. 32
• Warning and Instruction Displays .. 32
Before Requesting Service ................................................... 33
Warranty ............................................................................ 34, 35
Spanish (Espafiol) Quick Use Guide .............................. 36, 37
Location of Controls ........................................................ 38, 39
Quick Use Guide (Playback, Recording) ..................... Back Cover
3
Congratulations
on your purchase of one of the most sophisticated and
reliable products on the market today. Used properly,
it will bring you and your family years of enjoyment.
Please till in the information below. The serial number
is on the tag located on the back of your VCR.
• Date of Purchase
• Dealer Purchased From
• Dealer Address
• Dealer Phone No.
• Model No.
• Serial No.
[] Remote Control
LSSQ0231
i.©
tl oc_
[] Batteries 2 "AA"
[] RF Coaxial Cable
VJAS0196
ii L.
1) Open the cover.
batteries as
marked.
--i' -
3) Close the cover.
tM Jrii-
[] Battery replacement caution
•Do not mix old and new batteries.
•Do not mix alkaline with manganese batteries.
4
If your TV has AUDIO and VIOEO IN terminals, connect
them to VCR for higher quality picture and sound.
You can enjoy stereo sound even it your TV is not stereo
by connecting a stereo amplifier to the VCR.
Connect VCR and TV with an AV Cable (not supplied) or a
RF Coaxial Cable (supplied) as shown in the figure below.
ANTENNA (See page 5)
_.e_ __ CABLE
TV
OUTDOOR ANTENNA
VCR
INDOOR ANTENNA
/
or ,, /
Disconnect antenna
or cable from TV and
connect to VCR.
a) AV CABLE _
(not supplied)
TV
;ct VCR
AP" ,TV with RF
Coaxial Cable.
1) While connection b) (above) is sufficient, connection
a) offers better sound and picture (especially with this
model, you can enjoy Hi-Fi STEREO sound).
2) For both connections a) and b) proceed as follows:
• To use VCR : VCR Power on, set TV to VIDEO.
• To watch TV : VCR Power off, select channel on.
3) Set VCR Output to channel 3 or 4 (not an active
station). (See page 6.)
Use the L Audio OUT jack for proper sound
reproduction when connecting to amonaural TV.
WARNING ....
When using "Nut type" RF coaxial cables, tighten with fingers
only. Overtightenmg may damage terminals.
Between ANT. and VCR
•Case 1 : Twin Lead Cable Only
To VCR Terminal
From Antenna" _ _-- __
300-75 ohm
, (Flat) Twin Lead Transformer
300 Ohm Cable (not supplied)
• Case 2: Twin Lead & Coaxial Cables
\
UHFNHF Band Mixer ',
(not supplied)
(Round) 75 Ohm
coaxial Cable To VCR Terminal
•Case 3: Two Twin Lead Cables
UHFNHF Band Mixer
(not supplied)
300-75 ohm
Transformer
(not supplied)
TO VCR Terminal
•If your TV has both post and plug-type
VHF terminals, the post connection is
recommended to minimize signal loss.
Note to CABLE system installer:
attention to Article 820-40 of the NEC in USA and to the Canadian
This reminder is provided to call the CABLE system installer's
IElectrical Code in Canada) that provides guidelines for proper
grounding and, in particular, specilies that the cable ground shall
be connected to the grounding system of the building, as close to
the point of cable entry as practical.
Between VCR and TV
• Case 1 :Screw & Plug Type Terminal
! UHF/VHF Band TV
Separator
(not supplied) - VHF
RF Coaxial Cable
•Case 2: Screw Type Terminal
TV
75-300 ohm
Transformer I_|
notsupp I _tV.F
•Case 3: Double Screw Type Terminal
UHF/VHF Band TV
Separator I
(not supplied) -VHF ,
•Case 4: Complex TV Terminal
TERMINALS ON BACK OF "IV SET
Split out _ _,_V
ANT2
•Connect to one of the ANT terminals and
select the same antenna number on the TV,
[ FCC Warning: Any unauthorized changes or modifications
[to this equipment would void the user's authority to operate.
5
When VCR is turned on the first time, Process of Setup
setup mode is entered automatically
Turn the "TV and VCR on.
Press POWER*.
Set TV Channel to CH 3.
•}f using AV Cable connection, set TV
to Video instead of channel. (See
connection a) on page 4.)
O
SELECT LANGUAGE
PUSH CH • ENGLISH
OPR_MIR CH • : _SPANOL
APP VCRi TV FRANCA IS
TO CHANGE VCR' S OUTPUT
CH, PUSH ACTION KEY
L............. _
Press ACTION
fF YOU PUSH ACTION KEY,
VCR' SOUTPUT CH SWITCHES
TO CH 4.
Press ACTION
PLEASE YOUF_ TV
I CH TUNE TO
4
:; After 3seconds
Display SELECT LANGUAGE•
This display appears for first time setup
only.
Select the language.
for English; for Spanish
........ (ESPANOL)
,z__-- for French
(FRANC.,AIS)
When using connection b)
(see page 4), tune TV to VCR's
output channel.
If there is beat or noise on CH3,
change VCR's output channel to CH4
by pressing ACTION twice
•Always tune TV to this channel to monitor the VCR,
• t{ you used audlofvideo jack connection, tune the TV to its video input.
• If wrong language is set, do "Reset All VCR Memory "Functions"
steps on page 30.
3VCRPCABLE lOSS BOXI, TV
VCRI, TV
SELECT:& •KEY
SET :_ KEY
END :ACTfON KEY
Select hookup.
1) PressAY
_ to select.
_'_'_'_ 2)Pressl_
to set.
• if you selected "CABLE/DSS BOX I_ VCR I_ TV," continue with step 4
and only the cable box output channel will be placed in memory.
If not, go to step 6.
4SELECT HOOKUP
CABLE /OSS SOXl-vce_ TV
CABLE/DSS BOX OUTPUT CHi
SELECT ••KEY
SET :_ _ KEY
END :ACTION KEY
Select cable box
or DSS receiver
output channel.
I1) Press AV
_ , to select.
..... I 2) Press I_
•Ii to enter.
• If necessary, refer to cable box manual.
• If you used Audio/Video jack connection to cable box, set "VIDEO OUT".
Turn on cable box and set it to PBS
channel in your time zone.
•If you use DSS receiver, it must be turned off.
6
6CHANNEL/CLOCKAUTOSE_
CONNECT ANTENNA CABLE
AND IF YOU USE A CASLE
BOX, TUNE IT TO YOUR
LOCAL PBS OH THEN..,
PLEASE PUSH CH UP KEY
LOH AUTO SET PROCEED ING j
iAUTO CLOCK SET i
PROCEEDING I
(C_-! _ (Setupcompleted)
1/4/2000TUE12:00PM
DST:ON
SETTING : CH 02
AUTO CLOCK SET
COMPLETED
END ; PUSH CH UP KEY
Start Channel Auto Set
and Clock Auto Set.
_)_ Press CHA.
CH
CH
(]De
Press CH •
to exit.
•If your area observes OST (daylight
saving time), but the time is incorrect;
do the "Time Zone Adjust" steps on page 29.
SELECT/
SET
• :PLAY
•:STOP
4 :REW
• :FF
_"]_ll [o[e]_l:,]ltd_le]
ACTION
Jle.e® i,
,/I
iiI
1
• _ ..................... JJ5
CH •
IP
!_ _! (Setup
IMPORTANT NOTE FOR
AUTO CLOCK SET
• Auto clock set is performed the
first time the VCR is turned off
each day. If used, a cable box
must be left on and tuned to the
PBS channel at the time VCR
power is turned off if you want auto
clock set to be done.
If used, a DSS receiver must be
turned off for auto clock set.
• If Cable Box or DSS receiver is
connected to VCR via Audio/Video
jacks, an RF coaxial cable must
also be connected for auto clock
set and channel auto set features
to work.
incomplete)
Clock Setup incomplete.
Set the clock manually.
AUTOIsINCOMPLETECLOCKSET ! _O_1)Press ACTION.
PUSH ACTION TO SET CLOCK I
L
I1\ DST:ON
SELECT:_ •KEY
SET :_ KEY
END :ACTION KEY
SET CLOCK
DST:ON
SET :_ _ KEY
START :ACTION KEY
i_ _12) Press •v to
'6_' i select month.
3) Press • to set.
• Likewise, set date, year, time,
DST (Daylight Saving Time)•
To Make Corrections,
repeatedly press <1 • to move to
error, then correct•
]4) Press ACTION.
_) / (Clock starts.)
/" To exit this
O mode, press
JACT ON agan.
• VCR calendar is accurately maintained to
Dec. 31, 2096 1t:59PM.
• Channel auto set selects normal TV or Cable
channels depending on your VCR hookup.
•To reset Language, Channels, Clock or
VCR's Output Channel see pages 28 and 29.
-- Using &_'< I_ keys
You can also operate the menu
screen using VCR buttons.
When menu screens are iI
- r
displayed, the PLAY, STOP, _._ ;I
REWIND, and FF buttons on i "'_'3"_24,_--_"t L L- _ ==_ ,,.,sz_
the VCR and remote function i _ [ :
as ••_I • on y w th no tape " I
inserted. On Remote IOnVCR
To display menu using VCR • : PLAY _1 : REW
buttons, press CH • and CH • : STOP • : FF
•together.
To exit the menu, repeat above.
7
[_PCheck list before you begin.
[] All connections are made.
[] TV and VCR are plugged in.
[] TV is turned on and tuned to CH3, 4 or Video.
[] Remote is in VCR mode.
" _b
¸, .......iiii
J i
Multi Function Display STOP/EJECT
PAUSE/
SLOW
_ O EJECT
_ C_) _'-- STOP
(Z3 (E_ QD
Q3 CO QD I
Insert a cassette.
• VCR power comes on and "VCR"
appears on Multi Function Display.
Press PLAY.
•Or, if cassette has no record tab
(see page 30), auto playback begins.
• TO Find a Particular Scene
Forward Search --> Press FF. (To release, press PLAY
or FF.)
Reverse Search --> Press REW. (To release, press PLAY
or REW.)
• For Still (Freeze) picture --> Press PAUSE/SLOW.
(To release, press PLAY.)
• For Frame by Frame picture --> Press PAUSE/SLOW in
Still mode.
(To release, press PLAY,)
• For Slow Motion --> Press and hold PAUSE/SLOW in Still
mode. (To release, press PLAY.)
O•These features work best in SP or SLP mode.
• The sound will be muted.
', ........ i _/i)
•To prevent tape jam
Inspect your cassette tapes and
remove any loose or peeling labels,
• To reduce picture noise, see "Manual Tracking Control" on
page 31.
• After the VCR is in Still or Slow mode for 3 minutes, it will
switch to Stop mode automatically to protect the tape and the
video head.
•To stop --> Press STOP.
•To rewind tape -> Press REW in Stop mode.
•To fast forward tape --> Press FF in Stop mode.
•To eject tape -*> Press EJECT on the remote or
STOP/EJECT on the VCR.
Playback using VCR controls
Insert a cassette.
2Press PLAY.
• Press to stop and/or eject tape.
_J
8
[_lPcheck list before you begin.
[] All Connections are made.
[] TV is turned on and tuned to CH3 or 4 or Video.
[] Cassette record tab is in place.
[] Remote in VCR mode.
,....... 1
I
Multi Function Display 2
II
cb stop
(2D (E_ (ED l i PAUSE/
REC
f
Insert a cassette.
•VCR power comes on and "VCR"
appears on Multi Function Display,
(ED or CH °
Select Channel.
Press CH • /V* or NUMBERED keys.
• To select "LINE," see page 11.
•To select channels over 100,
first press 100 key, then enter
remaining two digits.
3[
4
After the VCR has been in Pause mode
for 5 minutes, it will stop automatically
to protect the tape and the video head.
This video recorder, equipped with the HQ (High I
Quality) System, is compatible with existing VHS I
equipment. Only use those tapes with the
mark. It is recommended that only cassette tapes I
that have been tested and inspected for use in 2,
4, 6, and 8 hour VCR roach nes be used.
SPEED Select Recording speed.
(See page 30.)
Press SPEED.
• SP = Standard Play
LP = Long Play
SLP = Super Long Play
• Selected speed is displayed on TV
screen and Multi Function Display.
Start Recording.
REC
(_ Press REC.
• To edit out unwanted portions,
press PAUSE/SLOW to pause
and to resume recording.
•To stop -> Press STOP.
•One Touch Recording
Press REC repeatedly to set the recording length
(30 min. - 4 hours).
• The VCR turns itself off at the preset time.
q :: rmj: :RLcC:O::O:ll :I:Zb
•Record One Program While Watching Another
Press VCR/TV-> '_/CR" disappears on Multi Function Display
--> Select Channel at the TV.
ISelecting Channel at the VCR (You cannot view
another channel during recording.)
Press VCRi'I-V--> '_/CR" appears on Multi Function Display
--> Select Channel at the VCR (applies to connection b)
only, see page 4).
"Record using VCR controls "_
2Select 1Insert ,4 Start
Chan_el" ::::.a c___:?tt21.:.-___-Rec°rding"
VCR/TV •Press to stop. 9
Be sure to tune TV to VCR output channel. (The same
one you set on screen of -IV: CH3 or CH4.)
All connections on these pages are made with 75 Ohm coaxial cables.
CATV Connection
•With a Cable Box (Cable Box,_VCR)
I/ / _ \l
i or I
I CATV I CABLE BOX
i fo£ AUDIO IN FROM ANT.
O OR _ IN OUT
O OAuo,o
O O L VHF/UHF
c_IDEOo OU_TOTV O OViOEO
_) VHF/UHF
IN1 OUT v
VCR TV
• record or view any •
(including
scrambled)
channel.
• use VCR Remote •
Control to select
channels using
Multi-brand control
feature.
• With a Cable Box (VCR-_Cable Box)
iI
i or i
CATV r
-l-
/
AUDIO mFROM ANTJ
O OR (_
MONO
O O L V.F/UHF
OUTTOTV IN
c_IDEO O
IN1 CLfT @
VCR
TV
IN OUT
CABLE BOX O LROAUDtO
OUT 0 0 VIDEO
• view any
(including
scrambled)
channel.
• use VCR Remote
Control to select
channels without
using Multi-brand
control feature.
view channel
other than the one
selected for any
type of recording.
do a Timer
recording of a
channel unless
you select it at the
cable box.
record scrambled
channels.
•With Two Cable Boxes VCR
I AUDIO IN FR(_
CABLE BOX 0O R
MONO
IN O(__.,__J 0 0 L VHF(UHF
c_'DEOo
IN! OUT
2-Way Splitter CABLE BOX
OUT1 OUT2 IN OUT
_.TT
OUT TO TV
I_B Switch IN OUT
TV
l"q ° OAuD'°
IIN1 IN2 IO-- O VIDEO
DSS Connection
S
J\
l\
JSATELLITE I
\I
tt'ANT ""_ "-1-'"
or _ DSS I I
,,o tv ,ECE,VI I
. _ .- s IN IN e(_) I
L__t°uTtJ
AUD,O ,. _nOM....l
OOA _ ,N OUT
SL"OoAuO,o
O O C VHF/UHF
d'O_Oooe__o_vo Ov,D_O
_ VHFAJHF
INt QUT
VCR TV
10
record and view
both scrambled
and unscrambled
channels if
additional
equipment is
added. This
connection
requires: two
converter boxes,
an A/B switch, and
a 2-way splitter.
view channel
other than the one
selected for any
type of recording.
do a Timer
recording of a
channel unless
you select it at the
cable box.
i
• record and view ],view channel
any (including other than the one
scrambled) selected for any
channel, type of recording.
• use your VCR
Remote Control to
select channels
using Multi-brand
control feature.
• do a Timer
recording of a
channel unless
you select it at the
DSS box.
NOTE:
DSS receiver must be turned off to
view cable box or antenna programs.