manuals.online logo
Brands
  1. Home
  2. •
  3. Brands
  4. •
  5. Panasonic
  6. •
  7. VCR System
  8. •
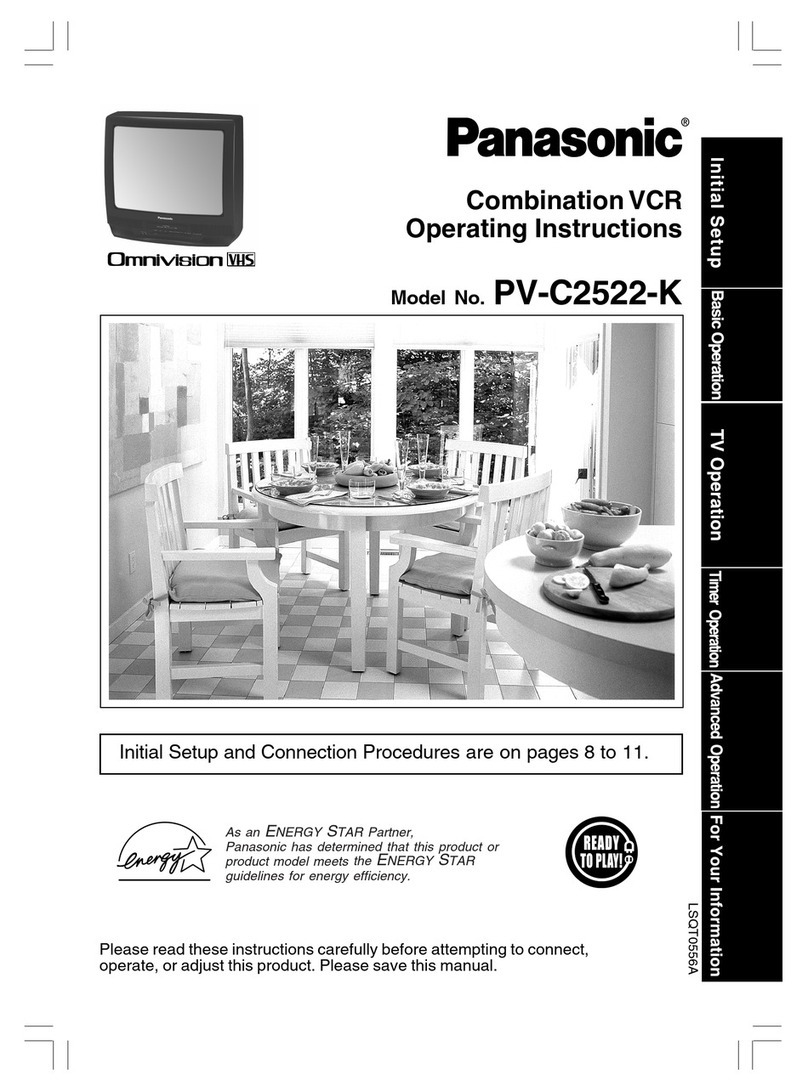
  9. Panasonic PV-C2541 User manual

Panasonic PV-C2541 User manual

importantSafeguardsandPrecautions
READ AND RETAIN ALL SAFETY AND
OPERATING INSTRUCTIONS. HEED ALL J
WARNINGS iNTHE MANUAL AND ON UNIT
INSTALLATION J
POWER SOURCE CAUTION
Operate only from power source indicated on unit
or in this manual, if uncertain, have your Electric
Utility Service Company or Video Products Dealer
verity your home power SOurce.
2 POWER CORD PLUG
For safe_, this unit has a polarized type plug (one
wide blade), or a three-wire grounding type plug.
Always hold the plug firmly and make sum your
hands are dry when plugging in or unplugging the
AC power cord. Regularly remove dust, dirt, etc.
on the plug.
POLARIZED PLUG CAUT1ON:
The plug fits into outJetone w'ay.If it cannot be fully
inserted, try reversing it. If it stillwill not fit, have an
electrician install the proper wail outlet• Do not
tamper with the plug÷
GROUNDING PLUG CAUTION:
The ptug requires a three-hole grounding outlet.
If necessary, have an electrician install the proper
outlet. Do not tamper with the plug•
3 POWER CORD
To avoid unit malfun_on, and to protect against
electrical shock, fire or personal injury:
- Keep power cord away from heating appliances
and walking traffic. Do not rest heavy objects on,
or roll such objects over the power card.
-Do not tamper with the cord in any way.
- An extension cord should have the came type
plug (polarized or grounding) and must be
securely connected.
- Overloaded waft outlets or exlension cords isa
fire hazard.
- Frayed cords, damaged plugs, and damaged or
cracked wire insulation are hazardous and should
be replaced by a qualified erectdcian.
4 DO NOT BLOCK VENTILATION HOLES
ventilation openings in the cabinet release heat
generated during operation, I! blocked, heal
build-up may result in a fire hazard or heat
damage to cassettes.
For your protection:
a. Never cover ventilation slotswhile unitis ON,
or operate unitwhile placed on a bed, sofa,
rug, or other soft surface.
b. Avoid built-in installation, such as a book case
or rack, unlass properly ventilated.
5 AVOID EXTREMELY HOT LOCATIONS OR
SUDDEN TEMPERATURE CHANGES
Do not place unitover or near a heater or
regulator, in direct sunlight, etc. If unit Lssuddenly
moved from a cold place to a warm place,
moisture may condense in unitand on the tape
cau_ng damage.
6 TO AVOID PERSONAL INJURY
•Never place unit or) support orstand that is not
OUTDOOR ANTENNA INSTALLATION
SAFE ANTENNA AND CABLE CONNECTION
An outside antenna or cable system must be propedy
grounded to provide SOme protection
against built up static charges ___'_'="
and voltage. Section 810 /_---",,fS'_
Ofthe National Electrical _--------------------_______,/__,,_=_--
•i¢_=,_-...
Code, ANSI/NFPA 70 (=n I_1 /_iJ-_
Canada, part 1 of the L._,__..--._
Canadian EIec'o'ical Code) __-_J.____
provides information _='-='_"
regarding proper grounding of the mast and supporting
structure, grounding of the lead-in wire to an antenna
discharge unit, size of grounding conductors, location of
antenna discharge unil, connection to grounding
electrodes, and requirements for the grounding electrode.
2 KEEP ANTENNA CLEAR OF HIGH VOLTAGE
POWER LINES OR CIRCUITS
Locate an outside antenna system well away from power
lines and elect.,ic light or power circuits so it will never
touct_ these power sources should it ever fall, When
installing antenna, absolutely never touch power lines,
cimuits or other power sources as this could be fatal,
J USING THE UNIT
Before unitis brought out ofstorageor moved _oa new kx;ation,
refer agaJ_to the INSTALLATION section of these safeguards.
1 KEEP UNIT WELL AWAY FROM WATER OR
MOISTURE, such as vases, sinks, tubs, etc,
2 IF EXPOSED TO RAIN, MOISTURE, OR
STRONG IMPACT, unplug unit and have it inspected
by a qualified service technician before use.
3 ELECTRICAL STORMS
Dudng a lightning storm, or before leaving unit unused for
extended pedods el time, disconnect all equipment from
the power source as well as the ar_enna and cable system.
4 WHEN UNIT IS PLUGGED IN
*DO NOT OPERATE IF:
- liquidhas spilled into unit.
- unitwas dropped or otherwise damaged.
- unitemits StudY,e. melodors, ornoises.
Immediately unplag unit, and have it inspected by a
serv_e tedwcian to avoid potentiaJfire and shock hazards.
, Never drop or pushanyobjectthrough openiegs inunit
Touchi_ internalpartsmay_u._a _ shod_orlye hazard.
• Keep magnetic obiects, such as speakers, away from
unit to avoid e_ectncal interference.
5 USING ACCESSORIES
Use onty accessories recommended by the manufacturer
to avoid dsk of fire, shock, or other hazards.
6 CLEANING UNIT
Jg_it. Use a dean, de/,_untrasted clo_ to
removedu_ or de_is. DONOT USE dea_ Ituids,
asmsot_ orforced air that couldover-spray,orseep intounit and
cause electTicalsl_xt,_Any subs_co, suchas wax, adhesi_
tape, ate,rnay marthe _dnet suffacs,_re to grsasy,
humid,or dustyareas may edveP._y affect internal parts.
ISERVICE I
1DO NOT SERVICE PRODUCT YOURSELF
If.after carefully fo_lowingdetailed operating _, the
unitdoes not operate properly,do notattempt to ogan or
remove covers, or rnakaany edjustmor_s not describedin the
firm, level, and adequately strong.
The unitcould fall causing serious _, manual. Un_ug unitand cordacta qualified service technidan.
injury to a child or adult and 2 REPLACEMENT OF PARTS
Make sure the service technician uses only parts specified
damage to the unit. by the manufacturer, or have equal safety characteristics I
• Move any appliance and cart
combination with care, as original p_rls. The use of unauthorized substitutes mayJ
Quick stops, excesdve tome, and result ,n fire, electric shock, or other hazards. I
uneven surfaces may cause objects to overturn. 3 SAFETY CHECK AFTER SERVICING I
•Carefully follow all operating instructions. Afterunitisserviced or repaired, requestthata through safety
checkbe done as described inthe manulacturer'sservi_ J
2. =ersture t° inscre v_:leouni_is insafe °Peratlng ccxlddJorl'J
Safety Precautions/Mesures de sdcuritd
WarnJng :To prevent fire or shock hazard, do not expose this equipment to rain or moisture.
Caution : To prevent electric shock, match wide blade of plug to wide slot, fully insert.
Avertissement :Afin de pr_ven[r tout risque d'Incendie ou de chocs _lectriques, ne pas
exposer cet appareil tt la pluie ou _une humidit6 excessive.
Attention : Pour dviter les chocs 61ectrtques, introduire la lame la plus large de la fiche dans
laborne correspondante de la prise et pousser jusqu'au fond.
This video recorder, equipped withthe HQ (High Quality) System, is compatiblewith
existing VHS equipment.
Only use those tapes with the _ mark. It is recommended that only cassette tapes that
have been tested and inspected for use in 2, 4, 6, and 8 hour VCR machines be used.
This television receiver provides display of television closed captioning in accordance with
§15.119 of the FCC rules.
FCC WARNING : Any unauthorized changes or modifications to this equipment
would void the user's authority to operate.
CAUTION: TO REDUCE THE RISK
OF ELECTRIC SHOCK, DO NOT
REMOVE COVER (OR BACK)
NO USER-SERVICEABLE PARTS
INSIDE REFER SERVICING TO
QUALIFIED SERVICE PERSONNEL
This symbolwarns the user that uninsulated
voltage within the unit may have sufficient
magnitudeto cause eTectdcshock.
Therefore, it is dangerousto make any kind
ol contact with any insidepart ofthis unit.
This symbolalerts the userthat important
literatureconcerningthe operation and
maintenance ofthis unithas been included.
Therefore, it should be read carefully in order
to avoid any problems.
3
Congratulations
on your purchase 0f one of the most
sophisticated and reliable products on the market
today. Used properly, it wi/i bring you and your
family years of enjoyment. Please till in the
information below, The serial number is on the
tag located on the back of your unit.
DateofPurchase
DealerPurchasedFrom
DealerAddress
Dealer Phone No,
Model NOr
Serial No,
Accessories 1
i M_
eo_.®
,_,_ ,Q[_,i
[] Remote Control
LSSQ0277
I_Ba_edes
2"AA"
TO order accessories,
call toll free 1-800-332-5368.
,,. .. . ............ .,,
1) Open the cover.
2) Insertbattedesas marked,
3) Close thecover.
[] Battery replacement caution
•Donotmixoldandnewbatteries.
• Donotmixojkaiinowithmanganesebatteries.
Break off the tab to protect.
Record Tab
With Power ON, press
PLAY/REPEAT on the
unit for 7 seconds to
deactivate the SELF-
DEMO Mode.
Repeat this to display
demo screen.
4
Screw driver
To record again.
Cover the hole
with cellophane tape.
Important Safeguards and Precautions /Safety Precautions ......... 2
Before Using ......................................................................................... 4
Table of Contents ................................................................................. 5
Location of Controls ............................................................................ 6
Initial Setup for ANT. /Cable Connection .......................................... 8
Initial Setup for DSS /Cable box Connection ................................. 10
Reset Language, Channels, Clock, Time Zone Adjust ................... 12
Playback a Tape ................................................................................. 14
Record On a Tape .............................................................................. 14
Copy Your Tapes (Dubbing) ............................................................. 15
TV Operation ...................................................................................... 16
Closed Caption System ..................................................................... 17
TV Timer Features .............................................................................. 18
Picture Adjustment ............................................................................ 20
FM Radio ............................................................................................. 21
Timer Recording ............................................................ *..................... 22
Timer Programming using
VCR Plus+ ®System ............................................................................ 24
Cable Box Universal Remote Control Feature ................................ 26
Tape Operation ................................................................................... 28
Special VCR Features ........................................................................ 31
V-Chip Control Feature ...................................................................... 35
On-Screen Display (OSD) .................................................................. 39
Warning and Instruction Display ...................................................... 40
Unit Information ................................................................................. 41
Before Requesting Service ............................................................... 42
Service Center List ............................................................................ 43
Spanish Quick Use Guide /Guia para rdpida consulta .................. 44
Limited Warranty ................................................................................ 46
Index .................................................................................................... 47
m,oio,,F.l o]I LoJlL o] tIqaL.oJ ..
Light Tower'" Illuminated Remote Control
LIGHT button:
When LIGHT is pressed, available buttons in the selected mode light up and the selected mode
button (COMBO or DSS CABLE) flashes for 5 seconds. If no button is pressed, light goes out in 5
seconds to conserve batteries. Also, by holding down a button, you can confirm the setected mode
(mode button will flash) in the dark.
EJECT button:
When EJECT is pressed, the tape is ejected from Cassetle Compartment.
If EJECT is pressed during recording, the unit will not respond to the command,
EJECT
Page 6
POWER
Page 8
FMfl"V
Page 21
MUTE
Page 16
CHANNEL UP/DOWN Pg. 16
SELECTUP/DOWN
ACTION
Page 12
NUMBER KEYS
Page 16
REWIND/SEARCH
_e 14
PAUSE/SLOW
Pa( 14
CMIZERO
SLEEP
NITE
Pa( 16
EJECT
Pg. 13
COMBO
Page 26
LIGHT
Page 6
OSS CABLE
Page 26
RAPID TUNE
Page 16
VOLUME UP/DOWN Pg, 16
SET/BACKSPACE Pg. 13
PROGRAM Page 22
VCR Plus+ Page 24
TRACKING UP/DOWN
V-Lock Page 41
ADD/DELETE
Page 13
PLAY
Paqe 14
FAST FORWARD/SEARCH
Page 14
ENTER Page 26
39
STOP
le 14
TAPE POSITION
Pa( 29
REC
14
;F_ARCH
Pa 28
SPEED
Page 14
COUNTER RESET
Page 30
6[*]il:l,.'f.'ll,'l_liltl_llllfil, i,l,:lIIif.=lll l_'-[_]_ir_'_J:1i_-_ir_p_*'_i_I'_i_I_Ki_1_[_H_i_r_ ,IIKI_*]i
REWIND/SEARCH Page 14 __
ACTION Page 13
STOP/EJECT Page 14 __
ACTION Page 13
CHANNELUP/OOWN Page 16 __
TRACKINGUP/DOWNPage 41
SELECTUP/DOWN Page 13
VOLUME UP/DOWN Page 16
SET/BACKSPACE Page 13
POWER
Page 8
Audio/Video In Jack
Page 15 ++++++....
Cassette Compartment
- Page 14
PLAWREPEAT
Page 14
__FAST FORWARD/SEARCH
Page 14
REC
Page 14
TIMER/FM
Pages 19, 21
Bulll-ln Speaker
Phones Jack
Page 16
in ,r
REC Indicator '_
tights dudng recording. -- PROG TIMER Indicator
In Rec Pause or OTR _I/JLightswhen the unit issat for"rimer
I/ / Recording. It flashes when aTimer
Pause mode, the indicator _I/_/ Recording has been set withno tape
flashes.
Page 14 f _ inserled, the clock is not set, or the
tape isLnmotion.
Remote Sensor ON TIMER Indicator Page 22
Lights when the
On Timer isset.
Page 18
AC Power Plu,
When pLuggedinto
an AC outlet, this
unit consumes 4.0 W
of electric power in
OFF condition. ®
II-IF Antenna
Input Terminal
In from your Antenna
or Cable.
Pages 8, 10
•Connect the Cable from Antenna/Cable to the VHF/UHF
terminal on unit.
UNIT
-'" ANT.ICABLE
VHF/UHF
Press COMBO for Combo mode.
Press POWER* on the
remote or unit.
When the unit is turned on the
first time, SELECT
LANGUAGE screen appears,
SELECTLANGUAGE
PRE_S CH •:E_gt_sh
OPRIMIR CH V :Espaffo]
APP. VOL + :Frangal$
•If wrong language is set, complete "Reset
all unit Memory Functions" steps page 9.
3Press CH & to select English,
OR
Press CH Yto select Spanish
(Espahol). OR
Press VOL + to select French
(Franqais),
CHANNEL/CLOCK AUTO SET
screen appears.
CHANNEL/CLOCKAUTOSET
CONNECT ANTENNA CABL_
AND IF YOU USE A CAIB_.E
BOX, TUNE I T TO YOUR
LOCAL PB,9 OH THEN,,.
PLEASE PRES_ CH UP KEY
WARNING: ]
When using "Nut type" RF coaxial cables, tighten with I
fingers only.Overtightening may damage terminals. I
4Press CH & Key to start
CHANNEL /CLOCK AUTO SET
operation Settmgs are performed
automatically If the setup is
completed, the following screen is
displayed
2I712001tYEO1200PM
DST ON
_EF-F ING CH 10
AUTO CLOCK SET
COMPLETED
END PRESS OH UP KEY
If AUTO CLOCK SET IS
INCOMPLETE screen appears, set
the clock usmg MANUAL CLOCK
SET )rocedure as below
AUTO CLOCK SET
I S iNCOMPLETE
PLEASE SET CLOCK BY
PRESSLNG ACTION KEY
POWER--
ACTION"
÷/o
o _B:J
--COMBO
SELECT/
--SET
-'. CH UP
,i, CH DOWN
)' VOL UP
4VOL DOWN
If AUTO CLOCK SET was _ncomplete,
manually set the clock as follows
Press ACTION Key on the Remote
to display SET CLOCK Menu screen
../]_-,........... .o_j..o_,,,_
SELECT a •
E]_ ACT ION
[."[q l!:l[ol in _le]_i i-"
Press ,i, V to select the month and
press b, to set In the same manner,
setectand set thedate, year, time,
and DST (DayltghtSaving Time)
SET CLOCK
DS¥ ON
_L=IR_[_iIle{o}31,TaIt=ill._
3SET ,11
END ACT ION
Press ACTION Key twiceto start
CLOCK and exit
When moving unit to a new location,or =fa
mistake was made _nthe IntttalSetup
sect=on,
• Make sure a tape tsnot inserted =nthe untt
,,t t
,Torntheun,,
Power on
Press and hold both PLAY and
FF on the unit for more than 5
seconds
•The powerwillshutoff
•Please_gnore=NOCASSETTE"
warning
Do "Initial Setup" on page 8 9
•Connect the OUT Jack on your
cable box to the VHF/UHF
terminal on unit with an RF cable.
UNIT
Note to CABLE System Installer
This reminder is provided to call the
CABLE (Cable TV) System Insta{lers
attention toArticle 820-40 of the NEC
that provides guidelines for proper
grounding and, in particular, specifies
that the cable ground shall be
connected to the grounding system
ol the building, as close to the point
of cable entryas practical.
Cable TV
Converter Box
J/IN from
CAB LE
Press COMBO for Combo mode.
1 ress POWER* on the
remote or unit.
When the unit is turned on
the first time, SELECT
LANGUAGE screen ap _ears.
SELECTLANGUAGE
PRESS CH & :English
OPRIMIRCH T:Espa_ol
APP. VOL + ;Fr_nqais
3
•Turn on your cable box and set it to
.PBS(Public Broadcast Station) channel
,n your time zone. If you use DSS
receiver, it must be turned off.
IWARNING: . J
When using "Nut type RF coaxial cables, tightenwith ]
fingers only. Overtightenlng may damage terminals. I
10
Press CH A to select English,
OR
Press CH V to select Spanish
(EspaSo]). OR
Press VOL + to select French
(Frangais).
CHANNEL/CLOCK AUTO SET
screen appears.
CKANNEL/CLOCKAUTOSET
CONNECT ANTENNA CABLE
AND tF YOU USE A CABLE
BOX, TUNE IT TO YOUR
LOCAL PBS CH THEN.,.
PLEASE PRESS CH UP KEY
•If wrong language isset,
comptete"Reset al_unit Memory
Functions" steps page 9.
4Press CH A Key to start
CHANNEL /CLOCK AUTO SET
operation. Settings are performed
automatically. If the setup is
completed, the following screen is
displayed.
2/712001WED12:00PM
DST: ON
SETTING : CH 10
AUTO CLOCK BET
COMPLETED
END ; PRESS OH UP KEY
If AUTO CLOCK SET IS
INCOMPLETE screen appears, set
the clock using MANUAL CLOCK
SET )rocedure on page 9.
AUTO CL(X;K SET
ISI NC,OMPLETE
PLEASE SET CLOCK BY
PRESSING ACTION KEY
1) Press ACTION.
2) Press kV_ I_ to select "CH."
<2D(3DGD
(_ <3D(333
_c_c) o
_-o o OD (3-1
o_ o_1
SELECT/
A:CH UP
v:CH DOWN
k:VOL UP
4:VOLDOWN
MAIN MIES",,U
SELECT:& Y,il I_-
SET :ACTION
3) Press ACTION.
I SET UP CHANNEL
1ANTENNA : CABLE
]AUTO SET
ICHANNEL CAPTION
IVCR_Ius÷ CH SET UP
| SELECT:A v
I SET ;b
I END :ACTION
4) Press &V to select
CABLE BOX SET UP and press I_.
IARE YOU USING i
A CABLE BOX?
YES
5) Press &_' to select "YES" or "NO"
and press I_.
• Ifyou select...
• "YES"-) Step 6).
• "NO" --)PressACTIONthreetimesto exit.
ENTER CABLE BOX OUTPUT
CHANNEL
6) Press AV to selectthe same channel as
your cable box or DSS receiver output
channel, then press I_.
•If necessary,refertoyour cableboxmanual.
• If youare usingAudioNideo jack connection
for yourcablebox, selectand set"VIDEO
OUT"astheoutputchannel.
7) Press ACTION
three times to exit. 11
1Press ACTION*
to display MAIN MENU.
1Language
1) Press &V'<I I_ to
select language
icon.
2) Press ACTION
repeatedly.
MENU PFIIN_IPAL
_LEGIR:a. v4I,,
FIJAR :ACTION
For Spanish
For French
MAIN
ForEnglish
3) Press &V<l I_ to
select "EXtT."
Press ACTION to
exit.
[] Channels
1) Press AV<I I_ to
select "CH."
2) Press ACTION.
NNEL
{WE_ g|GNAL DtSPLAY',OFF
{CABLE 6OX SIET UP
(VCR Plus+ CH SET UP
ISELECT:A 1"
I SEI" :_
_,END :ACTION
3) Press &T to select
"ANTENNA," then
press I_ to set your
antenna system
("TV"or "CABLE").
4) Press kT to select
=AUTO SET," then
press I_-.
•AfterChannelAutoSet
isfinished,ClockAuto
Setwillbeperformed.
[] Clock
1)Press &Y<I I_ to
setect "CLOCK."
MA|N ME_
2) Press ACTION.
SET C_.OCK
AUTO CLOCK SET
rm_ln_n=
TtME ZONE ADJUST :O
SELECT :J, •
SET :1_
END :ACttON
"TIMEZONEADJUST'
appearsonlywhen
autoclockisset,)
3) Press &V to select
"MANUAL" or
"AUTO CLOCK
SET" and press I_.
* ForAutoClockSet,
select"AUTOCLOCK
SET,"thenpressCH_
\_,, sETCLOCK
4) Press &V and
press ,4 I_ to
select and set the
month, date, year,
time, and DST
(Daylight Saving
Time).
5) Press ACTION
twice to
clock and exit this
mode.
' x I I
• TimeZone Adjust
(Only when Auto Clock is set.)
1)Press AV41 I_ to
select "CLOCK."
2) Press ACTION.
SET CLOCK
AUTO CLOCK SET
ICAN_JAL e ,J q
SELECT: A T
SET :_ ib
END :ACTION
3)Press AY to select
TIME ZONE
ADJUST and
press 41or • to
subtract or add
hour(s) as
necessary.
SET CLOCK 1
AUTO CLOCK SET
MANUAL
SELECT:A v
SET ;<
END :ACTION
4) Press ACTION
twice to exit.
•TIME ZONE
ADJUST returns to
"0" if clock is set
manually.
POWER_ SELECT/
A:CH UP
v:CH DOWN
1':VOL UP
4:VOL DOWN
NUMBER
Keys
--ADD/DLT
ACTION key on
the unit
IrI_0PF,UlEC/m"t_
On Unit
Youcanoperatethe
menuscreenusing
unitbuttons.
Todisplaythemenu,
press STOP/EJECT
andREWtogether
with notapeinserted.
Toexitthemenu,
repeat abovewithor
withouttapeinserted
untilnormalscreen
appears,
Using &V41 _keys
On Remote
VOL CH
QQ®Q
.On Unit
•: CH UP
V: CH DOWN
I_ : VOLUME UP
41: VOLUME DOWN
Wheneverthe menuor program
screenisdisplayed,CHANNEL
UP/DOWNfunctionas •V and
VOLUMEUP/DOWN functionas
<11_only,
Add or Delete a Channel
To add channel: To delete channel:
Selectchannelwith SelectchannetwithCH
numberkeysand Ay or numberkeysand
pressADDIDLT. pressADD/DLT.
CH/,t,ZNE_Oe XDOE_ Q't/_N_"t 08 _ "rED
.o" "-oo •. .o"
[_Ready Check List
[_ Allconnectionsare made.
[] Yourunitis pluggedin,
11__ IInsert a cassette.
• The unitpowercomes
onautomatically.
rd __,
To prevent tape jam, __>_'_
remove looseor peelinglabels
fromtapes.
Press PLAY.
•Playbackbegins if cassettehas no
record tab.
•Forward/Reverse scene search
•-) Press FF or REW
•-) Press again or PLAY to release.
•Still (Freeze) picture
•-) Press PAUSFJSLOW
•-) Press PLAY torelease.
•Slow Motion picture
•-_ Hold down PAUSE/SLOW in
Still mode
•-) Press PLAY to release.
•Frame by Frame picture
•-) Press PAUSE/SLOW in Still mode
•-) Press PLAY to release,
•These features workbest inSPor SLP mode.
•After theunit is inStill orSlow mode for 3
minutes, it will switch to Stop modeautomatically
to protectthe tape and the video head.
•Stop -_ Press STOP
•Rewind tape --) Press REW inStop mode
•Fast forward tape --) Press FF in Stop mode
•Eject tape .-) Press EJECT on the remote
orSTOP/EJECT onthe unit
You can operate on the unit
CH&T
insertacassette. PLAY
REC
[] Press to stop and/or REC Indicator
ejecttape.
Insert a cassette with record tab,
• The unitpowercomesonautomatically.
Press CH AV'* or number keys to
Select Channel.
•For "LINE"input,see bottomof next page.
Press SPEED to select recording
speed (see page 41).
SP = Standard Play
LP = Long Play
SLP = Super Long Play
• Selectedspeedis displayed.
Press REC to start recording.
•Toeditoutunwantedportions,press
PAUSE/SLOWto pauseandresume
recording.
• Youcannotviewanotherchannelduring
recording.
•Stop -_ Press STOP
•One Touch Recording (OTR)
Press REC repeatedly -._,...-_,_o
to set the recording ('- " "_)
length (30 rain -4 hours.) --,_o,--=_.,-2_0.,-1:_0.,-.-
•The unit stops recording at a preset time.
•PROG TIMER indicator lights on the unit.
• After the unit has been in Rec Pause mode for 5
minutes, it wLllstop automatically to protect the
tape and the video head.
•The remaining recording time of an OTR can be
displayed by pressing DISPLAY.
II _)_(_)_j SELECT!
]J ,(_"_SET
//f-__ \\=:CH UP
II ' :il -:CHDOWN
ACTIOn- _ -C_JJJ p:VOLUP
,:vo,oowN
___ III (3) G:3[QD_J4-_--TFIACKINGI
NUMu_-H
PLAy_ADD/DLT
REW_-__ __Z_.__.G_-_-_-FF
/SLOW HJ u .V=u_STOP
SPEED__ -c)__ -REc
Connections you'll need to make. Recording (Editing) unit
Playing (Source) VCR
AUDIO VIDEO
OUT (3 7
,NOIOCI _) IN FROMANT.
@OUT TO TV VIDEO IN AUDIO IN
' I
Insert pre-
recorded tape.
"t
Insert blank tape
with record tab.
• Dubbing tapes protected
with Copy Guard will have
poor quality results,
Select "LINE" mode.
See "Selecting Input Mode" below.
IPress PLAY then I Press REC, then
PAUSE
_1 _ PAUSE at starting REC PAUSEPAUSE/SLOW
point to put in {_) _l_ immediately to put in
Standby mode. Standby mode.
(Perform operation of steps 4 and 5 on both units at same time.)
Press PLAY
to start dubbing.
PressSTOP
to stop dubbing.
PAUSE
STOP
Q)
Press PAUSE/SLOW
to start dubbing.
Press STOP
to stop dubbing.
7
• Unauthorized exchanging |
and/or copying of copyrighted /
recordings may be copyright
infringement.
Method1:
PressCH &,. The displaywillchangeaslollows.
C--'--2;I
LE)
Method 2: "-,-_LINE,,.-_,-125 or
aPress ACTION for MAIN MENU.
b Press A,_'<II_ to select 'q-V",then press ACTION
lot SET UP TV screen.
cPress AV to select =INPUT SELECT," and
then press I_ to select "TUNER" or "LINE."
dPress ACTION twice to exit this mode. 15
Press POWER* on the remote or
unit.
208 UseCH&_'or
•Be number keys to
select a channet.
3
24 IIIlflIIIH ......................
Press VOL + or VOL -
to adjust votume.
Color and picture intensity levels are adjusted so the
screen is easier on your eyes during nLghttime use,
NIGHT Press NITE to set NIGHT
mode.
•NIGHT mode may be selected
when watchingTV, playinga
tape, or while in FM mode.
Press NITE to cancel.
•Previoussettingsare restored.
° NIGHT mode iscanceled
when power is turnedoffor
powerfailure occurs.
[_PReady Check List
[] All connections are made,
[] Your unit is plugged in.
VOL + VOL-
PLAY/
REPEAT
r -i.PHONES
Jack
RAPID
• Using the 100 key
When selecting CABLE channels 100 to 125
with the number keys, first press the 100 key,
and then enter the remaining two digits.
[] Rapid Tune
Press R-TUNE to display the last channel you
were watching.
[] Audio Mute
Press MUTE to instantly mute the sound. Press
agaLnto restore the previous sound level
• Phones
Connect an earphone (not supplied) or
headphones (not supplied) to the Phones Jack.
VOL
UP/DOWN
100 KEY-
NITE-
;H
IP/DOWN
-NUMBER
Keys
Closed Caption is ...
This multi-use systemnot onlyallows the hearing
impairedtoenjoy selectedprograms, but also
makes useful information from TV stations
availableto everyone.
Press ACTION
to display MAIN MENU.
MAIN k_5'dU
_'r ;AC'rloN
Closed Caption narration, ifavailable, isdisplayed
when MUTE button is pressed for silence.
Press ACTION
to display MAIN MENU.
I.__ 1)Press A,V411_
,_=_u toselect "I'V."
2) Press ACTION
1)Press AV4 I_ to display SET
to select "IV." UP "IV screen.
2) Press ACTION
to display SET _ _'_
UP "IV screen. O select_APTIOI"_="
.._r sEL_c_:TUNER2) Press I_ to
SET UP T_
_SELEK
I;:'l' :TUNER
VIOEO AD,JUS7
FM ANTENNA :EXT
_,fLECT ;•'i'
SET :l_
END :ACT ION
VIDE0 ADJUST
1) Press AV tO FMANTENNA:EX3"
SELECT:•
select "CAPTION". sET :,.
END :ACTION
2) Press I_ to
display CAPTION 4 c_,m,ON
CCON MUTF. : CAP C1
screen.
cA_r,o. 1) Press &T to
select CAPTION[_PmTliE[e_Je]r_J-i1___.a r_ COil
CC ON MUTE : CAP Cl MODE.
displayCAPTION
screen.
S_:• qL'
SET :b
END :ACT_(]N
1) Press A'Y to
selectCAPTION
MODE.
2) Press I_
repeatedlyto
select"OFF."
SL=T :_-
:ACTION
TF_T C2 TEXTC1
_u_ _--J
2) Press I_
repeatedlyto
selectmode.
(See left.)
Press ACTION three times
to returnto the normal screen.
[G_.PT tON
/SEL.E_t ;• ",'
IN
1) Press AV to
select CCON
MUTE.
Press
repeatedlytoselect
desired mode.
,EachpressofI_ will
thedisp4ayas
left.
° Thecaptionmaybe
broadcastoverCAP
C1orC2.
Recordingand Playing Back a Closed "_
Caption/Text Program /
Record : Record normally.Closed Caption/|
Textsignal, ifpresent,isrecorded L
automatically.
Playback : Start playback. Doabove steps to i
selectdesired captionmode. ]
Closed Caption Mode Selections
Caption Mode: CAP C1 or C2
Press ACTION three times
to return to the normal screen.
Press MUTE to mute the sound and
display closed captioning.
• To cancel, pressMUTE again.
A narrationof selected TV programs isdisplayed.
Check TV program listings for CC(Crosed Caption) broadcasts.
Caption Mode: TEXT C1 or C2
The lower half ofthe screen will be blocked out. When the TV station broadcasts information,
suchas programlistings,itwillappear in this space,
Caption Mode: OFF
Closed Caption/Text narrationwill not be displayed.
NOTE : The closed caption ortext signal may be broadcast overC1, C2, or both,
Also, text contentscan vary so you may wishto try differentsettings. 17
This unit can be set to automatically power on in one
of 3 modes (TV, Playback, or FM radio.)
You can also combine the On-Timer with a one
minute alarm that gradually increases in volume.
Press PROG/VCR+* button
to display SET PROGRAM screen.
2pROGP,t,.M
TIMER PR(XtP,/_U;t_=
SELL:_" : & v
SET :i-
I_D :PROG
1)Press &V to select
"ON TIMER."
2) Press Ibto display
ON TIMER screen.
1_ Ready Check List
[] The clock is set to correct time.
r,,,1
...........
n,_._:_ v
•ON-TIMERmode
selectionorder
I_CH02_CH0:3 "°°''¢H125m,I
CH01 PLAY
L,FMg--FMS'--"FM1J
1) Press &Y to select
desired settings.
2) Press I_ to set the
ON-TIMER TIME or
ON-TIMER mode.
•Make sure a tape is
insertedifPlaybackmode
isselected.
•See "FM Radio" on page
21 for instructionson
how topreset FM
stations.
ON T IME_,
CANCI_ _/tJ_O/12.T
._:l V
F.NO _PRC_
Press &Y to select
ALARM "ON" or "OFF."
When "ON" is selected
an alarm willgradually increase in volume for one
minute or untilcanceled by pressing any button
(includingVOL + -).
To Make Corrections,
use &V and • i_ to move back and correct.
i_ TIMER/FM
CH A,V' ON TIMER
indicator
Press PROG/VCR+ button
to set ON TIMER.
•"ONTIMERSET"isdisplayed.
•ONTIMERIndicatorlightsontheunit.
To Cancel ON-TIMER set,
Repeat steps Iand 2.Then, press ADD/DLT to clear
the time in step 3. Now, press PROG/VCR+ buttonto
end.
=ONTIMER END" briefly appears on-screen.
[I no button onthe remote or unit
(including abutton used to turn off
the alarm) is pressed within 60
minutes after unit turns itself on, it
will turn itselfback off.
o_
SELECT/
SET
A:CHUP
--_:CHDOWN
)_:VOLUP
-AOD/D1.T
-OLSPLAY
-SLEEP
1:00 (oneminute)......
I
2:00
I one-minute
3i00 increase
:until 10:00
9!001 i
_ 10:00 ::::;::".:-'"',
I
15:00
Ifive-rninuIe
20:00 increase
I until30:00
25:00
I
_-30:00........ '_
....... 1
I
4o:oo ten-minute
I increase
50:00 until60:00
I
,_._00 (Max) --.j
0
While timer functionis in progress,
you can change channels on the
unit with CH &V while "CANCEL/
SET' screen is not dispfayed.
This unit can be set for auto power off.
Press SLEEP repeatedly
to set SLEEP TIMER. SLEEPTIMER30
• Pressing DISPLAY with SLEEP TIMER 60
sleep timer set displays
remaining time. SLEEP TIMER 90
Press SLEEP repeatedly
until "SLEEP TIMER 00" SLEEPTIMER(30
appears to cancel, t
You can set a timeralarm up to60 rain,Useful when
you are cooking, etc,
Press TIMEPJFM on the unit to display
the instant alarm CANCEL/SET screen.
t
I_:/d_O/OLT o2:_,o/
|sEr:CH • • KEY ON UNIT
IRern)ining Tirn;]
Press CH AT on the
unitwith CANCEL/SET
screen displayed to set
alarm. (Timechangesin
theordershownleft.)
•Pressing TIMER/FM repeatedly on the unit
will change display as follows.
INSTANTAL_RMI_ I=NSTAm"ALARm|
TV (O_' LINE) J _IFM II
J
IIIIII I
To cancel, press TIMER/FM then press ADD/DLT on
the remote while CANCEL/SET screenisdisplayed.
To Increase timer in progress, repeat step 2. Time
will be rounded upto next 1,5, or 10 minute interval.
(See chartleft.)
<Example>
• If current time remaining is 12:15, countdownwill
restart from 15:00.
•Ifcurrent time remaining is 9:15, countdown will restart
from 10:00.
Alarm will sound at 0: 00.
Press any button to stop
• The volume of the alarm gradually increases for
one minute and then continuesto beep until
any button ispressed. 19
Press ACTION*
to display MAIN MENU,
2MAnN MENU
Si___c'r :& v,ll IF.
:ACT}ON
1)Press AV<I lwto
select 'q'V."
2) Press ACTION to
display SET UP TV
screen.
[LOG KsEr uP TV ]
/ CAPTION
/FM ANTENNA '. E.XT
/S r'L£CT;A V
/SEt :_.
END : ACT I(_1
1)Press A_' to select
VIDEO ADJUST.
2) Press I_ to display
screen.
4m ....... I......
TINT ....... _......
BRIGHI3_ES.._........ 1......
P 4C'UIJRI:" .............. 4
SI-I._PNE._ ....... t......
_E_-CT :Av
END :AC:TION
1)Press AV to setect
an adjustment item.
(See below right.)
2) Press <1l_ to adjust.
SELECTtSET
v:CH DOWN
P:VOL UP
4 :VOL DOWN
NUMBER
Keys
--ADD_LT
-DISPLAY
COLO_I ....... I......
TINT ....... I......
BRIGH11_ESS ....... }......
PICTURE .............. 4
SHARPt_E$.S ....... I......
SEI..ECT :& v
:tb
END :ACTION
To Reset Picture
Controls.
Press AT and I_ to
select and set
"NORMAL."
All controls returnto
their factory settings.
Press ACTION three times to exit.
Picture Adjustment
[] COLOR Control
Adjustcotorintensity.
[] TINT Control
Adjust for naturalflesh tones.
[] BRIGHTNESS Control
Adjustpicturebrightness.
[] PICTURE Control
Adjustpictureintensityby
adjustingboth contrastand
colorlevelintheproper
balance.
[] SHARPNESS Control
Adjustpicturesharpness.

Other manuals for PV-C2541

1

Other Panasonic VCR System manuals

Panasonic NV-HS800 User manual

Panasonic

Panasonic NV-HS800 User manual

Panasonic AJD220P - DVC PRO User manual

Panasonic

Panasonic AJD220P - DVC PRO User manual

Panasonic AG-DV11DC P User manual

Panasonic

Panasonic AG-DV11DC P User manual

Panasonic PV-V462 User manual

Panasonic

Panasonic PV-V462 User manual

Panasonic NV-SD300AM User manual

Panasonic

Panasonic NV-SD300AM User manual

Panasonic AGRT650P - TIME LAPSE VTR User manual

Panasonic

Panasonic AGRT650P - TIME LAPSE VTR User manual

Panasonic Omnivision PV-V4523S User manual

Panasonic

Panasonic Omnivision PV-V4523S User manual

Panasonic OmniVision PV-Q920 User manual

Panasonic

Panasonic OmniVision PV-Q920 User manual

Panasonic Omnivision PV-M1349 User manual

Panasonic

Panasonic Omnivision PV-M1349 User manual

Panasonic NV-SD20EE User manual

Panasonic

Panasonic NV-SD20EE User manual

Panasonic Omnivision PV-4611 User manual

Panasonic

Panasonic Omnivision PV-4611 User manual

Panasonic ProLine AG-2570 User manual

Panasonic

Panasonic ProLine AG-2570 User manual

Panasonic AJ-HD3700H Owner's manual

Panasonic

Panasonic AJ-HD3700H Owner's manual

Panasonic NV-J35 Series User manual

Panasonic

Panasonic NV-J35 Series User manual

Panasonic NV-HD635 User manual

Panasonic

Panasonic NV-HD635 User manual

Panasonic AGRT600AP - TIME LAPSE RECORDER User manual

Panasonic

Panasonic AGRT600AP - TIME LAPSE RECORDER User manual

Panasonic NV-F55EA User manual

Panasonic

Panasonic NV-F55EA User manual

Panasonic AJ-SDa755E User manual

Panasonic

Panasonic AJ-SDa755E User manual

Panasonic NV-FJ613 S User manual

Panasonic

Panasonic NV-FJ613 S User manual

Panasonic NV-SJ200AM User manual

Panasonic

Panasonic NV-SJ200AM User manual

Panasonic Omnivision PV-V4660 User manual

Panasonic

Panasonic Omnivision PV-V4660 User manual

Panasonic PV-4562 User manual

Panasonic

Panasonic PV-4562 User manual

Panasonic NV-FJ730 Series User manual

Panasonic

Panasonic NV-FJ730 Series User manual

Panasonic ProLine AG-1980P User manual

Panasonic

Panasonic ProLine AG-1980P User manual

Popular VCR System manuals by other brands

JVC SR-VS20U - Dual Format S-vhs/minidv Recorder instructions

JVC

JVC SR-VS20U - Dual Format S-vhs/minidv Recorder instructions

Zenith VCM321 Installation and operating guide

Zenith

Zenith VCM321 Installation and operating guide

Samsung SVR-24PRT Installation and operating instructions

Samsung

Samsung SVR-24PRT Installation and operating instructions

JVC BR-DV600E - Professional Dv Recorder/player instructions

JVC

JVC BR-DV600E - Professional Dv Recorder/player instructions

Sharp VC-H800X Service manual

Sharp

Sharp VC-H800X Service manual

Sony SLV-E325EG Service manual

Sony

Sony SLV-E325EG Service manual

JVC HR-VP470U quick start

JVC

JVC HR-VP470U quick start

Philips VR840 Specifications

Philips

Philips VR840 Specifications

JVC HR-J588 instructions

JVC

JVC HR-J588 instructions

JVC DR-MV5BEK Service manual

JVC

JVC DR-MV5BEK Service manual

Philips VR447/05 operating instructions

Philips

Philips VR447/05 operating instructions

akira VCR-S607 Service manual

akira

akira VCR-S607 Service manual

Toshiba M-752 owner's manual

Toshiba

Toshiba M-752 owner's manual

Toshiba M-262 owner's manual

Toshiba

Toshiba M-262 owner's manual

Sylvania 6261CVB owner's manual

Sylvania

Sylvania 6261CVB owner's manual

JVC HR-E249E instructions

JVC

JVC HR-E249E instructions

Philips VR510 Specifications

Philips

Philips VR510 Specifications

Quasar VHQ-720 user guide

Quasar

Quasar VHQ-720 user guide

manuals.online logo
manuals.online logoBrands
  • About & Mission
  • Contact us
  • Privacy Policy
  • Terms and Conditions

Copyright 2025 Manuals.Online. All Rights Reserved.