Paraavis Space Reserve User manual

R
AA
www.paraavis.com
OWNER’S MANUAL
packing instructions

q
AA
www.paraavis.com
Read and follow all WARNINGS, WARRANTY and INSTRUCTIONS for products.
Read page 2 of this manual.
Read and follow all operating instructions and all manufacturer specifications,
advice and requirements for use of the equipment.
Use only manufacturer recommended compatible components.
Examine and replace ANY defective, worn or deteriorated component part.
Examine all gear and equipment, including all fittings, buckles, snaps or other
fasteners before each use of any parachute product.
Use only products for parachute use.
Do not exceed recommended or stated forces, speeds, or other factors
regarding safe use of the equipment.
Read and follow all warning labels, timers or other similar equipment
before each jump or use.
Be extremely careful and cautious.
Review emergency procedures before each use.
Do not be too selfconfident.
Never use eguipment packed, prepared, assembled or fitted by others.
Examine your equipment before each use.
Failure to activate the main or reserve parachute (or execute correct
emergency procedures)
at a safe altitude, and/or eguipment failure can result in serious injury or death.
FAILURE TO FOLLOW ALL WARNINGS, INSTRUCTIONS AND
REQUIRED PROCEDURES MAY RESULT IN SERIOUS INJURY OR DEATH.
Dear customer!
2
SPACE 7 cell reserve canopy. Manual.

q
AA
www.paraavis.com
Read and follow all WARNINGS, WARRANTY and INSTRUCTIONS for products.
Read page 2 of this manual.
SPACE 7 cell reserve canopy. Manual.
1
2
A
B
NEVER USE UNLESS YOU HAVE:
:
R
AA
www.paraavis.com

q
AA
www.paraavis.com
Read and follow all WARNINGS, WARRANTY and INSTRUCTIONS for products.
Read page 2 of this manual.
WARNING
PARACHUTING IS A HAZARDOUS ACTIVITY
THAT CAN RESULT IN INJURY OR DEATH
Even though the parachutes described in this manual are
intended to be life saving devices, there is no guarantee
that they will work if needed.
There are so many factors, both human and natural,
beyond our control that we want you to clearly
understand that by using or intending to use our
parachutes, you are assuming a considerable risk of
personal injury or death.
DISCLAIMER
There are NO WARRANTIES which extend beyond the
description of the parachutes in this manual, and neither
the seller nor any agent of the seller has made any
affirmation of fact or promise with respect to the
parachutes except those that appear therein.
The liability of the seller is limited to the duty to replace
defective parts found upon examination by the
manufacturer to be defective in material or workmanship
within 7 days after purchase and found not to have been
caused by any accident, improper use, alteration,
tampering, abuse or lack of care on the part of the
purchaser.
4
SPACE 7 cell reserve canopy. Manual.

q
AA
www.paraavis.com
Read and follow all WARNINGS, WARRANTY and INSTRUCTIONS for products.
Read page 2 of this manual.
5
SPACE 7 cell reserve canopy. Manual.
Introduction
NOTE. We require that the rigger packing these canopies be completely familiar with ram-air
type parachutes. Although we do not require a special rating, the owner/jumper should be sure
that the rigger thoroughly understands a ram-air parachute. Having a square reserve on
backwards would be a serious matter!
Lay the harness and container on a smooth clean surface as if the wearer were face down, head
toward the canopy. Lay the canopy out and straighten the line groups. The front first and second
line groups go to the front risers, the third and fourth line groups go to the rear risers. The
smooth side of the grommets in the slider goes toward the harness.
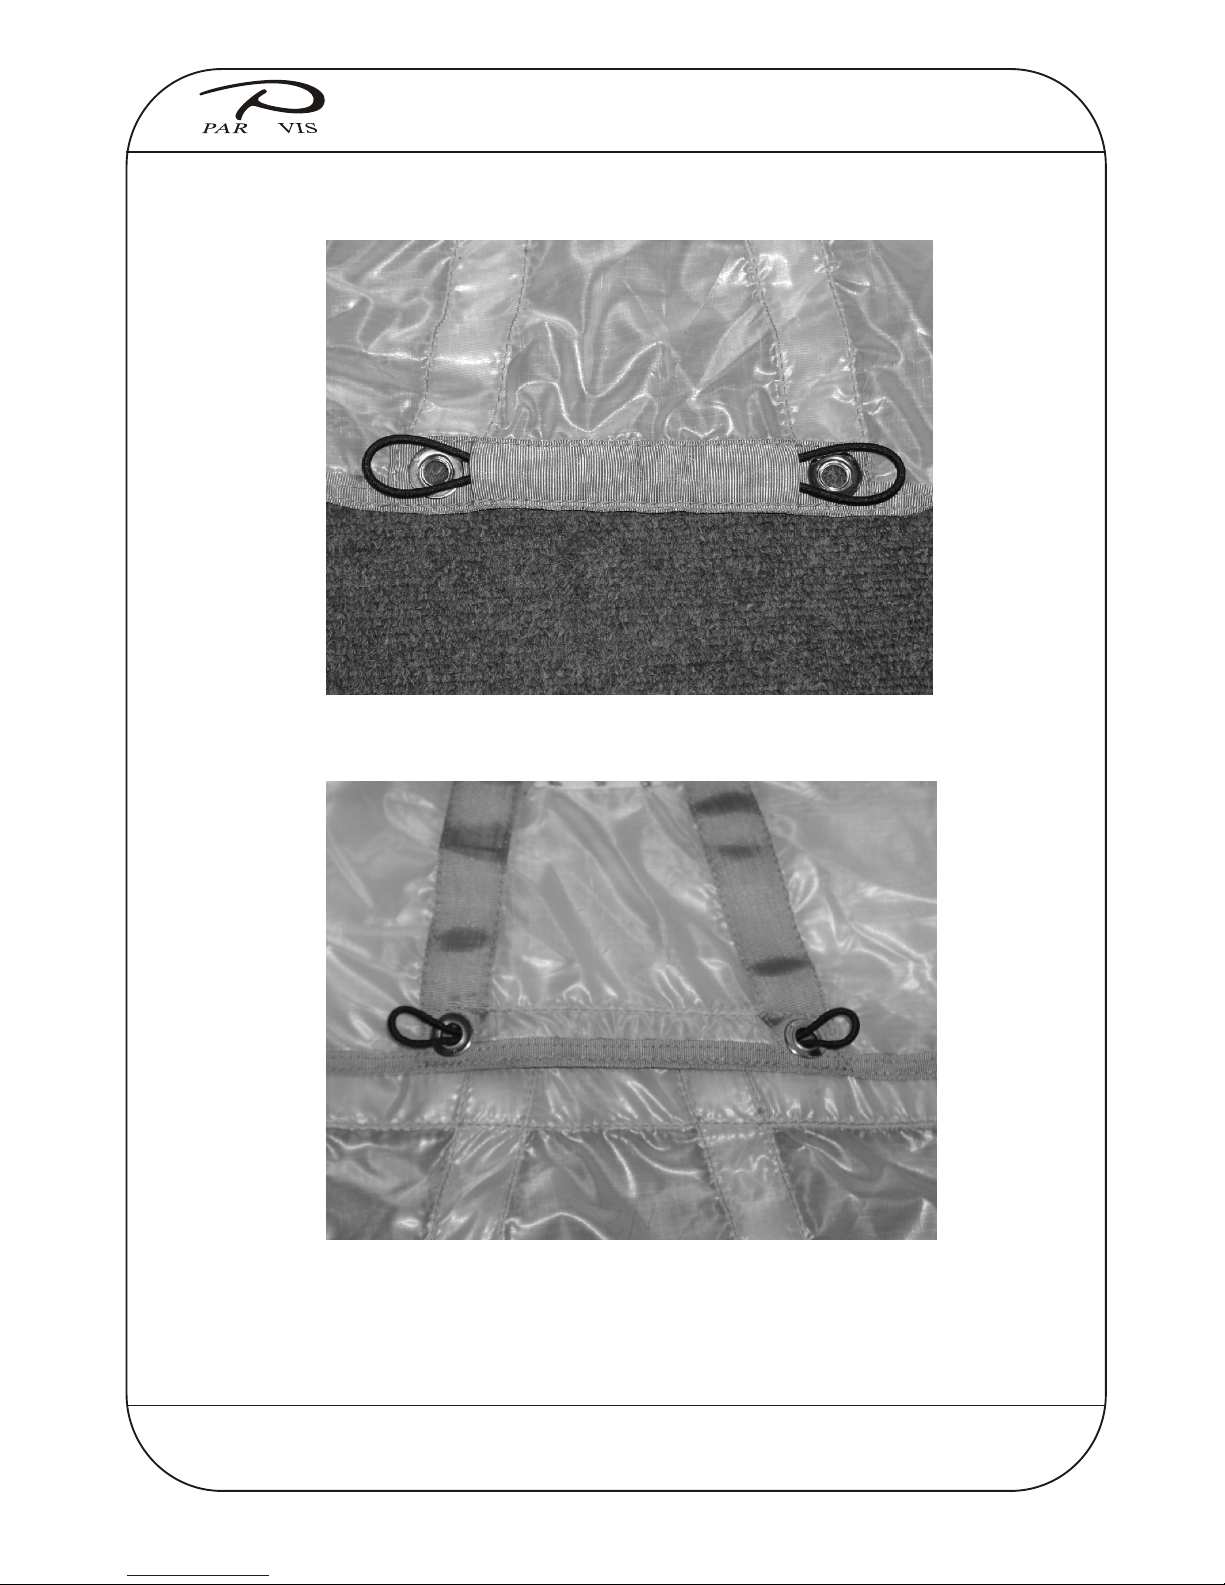
Attach the connector links to the corresponding risers temporarily and do a complete continuity
check on each link to insure proper sequence, and then tighten the links. Clear each set (left and
right) of upper control lines (steering lines). Lower control lines should pass through the rear
grommets of the slider (clear of the suspension lines) then through the Type I webbing guide
loop located on the rear riser just below the L-link and then through their respective guide rings
on the rear risers. Attach the steering toggles to the lower control lines by inserting the looped
lower end of the lower control line through the grommet in the toggle from the Velcro® side,
and then passing the bottom end of the toggle through the loop and cinching the loop snug
around the toggle. If practical, the rigger should then carefully inflate the reserve as a final
continuity and assembly check.
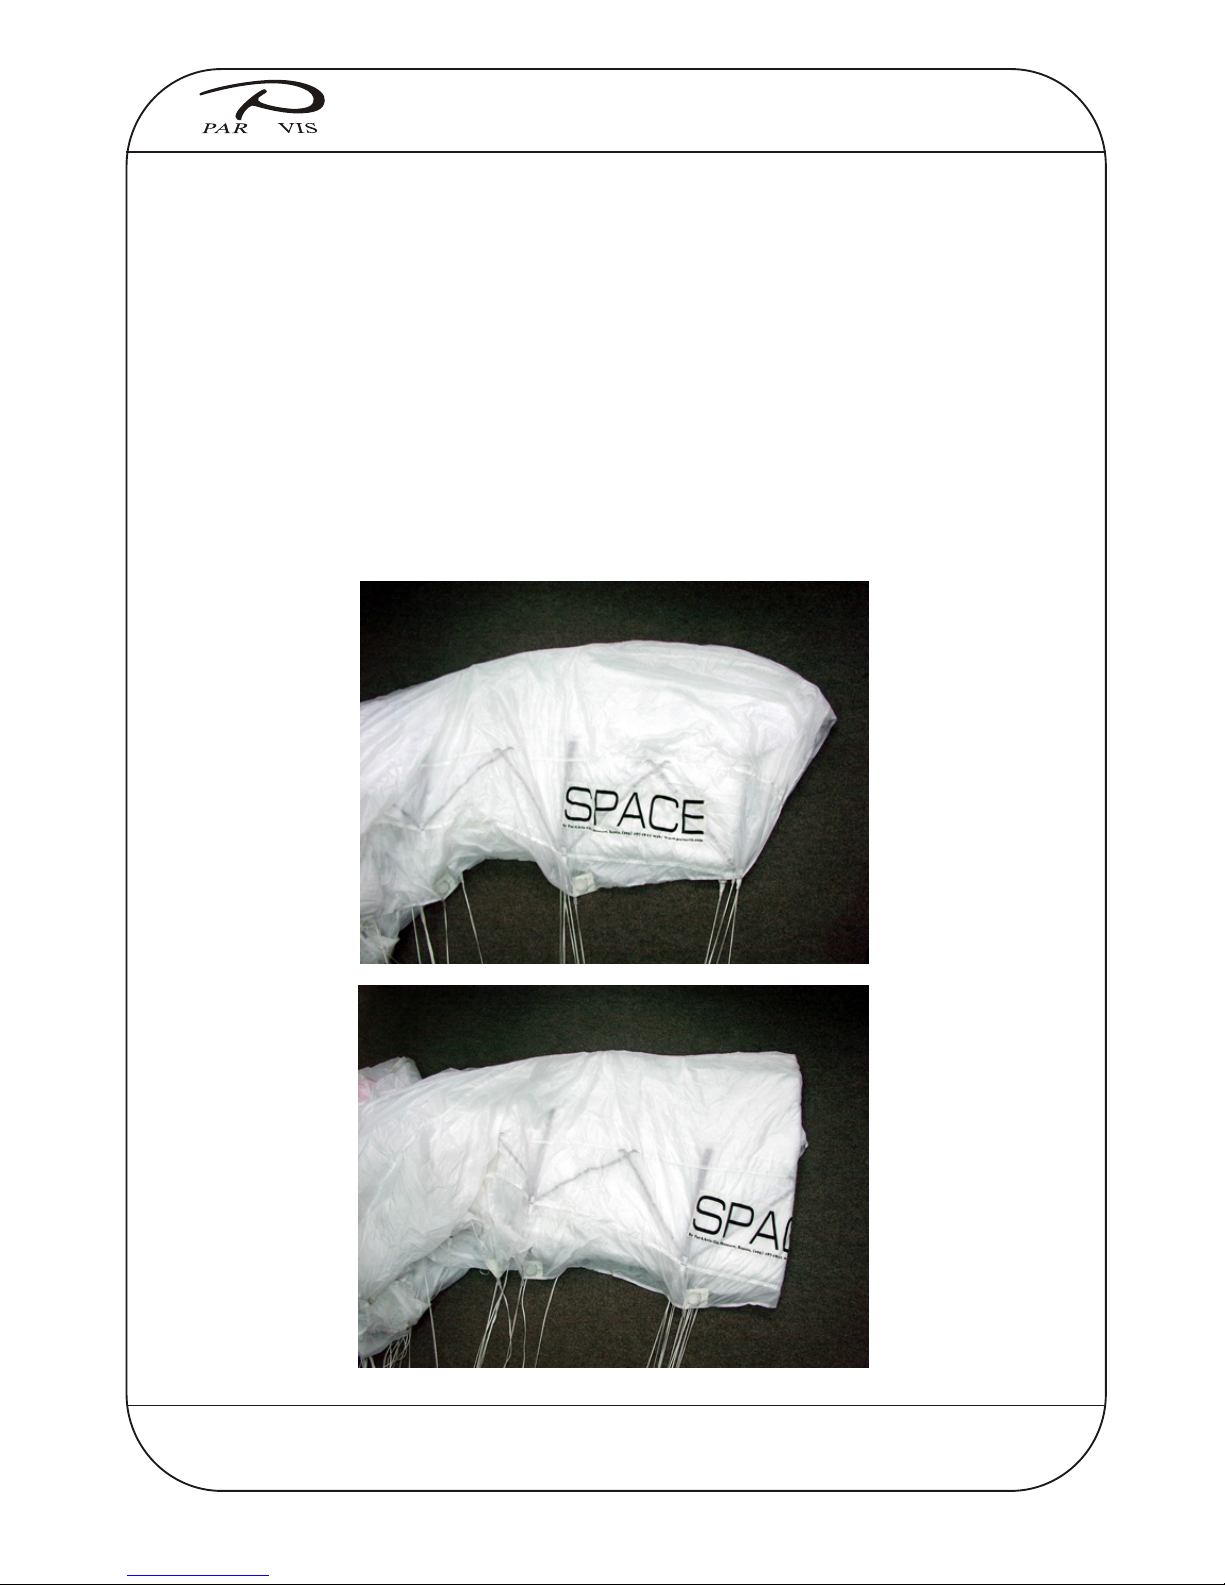
Pass the long bridle webbing through the deployment bag’s loop, then pass the large loop end of
the webbing through the smaller loop end and cinch snug. Next pass the large loop end of the
bridle through the pilot chute’s loop, and then pass the entire pilot chute through the large loop
of the bridle.
WARNING! This bag assembly must not be attached to the reserve canopy.

q
AA
www.paraavis.com
Locking loops:
Type of closing loop can be used with CONTAINER.
Standard loop made of 2,3 mm diameter line.
Use the picture below to identify the correct type of loop.
The following points must be strictly respected:
The fixing of the loop must be made with the metallic washer
Provided with your harness container.
A) Mark the right lenght for the canopy to be packed, then make the knot and tight it on the
mark.
B) Make a second knot and tight it on the first one.
C) Attach a thread on the loop, then route it through the second and third hole as it is
shown.
Read and follow all WARNINGS, WARRANTY and INSTRUCTIONS for products.
Read page 2 of this manual.
2,3mm Standard washer
6
SPACE 7 cell reserve canopy. Manual.

q
AA
www.paraavis.com
After checking reserve canopy lines, check connectors and risers.
Control lines must set in to the reefing rings on a back
reserve canopy risers.
Hook toggles set up.
Route the control line through the grommets on a toggle and
put loop trough toggle. Tight the loop across grommet.
Read and follow all WARNINGS, WARRANTY and INSTRUCTIONS for products.
Read page 2 of this manual.
7
SPACE 7 cell reserve canopy. Manual.

q
AA
www.paraavis.com
Read and follow all WARNINGS, WARRANTY and INSTRUCTIONS for products.
Read page 2 of this manual.
Reaching this stage of operations the reserve canopy is ready to
be packed into the deployment bag according to the specific manual.
Reserve canopy control lines
Stow line slack then secure it with the velcro fastener.
8
SPACE 7 cell reserve canopy. Manual.

q
AA
www.paraavis.com
Read and follow all WARNINGS, WARRANTY and INSTRUCTIONS for products.
Read page 2 of this manual.
Route the elastic endings through the grommets.
Reserve D-bag set up
9
SPACE 7 cell reserve canopy. Manual.

q
AA
www.paraavis.com
Read and follow all WARNINGS, WARRANTY and INSTRUCTIONS for products.
Read page 2 of this manual.
SPACE 7 cell reserve canopy. Manual.
11
1. Space Reserve canopy packing
Lay the canopy out with the left or right side up. Orient the harness face down, head toward the
canopy. Clear the lines of twists and tangles. Insure that the control lines are clear of other lines and
that they pass through the rear grommets of the slider as well as through the guide loop and the
guide ring on each rear reserve riser.
1) List the right side of the canopy. Take the fabric of the top skin through the lines of the first row
and spread them properly. Take the fabric opposite the lines of the second row, spread them and lay
on the fabric beside the lines of the first row .
2) The same way pack the fabric opposite the lines of the third row and the fourth row.

q
AA
www.paraavis.com
Read and follow all WARNINGS, WARRANTY and INSTRUCTIONS for products.
Read page 2 of this manual.
SPACE 7 cell reserve canopy. Manual.
Spread the side fabric between the lines
of the second, third and fourth rows
Take the bottom fabric of the canopy between
the places of control lines attachment and
stretch lines and fabric between them.
Pack the bottom fabric as shown.
The same way pack the left par
t of the canopy

q
AA
www.paraavis.com
Read and follow all WARNINGS, WARRANTY and INSTRUCTIONS for products.
Read page 2 of this manual.
SPACE 7 cell reserve canopy. Manual.
Move the slider up to the base of the stabilizers
making sure any twists in the lines are above the
slider. Spread the slider out flat (it will be
folded in half span wise) and stow it between the
two stabilizers. Make one more stack with the tail
section placing it on top of the nose section
(see picture A).
A

q
AA
www.paraavis.com
Read and follow all WARNINGS, WARRANTY and INSTRUCTIONS for products.
Read page 2 of this manual.
SPACE 7 cell reserve canopy. Manual.
Dress the tail, half on one side and half on
the other so that the centre of the tail is
on top. Care should be taken when doing this
to insure that the steering lines stay
neatly stacked on top of the lines of the
fourth row.
Wrap the tail around as shown on the picture.

q
AA
Read and follow all WARNINGS, WARRANTY and INSTRUCTIONS for products.
Read page 2 of this manual.
SPACE 7 cell reserve canopy. Manual.
Find the three nose openings on the inside
edge of each ear and pleat them out neatly
on top of each other. Now dress the ears to
approximately the same width as the ear
pockets in the top of the molar bag

q
AA
www.paraavis.com
Prepare the canopy following the drawings
Firstly insert the two parts into the corners of
the bag then remaining bundle Lock the flap with
two lines stows.
Roll over the bag without making twists and stow the lines into the velcro line pocket.
Packing reserve to the reserve D-bag.
Read and follow all WARNINGS, WARRANTY and INSTRUCTIONS for products.
Read page 2 of this manual.
Close the protection flap and roll over the deployment bag (do not twist).
SPACE 7 cell reserve canopy. Manual.

q
AA
www.paraavis.com
Read and follow all WARNINGS, WARRANTY and INSTRUCTIONS for products.
Read page 2 of this manual.
15
SPACE 7 cell reserve canopy. Manual.
Table of contents
Popular Aircraft manuals by other brands

Piper Aircraft Corporation
Piper Aircraft Corporation PA-28-181 Airplane Maintenance Manual

Van's Aircraft
Van's Aircraft RV-7 Flight manual

Piper
Piper CHEROKEE WARRIOR II Information manual

Tuff Birds
Tuff Birds Micro BEE Instructional manual

Evektor
Evektor SportStar RTC Maintenance manual

FlyingFoam
FlyingFoam Nurf General assembly instructions