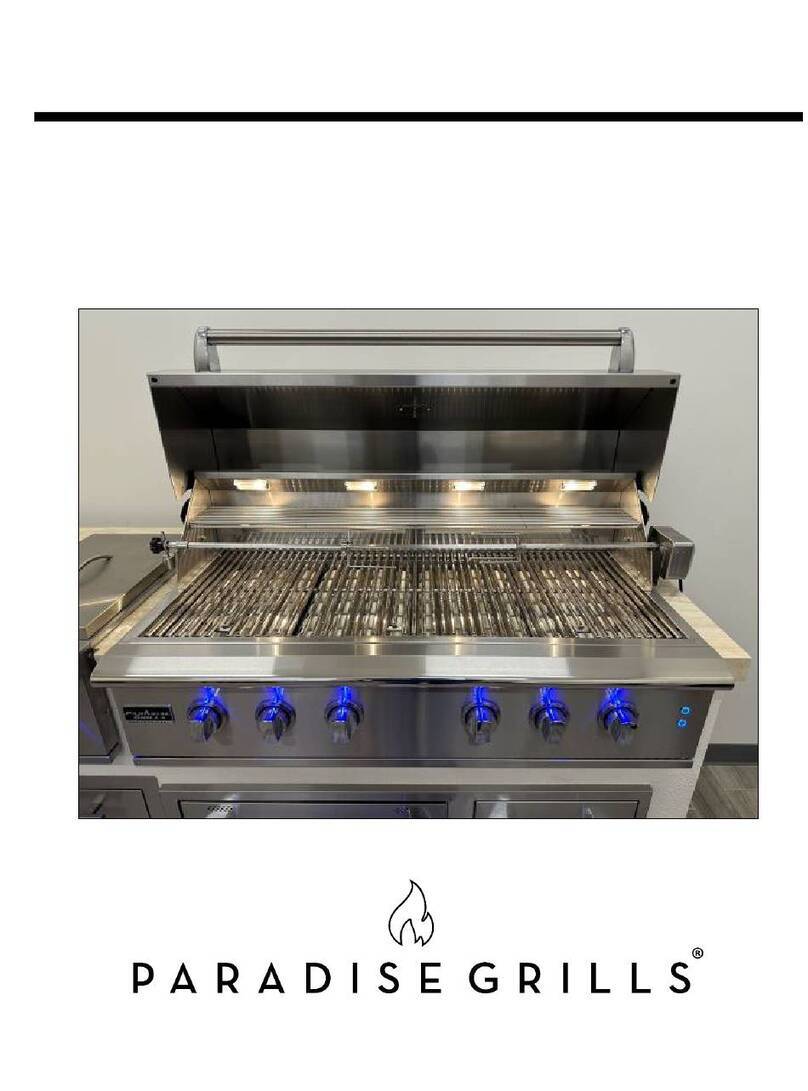
PARADISE GRILLS ESL-24 User manual

ESL-24 Electric Grill
Operator Manual
ESL-24 shown with
optional pedestal mount

ESL-24 Electric Grill Operator Manual
October 2022
The content of this manual is the property of Paradise Grills International, Inc. All rights reserved. Any
reproduction, in whole or in part, is strictly prohibited without express written consent of Paradise Grills
International, Inc.
Paradise Grills International, Inc.
640 Ocoee Business Pkwy, Suite #80
Ocoee, FL 34761
800-604-2023
www.paradisegrills.com
ATTENTION INSTALLER: PLEASE LEAVE THESE INSTRUCTIONS WITH THE CONSUMER.
ATTENTION CONSUMER: PLEASE RETAIN THESE INSTRUCTIONS FOR FUTURE
REFERENCE. You are responsible for checking updates and revisions available online at
http://www.paradisegrillsdirect.com/owners/.
Serial number ______________________________________
(See grill rating plate for serial number)
Purchase date ______________________________________
WARNING
•FOR OUTDOOR USE ONLY!
•Observe all local codes and ordinances when installing this appliance. If no local
codes are applicable, wire unit in accordance with the latest National Electrical
Code, ANSI/NFPA 70, or the Canadian Electrical Code, CSA C22.1, whichever is
applicable.
•DO NOT use grill with a damaged power cord. Electrical shock can occur with
exposure to water or another liquid, causing serious bodily injury, death and/or
property damage.
•Do not store or use gasoline or other flammable liquids or vapors in the vicinity
of this or any other appliance.

ESL-24 Operator's Manual Contents •i
Contents
Safety Considerations 3
Safety Symbols...........................................................................................................3
Operational Warnings................................................................................................3
Specifications 5
Grill Specifications......................................................................................................5
Customer Required Items.........................................................................................6
Outdoor Rated Electric Cord .......................................................................6
Safety Equipment..........................................................................................6
Grill Covers ....................................................................................................6
Grill Island Preparation 7
Clearances ..................................................................................................................7
Custom Island Construction .....................................................................................7
Planning Considerations ..............................................................................8
Custom Built Island Cut-outs.......................................................................8
Grill Dimensions ............................................................................................9
Grill Assembly 10
Electrical Precautions ..............................................................................................10
Unpack the Box ........................................................................................................11
Install the Grill ...........................................................................................................12
Countertop Placement................................................................................12
Pedestal Installation (optional)..................................................................12
Paradise Grills Grill Cart (optional)...........................................................16
Island Installation (optional).......................................................................18
Grill Setup..................................................................................................................19
Basic Setup..................................................................................................19
Install Handles .............................................................................................22
Install Side Shelves ....................................................................................23
Operating the Grill 25
Warnings and Cautions...........................................................................................25
Normal Operation.....................................................................................................26
Using the Grill ...........................................................................................................27
First Time Operation...................................................................................27
Heating Element..........................................................................................27
Cleaning and Maintenance 28

ii •Contents ESL-24 Operator's Manual
Maintain your Grill ....................................................................................................28
Stainless Steel Maintenance ..................................................................................28
Corrosive Environmental Conditions.....................................................................29
Grill Exterior ..............................................................................................................29
Grill Interior................................................................................................................29
Cleaning the Drip Tray ............................................................................................30
Preventive Maintenance..........................................................................................30
Parts Diagram 31
Limited Manufacturer’s Warranty 32
Limited Warranty ......................................................................................................32
Warranty Claim Submission ...................................................................................33

ESL-24 Operator Manual Safety Considerations •3
Safety Considerations
Safety Symbols
Throughout this manual, important safety information will be highlighted and marked as CAUTION,
DANGER, or WARNING.
A potentially hazardous situation or
unsafe practice which, if not avoided,
may result in minor or moderate injury,
or property damage.
A potentially hazardous situation which,
if not avoided, could result in death or
serious injury, or property damage.
An imminently hazardous situation
which, if not avoided, will result in death
or serious injury, or property damage.
Operational Warnings
All users must read this entire manual before attempting to operate the grill. Follow these safety
precautions every time the grill is used:
Do not immerse the ESL-24 Electric Grill in water.
This grill is for outdoor use only! Do not operate in a building, garage,
an any other enclosed area.
Do not store or use gasoline or other flammable liquids or vapor in the
vicinity of this or any other appliance.
Observe all local codes and ordinances when installing this appliance.
If no local codes are applicable, wire unit in accordance with the latest
National Electrical Code, ANSI/NFPA 70, or the Canadian Electrical
Code, CSA C22.1, whichever is applicable.

4•Safety Considerations ESL-24 Operator Manual
Do not use grill with a damaged power cord. Electrical shock can
occur with exposure to water or other liquids, causing serious bodily
injury, death and/or property damage.
If the information in this manual is not followed exactly, a fire or
electrocution may result, causing serious property damage, personal
injury, and/or loss of life.
CALIFORNIA PROPOSITION 65
1. Combustible by-products produced when using this appliance
contain chemicals known to the State of California to cause cancer,
birth defects, or other reproductive harm.
2. This product contains chemicals, including lead and lead
compounds, known to the State of California to cause cancer, birth
defects or other reproductive harm.
3. For more information see www.P65Warnings.ca.gov
Read the installation, operation, and maintenance instructions
thoroughly before operating or servicing this equipment to reduce risk
of electrocution, fire, burn hazard, or other injury.
All electrical installations, service, and repairs must be performed by a
qualified technician or authorized service agent.
This grill is for single family/residential use only, and not intended for
commercial or indoor use.

ESL-24 Operator Manual Specifications •5
Specifications
Grill Specifications
Cut-out Dimensions 24” W x 14 15/16” D x 5 5/8” H
Cooking Grate Dimensions 21” W x 11” D
Flame Tamer Flame Stabilizer Grid with Ceramic Briquettes
Primary Ignition Electric Element
Electrical Ratings 120V 60Hz 1540W
Warranty
Limited Lifetime Warranty on stainless steel housing to be free from
original manufacturing defects.
2 Year warranty on cooking grate, flame tamers, and valves to be free
from burn-through or original manufacturing defects.
1 Year warranty on heating element, heating element components,
and lighting systems to be free from rust-through or original
manufacturing defects.
See Warranty section on page 32 for further details.

6•Specifications ESL-24 Operator Manual
Customer Required Items
Outdoor Rated Electric Cord
Your Paradise Grills Outdoor Kitchen electric grill is pre-wired with a GFCI electrical box installed. This
electrical box has a hanging plug pigtail for connection to an existing GFCI electrical outlet for power
supply. The customer must supply an outdoor-rated extension cord long enough to reach your chosen
electrical outlet.
Use only a 12-gauge extension cord with a grounded, 3-prong plug. Outdoor extension cords should be
used with outdoor products and are surface marked with suffix letter “W” and with a tag stating
“Suitable for use with outdoor appliances.” The maximum length allowed for the extension cord is 25
feet. Do not use damaged extension cords. Examine extension cord before each use and replace if
damaged. Keep cord away from heat and sharp edges.
Safety Equipment
It is highly recommended to keep the following items close at hand whenever the grill is in use:
•Fire extinguisher, baking soda, sand, and/or kosher salt in case of a fire
•Grill gloves
•Long handled grill utensils
Grill Covers
Grill covers are highly recommended. Protect your investment with our custom fit ESL Grill Cover, sold
separately.

ESL-24 Operator Manual Grill Island Preparation •7
Grill Island Preparation
Clearances
Your grill island, regardless of the source, must be installed to ensure sufficient clearance from any
combustible construction or materials. The customer is responsible for compliance with all local codes.
Heat rises when the grill is in operation. Covered locations (construction, overhang, or awning) should be
avoided unless an outdoor vent hood is properly installed.
Combustibles Materials: Ensure your grill is located at least 16” from any combustible material such as
wood, gyprock, paper and plants. Do not store combustible materials, gasoline, or flammable liquids or
vapors anywhere in the vicinity of the grill. Ensure clearance from the grill to any combustible material is
never less than 14” from sides and 16” from back. Follow all city and local codes.
Overhead construction:
•Do not locate the grill under any unprotected, combustible overhead materials
•At least 6’ clearance is required between the countertop and overhead construction unless an
exhaust hood is used
•An exhaust hood is required if the grill is below unprotected combustible materials, and is highly
recommended for any overhead construction
•When a vent hood is used, the coverage must be larger than the cooking surface of the grill, with a
minimum of 1200 CFM air movement
Custom Island Construction
This grill is for outdoor use only! Do not use this grill indoors under
any circumstances.
Do not install or operate the grill in or on a recreational vehicle, trailer,
boat, or any other moving installation.

8•Grill Island Preparation ESL-24 Operator Manual
Planning Considerations
Materials: All grill islands must be constructed using only non-combustible materials. If any combustible
materials are used, an insulated jacket must be added between the grill and the island.
Airflow: Proper airflow MUST be maintained for the grill to perform as it was designed. If airflow is blocked,
overheating will result. Do not block more than 75% of the cooking grid surface with pans, aluminum foil, or
other materials.
Firm level surface: Use your grill only on an outdoor, firm level surface. This grill is not designed for use
within recreational vehicles, and should not be operated on a boat, marine craft, or other moving
conveyance.
Protection from weather: Keep the grill protected from adverse weather, including rain and winds. Custom-
fitted covers are available for purchase that have been specially designed for this grill.
Partial enclosures: Many backyards have areas that are partially closed off, such as balconies and pergolas.
In some cases, it is difficult to decide whether these partially enclosed areas should be classified as indoor
areas, particularly in terms of permanent (non-closable) ventilation. If you are in doubt, consult your local
codes or a licensed contractor for guidance.
Building permit:Check with city and fire department for local building codes. A permit may be required for a
custom-built grill island.
Custom Built Island Cut-outs
Ensure any island cut-out opening is no larger than the outside frame of the appliance being installed. The
appliance should rest on the lip of the frame.
The grill must be installed in a non-combustible enclosure only. The
determination of whether a location is combustible or non-combustible
construction is made by the local fire marshal, building inspector, or
the local safety authority having jurisdiction.
To prevent overheating, do not obstruct the air flow of this appliance.
Here are some other considerations:
•Ensure your grill is adequately vented during operation. Consult your local licensed professional for
adequacy requirements
•Ensure your outdoor kitchen is constructed out of non-combustible materials
•If your outdoor kitchen is constructed of any combustible materials, an insulated jacket is REQUIRED
•Cutout dimensions do not allow for lid clearance or other measurement requirements. See the
Install the Grill section for specifics

ESL-24 Operator Manual Grill Island Preparation •9
•Please allow for a tolerance of +/- 1/8"; we recommend having your appliances in hand to measure
before making final cutouts in your custom-built grill island
Grill Dimensions
The ESL-24 dimensions as shown below:
Figure 1 ESL-24 Dimensions

10 •Grill Assembly ESL-24 Operator Manual
Grill Assembly
Your ESL-24 Grill comes pre-assembled and requires very little setup. We do, however, recommend using
professional help during the installation of your grill as improper installation may affect your warranty.
RISK OF FIRE:The power cord must not be pinched against a sharp
edge. Secure the cord to avoid tripping or snagging. To reduce the
risk of fire, electric shock, or personal injury, do not run cord under
carpeting, and do not cover cord with throw rugs or runners. Arrange
the cord away from traffic areas to avoid tripping hazards.
RISK OF FIRE:
Do not block air intake or exhaust in any manner. Do
not place the grill on soft surfaces where opening may be blocked.
RISK OF FIRE: Do not blow or place insulation against the grill.
This electrical appliance is tested and listed for use only with the
approved optional accessories. Use of accessories not specifically
tested for this appliance could result in a safety hazard and/or void the
warranty.
The grill is very heavy. It is highly recommended that two people lift
this appliance.
Electrical Precautions
The grill must be electrically ground in accordance with local codes or, in the absence of local codes, with
the National Electrical Code, ANSI/NFPA 70, or the Canadian Electrical Code, Part 1, CSA C22.1.
This electrical appliance is equipped with a grounded, 3-pronged plug for protection against shock hazard.
Plug this appliance into a properly grounded, 3-prong GFCI protected receptacle on a dedicated 20-amp
circuit. DO NOT cut or remove the grounding prong from the plug.
Follow these precautions if an extension cord is used to connect the grill island to an electrical supply:
•Use only 12-gauge extension cords with a 3 prong grounding plug, rated for the equipment power,
and approved for outdoor use with a W-A marking on the tag
•When connecting, first connect plug to the outdoor cooking appliance then plug appliance into the
outlet
•To protect against electrical shock, never immerse cord or plugs in water or other liquid
•Unplug the appliance from the outlet when not in use and before cleaning

ESL-24 Operator Manual Grill Assembly •11
•Do not operate the grill with a damaged cord, plug, or after the appliance malfunctions or has been
damaged in any manner; contact Paradise Grills to discuss service options, or call a licensed
professional for inspection and repair
•The cord should be arranged so that it will not drape over the countertop or tabletop (where it can
be pulled on or tripped over)
•Do not let the cord hang over any sharp edge or touch any hot surfaces
•Do not run the power cord directly below the appliance
•Never remove the grounding plug or use with a 2-prong adapter
Unpack the Box
1. Open the box and remove the Styrofoam spacers
2. Remove the grill from the box and place on a solid surface; two people are needed for lifting
3. Remove the plastic wrap, cardboard spacers, and zip ties from the outside of the grill
4. Remove the white shipping cover and set aside
5. Open the grill lid and remove all plastic wrap, zip ties, and straps
Figure 2 Unpack the Grill
6. Remove and retain these accessories:
•Operator Manual
•Side shelves and handles
•LED light power supply
•Warming rack
7. Check the grill and all components for any damage

12 •Grill Assembly ESL-24 Operator Manual
Install the Grill
Countertop Placement
The grill base must be placed on a stable, level surface to ensure the grill remains stable and upright at all
times. Place the grill on a countertop surface as follows:
1. Place the grill on a clean, dry, level, non-combustible surface
2. Ensure that all clearance and location requirements on page 7 are met
3. Route power cord to electric outlet ensuring the cord does not and cannot come into contact with
any heat source and does not have any pinch points
NOTE: The ESL-24 can be taken to and used at any outdoor location with a stable surface to support the grill,
adequate ventilation, and a suitable power supply, such as at a park or campground.
Pedestal Installation (optional)
The pedestal has four major components to assemble – Grill platform, Column, Base, and Mounting plate –
as shown in Figure 3. Dimensions of the grill mounted to a pedestal are in Figure 9.
Figure 3 Pedestal Components
BEFORE USE, the grill base must be securely fastened to a stable,
level surface to ensure the grill remains fixed and upright at all times.
The optional pedestal includes hardware to secure the mounting plate to a concrete or wooden floor surface
(Figure 4). Use the hardware most appropriate for your installation surface to install the pedestal.

ESL-24 Operator Manual Grill Assembly •13
Figure 4 Pedestal Mounting Hardware
Complete these steps to assemble the pedestal:
1. Use an Allen head wrench to remove the four hex head bolts from the sides of the base (Figure 7 A)
to release the mounting plate (Figure 7 B)
2. Securely attach the mounting plate to the installation ground surface using the most appropriate
hardware for the material below the pedestal
a. If mounting to a concrete or brick surface:
i. Locate the patio mount base in the planned installation location and mark the 4 holes on
the surface
ii. Drill the marked holes to a 1/2” diameter x 2” depth
Figure 5 Expansion Bolt Installation
iii. Insert expansion bolts into the holes and ensure that they are flush with the ground;
remove the screws
iv. Align the patio mount base holes over the lag shields in the ground
v. Secure the base with the expansion bolt screws

14 •Grill Assembly ESL-24 Operator Manual
b. If mounting to a wooden floor:
i. Locate the patio mount base in the planned grill location and mark the 4 holes on the
surface
ii. Drill the marked holes with 1/4” drill bit about 1.5” deep
iii. Align the patio mount base holes over the holes drilled in the wood
Figure 6 Lag Bolt Installation
iv. Use a socket wrench to secure the base with the washers and lag bolts
Figure 7 Attach the Base to Pedestal
3. Lift pedestal assembly onto the mounting plate and align the holes on each side
4. Use an Allen head wrench to secure the pedestal to the mounting plate using the four hex head
bolts (Figure 7 C)
5. Position the grill platform onto the top of the pedestal
6. Align the six holes in the grill platform with the bolt holes in the top of the column; reach through
the larger holes in the upper surface to attach using the provided bolts (Figure 7 D)
7. Remove the drip tray
8. Remove the four rubber feet from the bottom of the grill:

ESL-24 Operator Manual Grill Assembly •15
a. Remove the plug from the center of each foot (Figure 8 left)
b. Use a Phillips head screwdriver to remove the screw
9. Position the grill onto the platform aligned with the screw holes (Figure 8 center)
Figure 8 Attach Grill to Platform
10. Insert four mounting screws and washers through the large holes to the top surface, through the
feet, and into the grill screw holes (Figure 8 right)
11. Tighten the mounting screws
12. Replace the drip tray
Figure 9 Pedestal and Grill Dimensions

16 •Grill Assembly ESL-24 Operator Manual
Paradise Grills Grill Cart (optional)
A Grill Cart that supports the ESL-24 Electric Grill is available for purchase. A shelf sleeve, shown in Figure 10,
is required for the ESL-24. To install:
1. Assemble the Grill Cart per the included instruction sheet
2. Insert the shelf sleeve into place in the cutout:
Figure 10 Install Shelf Sleeve into Grill Cart
3. Carefully snip the zip ties around the electrical cable at the right rear corner of the grill (Figure 11);
DO NOT CUT THE WIRE
Figure 11 Electrical Cables
4. Connect the grill’s LED lights electrical cable to the power supply:

ESL-24 Operator Manual Grill Assembly •17
Figure 12 Connect Power Supply
a. Align the grill plug with the power supply holes (Figure 12 left)
b. Insert the plug until it is fully seated (Figure 12 center)
c. Slide the gnarled locking nut to the threads and hand-tighten until it stops; do not force
5. Gather the electrical cords and feed them into the power cord access at the rear of the sleeve
The grill is heavy. Lift using two people to avoid injury and damage to
the grill and island.
Pinch Hazard! Do not allow fingers to become pinched between grill
and counter top.
6. Lift the grill into place; use two people for safety:
a. Position the grill into the cut-out so it is 1/3 to 1/2 way into the cut-out with the outside
edge resting on the cut-out edge
b. Ensure the electrical cables are fed into the power cord access
c. Ensure nothing is binding below the grill
d. Slide the grill into place in the cut-out so the grill’s front edge is aligned with the sleeve’s
front edge (Figure 13)

18 •Grill Assembly ESL-24 Operator Manual
Figure 13 Place ESL-24 into Shelf Sleeve
7. Check to ensure the grill is level and properly supported around the entire outside edge of cut-out
8. If desired, attach the LED light power supply to the four mounting holes on the lower right corner
inside the cart (Figure 14)
Figure 14 Mount the LED Light Power Supply
9. Use the hole at bottom right an extension cord, if desired
Island Installation (optional)
Paradise Grill Island
The ESL-24 requires a shelf sleeve to fit into a Paradise Grills Island. The delivery and setup crew will install
the sleeve and ESL-24 into the island
Custom Built Base
If installing the ESL-24 into a custom-built cabinet, a shelf sleeve is available for purchase from Paradise
Grills to support the grill. Build an opening to fit the sleeve dimensions shown in Figure 15.
Table of contents
Other PARADISE GRILLS Grill manuals
Popular Grill manuals by other brands

Camp Chef
Camp Chef SHPRL manual

Navigator
Navigator Pit Boss PB1230G owner's manual

Air King
Air King AIG4 supplementary guide

GE
GE ZGG540LCPSS Dimensions and installation information

Beef Eater
Beef Eater BSH158SAEU Assembly and operating instructions manual

Bravetti
Bravetti EP865 Use and care instructions

heatco
heatco HTS-325 Use & care guide

Char-Broil
Char-Broil T-47G Assembly instructions

KFE
KFE KF-CB12-M Installation & operation manual

Broil King
Broil King IMPERIAL XL 9976-44 Assembly manual

Char-Griller
Char-Griller SMOKIN' CHAMP 1733 owner's manual

Calflame
Calflame Barbecue Grills Carts owner's manual