PARADOX INSIGHT HD77 User manual

Paradox Insight™ HD77 Installation Guide 1
paradox.com
Paradox Insight
™
HD77
Installation Guide
Revision 1.00

2Paradox Insight ™ HD77 Installation Guide
Warranty
For complete warranty information on this product, please refer to the Limited Warranty Statement found on
the website www.paradox.com/terms. The terms and conditions are subject to change without notice, from
time to time, at Paradox’s sole discretion. We invite you to visit our website on a regular basis for the latest
Limited Warranty Statement. Your use of the Paradox product signifies your acceptance of all warranty terms
and conditions. Please ensure that your use of the Paradox product is in compliance with local, national, and
international laws.
© 2014 Paradox Security Systems Ltd. All rights reserved. Specifications may change without prior notice. US,
Canadian and international patents may apply. Paradox Insight and Paradox are a trademarks or registered
trademarks of Paradox Security Systems (Bahamas) Ltd. or its affiliates in Canada, the United States and/or
other countries.
This product is manufactured in Canada.
Paradox
780 Industrial Boulevard
St-Eustache, Quebec
Canada, J7R 5V3
Tel: (450) 491-7444
Fax: (450) 491-2313

Paradox Insight™ HD77 Installation Guide 3
Contents
Warranty . . . . . . . . . . . . . . . . . . . . . . . . . . . . . . . . . . . . . . . . . . . . . . . . . . . . . . . . . . . . . . . . . 2
Contents . . . . . . . . . . . . . . . . . . . . . . . . . . . . . . . . . . . . . . . . . . . . . . . . . . . . . . . . . . . . . . . . . 3
Chapter 1 Introduction . . . . . . . . . . . . . . . . . . . . . . . . . . . . . . . . . . . . . . . . . . . . . 8
1.1 HD77 Key Features . . . . . . . . . . . . . . . . . . . . . . . . . . . . . . . . . . . . . . . . . . . . . . . . . . . . . . . .8
1.2 Overview . . . . . . . . . . . . . . . . . . . . . . . . . . . . . . . . . . . . . . . . . . . . . . . . . . . . . . . . . . . . . . . . .9
1.3 LED Status Indicators . . . . . . . . . . . . . . . . . . . . . . . . . . . . . . . . . . . . . . . . . . . . . . . . . . . . . .9
Chapter 2 Hardware Installation. . . . . . . . . . . . . . . . . . . . . . . . . . . . . . . . . . . . 11
2.1 Requirements . . . . . . . . . . . . . . . . . . . . . . . . . . . . . . . . . . . . . . . . . . . . . . . . . . . . . . . . . . . 11
2.2 Cabling Options . . . . . . . . . . . . . . . . . . . . . . . . . . . . . . . . . . . . . . . . . . . . . . . . . . . . . . . . . 12
2.3 Location and Mounting . . . . . . . . . . . . . . . . . . . . . . . . . . . . . . . . . . . . . . . . . . . . . . . . . 13
Chapter 3 Creating an Account in BabyWare . . . . . . . . . . . . . . . . . . . . . . . . 20
3.1 Required Tools . . . . . . . . . . . . . . . . . . . . . . . . . . . . . . . . . . . . . . . . . . . . . . . . . . . . . . . . . . 20
3.2 Required Software . . . . . . . . . . . . . . . . . . . . . . . . . . . . . . . . . . . . . . . . . . . . . . . . . . . . . . 20
Chapter 4 Programming . . . . . . . . . . . . . . . . . . . . . . . . . . . . . . . . . . . . . . . . . . . 23
4.1 Programming Through BabyWare . . . . . . . . . . . . . . . . . . . . . . . . . . . . . . . . . . . . . . . 23
4.2 Receive Programming . . . . . . . . . . . . . . . . . . . . . . . . . . . . . . . . . . . . . . . . . . . . . . . . . . . 23
4.3 HD77 Programming . . . . . . . . . . . . . . . . . . . . . . . . . . . . . . . . . . . . . . . . . . . . . . . . . . . . . 24
4.4 HD77 Server Parameters . . . . . . . . . . . . . . . . . . . . . . . . . . . . . . . . . . . . . . . . . . . . . . . . . 24
4.5 Static IP for the WAN . . . . . . . . . . . . . . . . . . . . . . . . . . . . . . . . . . . . . . . . . . . . . . . . . . . . 26
4.6 Reserved/Static IP Configuration for the LAN . . . . . . . . . . . . . . . . . . . . . . . . . . . . . 26
Chapter 5 PIR Parameters Programming . . . . . . . . . . . . . . . . . . . . . . . . . . . . 29
5.1 Programming Through the TM50 Touchpad . . . . . . . . . . . . . . . . . . . . . . . . . . . . . 30
5.2 Programming Through the K641 series Keypads and K656 Keypad . . . . . . . . 33
Chapter 6 ParadoxMyHome (PMH) . . . . . . . . . . . . . . . . . . . . . . . . . . . . . . . . . 35
6.1 To Open a ParadoxMyHome Account . . . . . . . . . . . . . . . . . . . . . . . . . . . . . . . . . . . . 35
6.2 Registering/Unregistering your devices to ParadoxMyHome . . . . . . . . . . . . . . 35
6.3 Deleting a Site from PMH . . . . . . . . . . . . . . . . . . . . . . . . . . . . . . . . . . . . . . . . . . . . . . . . 37
Chapter 7 Using a Static IP for the WAN . . . . . . . . . . . . . . . . . . . . . . . . . . . . . 38
Chapter 8 Upgrading Firmware . . . . . . . . . . . . . . . . . . . . . . . . . . . . . . . . . . . . 39

4Paradox Insight ™ HD77 Installation Guide
Appendix: A Trouble Shooting ......................................................................40
For DHCP ...............................................................................................................................................40
For Static IP ...........................................................................................................................................42
Appendix: B Specifications ............................................................................45
HD77 Specifications ...........................................................................................................................45
Appendix: C PIR Detector Beam Pattern .......................................................46
Appendix: D Certifications .............................................................................47
FCC Statement Class B ......................................................................................................................47
Appendix: E Un-Assemble Swivel Bracket ....................................................48
Disassemble Swivel ............................................................................................................................48
Appendix: F Configure IP Router (1 Example) ..............................................52
Setting Up the Router for Port Forwarding ...............................................................................52
Reserve the IP or Bind the IP to a MAC .......................................................................................56

Paradox Insight™ HD77 Installation Guide 5
List of Figures
Figure 1 Front View . . . . . . . . . . . . . . . . . . . . . . . . . . . . . . . . . . . . . . . . . . . . . . . . . . . . . . . . . . . . . . . .9
Figure 2 LED Arrangement . . . . . . . . . . . . . . . . . . . . . . . . . . . . . . . . . . . . . . . . . . . . . . . . . . . . . . . . .9
Figure 3 HD77 Hardware Connections . . . . . . . . . . . . . . . . . . . . . . . . . . . . . . . . . . . . . . . . . . . . 11
Figure 4 Recommended Wiring Option#1 . . . . . . . . . . . . . . . . . . . . . . . . . . . . . . . . . . . . . . . . . 12
Figure 5 Recommended Wiring Option#2 . . . . . . . . . . . . . . . . . . . . . . . . . . . . . . . . . . . . . . . . . 12
Figure 6 Ethernet Cable Wiring . . . . . . . . . . . . . . . . . . . . . . . . . . . . . . . . . . . . . . . . . . . . . . . . . . . 13
Figure 7 Mounting Guidelines . . . . . . . . . . . . . . . . . . . . . . . . . . . . . . . . . . . . . . . . . . . . . . . . . . . . 13
Figure 8 HD77 Swivel Bracket Parts . . . . . . . . . . . . . . . . . . . . . . . . . . . . . . . . . . . . . . . . . . . . . . . 14
Figure 9 Separating the Module from the HD77 Housing . . . . . . . . . . . . . . . . . . . . . . . . . . 14
Figure 10 Install the Wall Plate (part #1) . . . . . . . . . . . . . . . . . . . . . . . . . . . . . . . . . . . . . . . . . . . . 14
Figure 11 Run the Cable through the Swivel Assembly . . . . . . . . . . . . . . . . . . . . . . . . . . . . . 15
Figure 12 Connect the Bracket Assembly to the Wall . . . . . . . . . . . . . . . . . . . . . . . . . . . . . . . 15
Figure 13 Screw on HD77 Back Plate to Swivel. . . . . . . . . . . . . . . . . . . . . . . . . . . . . . . . . . . . . . 15
Figure 14 Screw Location to Adjust Camera Angle . . . . . . . . . . . . . . . . . . . . . . . . . . . . . . . . . . 16
Figure 15 Wire the HD77 . . . . . . . . . . . . . . . . . . . . . . . . . . . . . . . . . . . . . . . . . . . . . . . . . . . . . . . . . . 16
Figure 16 Knockout Locations . . . . . . . . . . . . . . . . . . . . . . . . . . . . . . . . . . . . . . . . . . . . . . . . . . . . . 17
Figure 17 Wire the HD77 . . . . . . . . . . . . . . . . . . . . . . . . . . . . . . . . . . . . . . . . . . . . . . . . . . . . . . . . . . 18
Figure 18 HD77 Video Stream in BabyWare . . . . . . . . . . . . . . . . . . . . . . . . . . . . . . . . . . . . . . . . 19
Figure 19 BabyWare Account Window . . . . . . . . . . . . . . . . . . . . . . . . . . . . . . . . . . . . . . . . . . . . . 20
Figure 20 IP150 Settings Window . . . . . . . . . . . . . . . . . . . . . . . . . . . . . . . . . . . . . . . . . . . . . . . . . . 21
Figure 21 Locate IP Device on Network . . . . . . . . . . . . . . . . . . . . . . . . . . . . . . . . . . . . . . . . . . . . 21
Figure 22 IP Device Configuration . . . . . . . . . . . . . . . . . . . . . . . . . . . . . . . . . . . . . . . . . . . . . . . . . 22
Figure 23 BabyWare Homepage . . . . . . . . . . . . . . . . . . . . . . . . . . . . . . . . . . . . . . . . . . . . . . . . . . . 23
Figure 24 HD77 Receive Programming . . . . . . . . . . . . . . . . . . . . . . . . . . . . . . . . . . . . . . . . . . . . 24
Figure 25 Write Button . . . . . . . . . . . . . . . . . . . . . . . . . . . . . . . . . . . . . . . . . . . . . . . . . . . . . . . . . . . . 24
Figure 26 Communication Drop Down Menu . . . . . . . . . . . . . . . . . . . . . . . . . . . . . . . . . . . . . . 25
Figure 27 Server Parameters . . . . . . . . . . . . . . . . . . . . . . . . . . . . . . . . . . . . . . . . . . . . . . . . . . . . . . . 26
Figure 28 Command Prompt ipconfig . . . . . . . . . . . . . . . . . . . . . . . . . . . . . . . . . . . . . . . . . . . . . . 27
Figure 29 DHCP Settings . . . . . . . . . . . . . . . . . . . . . . . . . . . . . . . . . . . . . . . . . . . . . . . . . . . . . . . . . . 27
Figure 30 Port Numbering . . . . . . . . . . . . . . . . . . . . . . . . . . . . . . . . . . . . . . . . . . . . . . . . . . . . . . . . . 28

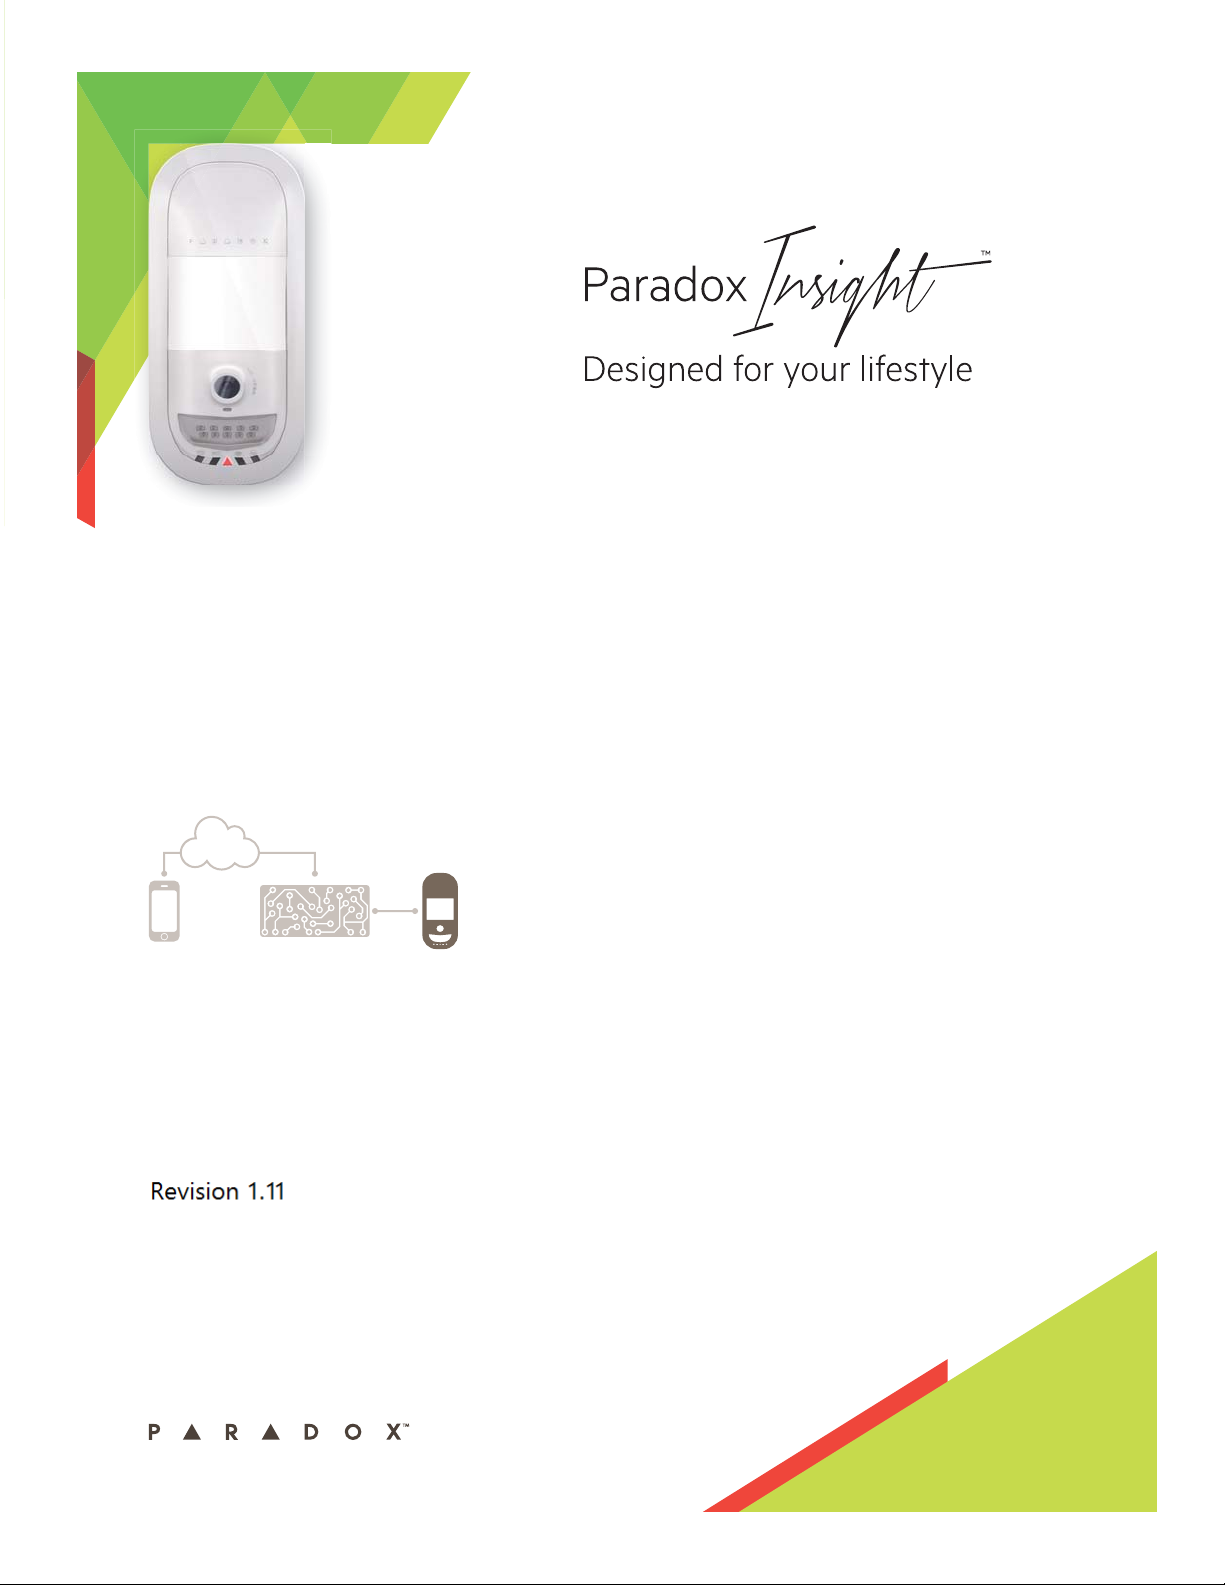
6Paradox Insight ™ HD77 Installation Guide
Figure 31 PIR Parameters . . . . . . . . . . . . . . . . . . . . . . . . . . . . . . . . . . . . . . . . . . . . . . . . . . . . . . . . . 29
Figure 32 Flow Through the TM50 Touchscreen . . . . . . . . . . . . . . . . . . . . . . . . . . . . . . . . . . . . 30
Figure 33 Main Screen . . . . . . . . . . . . . . . . . . . . . . . . . . . . . . . . . . . . . . . . . . . . . . . . . . . . . . . . . . . . . 30
Figure 34 Menu Selections Screen . . . . . . . . . . . . . . . . . . . . . . . . . . . . . . . . . . . . . . . . . . . . . . . . . 31
Figure 35 Advanced Screen . . . . . . . . . . . . . . . . . . . . . . . . . . . . . . . . . . . . . . . . . . . . . . . . . . . . . . . 31
Figure 36 Installer Code . . . . . . . . . . . . . . . . . . . . . . . . . . . . . . . . . . . . . . . . . . . . . . . . . . . . . . . . . . . 31
Figure 37 Installer Programming Screen . . . . . . . . . . . . . . . . . . . . . . . . . . . . . . . . . . . . . . . . . . . 32
Figure 38 Installer Programming Screen . . . . . . . . . . . . . . . . . . . . . . . . . . . . . . . . . . . . . . . . . . . 32
Figure 39 Module Serial Number Screen . . . . . . . . . . . . . . . . . . . . . . . . . . . . . . . . . . . . . . . . . . . 32
Figure 40 Programming Section . . . . . . . . . . . . . . . . . . . . . . . . . . . . . . . . . . . . . . . . . . . . . . . . . . . 32
Figure 41 Options Selection Screen . . . . . . . . . . . . . . . . . . . . . . . . . . . . . . . . . . . . . . . . . . . . . . . . 33
Figure 42 Select an HD77 to Register . . . . . . . . . . . . . . . . . . . . . . . . . . . . . . . . . . . . . . . . . . . . . . 35
Figure 43 Registration to PMH . . . . . . . . . . . . . . . . . . . . . . . . . . . . . . . . . . . . . . . . . . . . . . . . . . . . . 35
Figure 44 Register/Unregister to PMH . . . . . . . . . . . . . . . . . . . . . . . . . . . . . . . . . . . . . . . . . . . . . . 36
Figure 45 ParadoxMyHome Registration Page . . . . . . . . . . . . . . . . . . . . . . . . . . . . . . . . . . . . . . 36
Figure 46 Registration Successful . . . . . . . . . . . . . . . . . . . . . . . . . . . . . . . . . . . . . . . . . . . . . . . . . . 36
Figure 47 ParadoxMyHome Site . . . . . . . . . . . . . . . . . . . . . . . . . . . . . . . . . . . . . . . . . . . . . . . . . . . 37
Figure 48 Poll PMH . . . . . . . . . . . . . . . . . . . . . . . . . . . . . . . . . . . . . . . . . . . . . . . . . . . . . . . . . . . . . . . . 38
Figure 49 Select HD77 . . . . . . . . . . . . . . . . . . . . . . . . . . . . . . . . . . . . . . . . . . . . . . . . . . . . . . . . . . . . . 39
Figure 50 Update button . . . . . . . . . . . . . . . . . . . . . . . . . . . . . . . . . . . . . . . . . . . . . . . . . . . . . . . . . . 39
Figure 51 Click Update . . . . . . . . . . . . . . . . . . . . . . . . . . . . . . . . . . . . . . . . . . . . . . . . . . . . . . . . . . . . 39
Figure 52 HD77 — Settings Update Graphic . . . . . . . . . . . . . . . . . . . . . . . . . . . . . . . . . . . . . . . 40
Figure 53 HD77 Settings Window . . . . . . . . . . . . . . . . . . . . . . . . . . . . . . . . . . . . . . . . . . . . . . . . . . 41
Figure 54 HD77 — Settings Update Graphic . . . . . . . . . . . . . . . . . . . . . . . . . . . . . . . . . . . . . . . 42
Figure 55 HD77 Settings Window Update Graphic . . . . . . . . . . . . . . . . . . . . . . . . . . . . . . . . . . 42
Figure 56 Locates Devices Window . . . . . . . . . . . . . . . . . . . . . . . . . . . . . . . . . . . . . . . . . . . . . . . . 43
Figure 57 IP Device Configuration Window . . . . . . . . . . . . . . . . . . . . . . . . . . . . . . . . . . . . . . . . 43
Figure 58 PIR Detector Beam Pattern . . . . . . . . . . . . . . . . . . . . . . . . . . . . . . . . . . . . . . . . . . . . . . 46
Figure 59 HD77 Swivel Bracket Parts . . . . . . . . . . . . . . . . . . . . . . . . . . . . . . . . . . . . . . . . . . . . . . . 48
Figure 60 Assembled Swivel Bracket . . . . . . . . . . . . . . . . . . . . . . . . . . . . . . . . . . . . . . . . . . . . . . . 48
Figure 61 Screw the Slider, HD77 Camera Housing and Back Housing Together . . . . . 49
Figure 62 Separating the Module from the Camera Housing . . . . . . . . . . . . . . . . . . . . . . . . 49

Paradox Insight™ HD77 Installation Guide 7
Figure 63 Install the Wall Plate (part #1) and Wall Housing (part #2 . . . . . . . . . . . . . . . . . . 49
Figure 64 Screw the Slider, HD77 Camera Housing and Back Housing Together . . . . . 50
Figure 65 Screw on Camera Back Plate to Swivel. . . . . . . . . . . . . . . . . . . . . . . . . . . . . . . . . . . . 50
Figure 66 Wire the Camera . . . . . . . . . . . . . . . . . . . . . . . . . . . . . . . . . . . . . . . . . . . . . . . . . . . . . . . . 51
Figure 67 Command Prompt ipconfig . . . . . . . . . . . . . . . . . . . . . . . . . . . . . . . . . . . . . . . . . . . . . . 53
Figure 68 DHCP Enable . . . . . . . . . . . . . . . . . . . . . . . . . . . . . . . . . . . . . . . . . . . . . . . . . . . . . . . . . . . . 54
Figure 69 Fill in the Port Forwarding Information . . . . . . . . . . . . . . . . . . . . . . . . . . . . . . . . . . . 54
Figure 70 Port Forwarding . . . . . . . . . . . . . . . . . . . . . . . . . . . . . . . . . . . . . . . . . . . . . . . . . . . . . . . . . 55
Figure 71 Binding or Reserving a Port . . . . . . . . . . . . . . . . . . . . . . . . . . . . . . . . . . . . . . . . . . . . . . 56
Figure 72 HD77 Settings . . . . . . . . . . . . . . . . . . . . . . . . . . . . . . . . . . . . . . . . . . . . . . . . . . . . . . . . . . . 56
Figure 73 Locate Static IP Addresses . . . . . . . . . . . . . . . . . . . . . . . . . . . . . . . . . . . . . . . . . . . . . . . 57

8Paradox Insight ™ HD77 Installation Guide
Chapter 1 Introduction
The Paradox Insight™ HD77 camera is a highly reliable HD video (720p in color) and high-quality audio PIR
camera that delivers unlimited live HD video and audio streaming to allow users to see and hear events and
activities and to protect their homes or businesses anytime, anywhere, directly from a smartphone.
In case of a security breach, the HD77 camera provides HD videos with high-quality audio of events for visual
verification and reporting. When an alarm is triggered, the HD77 sends a pre-recorded video (360p) in color or
black and white (night vision) and 10 images (jpegs) to allow users and the CMS to view what triggered the
alarm. The user can also access HD 720p video and audio recordings, as required.
The HD77 fully complies with CE, and EN 50131certification.
1.1 HD77 Key Features
• HD video / audio - with 360p video and live streaming
•VideoonDemand(VOD)
•RecordonDemand(ROD)
• Record on Motion (ROM)
• Record on Trigger (ROT)
• HD video / audio alarm event verification (jpg still images and H.264 video files)
• Integrated video verification alarm event reporting to the CMS (IPRS-7 / CMSI) and user (email)
• Detection - high reliability PIR, auto pulse, auto dual edge, digital detector with a 110° beam spread
• HD 720p color recordings
• 1.4 mega pixel Image sensor HD video camera equipped with video auto gain control, white balance
and auto exposure
• Three second audio / video pre-alarm
• Zero-lux vision using high power IR LEDs
•LANconnection
• Multiple simultaneous multimedia streams
• Event file names and video file names are linked through naming convention for easy identification
• Digiplex bus connection enables easy HD77 system installation/ integration
• Fully compatible with the Paradox EVOHD control panel
1.1.1 Video on Demand (VOD)
The video on demand feature allows up to eight users of the security system (selected as permitted users
through the Paradox Insight™ phone application) to have viewing rights. The permitted users then have access
to the streaming video from the camera. This access is obtained through the Paradox Insight™ phone
application. The master user chooses these permitted users and also sets the permitted user’s viewing rights.
1.1.2 Record on Demand (ROD)
The record on demand feature allows permitted users to start and stop camera recording through the Paradox
Insight™ phone application. Record on demand records up to 2 minute long video files. Recordings are saved as
both 720p and 360p resolution. The 30 first seconds are sent by email to the master user and the user that
made the recording.
1.1.3 Record on Motion (ROM)
The record on motion feature starts the camera recording when the PIR detector in the HD77 camera detects
motion. The recording is started when the system is disarmed. The camera records for 10 seconds during ROM.

Paradox Insight™ HD77 Installation Guide 9
1.1.4 Record on Trigger (ROT)
The record on trigger feature starts the camera recording when another detector (zone) in the system is
triggered. Up to four detectors (zones) can be assigned to each camera. Whenever an assigned detector is
triggered the camera starts recording for 10 seconds. The recording can be started both if the detector is armed
or disarmed. The recorded files are saved in the camera and can be sent to pre-assigned emails.
Up to 4 HD77 cameras can each be assigned up to 4 different zones.
Configuring HD77 cameras for ROT is done by the master user through the Paradox Insight™ App.
1.2 Overview
The Paradox Insight™ HD77 camera is a highly reliable HD video (720p in color) and high-quality audio PIR
camera.
Figure 1 – Front View
1.3 LED Status Indicators
The following table describes the HD77 LEDS and their functionality.
Figure 2 – LED Arrangement
LEDs 1, 2, 4, and 5 are used for installer diagnostics. These LEDs are active when the lock mechanism is opened.
Camera
Microphone
IR LEDs
Information LEDs
LED1 LED2 LED3 LED4 LED5
TX RX
LED 2 LED 3
LED 1 LED 4 LED 5

10 Paradox Insight ™ HD77 Installation Guide
Note: LED3 — PIR indication can be set to On or Off by the installer, however, the VOD indication can be turned
off only by the master user using the Paradox Insight™ application.
Note: Turning the VOD LED off may be considered in some countries as a violation of applicable laws. Make
sure to install the HD77 according to local laws.
Table 1: LED Assignment
LED Functionality LED Display
LED1 Digiplex Data TX Flashing green = data
transmission
Off = No data transmission
LED2 Digiplex Data RX Flashing green = data
reception
Off = No data reception
LED3
(both with the front
cover locked and
unlocked)
HD77 module is up and running. There are currently
no PIR detections or requests for VOD/ROD.
OFF
Firmware upgrade in progress Flashing Purple
VOD Blue on
Power-up Flashing Blue
Locate mode (through the keypad only) Flashing Blue
General bus failure, wiring problem, or
communication problem
Red on
Bus low power Flashing Red
PIR alarm Red for 3 sec
LED4 Active Web connection Green
LED5 LAN 10/100Mbps link
LAN 10/100Mbps data transfer
Green = LAN active
Off = no connection
Flashing green = data transfer
Flashing red = UPnP failure

Paradox Insight™ HD77 Installation Guide 11
Chapter 2 Hardware Installation
Note: The installer should not leave the house without verifying the VOD can be seen through the App!
This MUST be checked with an external network in order to verify that port forwarding is working – using
wireless network from the property’s WIFI router will not test this, please use the 3G network.
This section explains the hardware requirements and mounting instructions.
2.1 Requirements
2.1.1 Required Infrastructure
Ensure that the mounting location has the following infrastructure:
• CAT5 or higher cable line that connects to a router or an Ethernet switch
• a router with enough ports to connect all of the cameras (1 port for each camera) plus 1 port if you are
using an IP150, 1 port for the installer’s computer, and 1port for the incoming Internet connection
Note: If the installer is connecting wirelessly one less port is needed.
Note: A single CAT5 or higher cable can be used to wire a single HD77 camera. This cable includes 2 twisted
pairs for the 4-wire combus and 2 twisted pairs for the Ethernet lines. When using this option the cable
length is limited to 50 meters. See see section 2.2.1 on page 12.
Note: An alternate wiring scheme is to wire the HD77 with two separate cables. 1 CAT5 or higher cable for the
Ethernet link, and one– 4-wire cable for the combus. Using this wiring option you can run the CAT5
Ethernet cable up to 70 meters. See see section 2.2.2 on page 12.
Note: If the router does not have enough ports you will also need an Ethernet switch.
Figure 3 – HD77 Hardware Connections

12 Paradox Insight ™ HD77 Installation Guide
2.2 Cabling Options
2.2.1 Cabling Option #1
A single CAT5 or higher cable can be used to wire a single HD77 camera. This cable includes 2 twisted pairs for
the 4-wire combus and 2 twisted pairs for the Ethernet lines. When using this option the cable length is limited
to 50 meters.
The Ethernet cable goes to the router. The 4 – wire combus goes to EVOHD panel.
See option #2 for an alternate wiring scheme to wire the HD77 with two separate cables.
Figure 4 – Recommended Wiring Option#1
2.2.2 Cabling Option #2
This option uses 2 separate cables going to two different locations. One cable to the router and one cable to the
EVOHD. One CAT5 or higher cable for the Ethernet link, and one 4-wire cable for the combus. Using this wiring
option you can run the CAT5 Ethernet cable up to 70 meters.
Figure 5 – Recommended Wiring Option#2
2.2.3 Ethernet Cable Wiring
If you will be connecting Ethernet connectors to the cut Ethernet cable wire the connector in compliance with
the following table.
Table 2: Wire Color
Assignment
Label Wire color
RBrown
BBlue
GBluestripped
Y Brown stripped
RX- Green
RX+ Green stripped
TX- Orange
TX+ Orange stripped
4-wire
combus
CAT5e with 4
twisted pairs
R
B
GY
EVOHD
4-wire combus Ethernet
RGB Y RX-RX+TX-TX+ 12345678
Table 3: Wire Color
Assignment
Label Wire color
RRed
BBlack
GGreen
YYellow
RX- Green
RX+ Green stripped
TX- Orange
TX+ Orange stripped
4-wire
combus
Ethernet
EVOHD
RGBYRX-RX+TX-TX+
12345678

Paradox Insight™ HD77 Installation Guide 13
Figure 6 – Ethernet Cable Wiring
2.3 Location and Mounting
2.3.1 Recommendations
• Install the device at a height between 2.1m to 2.7m (7ft to 9ft), allowing a minimum gap of 2cm (~1 in)
from the ceiling (to allow for opening/closing of the cover).
Figure 7 – Mounting Guidelines
• Install the device in a location where the detector and camera’s field of view is clear of any obstacles.
• For LAN connection, use a CAT5/CAT5e/CAT6 Ethernet cable (70m max. for option #2, 50m max. for
option #1 ) between the HD77 and the router.
Note: When using a single CAT5 cable (option#1) to also connect the 4-wire combus, the wire run is limited to
50 meters.
• Mount the module so that walking traffic cuts across the beam pattern.
2.3.2 Cautions
• Do not install the device near objects causing temperature changes such as heaters, refrigerators and
ovens.
• Do not install the device in the path of air flow from heating and air conditioning vents, fans, or
windows.
• Do not install the device in the path of reflective surfaces, direct sunlight or infrared light.
• Do not install the device where it is exposed to oil vapors or steam.
12345678
Ethernet Wire Locations Wire color
1Green striped
2Green
3Orange striped
4Blue
5Blue striped
6Orange
7Brown striped
8Brown

14 Paradox Insight ™ HD77 Installation Guide
• Do not touch the sensor surface or the camera lens as this could result in a detector malfunction.
2.3.3 Installation Using the Pre-assembled Swivel Bracket
This swivel bracket is capable of:
• sweep angle from left to right of 90 degrees
• angle of declination (down) is 15 degrees.
Figure 8 – HD77 Swivel Bracket Parts
1. Unlock the cover of the HD77.
Figure 9 – Separating the Module from the HD77 Housing
2. Separate the front cover with module from the back plate of the HD77. Do this by carefully pulling out
the bottom of the front cover and sliding the front cover up. The two parts will separate.
3. Pull the cable(s) through the wall plate (part #1) and screw the wall plate to the wall (screws and anchors
are not supplied). The upper screws must be at least 3”(7.62cm) from the ceiling.
Figure 10 – Install the Wall Plate (part #1)
4. Angle the HD77 swivel mount 15 degrees down to facilitate cable insertion. Pull the cables through the
assembled swivel bracket.
Table 4: Parts List
Part # Description
1Wallplate
2 4 self tapping screws #6 B type
3 Pre-assembled swivel bracket
3
2
1
Unlock cover
The flat side goes
against the wall
Run the wires
through this hole
Wall plate (part #1)

Paradox Insight™ HD77 Installation Guide 15
Figure 11 – Run the Cable through the Swivel Assembly
5. Snap the bracket assembly to the wall plate by placing it on top of the wall plate and sliding it down until
it locks.
Figure 12 – Connect the Bracket Assembly to the Wall
6. Drill the knockouts for wall installation on the HD77 back plate.
Figure 13 – Screw on HD77 Back Plate to Swivel.
Drill the
knockouts for
wall installation
on the camera
housing
Tighten this
screw to lock
the swivel
bracket into
place
Anti-Tamper
actuator

16 Paradox Insight ™ HD77 Installation Guide
7. Write down the serial number and location of the module. After you finish the hardware installation you
can identify each module by serial number in BabyWare and add the location and label to each module.
8. Screw the HD77 back plate to the swivel bracket using the 4 self tapping screws.
9. Adjust the bracket position as desired and tighten the screw to lock it in place (through the opening in
the back plate).
Figure 14 – Screw Location to Adjust Camera Angle
10. Connect the combus wires and the Ethernet wires. See Figure 4 and Figure 5for wiring instructions.
Figure 15 – Wire the HD77
11. Close and lock the HD77 into the camera back plate:
Step 1. Install the top of the unit.
Step 2. Close the HD77 onto the back plate.
Loosen this screw to
adjust the camera
angle

Paradox Insight™ HD77 Installation Guide 17
Step 3. Close the lock mechanism at the bottom of the HD77 camera.
Note: By securing the lock, the installer diagnostic LEDs will be turned off.
12. Connect the Ethernet line to the router (if not already connected). Make sure the router is turned on.
13. Adjust the HD77 position.
2.3.4 HD77 Installation without Swivel Bracket (Wall or Corner Mount)
1. Separate the front from the back plate of the HD77:
Step 1. Open the lock mechanism at the bottom of the device.
Step 2. Pry the cover off from the bottom of the unit.
Step 3. Lift the front cover up and away. On the back of this module you will see the serial number.
Step 4. Knock out the appropriate holes on the back plate. Use an awl or an ice pick.
Step 5. Write down the serial number and location of the module. After you finish the hardware instal-
lation you can identify each module by serial number in BabyWare and add the location and
label to each module.
Figure 16 – Knockout Locations
Step 6. Install the device a minimum of 2cm (~1 in) from the ceiling, between 2.1m and 2.7m off the
floor.
Step 7. Insert the Ethernet and 4-wire combus cables through the wiring slot of the back plate.
Step 8. Secure the back plate to the wall with screws. (screws and anchors are not supplied).
Step 9. Ensure that the wall tamper knockout is secured to the wall.
Anti-Tamper
For corner
installation
Wiring Slot
Anti-Tamper
For wall
installation
Wiring Slot
Wall mount
Ceiling
Corner mount

18 Paradox Insight ™ HD77 Installation Guide
Step 10. Connect the combus wires and the Ethernet wires. See Figure 4 and Figure 5for wiring
instructions.
Figure 17 – Wire the HD77
2. Place the front cover onto the back plate:
Step 1. Install the top of the unit.
Step 2. Close the HD77 onto the back plate.
Step 3. Close the lock mechanism at the bottom of the device.
Note: By securing the lock, the installer diagnostic LEDs will be turned off.
3. After the system hardware is connected, power up the system by connecting the power lines from the
16V AC transformer to an outlet.
4. The system will boot-up including the cameras.
The HD77 boot-up is indicated by LED3. The LED flashes blue for up to 3 minutes.
5. Use VOD to verify camera vision / image / angle.
In BabyWare => HD77 Properties => Video tab => play button

Paradox Insight™ HD77 Installation Guide 19
Figure 18 – HD77 Video Stream in BabyWare
When installed with a swivel bracket, you can adjust the HD77 position by doing the following.
Step 1. Remove the camera.
Step 2. Loosen the screw. See Figure 14.
Step 3. Make your adjustments.
Step 4. Re-tighten the screw.
Step 5. Replace the front cover.
6. Perform a walk test to verify that everything is working properly.
Note: The installer should not leave the house without verifying the VOD can be seen through the App!
This MUST be checked with an external network in order to verify that port forwarding is working – using
wireless network from the property’s WIFI router will not test this, please use the 3G network.

20 Paradox Insight ™ HD77 Installation Guide
Chapter 3 Creating an Account in BabyWare
3.1 Required Tools
The installer will also need to have the following job specific tools and equipment:
• a laptop with Windows 7
• a connection from your laptop to the system either by:
• 307USB or
• IP150 Internet module to connect to the EVOHD serial port plus an Internet connection through
your computer
3.2 Required Software
The installer will also need to have the following software available on his laptop.
• BabyWare Installer software V 2.8 or higher (downloadable from www.paradox.com)
Once the system is wired and powered up:
1. Open BabyWare.
2. On the accounts page, open a new account.
3. Enter the requested information.
Note: Click the link below and sign in to the site using your Paradox.com login user name and password to see
a video about creating a new account.
http://www.paradox-insight.com/learning/configuration-createanewaccount
Figure 19 – BabyWare Account Window
4. Open the Connection Options Settings window. The following window opens up.
Other manuals for HD77
1
Table of contents
Other PARADOX INSIGHT Digital Camera manuals
Popular Digital Camera manuals by other brands

TKH security
TKH security Siqura UP Series installation manual

GE
GE A1035 Manual do usuário

Panasonic
Panasonic LUMIX DMC-FS4 Basic operating instructions

Panasonic
Panasonic Lumix DMC-L10 Instrucciones básicas de funcionamiento

Olympus
Olympus STYLUS-5010 quick start guide

Panasonic
Panasonic LUMIX DMX-FS10 Description