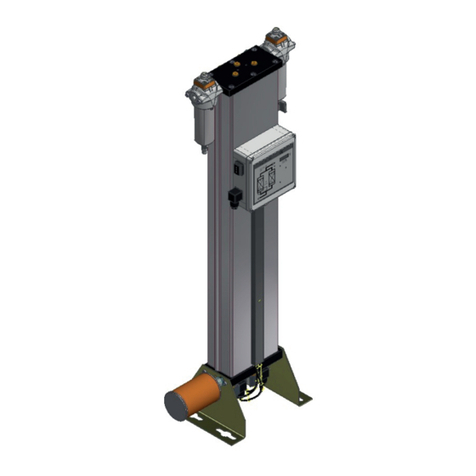
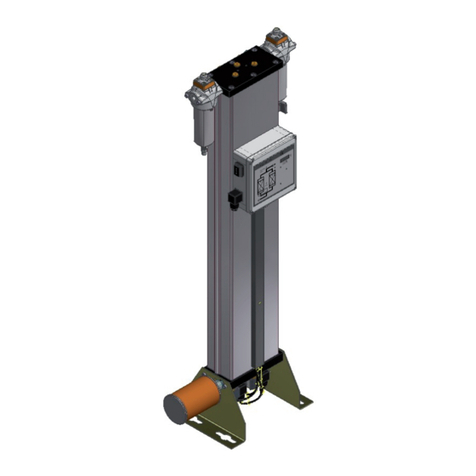
Parker Zander HDK-MT 15/100 User manual

High Pressure Dryer
HDK-MT
15/100—70/100
15/350—70/350
Dokument-ID: DMN-HDK-MT15-70/R06
Operating Instructions
Revision 06—07-2016 /EN

Declaration of Conformity
Parker Hannifin Manufacturing Germany GmbH& Co. KG
Gas Separation and Filtration Division EMEA
Im Teelbruch 118
D – 45219 Essen Kettwig
hereby declares with sole responsibility, that the products
High-pressure Dryer
Series HDK-MT 15/100 to 70/350
Assembly type: assembly acc. to Art. 4 No. 2b,
which this declaration refers to, conform to Directive 2014/68/EU and were
subjected to a conformity assessment according to Annex III Modules B + D (for
assembly assessment).
For the assembly, the EC type approval certificate DTM0506108 by Lloyd’s
Register Quality Assurance GmbH, Hamburg, is available.
The quality assurance system is monitored by the service provider stated below
Lloyd’s Register Quality Assurance GmbH (identification number 0525)
Am Sandtorkai 41, D - 20457 Hamburg.
The assembly consists of pressure appliances according to the classification list
(attached to the technical documentation provided by the manufacturer).
Pressure vessel
Dryer Quantity Allowable
pressure (PS)
Volume
[l]
Category
(PED)
Module
HDK-MT 15 / 100 2
100 6,1 II H (D1, E1)
HDK-MT 20 / 100 2
100 8,6 II H (D1, E1)
HDK-MT 25 / 100 2 100 11,04 III H
HDK-MT 30 / 100 2 100 13,5 III H
HDK-MT 40 / 100 2 100 19,33 III H
HDK-MT 50 / 100 2 100 22,9 III H
HDK-MT 70 / 100
2 100 28,2 III H
HDK-MT 15 / 350 2
350 3,5 III H
HDK-MT 20 / 350 2
350 4,96 III H
HDK-MT 25 / 350 2 350 6,4 III H
HDK-MT 30 / 350 2 350 7,8 III H
HDK-MT 40 / 350 2 350 12,4 IV H 1
HDK-MT 50 / 350 2 350 14,7 IV H 1
HDK-MT 70 / 350
2 350 18,1 IV H 1

Piping (100 / 350 bar)
Dryer Allowable
pressure (PS) Dimensions
(DN) Category
(PED) Module
HDK-MT 15 / … 400 DN15 Art.4.3 Art.4.3
HDK-MT 20 / …
400
DN15
Art.4.3
Art.4.3
HDK-MT 25 / …
400
DN15
Art.4.3
Art.4.3
HDK-MT 30 / … 400 DN15 Art.4.3 Art.4.3
HDK-MT 40 / …
400
DN20
Art.4.3
Art.4.3
HDK-MT 50 / …
400
DN20
Art.4.3
Art.4.3
HDK-MT 70 / …
400 DN20 Art.4.3 Art.4.3
Filter
Dryer Filter Quantity
Allowable
pressure (PS)
Volume
[l]
Category
(PED) Module
HDK-MT 15 / 100
GH7
2
100
0,52
I
B+D
HDK-MT 20 / 100 GH7 2 100 0,52 I B+D
HDK-MT 25 / 100
GH7
2
100
0,52
I
B+D
HDK-MT 30 / 100
GH7
2
100
0,52
I
B+D
HDK-MT 40 / 100 GH9 2 100 1,33 I B+D
HDK-MT 50 / 100
GH9
2
100
1,33
I
B+D
HDK-MT 70 / 100
GH9
2
100
1,33
I
B+D
HDK-MT 15 / 350 GH7 2 350 0,52 III H
HDK-MT 20 / 350
GH7
2
350
0,52
III
H
HDK-MT 25 / 350
GH7
2
350
0,52
III
H
HDK-MT 30 / 350 GH7 2 350 0,52 III H
HDK-MT 40 / 350
GH9
2
350
1,34
III
H
HDK-MT 50 / 350
GH9
2
350
1,34
III
H
HDK-MT 70 / 350
GH9 2 350 1,34 III H
The following standards / technical specifications were used:
Harmonized standards: DIN EN ISO 12100:2011-03, DIN EN 61000-6-3, DIN
EN 61000-6-4
The following other EC directives were used:
2014/30/EU
2014/35/EU
Essen,
19.07.2016
Datum / Date i. V. Dr. Jürgen Timmler
Leiter Technik und Entwicklung /
Manager Engineering and Development

Machine passport
It is the responsibility of the owner,
to enter for the first time any appliance data not stated above,
to keep these appliance data up to date.
Type designation HDK-MT__
Order no.
Project no.
Build no.
Vessel no.
Vessel no.
Year of manufacture
The above-stated appliance data provide for a clear identification of the dryer and
its components, and significantly facilitate any service measures.
Note:
Further important data on the dryer such as the details on the
permissible operating pressure and the electrical connection are found
on the type plate (for position of the type plate see page 12).

Table of contents
General Information.............................................................................................7
Manufacturer's details............................................................................................................7
Details on the dryer................................................................................................................7
About these operating instructions.........................................................................................8
Intended use of the dryer.......................................................................................................9
For your own safety.............................................................................................9
General safety notes............................................................................................................10
Signs and hazard areas on the dryer...................................................................................12
Technical Description .......................................................................................14
Layout..................................................................................................................................14
Function...............................................................................................................................15
Standard equipment ............................................................................................................16
Available options..................................................................................................................16
Transportation, installation and storage.........................................................18
What to do in the case of transport damage occurring?.......................................................18
Transporting the dryer to its installation site.........................................................................19
Installing and anchoring the dryer........................................................................................19
Storing the dryer..................................................................................................................21
Installation..........................................................................................................22
Recommended installation..................................................................................................22
Requirements for installation................................................................................................23
Connect piping.....................................................................................................................23
Installing the electrical connection........................................................................................24
Operating and control elements ......................................................................26
Commissioning..................................................................................................29
Requirements for initial start-up...........................................................................................30
Dryer settings.......................................................................................................................30
Emergency shutdown ..........................................................................................................31
Start up dryer.......................................................................................................................31
Recommended operating modes in the individual phases ...................................................33
Monitoring dryer operation...............................................................................34
With dewpoint-sensing control.............................................................................................34
Shutting down and restarting the dryer..........................................................35
Shutting down and depressurising the dryer........................................................................35
If work is to be carried out on the electrical system..............................................................36
Re-start................................................................................................................................36
Maintenance and repair of the dryer................................................................37
Notes on maintenance..........................................................................................................37
Regular maintenance intervals.............................................................................................38
Instructions for use of the dongle..........................................................................................39
HDK-MT special tool kit........................................................................................................40
Perform a weekly visual inspection.......................................................................................41
Maintenance work to be completed every 12 months...........................................................42
Maintenance work to be completed every 24 months...........................................................47
Other maintenance work ......................................................................................................55
Identifying and eliminating faults ....................................................................60
Overview of faults.................................................................................................................60
Index ...................................................................................................................63
Annex with technical documentation..............................................................65
Technical data......................................................................................................................66
Replacement and wear parts list ..........................................................................................68
Logic control diagram...........................................................................................................71
Flow diagram........................................................................................................................73
Dimensional drawing............................................................................................................74

HDK-MT350_EN_06 7
General Information
Manufacturer's details
Name and address
Details on the dryer
Standard scope of delivery
Dryer, comprising
2 towers with a top and bottom valve block.
filled with desiccant
1 prefilter
1 after-filter
1 muffler
1 dewpoint sensor
1 control system
Associated documents
Circuit diagrams (see separate document)
Notes on accompanying documentation
Accompanying documents such as operating instructions for options or related
components must always be taken into account. These contain additional
information such as in respect of maintenance and are therefore essential for
safe operation of the system.

8 HDK-MT350_EN_06
About these operating instructions
These operating instructions contain basic information on the safe use of the
dryer.
Characters and symbols used
►Work steps that you have to carry out in the sequence stated are marked by
black triangles.
Lists are marked by a small box.
Note:
These notes provide you with hints and information on the safe and
efficient handling of machines and devices.
Attention!
These safety notes warn against damage to property and help you to
avoid such damage.
Danger!
These danger notes with a grey background warn against personal injury
and/or danger to life and limb; danger notes help you to avoid serious or
life-threatening situations for yourself and/or third parties.
Target group of these operating instructions
These operating instructions are intended for all persons working on and using
the dryer. We assume that all such persons are specialist personnel, e.g. fitters
or electricians.
The tasks described in the section Dryer Maintenance must only be carried out
by persons who have been trained by the manufacturer or a distributor.
Notes on the operating instructions
These operating instructions must be continuously available at the site where the
dryer is used. We recommend to prepare a copy and to keep the same in a safe
and freely accessible place next to the dryer. Keep the original document in a
safe place.

HDK-MT350_EN_06 9
For your own safety
The dryer has been built in accordance with the state of the art and the
recognized technical safety regulations. Nevertheless, there is a risk of personal
injury and damage to property when the dryer is used, if
it is operated by non-qualified personnel,
not used within its intended design specifications,
is repaired or maintained incorrectly.
Note:
For your own safety and to prevent machine damage, please note the
information and safety notes in these operating instructions when
working with the dryer.
Intended use of the dryer
The dryer is solely intended for the purpose of drying compressed air and
nitrogen (gaseous) in accordance with the Pressure Equipment Directive.
Consultation with the manufacturer is required if the dryer is to be used in
connection with other gases of fluid group 2.
Depending on defined conditions, it dries compressed air for industrial use. The
compressed air must be free of aggressive water, oil and solid constituents.
Refer to Technical data on Page 66 for information on the defined conditions.
The dryer may only be operated in discontinuous operating mode when a start-up
facility (pressure retention valve) is installed.
The dryer may be operated only in accordance with the data on the type plate
and in accordance with the contractual conditions. Non-observance of the data
given there is regarded as improper use.
Suspected misuse
In accordance with the Pressure Equipment Directive (PED), the dryer must not
be used to dry potentially explosive, combustible or toxic gases of fluid group 1.
The dryer must not be misused as a climbing aid! Pipes, valves, and similar
fittings have not been designed for such loads. They could fracture, tear off, or
become damaged in another way.
Changes to the pressure vessels are not permitted.

10 HDK-MT350_EN_06
General safety notes
For your own safety, when carrying out any work on the dryer comply with
all applicable national safety regulations!
Risk of injury from escaping compressed air!
Never remove any parts of the dryer, or manipulate the same in any way,
for as long as the plant is still pressurised! Suddenly escaping
compressed air might cause serious injuries.
Before carrying out any work on the dryer, first depressurise the plant.
Hazard caused by exceeding the limit values!
The dryer may only be operated within the defined operating conditions.
Exceeding the maximum permissible conditions can cause serious
injuries and death.
The operating company must ensure the maximum operating pressure
and permissible fluid temperature are not exceeded by installing
corresponding safety devices.
Warning against sudden air ejection!
During expansion the pressure is released suddenly through the muffler:
A loud cracking noise occurs which can injure your hearing.
Particles carried in the air flow act like bullets and can injure your
eyes or skin.
Always wear eye and ear protection, therefore, when you are in the
vicinity of the dryer!
Attention! Start up dryer in discontinuous operating mode!
Discontinuous operation (cut-out mode) and correspondingly frequent
dryer start-ups can cause excessively high flow rates in the dryer.
Frequent pressure surges and excessive flow rates can damage the dryer
as well as its valves and fittings.
A start-up device prevents high flow rates from occurring in the dryer
even in the case of synchronised, automatic compressor start-up. For
discontinuous operation it is therefore necessary to install a pressure
retention valve downstream of the dryer.
Risk of falls!
The dryer must not be misused as a climbing aid! The components have
not been designed for such loads and could fracture.

HDK-MT350_EN_06 11
Personnel qualification
Only authorized and qualified specialist personnel may be tasked with the work
on the dryer described in these operating instructions.
The operating personnel must have been trained by the manufacturer or a
distributor.
Conversions and modifications
Without prior approval by the manufacturer, no conversions and modifications
must be made to the dryer! Any non-approved modifications may restrict the
operational safety of the dryer and cause damage to property or personal injury.
Handling desiccant
The desiccants are perfectly safe when in an unused condition. However, when
filling and emptying the vessels with desiccants, increased dust generation may
occur. Please comply with the following instructions:
When filling desiccants into the vessels, wear a dust mask and eye
protection!
If a spillage occurs, any spilt desiccant must be taken up immediately. There
is a risk of skidding!
Disassembly and disposal
Dispose of all parts of the dryer, the desiccant and all other operating in an
environmentally responsible manner and in accordance with the current legal
regulations.

12 HDK-MT350_EN_06
Signs and hazard areas on the dryer
Signs and labels
Label with setting pressure of start-
up
device (option)
Label with setting value for
regeneration gas
Filter ratings plates
Type plate of the dryer
Front view
Please note these signs on the dryer. Keep them complete and always
legible.Keep them complete and always legible.

HDK-MT350_EN_06 13
Hazard areas on the dryer
Hazard area
Symbol in
operating
instructions
Warning against hazardous electrical voltage
Different parts of the dryer carry electrical current. These parts may be
connected, opened, and maintained by authorized specialist personnel only.
Warning against overpressure
The entire dryer is under pressure. Before commencing any work, the plant
must be depressurised.
Warning against sudden air ejection
When the vessels are depressurised, air flows suddenly out of the sound
absorber:
This causes a sudden loud cracking noise.
Due to particles carried in the air flow, there is a very considerable risk of
eye injury.
When working on the dryer, always wear eye and ear protection equipment.
Risk of skidding
When emptying and filling the vessels with desiccant, there is a risk of
skidding caused by spilt desiccant.

14 HDK-MT350_EN_06
Technical Description
Layout
Front view
Check valve block
Vessel pressure gauge
Regeneration gas return
connection (option)
Compressed air inlet
Start-up device (option)
Prefilter
Control systemCompressed air outlet
ON/OFF switch
Power connector
Muffler
Solenoid valve block
Differential pressure gauge
(option)
Transport lugs
Vessel
Dewpoint sensor
Time-controlled
condensation drain
(option)
After-filter
Manual drain valve
Stand profile
Solenoids

HDK-MT350_EN_06 15
Function
The dryer dries the compressed air supplied by the compressor and makes it
available for industrial use.
The installed prefilter and after-filter clean the compressed air supplied to the
dryer and the compressed air from the dryer to the consumers.
The two vessels contain extremely porous desiccants by means of which
humidity is removed from the compressed air and stored just as in a sponge. The
stored moisture is further removed from the desiccants and then fed into the
environment.
To this end, the two vessels alternate between different operating modes. Whilst
in one vessel, compressed air is de-humidified (adsorption), in the other vessel
the humid desiccant is prepared for another charge (regeneration). These two
states, which run in parallel during compressed air preparation, are described
below.
Adsorption The moist and unfiltered compressed air delivered by a compressor is initially fed
to the prefilter (coalescence filter) where solid and liquid particles are filtered out.
The filtered components are expelled from the system via a condensation drain
valve. The compressed air then flows through the pressurised absorption tower
from the bottom to the top. In so doing, the desiccants dehumidify the air. The
after-filter at the dryer outlet filters any remaining solids from the flow of
compressed air to protect the downstream components. The dry compressed air
is then routed via the piping system to the consumers.
Regeneration (running in parallel to the adsorption)
At the same time the other vessel is prepared for a renewed take-up of humidity.
This process is called regeneration.
The regeneration is subdivided into three phases: expansion, dehumidification,
and pressure build-up. If the dryer is operated in dewpoint control mode a further
phase, i.e. standby phase follows regeneration.
Expansion phase
During the expansion phase the pressure in the vessel is released via the muffler
down to ambient pressure within just a few seconds. The outflow of the
compressed air becomes noticeable due to a sudden powerful flow noise at the
muffler.
Dehumidification phase
Prior to being released into the pipe network, dried compressed air is bled by
means of an orifice plate. This separate regeneration air flow is fed through the
depressurised vessel.
The humidity stored in the desiccant is taken up by the air flow and expelled into
atmosphere via the muffler.

16 HDK-MT350_EN_06
Pressure build-up phase
After dehumidification the pressure in the regenerated hollow section vessel is
built up to operating pressure, so that the switchover from regeneration to
adsorption can take place at operating pressure level.
Switchover When the desiccant in the adsorbing vessel has taken up a sufficient level of
humidity, then the switchover between the vessels will be effected between the
vessels. Following switchover, the above-described process is repeated, with the
adsorption and regeneration now taking place in the respective different vessel.
Standby phase (only with the dewpoint-sensing control)
When in standby phase, the fully regenerated vessel is ready for absorption
operation. The system is switched to this chamber, as soon as the measured
dewpoint at the compressed air outlet has reached the set dewpoint value for
switchover.
Standard equipment
Compressor synchronisation
The control system is equipped with a digital input for the synchronised operation
with a compressor. This feature allows for synchronised and thus efficient dryer
operation with discontinuous compressor operation, as the dryer can be operated
independently of the compressor.
Dewpoint-sensing control
With the dewpoint-sensing control system, you can operate the dryer in fixed or
variable cycles. In the fixed cycle, switchover is effected after a fixed time period
(usually after 10 minutes). Changeover in the variable cycle depends on the
charge of the desiccant and the dewpoint measured at the dryer outlet as well as
the set changeover value. The adsorption time in the variable cycle is set to max.
60 minutes (see Page ).
Available options
The following options are available for the dryer:
Start-up device
Condensation drain for prefilter
Differential pressure gauge for up- and after-filters
Start-up device (also pressure retention valve)
If the dryer is operated in a depressurised compressed air system excessively
high compressed air flow rates will occur in the dryer. These flow rates can
damage the desiccant and cause increased wear of the dryer components. The
pressure must therefore not be applied or relieved abruptly when starting up and
shutting down the dryer.

HDK-MT350_EN_06 17
A start-up device protects the dryer from excessively high flow rates as it only
opens after reaching a preset minimum pressure of approx. 80%, thus
maintaining adequate operating pressure in the dryer.
A T-piece is supplied with the start-up device, to which the regeneration gas
return can be connected.
Time-controlled condensation drain on prefilter
The purpose of the condensation drains is to drain off the liquid collected in the
prefilter. The time-controlled condensation drains drain off the liquid at defined
time intervals.
Differential pressure gauge for up- and after-filters
The differential pressure gauge shows the pressure difference between the filter
inlet and outlet. The degree of filter contamination is determined based on the
differential pressure. If the differential pressure gauge is equipped with a reed
contact, a signal will be output at a defined limit value.

18 HDK-MT350_EN_06
Transportation, installation and storage
Danger due to incorrect transportation!
The dryer must be transported by authorized and qualified specialist
personnel only. During transportation all applicable national regulations
for accident prevention must be complied with. Otherwise there is a risk
of personal injury.
Danger of toppling over!
The dryer has a very high centre of gravity.
The dryer toppling over can cause serious injuries.
Secure the dryer for transportation and while loading and unloading to
prevent it toppling over.
Dryers are delivered upright, bolted to a pallet
(exceptions are possible for air or ship transportation).
The position of the dryer centre of gravity is specified on the packaging.
The openings in the dryer must remain closed off with plugs to prevent
moisture getting into the dryer.
Only use suitable and technically perfect lifting gear with a sufficient carrying
capacity.
The manufacturer will not be liable for any damage caused by incorrect storage
or incorrect transportation. Please note therefore the following instructions as well
as the storage instructions on page 21.
If the packaging is undamaged
The undamaged packaging should be removed only at the final installation site,
as it offers protection against any weather influences.
What to do in the case of transport damage occurring?
►Check whether only the packaging or the dryer itself were damaged.
►Inform the haulier immediately in writing of any damages.
►Also immediately contact your distributor for the purpose of
reporting/registering the damage.
Attention!
A damaged dryer must not be taken into operation! Damaged components
may lead to functional faults and possibly cause further damage.

HDK-MT350_EN_06 19
Transporting the dryer to its installation site
Warning - lifting dryer contrary to instructions!
Lifting the dryer contrary to instructions can cause damage.
Lift the dryer only with the supplied lifting eyebolts!
Transport lugs
Transportation using lifting or forklift truck
Warning against damage to property!
The dryer is supplied upright on a pallet. Therefore always use a pallet
truck or forklift truck to transport the dryer on the pallet.
►Secure the dryer on the lifting or forklift truck against sliding movements.
►Transport the dryer to its installation site.
Installing and anchoring the dryer
Requirements for the installation site
The conditions at the installation site have a large influence on the functional
capability of the dryer and the service life of the desiccant. In order to ensure a
mode of operation, which is as continuous as possible, and low maintenance, the
installation site must meet the following requirements:
The installation location must provide protection against the weather inside a
building as well as against humidity (e.g., the accumulation of condensation).
The ambient temperature must not drop below +1 °C (33.8 °F). If necessary,
an auxiliary heater is to be provided.
Heed the dryer’s noise level when selecting the installation location (see
Technical data on page 66).

20 HDK-MT350_EN_06
The installation area must be level, firm and vibration-proof. It must have the
necessary carrying capacity for the weight of the dryer. The weight of the
dryer is specified in the technical data section of the annex.
The dryer should be installed with sufficient spacing at the top, sides, and
rear, in order to be able to carry out maintenance work and change the
desiccant without any hindrances.
The minimum required spacing is 1 m.
If in doubt, the installation site must be inspected by specialists. Contact your
distributor should you have any questions relating to the installation location.
Setup
►
Remove the packaging of the dryer.
►
Check that the lifting eyebolts are secure in
the holes in the top valve block.
►
Attach suitable lifting gear to the transport
lugs.
►
Place the dryer at its installation site.
Transporting with crane
Anchoring the dryer
The upright stand profiles of the dryer are provided with pre-drilled anchorage
bores.
►Use suitable attachment material to anchor
the dryer to the floor (see figure).
►
In the case of vibrating floors:
place the dryer on suitable vibration dampers.
Holes on the base of the dryer
This manual suits for next models
13
Table of contents
Other Parker Zander Dryer manuals

Parker Zander
Parker Zander KA-MT 1 User manual

Parker Zander
Parker Zander KE-MT Series User manual

Parker Zander
Parker Zander HDK-MT 4-100 User manual

Parker Zander
Parker Zander BSP-MT 1-8/D3 User manual

Parker Zander
Parker Zander WVM Series User manual

Parker Zander
Parker Zander K-MT 1-8/D3 User manual

Parker Zander
Parker Zander ASD 10 User manual

Parker Zander
Parker Zander BSP-MT 10-95/D3 User manual

Parker Zander
Parker Zander K-MT 1/D3 User manual