Tube assembly
E24 Catalogue 4100-5/UK
8
576
12 3 4
910 11 12
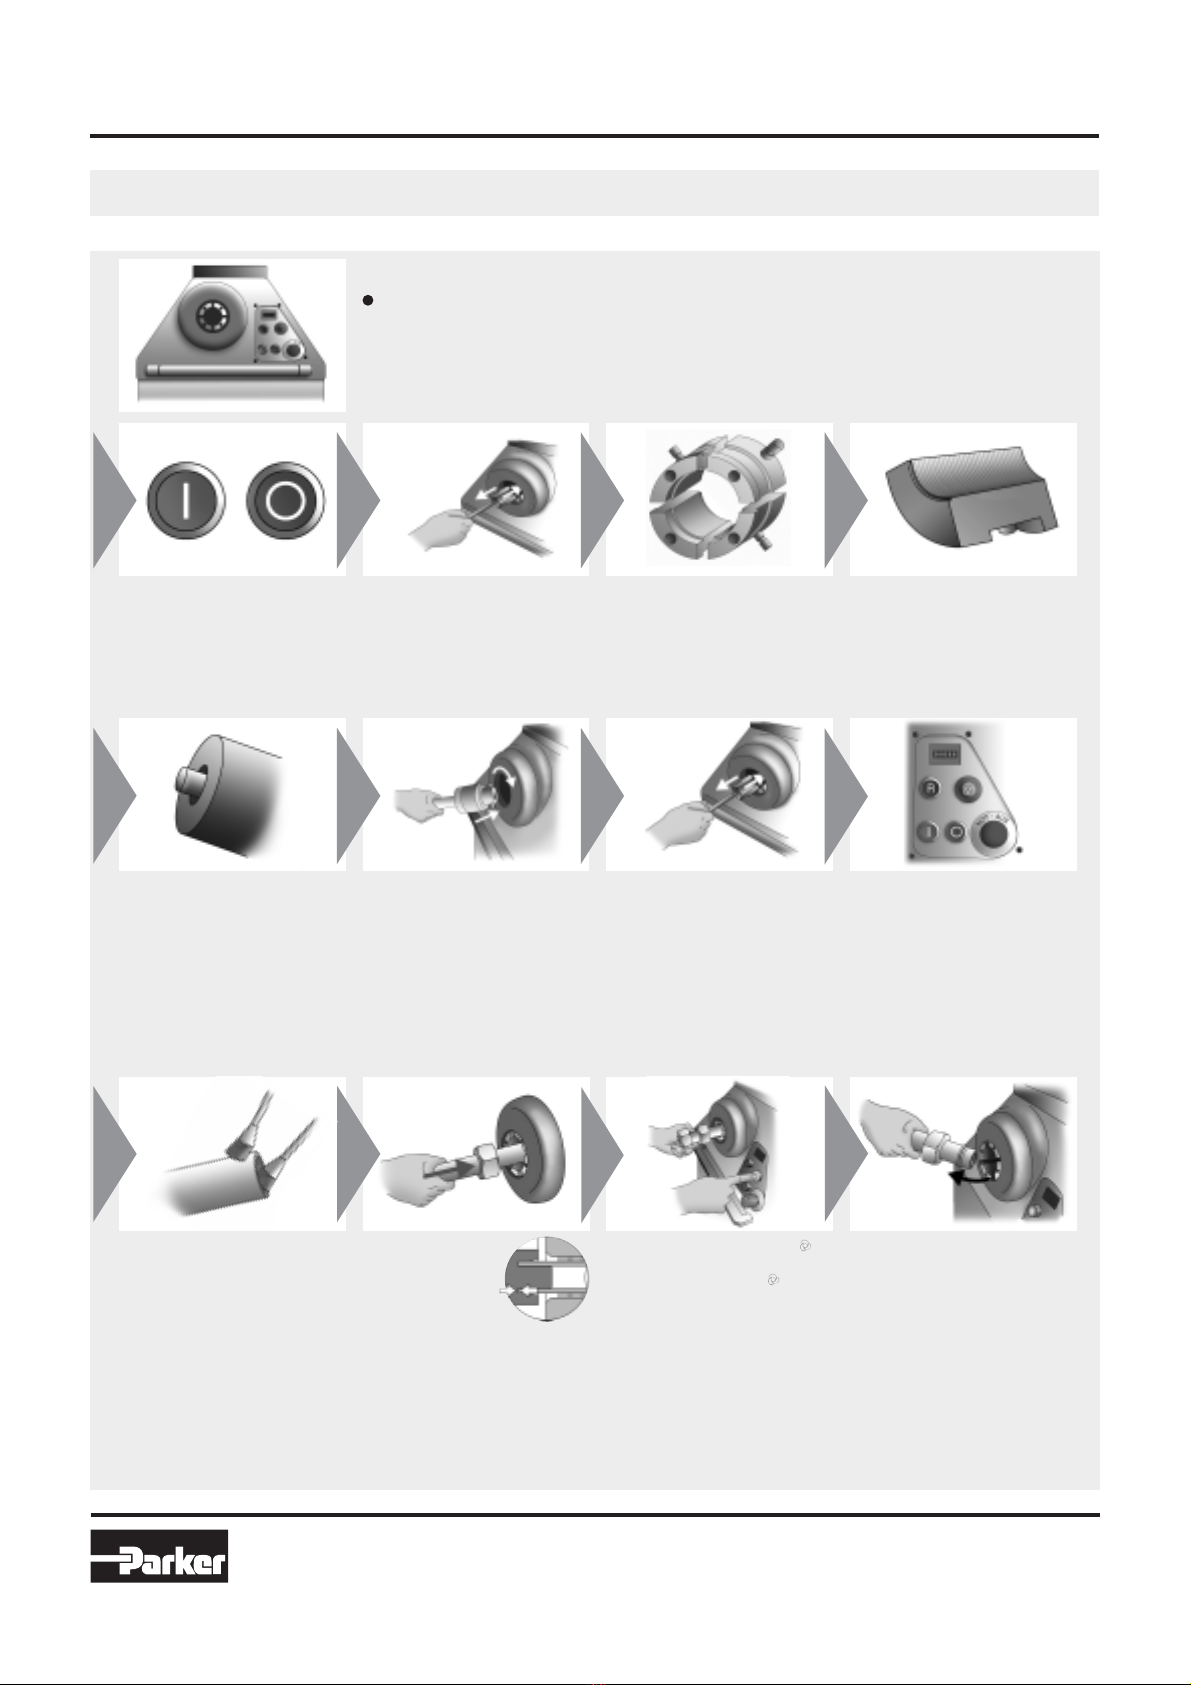
EO2-FORM assembly instructions
Tube forming with EO2-FORM F2
Reliable forming method
Change tool only when drive
switched off (button 0)
Obey safety instructions
●Select suitable forming die
according to tube material, outer
diameter and wall thickness
●Select suitable clamping dies
according to tube outer diameter
Keep stainless tube clamping
dies seperate from other tube
materials to prevent contact
corrosion
●Use magnetic holder to insert
forming die
●Turn clockwise to lock bayonet
fixture
●Tube can be taken out after the
clamping dies are open
●Reset button (R) lights up and
the machine is ready for the next
operation
●Check tools regularly (approx.
50 assemblies) for dirt and wear
●Remove tools for cleaning
●Clean clamping dies with wire
brush
●Clean forming die using
compressed air
●Replace worn-out tooling
●Press and hold start button
until tube is clamped
●Instead of start-button foot-
switch can be used
Hold tube firmly until clamping
dies are closed
●Use support for long tubes
Do not reach into tool area while
machine is working
●Check clamping dies for dirt,
wear and damage
●Check forming die for dirt,
wear and damage
●Insert clamping dies in holder
●Pins must lock in drill holes
●Use handling pin for easy die
insertion
●Switch on drive (button I)
●Each time the drive is switched
on, the reset button (R) must be
pressed first
●The automatic tool recognition is
initiated
Clamping dies will close
Reset button (R) must be held
until it lights up
●Lighten of reset button (R)
indicates “ready to start“
Make sure tube-end is free
of burrs, chips and dirt
Lubricate inside and outside
of tube-end
●Use EO-NIROMONT for best
performance
●Insert tube-end with
nut into open tool
until it firmly
touches the stop
at the end
Press tube-end firmly
into the tube stop
●Do not turn tube-end
anti-clockwise