Parmco FS54R User manual

Installation
and Operating
Instructions
As part of Parmco Appliances commitment to improving and updang product ranges,
we reserve the right to alter, change and update technical specicaons and appearance
aributes of all Parmco Appliances products. E&OE.
Model:
FS54R
For your convenience, we recommend to attach the serial number label HERE.

Dear Valued Customer,
Thank you and congratulations on purchasing your new Parmco appliance.
All Parmco products are made to the highest quality and design standards. We are
sure you will enjoy your new appliance.
As a note, please read through these instructions carefully, as these will assist you
in gaining a complete understanding of the functions and features oered by your
appliance.
Please take special note of all detailed technical information and installation
instructions. It is essential that you only allow a qualied technician to install this
appliance to ensure the safety and reliability of this appliance.
Furthermore, not using appropiate personnel to install this appliance may aect any
future warranty claims lodged, so please check with Parmco Appliances before any
installation is carried out.
We hope you enjoy your new appliance. If you would like to nd out more about
this product or any other products in Parmco’s extensive range, visit us on the web
at www.parmco.co.nz.
Regards,
The Parmco Team

1
INDEX
1
1.
.
C
CO
ON
ND
DI
IT
TI
IO
ON
NS
S
O
OF
F
U
US
SE
E........................................................................................................................................ 2
2
2.
.
S
SA
AF
FE
ET
TY
Y
P
PR
RE
EC
CA
AU
UT
TI
IO
ON
NS
S................................................................................................................................... 2
3
3.
.
O
OT
TH
HE
ER
R
I
IM
MP
PO
OR
RT
TA
AN
NT
T
S
SA
AF
FE
ET
TY
Y
I
IN
NF
FO
OR
RM
MA
AT
TI
IO
ON
N......................................................................................... 2
4
4.
.
W
WA
AR
RN
NI
IN
NG
GS
S
F
FO
OR
R
U
US
SE
E
O
OF
F
G
GR
RI
IL
LL
L,
,
O
OV
VE
EN
N,
,
A
AN
ND
D
A
AP
PP
PL
LI
IA
AN
NC
CE
E
H
HO
OB
B........................................................... 3
5
5.
.
D
DI
IS
SP
PO
OS
SA
AL
L
O
OF
F
P
PA
AC
CK
KA
AG
GI
IN
NG
G............................................................................................................................. 3
6
6.
.
I
IN
NS
ST
TA
AL
LL
LA
AT
TI
IO
ON
N,
,
C
CL
LE
EA
AN
NI
IN
NG
G
A
AN
ND
D
S
SE
ER
RV
VI
IC
CI
IN
NG
G
W
WA
AR
RN
NI
IN
NG
GS
S.................................................................... 3
7
7.
.
P
PR
RO
OD
DU
UC
CT
T
D
DE
ES
SC
CR
RI
IP
PT
TI
IO
ON
N................................................................................................................................ 4
8
8.
.
F
FI
IR
RS
ST
T
T
TI
IM
ME
E
U
US
SE
E
O
OF
F
T
TH
HE
E
A
AP
PP
PL
LI
IA
AN
NC
CE
E......................................................................................................... 5
9
9.
.
U
US
SI
IN
NG
G
T
TH
HE
E
O
OV
VE
EN
N............................................................................................................................................... 6
1
10
0.
.
U
US
SI
IN
NG
G
T
TH
HE
E
G
GR
RI
IL
LL
L........................................................................................................................................ 10
1
11
1.
.
U
US
SI
IN
NG
G
T
TH
HE
E
C
CO
OI
IL
LE
ED
D
E
EL
LE
EM
ME
EN
NT
TS
S
O
OF
F
Y
YO
OU
UR
R
C
CO
OO
OK
KE
ER
R.......................................................................... 11
1
12
2.
.
T
TH
HE
E
S
SO
OC
CK
KE
ET
T
C
CO
ON
NN
NE
EC
CT
TI
IO
ON
N...................................................................................................................... 12
1
13
3.
.
F
FI
IT
TT
TI
IN
NG
G
O
OV
VE
EN
N
A
AC
CC
CE
ES
SS
SO
OR
RI
IE
ES
S
A
AN
ND
D
C
CL
LE
EA
AN
NI
IN
NG
G................................................................................... 12
1
14
4.
.T
TR
RO
OU
UB
BL
LE
ES
SH
HO
OO
OT
TI
IN
NG
G................................................................................................................................... 14
1
15
5.
.
I
IN
NS
ST
TA
AL
LL
LI
IN
NG
G
C
CO
OO
OK
KE
ER
R
-
-
P
PO
OW
WE
ER
R
C
CO
ON
NN
NE
EC
CT
TI
IO
ON
NS
S................................................................................ 15
1
16
6.
.
I
IN
NS
ST
TA
AL
LL
LI
IN
NG
G
Y
YO
OU
UR
R
N
NE
EW
W
C
CO
OO
OK
KE
ER
R.......................................................................................................... 16
17. TECHNICAL SPECIFICATIONS.................................................................................................................. 18

2
We recommend that you read the instructions in this Manual carefully before use for the best performance and to
extend the life of your appliance, as it will provide you with all the instructions you require to ensure its safe installation, use
and maintenance. Always keep this Manual close to hand since you may need to refer to it in the future. Thank you.
1
1.
.
C
Co
on
nd
di
it
ti
io
on
ns
s
O
Of
f
U
Us
se
e
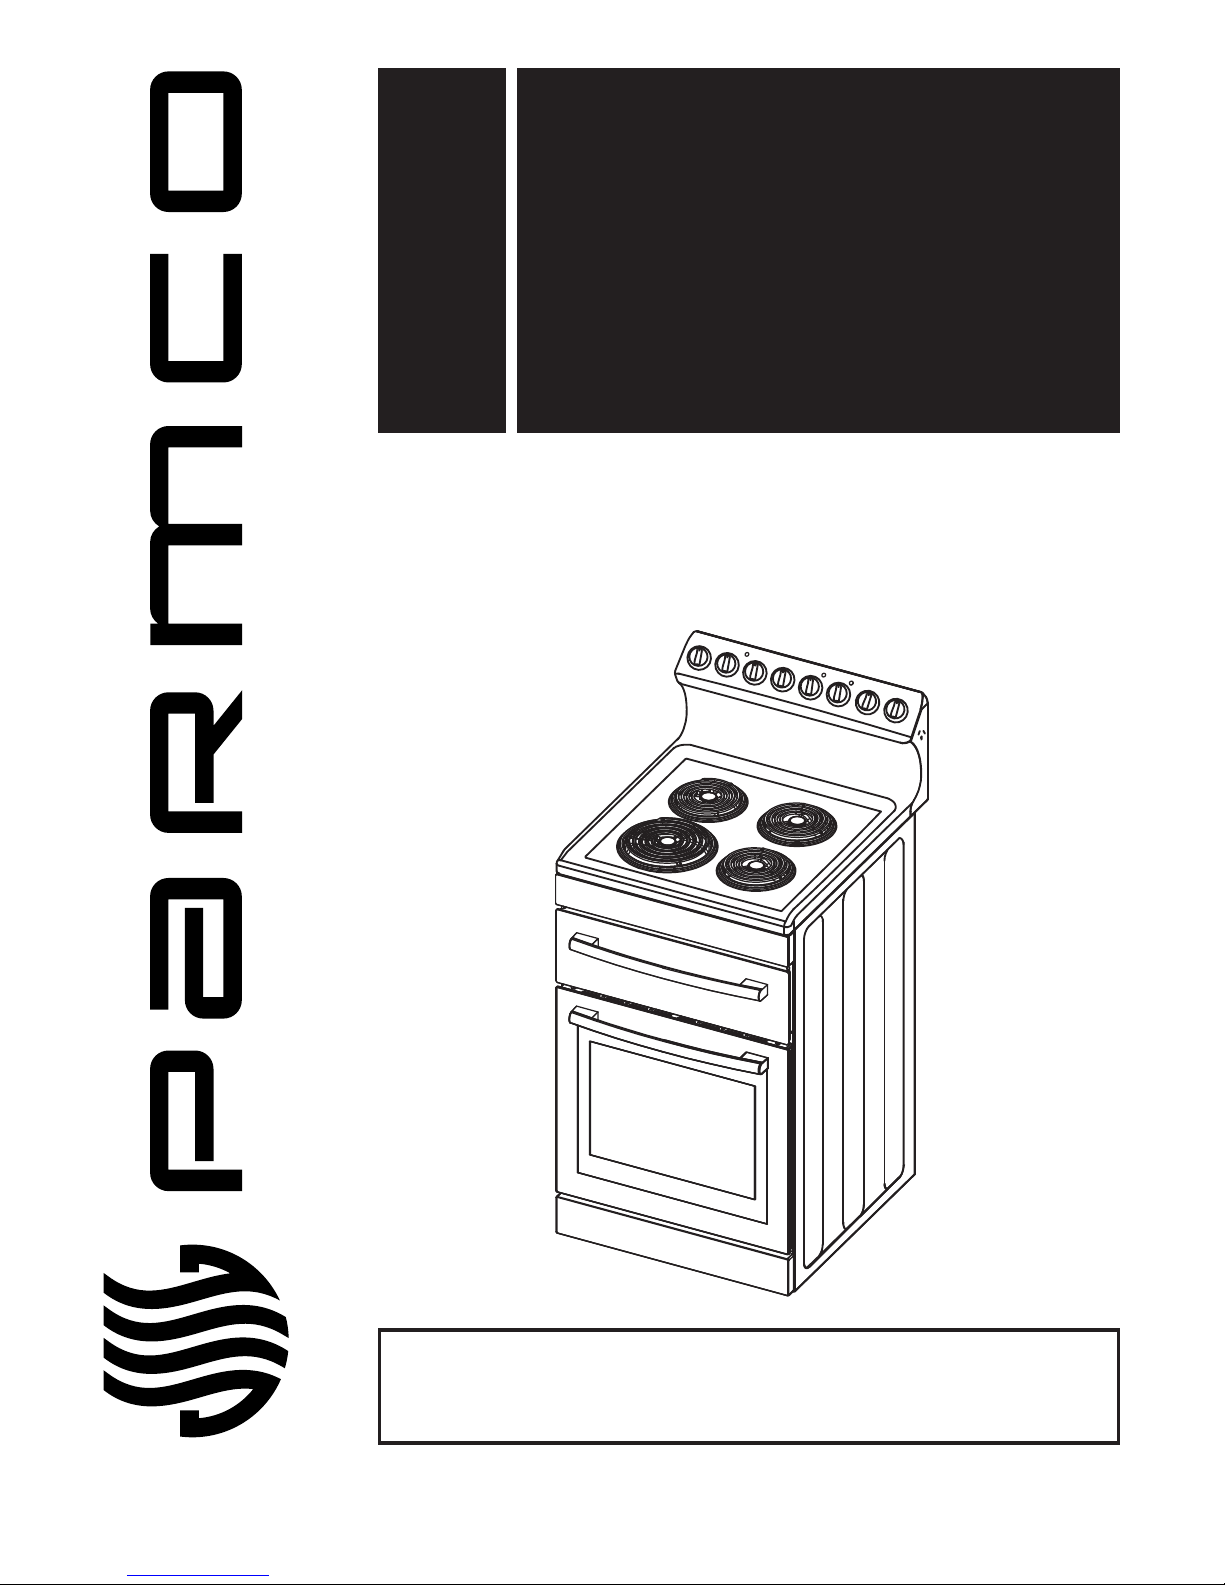
This appliance is intended to be used for domestic use, not commercial use.
2
2.
.
S
Sa
af
fe
et
ty
y
P
Pr
re
ec
ca
au
ut
ti
io
on
ns
s
This appliance is not intended for use by persons (including children) with reduced physical, sensory or mental
capabilities, or lack of experience and knowledge, unless they have been given supervision or instruction concerning use
of the appliance by a person responsible for their safety.
Warning – ensure that no downward pressure is applied to the oven door when open. in particular, do not allow a child
to climb on to open oven door
Warning - accessible parts can become hot during use, especially the oven door. to avoid burns, young children must be
kept away.
Young children should be supervised to ensure they do not play with this appliance.
During use this appliance becomes hot. Care should be taken to avoid touching hot external and internal surfaces when
in use. Use oven gloves.
Install cooker, shelving and fittings in accordance with this Manual.
Ensure all specified vents, openings and airspaces are not blocked.
To ensure your safety all electric appliance should only be installed or service by qualified staff. If the supply cord is
damaged, it must be replaced by the manufacture, its service agent or similarly qualified staff in order to avoid a hazard.
Do not spray aerosols in the vicinity of this appliance while it is in operation.
Do not store flammable materials in the appliance or near this appliance.
Do not modify this appliance.
Appliance must be installed according to current laws and regulations in New Zealand by qualified Tradesmen/Installers
T
Th
he
e
M
Ma
an
nu
uf
fa
ac
ct
tu
ur
re
er
rs
s
a
an
nd
d
I
Im
mp
po
or
rt
te
er
rs
s/
/D
Di
is
st
tr
ri
ib
bu
ut
to
or
rs
s
a
an
nd
d
R
Re
et
ta
ai
il
le
er
rs
s
s
sh
ha
al
ll
l
n
no
ot
t
b
be
e
l
li
ia
ab
bl
le
e
t
to
o
a
an
ny
y
l
le
eg
ga
al
l
l
li
ia
ab
bi
il
li
it
ty
y,
,
p
pe
er
rs
so
on
na
al
l
i
in
nj
ju
ur
ry
y
a
an
nd
d
p
pr
ro
op
pe
er
rt
ty
y
d
da
am
ma
ag
ge
e
d
du
ue
e
t
to
o
i
in
nc
co
or
rr
re
ec
ct
t
o
op
pe
er
ra
at
ti
io
on
n
o
or
r
i
in
nc
co
or
rr
re
ec
ct
t
I
In
ns
st
ta
al
ll
la
at
ti
io
on
n.
.
3
3.
.
O
Ot
th
he
er
r
I
Im
mp
po
or
rt
ta
an
nt
t
S
Sa
af
fe
et
ty
y
I
In
nf
fo
or
rm
ma
at
ti
io
on
n
This appliance must not be used as a space heater.
Do not obstruct the ventilation slots on front or back of appliance.
Do not remove any labels or use abrasive/ corrosive cleaners on them.
According to the electrical safety regulations the appliance equipment must be properly earthed.
Do not use corrosive cleaners e.g. oven cleaners that contain caustic soda.

3
4
4.
.
W
Wa
ar
rn
ni
in
ng
gs
s
f
fo
or
r
u
us
se
e
o
of
f
g
gr
ri
il
ll
l,
,
o
ov
ve
en
n,
,
a
an
nd
d
a
ap
pp
pl
li
ia
an
nc
ce
e
h
ho
ob
b
4
4.
.1
1
G
Gr
ri
il
ll
l
w
wa
ar
rn
ni
in
ng
gs
s
Do not leave grill on unattended.
Do not cover the grill dish insert with foil.
Placing thick portions of food under grill can be a fire hazard.
Fat left on a grill dish is a fire hazard! Keep grill clean and turn off grill immediately after use.
4
4.
.2
2
O
Ov
ve
en
n
w
wa
ar
rn
ni
in
ng
gs
s
Do not push down or apply any weight on open oven door.
Do not line oven with foil or place anything on the bottom of the oven while baking to avoid permanent damage, as
trapped heat will crack or craze the enamel floor of the oven cavity liner and could damage the element.
Use of olive oil and other poly-unsaturated oils (vegetable oils) when roasting uncovered food causes deposits inside
the oven which are very difficult to remove.
4
4.
.3
3
E
El
le
em
me
en
nt
t
w
wa
ar
rn
ni
in
ng
gs
s
Do not allow pots to boil dry, as damage to the elements may result.
Do not operate elements without a pot, fry pan etc.
Do not allow cookware to overhang hob onto adjacent bench tops, this will cause scorching to the bench top surface.
5
5.
.
D
Di
is
sp
po
os
sa
al
l
o
of
f
p
pa
ac
ck
ka
ag
gi
in
ng
g
Please recycle the cardboard, and also any polystyrene packaging where possible.
6
6.
.
I
In
ns
st
ta
al
ll
la
at
ti
io
on
n,
,
C
Cl
le
ea
an
ni
in
ng
g
a
an
nd
d
S
Se
er
rv
vi
ic
ci
in
ng
g
W
Wa
ar
rn
ni
in
ng
gs
s
An authorized person must install this appliance.
Before using the appliance, ensure that all packing materials are removed from the appliance.
In order to avoid any potential hazard, the Installation Instructions must be followed.
In order to avoid accidental tipping of the appliance (for example, by a child climbing onto the open oven door), the
anti tilt plate must be installed.
Where the appliance is installed next to cabinets, the cabinet material must be capable of withstanding 85°C.
Only authorized personnel should carry out servicing (Certificate of Compliance to be retained).
Always ensure the appliance is switched off before cleaning.
Do not use caustic soda- based cleaners.
Do not use steam cleaners, as this may cause moisture build up.
Always clean the appliance immediately after any food spillage.
To be serviced only by an authorized person.
Appliances requiring connection to 220-240V and must be earthed.

4
7
7.
.
P
Pr
ro
od
du
uc
ct
t
d
de
es
sc
cr
ri
ip
pt
ti
io
on
n
7
7.
.1
1
D
De
es
sc
cr
ri
ip
pt
ti
io
on
n
o
of
f
e
el
le
ec
ct
tr
ri
ic
c
c
co
oo
ok
ke
er
r
w
wi
it
th
h
s
se
ep
pa
ar
ra
at
te
e
g
gr
ri
il
ll
l
1. Hob
2. Heat shield
3. Telescopic runner
4. Grill Drawer
5. Oven Shelf
6. Baking tray
7. Oven Inner Glass Door
8. Oven Door
9. Control Panel
10. Socket-outlet
11. Fuse holder
12. Grill Element (inside compartment)
13. Grill tray wire rack insert(reversible to adjust height)
14. Enameled grill tray
15. Fan & Element Cover
16. Oven rear fan forced element
17. Hidden oven base element
18. Rear adjustable anti slip feet(2)
19. Anti tilt floor bracket
20. Kick panel(stability bolt located kick panel)
21. Front adjustable anti slip feet(2)
7
7.
.2
2
C
Co
on
nt
tr
ro
ol
ls
s
1. Radiant Hotplate Control Knob - can be rotated in either direction
• Adjusts temperature of hotplate.
2. Hotplate Indicator Lamp (where fitted)
• Comes on when a hotplate is turned on.
3. Grill Indicator Lamp
• Comes on when grilling is below set temperature, cycles on and off during grilling.
4. Oven Indicator Lamp
•Lamp is on when oven element is heating up oven, then cycles on and off.
5. Grill Temperature Control Knob
• Adjusts oven temperature.

5
6. Oven Temperature Control Knob
• Adjusts grilling temperature.
7. Function switch Control Knob
• Sets Oven Function/ Mode.
8. 120 Minute Ringer Timer (where fitted)
• Sets count-down time and if oven is being used, switches the oven OFF after the cooking time set has ended.
8
8.
.
F
Fi
ir
rs
st
t
t
ti
im
me
e
u
us
se
e
o
of
f
t
th
he
e
a
ap
pp
pl
li
ia
an
nc
ce
e
8
8.
.1
1
P
Pr
re
ep
pa
ar
ri
in
ng
g
y
yo
ou
ur
r
a
ap
pp
pl
li
ia
an
nc
ce
e
f
fo
or
r
t
th
he
e
f
fi
ir
rs
st
t
t
ti
im
me
e
Please wipe out the oven interior prior to operation with warm soapy water and polish dry with a soft clean cloth.
New appliances can have an odor during first operation from components manufactured with the aid of oils. It is
recommended to ‘run in’ your oven before you cook for the first time. Run the empty oven at 180°C for 1 to 2 hours,
ensure that the room is well ventilated.
Please install oven furniture as outlined in the “Fitting Oven Accessories and Cleaning” section.
The grill element may have oils left on the grill during manufacture. Before you cook on the grill for the first time, turn
it on for 15 minutes with 10mm of water in the bottom of the grill dish.
If your upright cooker is fitted with a 120 minutes timer you must select a cooking time or turn the knob clockwise to
the” ” symbol to operate. If either of these are not selected the oven will not heat.
8
8.
.2
2
F
Fi
it
tt
ti
in
ng
g
o
ov
ve
en
n
s
sh
he
el
lv
ve
es
s
Ensure shelf orientation is correct (refer picture).
The shelf has a safety bar fitted to reduce the risk of dishes sliding off the shelf, this is the rear of the shelf.
Slide into oven at an angle until raised back of shelf is past the stop on side runners.
Lower front of shelf and push in until stop is reached.
N
NO
OT
TE
E:
:
T
Th
he
e
t
to
op
p
l
le
ed
dg
ge
e
i
is
s
n
no
ot
t
a
a
s
sh
he
el
lf
f
p
po
os
si
it
ti
io
on
n

6
9
9.
.
U
Us
si
in
ng
g
t
th
he
e
o
ov
ve
en
n
9
9.
.1
1
O
Ov
ve
en
n
s
sa
af
fe
et
ty
y
w
wa
ar
rn
ni
in
ng
gs
s
Always follow the instructions for putting the shelves and side racks into the oven, to avoid accidents.
Do not line the oven with foil, it will damage the enamel coating.
Do not place cookwares or anything else on the bottom of oven as trapped heat will damage the oven enamel coating
and could damage the concealed element.
Do not touch the hot surfaces or heating elements inside the oven.
Do not use the oven door as a shelf.
Do not push down on the open oven door.
Do not place shelves on top of upper most shelf runner as there are no stops for shelf withdrawal.
9
9.
.2
2
O
Op
pe
er
ra
at
ti
io
on
n
S
Se
et
t:
:
1
1)
)
O
Ov
ve
en
n
F
Fu
un
nc
ct
ti
io
on
n,
,
2
2)
)
T
Te
em
mp
pe
er
ra
at
tu
ur
re
e
,
,
3
3)
)
c
co
oo
ok
ki
in
ng
g
t
ti
im
me
e
1
1)
)
O
Ov
ve
en
n
F
Fu
un
nc
ct
ti
io
on
n
K
Kn
no
ob
b
Description of each oven function (mode)
Lamp“ ”
The lamp of the oven is on. No heating elements are on.
Conventional cooking/ no fan (uses hidden bottom element) “ ”
Suitable for cakes, biscuits, cooking and ideal for blind baking. Good for slow cooking at lower temperatures(below 150°C).
Do not use lowest shelf position as base of food can burn as it is close to the element.
Bottom Element with Fan(Pizza) Cooking“ ”
The bottom heating element and the fan come on. Suitable for pastries, Pizza, cakes and puddings in baking tins or moulds
Do not use lowest shelf position
Fan-forcedCooking“ ”
The rear circular heating element and the fan come on to make heat distributed more uniformly throughout the oven. deal
for cooking on more than one level at a time.
This mode is ideal for general purpose cooking such as baking cakes, muffins and roasting meat. Cooking on multiple shelf
positions at the same time.
Defrosting Mode “ ”
Only the fan operates. It is located on the back of the oven, causing makes the air to circulate at room temperature around
the food .This is recommended for the defrosting of all types of food.

7
2
2)
)
O
Ov
ve
en
n
T
Te
em
mp
pe
er
ra
at
tu
ur
re
e(
(t
th
he
er
rm
mo
os
st
ta
at
t)
)
k
kn
no
ob
b
Selection of cooking temperature is carried out by turning the knob clockwise to
the required temperature, between 60°C to MAX .
The “oven indicator lamp” will come on when the oven is heating up. When it goes out it
means that it reaches the required temperature . Regular ‘on & off’ is then normal.
Itmeansthatoventemperatureisbeingconstantlymaintainedattheselectedlevel.
3
3)
)
S
Se
et
t
b
ba
ak
ki
in
ng
g
t
ti
im
me
e
1
12
20
0
M
Mi
in
nu
ut
te
e
R
Ri
in
ng
ge
er
r
T
Ti
im
me
er
r/
/
“
“O
Ov
ve
en
n
O
ON
N/
/O
OF
FF
F”
”
O
Op
pe
er
ra
at
ti
in
ng
g
o
ov
ve
en
n
w
wi
it
th
ho
ou
ut
t
T
Ti
im
me
er
r
:
:
Turn knob counterclockwise to symbol.
The oven will operate with use of the timer function.
O
Op
pe
er
ra
at
ti
in
ng
g
o
ov
ve
en
n
u
us
si
in
ng
g
t
th
he
e
T
Ti
im
me
er
r:
:
To set the timer, simply turn the knob clockwise to the required number of
minutes. The timer will automatically shut down the oven after the set
minutes and the timer will ring at the same time.
Note: Either the or timer function must be selected for the oven to operate!
O
Ov
ve
en
n
s
sh
he
el
lf
f
p
po
os
si
it
ti
io
on
ns
s
The main oven has 5 shelf positions to chose from:
oPosition 1 is the position at the bottom of the oven and
position 5 is located at the highest point of the oven
oThe 5 position side rack system can house both the
standard oven shelves and baking tray.

8
9
9.
.3
3
O
Ov
ve
en
n
c
co
oo
ok
ki
in
ng
g
g
gu
ui
id
de
e
The following cooking guide is intended as a guide only. You may be required to set oven 10-20 degrees above or below
this guide to get the result you want. Also adjustments may be needed to the cooking time to suit personal expectations. If
you are new to use a Fan Forced oven, It is advisable to make these adjustments until you get to know the way your oven
performs. If following cookbook recipes or pre-packaged goods you should read carefully their cooking times guidelines.
For best results when baking, preheat your oven for 15-20 minutes.
Food
ConventionalOven Fan forced oven
Time in minutes
Temperature(°C)Oven shelf
position
Temperature(°C)Oven shelf
position
Plain or fruit scones 200 Any 10-15
Rolled biscuits 170 2-3 150 Any 10-15
Spooned biscuits 190 2-3 180 Any 12-15
Shortbread biscuits 160 2-3 150 Any 30-35
Hard individual meringues 110 2 100 Any 90
Soft individual meringues 180 2 165 Any 15-20
Pavlova 110 2 100 Any 75
Patty cakes 190 2-3 170 Any 15-20
Sponge 180 2-3 170 Any 20-30
Plain butter cake 180 2 170 Any 25-40
Rich fruit cake 140 2 130 Any 180
Shortcrust cornish pasty 180-200 2 160 Any 40-45
Shortcrust custard tart 180-220 1(3) 170-200 Any 20-30
Cream puffs 210 2 200 Any 25-30
Yeast bread 210 1 200 Any 25-30
Pizza 215 2 205 Any 12-20
*When using you could use position 3 of the oven.
Meat/Poultry/Fish Recommended temperature (°C)Minutes per kilogram
Beef
Rare 180 35-40
Medium 180 45-50
Well done 180 55-60
Lamb Medium 180 40
Well done 180 60
Veal 170 60
Pork 200 60
Chicken 180 45-60
Duck 180 60-70
Turkey 180 40–45 (less than10kg)
35–40 (more than10kg)
Fish 160-170 20

9
9
9.
.4
4
U
Un
nd
de
er
rs
st
ta
an
nd
di
in
ng
g
c
co
oo
ok
ki
in
ng
g
p
pr
ro
ob
bl
le
em
ms
s
Problem Causes What to do
Uneven cooking
Incorrect shelf position Select shelf that puts food in centre of oven
Oven tray too large Remove oven tray. Use smaller trays or dishes
Trays not in centre Put trays in centre
Oven fan causing uneven browning or small
cakes to lean over
Rotate food during cooking, or use Conventional
Mode (i.e. no fan)
Baked products too
brown on top
Oven not preheated Preheat the oven
Baking tins too large (diameter) for recipe Use correct size tins
Fan-forced mode with oven temperature
too high
Check recipe. Reduce oven temperature by 10° – 20°
C or more
Cooking time too long Next time, shorten cooking time
Baking tins not evenly spaced Stagger baking tins at least 3cm between tins and
the oven walls
Items to be cooked are not evenly sized or
spaced on trays
Make into same size and shape and spread
evenly over trays
Baked products too
brown on bottom
Baking tins too large (diameter) Use correct size tins
Baking tins are dark metal or glass Change to shiny, light tins or lower the
temperature by 10°-20° C
Food too low in oven Cook one shelf higher
Oven door opened too frequently during
baking
Don’t open the oven door until at least half the
cooking time has passed
Baking temperature too high Lower the temperature
Oven tray blocking heat (below thermostat) Use higher shelf position for oven tray
Cakes have a cracked
thick crust
Baking temperature too high Lower the temperature
Food too low in oven Cook one shelf higher
Cake batter over mixed Mix just long enough to combine the ingredients
Baking tin too deep Check size of tin and use recommended size
Baking tins dark Change to shiny light tins
Baked products are
pale, flat and
undercooked
Baking temperature too low Raise the temperature
Food too low in oven Cook one shelf higher
Baking time too short Increase cooking time
Incorrect baking tin size Use correct size tin
Cakes fallen in centre
Baking temperature too low Raise the temperature
Baking time too short Increase cooking time
Proportions of ingredients incorrect for
recipe
Check recipe
Opening door too early during baking Do not open door until the last quarter of
cooking time
Roast meat and
potatoes not browning
in fan oven
Poor hot air circulation Elevate food onto a rack to allow air circulation
Oven temperature is too low Increase temperature to 200° - 220° C
Not long enough in oven Continue cooking for another 15+ minutes
N
NO
OT
TE
E:
:
C
Co
on
nd
de
en
ns
sa
at
ti
io
on
n
o
on
n
o
ov
ve
en
n'
's
s
d
do
oo
or
r
i
is
s
n
no
or
rm
ma
al
l,
,
e
es
sp
pe
ec
ci
ia
al
ll
ly
y
w
wh
he
en
n
k
ki
it
tc
ch
he
en
n
i
is
s
c
co
ol
ld
d
Also spacing and size of food on trays and the number of baking dishes in the oven can affect air circulation.

10
1
10
0.
.
U
Us
si
in
ng
g
t
th
he
e
g
gr
ri
il
ll
l
1
10
0.
.1
1
G
Gr
ri
il
ll
l
s
sa
af
fe
et
ty
y
w
wa
ar
rn
ni
in
ng
gs
s
Always turn off the grill immediately after you have finished cooking and pull drawer out or remove grill tray
otherwise fat left in the tray in the hot grill compartment will continue to smoke or could catch fire.
Wash grill tray & insert after every use.
Grill insert rack can be inverted to provide 2 different settings for the distance from top of food to grill element.
Do not line the grill rack with foil.
Do not leave the grill unattended and check progress of cooking every 1 – 2 minutes (especially bread).
Do not try to grill food more than 25mm thick. Food may catch fire.
Do not store flammable materials near the grill.
1
10
0.
.2
2
G
Gr
ri
il
ll
l
i
in
nf
fo
or
rm
ma
at
ti
io
on
n
The grill function is suitable for tender cuts of meat, steak, chops, sausages, fish, bread, cheese toasties and other
quick-cooking foods.
Preheat for 3 minutes
Place food in the grill chamber after pre-heating is finished.
The grill drawer door must be closed during grilling.
1
10
0.
.3
3
U
Us
si
in
ng
g
t
th
he
e
g
gr
ri
il
ll
l
Ensure grill wire rack is turned over to ‘high’ position in the enamel grill tray for toast, food less than 20mm thick,
or turned over to ‘low’ position for food 20-25mm thick.
Turn the grill control knob to adjust the temperature to get the desired result. Eg, toast 4 or 5, meat 6 or 7.
Ensure that the enameled grill tray is positioned correctly on the pins located on the telescopic side runners. Insert
the grill rack insert, choosing height level required for food being grilled, into the enameled grill tray and close the grill
drawer fully.
Preheat the grill. After 3 minutes, open the grill drawer and place food onto grill rack insert.Close the grill drawer.
In the process of grilling, slide out the grill drawer every 1 minute to check progress of toast, every 2-3 minutes for
meats.
1
10
0.
.4
4
H
Ha
an
nd
dl
li
in
ng
g
g
gr
ri
il
ll
li
in
ng
g
p
pr
ro
ob
bl
le
em
ms
s
Problem Causes What to do
Grilled meats burnt on
outside and raw in
centre
Meat too close to
grill
Use inverted wire tray insert and/or reduce temperature
setting
Excess grill smoke
Build-up of fats in
grill
Clean grill enamelled tray and wire rack after every use
Trim fat from meat prior to cooking
Grilled steaks and
Chops curling
Cut slits into fat with knife towards meat or remove all
fat prior to grilling

11
1
11
1.
.
U
Us
si
in
ng
g
t
th
he
e
c
co
oi
il
le
ed
d
e
el
le
em
me
en
nt
ts
s
o
of
f
y
yo
ou
ur
r
c
co
oo
ok
ke
er
r
1
11
1.
.1
1
E
El
le
em
me
en
nt
ts
s
s
sa
af
fe
et
ty
y
w
wa
ar
rn
ni
in
ng
g
Do not use pots and pans which are unsteady, as these could overbalance.
Do not use mats, heat diffusers or wok stands. These will cause a temperature build-up which can damage the
cook top.
Do not turn on elements if there is no pot or pan on hotplate or if they do not contain food or liquids in them
Do not let cooking pots overhang sides or front of hob as they can radiate too much heat onto control knobs or
bench top surfaces.
N
No
ot
te
e:
:
S
St
to
or
re
ed
d
h
he
ea
at
t
i
in
n
t
th
he
e
e
el
le
em
me
en
nt
ts
s
c
ca
an
n
b
be
e
u
us
se
ed
d
f
fo
or
r
t
th
he
e
l
la
as
st
t
f
fe
ew
w
m
mi
in
nu
ut
te
es
s
o
of
f
c
co
oo
ok
ki
in
ng
g.
.
S
Si
im
mp
pl
ly
y
t
tu
ur
rn
n
o
of
ff
f
t
th
he
e
c
co
on
nt
tr
ro
ol
l.
.
1
11
1.
.2
2
C
Ch
ho
oo
os
si
in
ng
g
C
Co
oo
ok
ki
in
ng
g
P
Po
ot
ts
s
Look at this diagram below which shows you which utensils to use on the hotplates and which utensils should not be used.
Always use pots and pans with flat bottoms. Uneven or thin bottoms will waste energy and cook slowly.
Always use pots and pans which are slightly larger than the hotplate. Small pans waste energy.
Always put dry pots and pans on the hotplates.
Do not use pots and pans which are too large. Pans which overhang the hotplate more than 50 mm can damage
the hob or surrounding surfaces.
1
11
1.
.3
3
U
Us
si
in
ng
g
t
th
he
e
e
el
le
em
me
en
nt
ts
s
o
of
f
y
yo
ou
ur
r
e
el
le
ec
ct
tr
ri
ic
c
c
co
oo
ok
ke
er
r
Check the elements on your cooker against the diagrams below before you use your cooker for the first time.
R
Ra
ad
di
ia
an
nt
t
h
ho
ot
tp
pl
la
at
te
es
s
The high-speed radiant coil element heats rapidly from a cold start. This saves power.
The radiant coil elements can be unplugged and the enamelled element dishes can be removed for cleaning any
spillage.

12
1
12
2.
.
T
Th
he
e
s
so
oc
ck
ke
et
t
c
co
on
nn
ne
ec
ct
ti
io
on
n
1
12
2.
.1
1
W
Wa
ar
rn
ni
in
ng
g
Use this socket with appliances that draw ≤10 Amps.
Please make sure that panel of the socket outlet is dry.
1
12
2.
.2
2
R
Re
ep
pl
la
ac
ci
in
ng
g
t
th
he
e
f
fu
us
se
e
First shut off the power supply to the stove.
Use pliers insurance cover to open the fuse holder (Fig.1)
Replace the fuse.
Voltage:220V-240V;
Current: 15Amp;
Note:
1. It is extremely important
to replace the fuse with the
correct Amperage.
2. Do not plug a multibox power distributor and run more than one 10Amp appliance from this socket.
1
13
3.
.
F
Fi
it
tt
ti
in
ng
g
o
ov
ve
en
n
a
ac
cc
ce
es
ss
so
or
ri
ie
es
s
a
an
nd
d
c
cl
le
ea
an
ni
in
ng
g
1
13
3.
.1
1
S
Sa
af
fe
et
ty
y
w
wa
ar
rn
ni
in
ng
gs
s
a
ab
bo
ou
ut
t
c
cl
le
ea
an
ni
in
ng
g
Always make sure that the cooker is turned off before cleaning.
Always clean cooker immediately after use.
Use of steam cleaners is prohibited to clean this appliance.
Do not use caustic- based cleaners. These will damage aluminums parts, and remove enamel gloss.
1
13
3.
.2
2
C
Cl
le
ea
an
ni
in
ng
g
t
th
he
e
e
en
na
am
me
el
l
Keep enamel clean by wiping it with a soft cloth and warm soapy water.
Rub difficult stains with a nylon scourer or creamed powder cleanser.
Do not use abrasive cleaners, dry powder cleaners, steel wool or wax polishes.
If you use an oven cleaner, then follow the instructions on the product carefully.
1
13
3.
.3
3
C
Cl
le
ea
an
ni
in
ng
g
t
th
he
e
c
co
on
nt
tr
ro
ol
l
p
pa
an
ne
el
l
Make sure control knobs are in off position.
Clean the control panel by wiping it with a soft cloth and warm soapy water and squeezed dry.
Take care when cleaning around knobs to ensure printing on control panel is not removed, this can occur if
abrasive cleaners are used, therefore, should not used at all.
1
13
3.
.4
4
C
Cl
le
ea
an
ni
in
ng
g
t
th
he
e
r
ra
ad
di
ia
an
nt
t
c
co
oi
il
l
e
el
le
em
me
en
nt
ts
s
These coiled hotplates are self cleaning. To clean the trim rings (if fitted), lift
the front of element and remove trim ring. Then wash it in warm, soapy water.

13
To clean the enamelled element bowls, lift element and pull out of socket pull.
Remove the bowl and wash in warm soapy water.
D
DO
O
N
NO
OT
T
P
PU
UT
T
E
EL
LE
EM
ME
EN
NT
TS
S
I
IN
N
W
WA
AT
TE
ER
R!
!
1
13
3.
.5
5
C
Cl
le
ea
an
ni
in
ng
g
t
th
he
e
g
gr
ri
il
ll
l
c
co
om
mp
pa
ar
rt
tm
me
en
nt
t
Lift the enameled grill tray out.
Clean the sides and bottom of compartment with hot soapy water.
If stronger action is needed use a nonabrasive oven
cleaner applied with a nylon scourer.
1
13
3.
.6
6
C
Cl
le
ea
an
ni
in
ng
g
t
th
he
e
O
Ov
ve
en
n
Open the door fully.
Remove oven shelves and side racks.
Clean with hot soapy water.
Thoroughly dry with a soft cloth to remove excess water that may be present.
1
13
3.
.7
7
C
Cl
le
ea
an
ni
in
ng
g
t
th
he
e
o
ov
ve
en
n
d
do
oo
or
r
/
/
H
Ho
ow
w
t
to
o
r
re
em
mo
ov
ve
e
t
th
he
e
o
ov
ve
en
n
d
do
oo
or
rs
s
For a more thorough clean, you can remove and disassemble the oven door. Proceed as follows:
Open the door to the full extent (fig.1);
Open the lever A completely on the left and right hinges (fig.2);
Hold the door as shown in fig.3 approximately 30 degree angle upwards
Gently close the door (fig.3)until left and right hinge levers A (fig.2) are hooked to part B (fig.2) of the door
Withdraw the hinge hooks from their location following arrow C (fig.4);
Rest the door on a soft surface;
To replace the door, repeat the above steps in reverse order.
R
Re
em
mo
ov
vi
in
ng
g
t
th
he
e
I
In
nn
ne
er
r
P
Pa
an
ne
e
o
of
f
G
Gl
la
as
ss
s
Triple Glazed oven door (if fitted): Remove the top frame (G) by unscrewing the 2 screws, located on the left and
right sides.
Gently pull out the inner pane of glass (fig. 2). Also remove the centre pane of door glass, not shown here.
Clean the glass panes with an appropriate cleaner. Dry thoroughly, and place on a soft surface.
Now you can also clean the inside of the outer glass.

14
C
Cl
le
ea
an
ni
in
ng
g
t
th
he
e
d
do
oo
or
r
g
gl
la
as
ss
s
Clean the glass door using non-abrasive products or sponges and dry it with a soft cloth.
Do not use the oven without the inner door panes fitted correctly. When re-fitting inner glass door panes ensure
they go back in facing the same way they came out. The doors are coated with a very slight reflective coating to reflect
the heat back into the oven cavity and keep the outer door cooler to touch.
Do not use harsh abrasive cleaners or sharp metal scrapers to clean the oven door glass since they can scratch the
surface, which may result in shattering of the glass.
1
13
3.
.8
8
R
Re
ep
pl
la
ac
ci
in
ng
g
t
th
he
e
O
Ov
ve
en
n
L
La
am
mp
p
Disconnect the oven from the power supply at the fuse-box by means of the switch used to connect the appliance
to the electrical mains ;
Remove the glass cover of the lamp-holder by rotating anti-clockwise.
Be aware that the glass may be difficult to remove if there is a build
up of oil and grease created during cooking. In this case the glass
may need to be cleaned with hot soapy water to break this build up.
Remove the lamp and replace with a lamp resistant to high
temperatures (300ºC) with the following characteristics:
Voltage:220-240V
Wattage:25W
Type:E14
Replace the glass cover. Reconnect the appliance to the mains power supply.
1
14
4.
.T
Tr
ro
ou
ub
bl
le
es
sh
ho
oo
ot
ti
in
ng
g
If you have a problem with your appliance, check the table below before calling service. You may be able to avoid a
service call by and avoid unnecessary inconvenience and expense.
For cooking problems, refer to Handling Baking Problems.
Problem Causes What to do
Oven or grill not
working
120 min Timer not in “Manual”
position
Refer to 120 min timer instructions
Power not turned on Switch on electricity
Household fuse blown Check fuses
Controls incorrectly set Reset controls
Circuit breaker tripped Check circuit breaker

15
Oven light not
working
Power not turned on
Switch on electricity
Household fuse blown Check fuses
Circuit breaker tripped Check circuit breaker
Lamp blown or loose in socket Replace or tighten globe
Oven not hot
enough
Heat escaping through incorrectly
sealed door
Check shelves or dishes are not preventing door closing
properly, Check that door is fitted properly after door
removal for cleaning
Door seal is worn or has moved Replace seal or refit it
Unit smoking when
first used
Protective oils being removed This is normal
Odour on the first
use of oven
This is normal
Allow 2–4 hours for odour to dissipate (open all windows)
120 minute timer
buzzer not audible
Timer not wound sufficiently Turn timer knob past 15 minute mark
Then turn to the required number of minutes
Oven shelf tight Oven shelf not inserted correctly,
may be upside down or back to
front
Remove shelf and insert as per diagram
N
No
ot
te
e:
:
O
On
nl
ly
y
a
au
ut
th
ho
or
ri
is
se
ed
d
s
se
er
rv
vi
ic
ce
e
a
ag
ge
en
nt
ts
s
s
sh
ho
ou
ul
ld
d
c
ca
ar
rr
ry
y
o
ou
ut
t
s
se
er
rv
vi
ic
ci
in
ng
g.
.
O
Ot
th
he
er
rw
wi
is
se
e
w
wa
ar
rr
ra
an
nt
ty
y
m
ma
ay
y
b
be
e
v
vo
oi
id
d.
.
1
15
5.
.
I
In
ns
st
ta
al
ll
li
in
ng
g
c
co
oo
ok
ke
er
r
-
-
p
po
ow
we
er
r
c
co
on
nn
ne
ec
ct
ti
io
on
ns
s
F
Fi
it
tt
ti
in
ng
g
o
on
n
a
a
P
Po
ow
we
er
r
S
Su
up
pp
pl
ly
y
C
Ca
ab
bl
le
e
W
WA
AR
RN
NI
IN
NG
G:
:
I
In
ns
st
ta
al
ll
la
at
ti
io
on
n
M
MU
US
ST
T
O
ON
NL
LY
Y
b
be
e
c
ca
ar
rr
ri
ie
ed
d
o
ou
ut
t
b
by
y
a
a
q
qu
ua
al
li
if
fi
ie
ed
d
a
ap
pp
pr
ro
ov
ve
ed
d
i
in
ns
st
ta
al
ll
le
er
r,
,
i
ie
e.
.
a
an
n
E
El
le
ec
ct
tr
ri
ic
ci
ia
an
n.
.
Using a screwdriver, prize open tabs of the Terminal board cover.
Remove the wire clamp screw.
Fasten the wires beneath the corresponding screw heads, using brass ‘bridge’ for single phase supply.
Fasten cable clamp and close the cover of the terminal board.
The AC power supply should be 220-240 V. For electric cookers, the minimum 45A fuse, or at least 45A a
distribution circuit breaker.

16
W
Wa
ar
rn
ni
in
ng
g:
:
C
Co
on
nn
ne
ec
ct
t
t
th
he
e
p
po
ow
we
er
r
c
co
or
rd
d
m
mu
us
st
t
b
be
e
i
in
n
a
ac
cc
co
or
rd
da
an
nc
ce
e
w
wi
it
th
h
t
th
he
e
i
in
ns
st
tr
ru
uc
ct
ti
io
on
ns
s
l
li
is
st
te
ed
d
i
in
n
t
th
he
e
t
ta
ab
bl
le
e
b
be
el
lo
ow
w
Wire cross-sectional
area(mm2)
Connection mode
L
L1
1
L
L2
2
L
L3
3
N
N
E
E
1
1N
N~
~
Min6 -
-
-
-
Min6
Min6
2
2N
N~
~
Min2.5 Min2.5 -
-
Min6
Min6
3
3N
N~
~
Min2.5 Min1.5 Min1.5 Min6 Min6
C
Co
on
nn
ne
ec
ct
ti
in
ng
g
t
th
he
e
s
su
up
pp
pl
ly
y
c
ca
ab
bl
le
e
t
to
o
t
th
he
e
m
ma
ai
in
ns
s
Install an approved circuit breaker with a minimum contact opening of 3 mm, between the appliance and the mains fuse
box .The circuit breaker should be sized according to the load and should comply with current regulations in New Zealand
(the earth wire should not be interrupted by the circuit breaker).
The supply cable should be positioned so that it does not reach a temperature of more than 50 °C with respect to the room
temperature, anywhere along its length Before switching fuse ON in meter-box check:
Earth continuity. The electrical safety of this appliance can only be guaranteed if the cooker is correctly installed
and earthed, in compliance with regulations on electrical installations.
The electrical capacity of the system and sockets will support the maximum power of the appliance, as indicated
on the data plate
Go to section “Installing your new cooker”
NOTE: All Upright cookers must comply to local regulations AS/NZS 3000:2007 guidelines. Qualified Electrician will have a
copy of these guides that must be adhered to.
1
16
6.
.
I
In
ns
st
ta
al
ll
li
in
ng
g
y
yo
ou
ur
r
n
ne
ew
w
c
co
oo
ok
ke
er
r
1
16
6.
.1
1
S
Sa
af
fe
et
ty
y
w
wa
ar
rn
ni
in
ng
gs
s
a
ab
bo
ou
ut
t
i
in
ns
st
ta
al
ll
la
at
ti
io
on
n
The cooker must be installed and serviced only by an authorized person.
The packing materials must be removed before you install the cooker.
You must follow the installation instructions in this booklet.
The surrounding kitchen cabinets must be able to withstand 85°C. We will not accept responsibility for damage
caused by installation in to kitchen cabinets which cannot withstand 85°C.
The appliance must not be installed in a corner. It must be installed at least 100mm from the side wall.
The vents openings and air spaces must not be blocked.
The anti-tilt plate must be installed to avoid accidental tipping.
The stabilizing bolt on the front of the cooker must be installed to avoid accidental moving.
You must not pull the cooker by the door handles.
If the supply cord or cable is damaged, it must be replaced by an approved service agent or a similarly qualified
person in order to avoid a hazard.
1
16
6.
.2
2
U
Un
np
pa
ac
ck
ki
in
ng
g
a
an
nd
d
I
In
ns
st
ta
al
ll
la
at
ti
io
on
n
I
In
ns
st
tr
ru
uc
ct
ti
io
on
ns
s
f
fo
or
r
I
In
ns
st
ta
al
ll
le
er
r
Please check the product and make sure that there is no damage.
Read the relevant Installation Sections of this Manual.
Check the attachment packing in good condition, complete accessories.
Use screw driver to remove two fixed Anti-tilt plate screws and plate.

17
1
16
6.
.3
3
I
In
ns
st
ta
al
ll
la
at
ti
io
on
n
S
Se
eq
qu
ue
en
nc
ce
e
Determine position of cooker and ant-tilt plate.
Securely fix the anti-tilt plate to the floor with appropriate fasteners.
Fasten the stability bolt bracket to the front frame with the 2 screws
supplied.
Reposition the cooker back into the anti-tilt plate and then mark the
position of the stability bolt hole.
Pull the cooker back out and drill the bolt location hole. Use a 10mm
masonry or wood drill. When drilling into concrete ensure a minimum
hole depth of 30mm.
Reposition the cooker back into the anti-tilt plate, aligning the stability
bolt bracket with the 10mm drilled hole. Then slide the bolt through the
bracket and into the hole.
Connect Electricity supply/gas supply but do not turn on until installation
is completed.
Slide the cooker back into the anti-tilt plate so that rear cover rests against the rear wall. Then check the height and
level of the cooker. If required, pull the cooker back out and adjust the leveling feet as required.
Anti-tilt
plate
Stability bolt

18
17. Technical specifications
Model FS54R
Oven capacity(L) 70
Grill capacity(L) 20
Voltage(V) 220-240
Frequency (Hz) 50/60
Circuit breaker(A) 45
Fush(A) 15
Oven power(W)1710-2030
Grill power(W)1650-1800
Hobs power(W)Max 6000
Product dimension(mm)540*630*1140
Gross/net weight(Kg)63.5/54
Other manuals for FS54R
1
Table of contents
Other Parmco Range manuals
Popular Range manuals by other brands

Whirlpool
Whirlpool WFE775H0HV user manual

Fisher & Paykel
Fisher & Paykel RDV3-304 installation guide

Bosch
Bosch HEIP054C installation instructions

Whirlpool
Whirlpool RF378LXPQ installation instructions

Whirlpool
Whirlpool 9757454 Use and care guide

Frigidaire
Frigidaire FPDS3085PF General installation guidelines