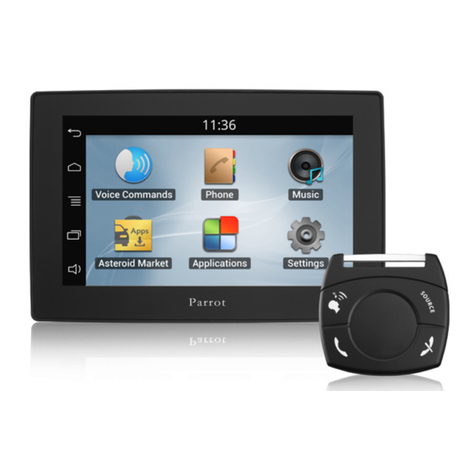
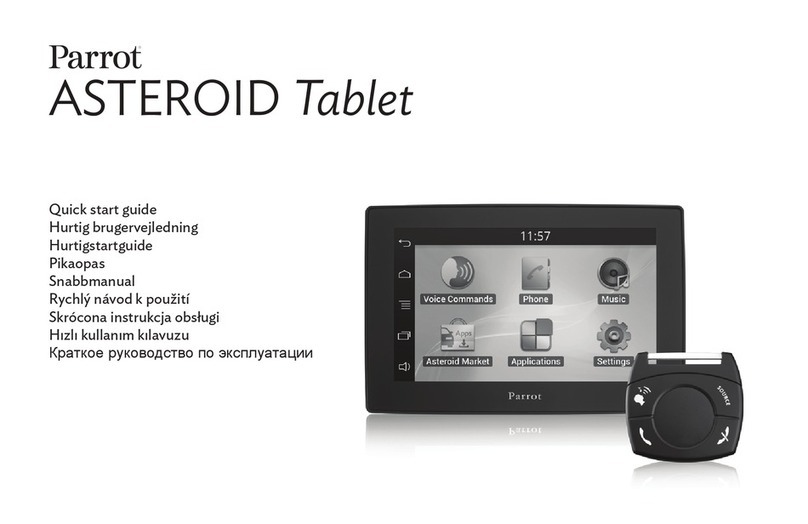
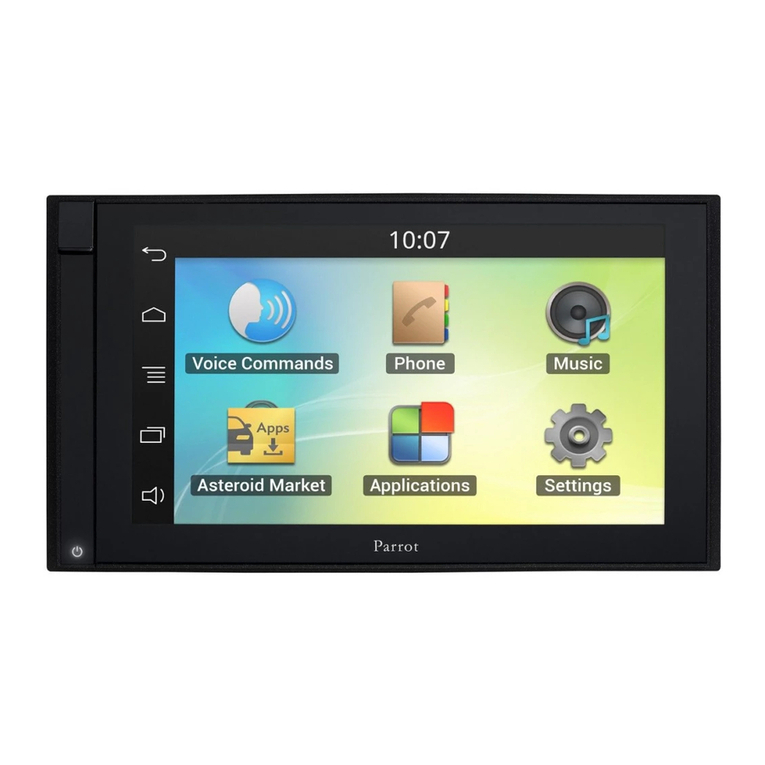
Parrot ASTEROID Smart User manual

Quick start guide
Hurtig brugervejledning
Hurtigstartguide
Pikaopas
Snabbmanual
Rychlý návod k použití
Skrócona instrukcja obsługi
Hızlı kullanım kılavuzu
Краткое руководство по эксплуатации


Parrot ASTEROID Smart
English ................................................................................
Dansk .................................................................................
Norsk ..................................................................................
Suomi .................................................................................
Svenska ..............................................................................
česky ...................................................................................
Polski ..................................................................................
Türkçe ................................................................................
РУССКИЙ ............................................................................
11
27
43
59
75
91
105
121
135

4
x4
12
3
4
5
6
7
8
9
10
11
12
13
14
x3
x2

5
Parrot Asteroid
Smart
Holder
Monteringsholder
Holder til montering
Asennuskannatin
Monteringsfäste
Montážní držák
Podstawa do montażu
Montaj mesnedi
Монтажный кронштейн
Trim ring
Ramme
Ramme
Kehys
Ram
Rám
Ramka
Çerçeve
Рамка
Side brackets
Sidestøtter
Sidestøtter
Sivukannattimet
Sidofästen
Boční držáky
Wsporniki boczne
Yan destekler
Боковые кронштейны
Screws
Skruer
Skrue
Ruuvit
Skruv
Šrouby
Śruby
Vida
Винт
SD Card - Parrot ASTEROID Map
SD-kort - Parrot ASTEROID Map
SD-kortti - Parrot ASTEROID Map
SD-kort – Parrot ASTEROID-karta
SD karta - Parrot ASTEROID Map
Karta SD - Mapa Parrot ASTEROID
SD Kart - Parrot ASTEROID Haritası
Карта SD - Parrot ASTEROID Map
Adhesive tape
Klæbestrimmel
Klebemiddel
Tarra
Klistermärke
Lepicí páska
Taśma samoprzylepna
Yapıştırıcı
Клейкая лента
GPS dongle
GPS-dongle
GPS-dongel
GPS-vastaanotin
GPS-dongel
GPS dongle
Antena GPS
GPS modülü
Аппаратный ключ GPS
ISO cable
ISO kabel
ISO-kabel
ISO-kabel
ISO-johto
ISO kabel
Kabel ISO
ISO kablosu
Кабель ISO
Microphon
e
Mikrofon
Mikrofon
Mikrofon
Mikrofoni
Mikrofon
Mikrofon
Mikrofon
Микрофон
Parking brake cable extension lead
Forlængerledning til håndbremsekabel
Forlengelsesstykke håndbremsekabel
Förlängningssladd för handbromskabel
Seisontajarrun johdon jatkos
Propojovací kabel ruční brzdy
Przedłużacz kabla do hamulca ręcznego
El freni kablo uzatması
Удлинитель тросика стояночного тормоза
USB cable
USB kabel
USB-kabel
USB-kabel
USB-johto
USB kabel
Kabel USB
USB kablosu
Кабель USB
USB / iPod cable extension
USB / iPod forlængerledning
Skjøteledning USB/iPod
USB/iPod -jatkos
USB-/iPod-förlängningssladd
Propojovací kabel USB/iPod
Przedłużacz USB / iPod
USB / iPod uzatması
Удлинитель USB/iPod
Cable fastener
Kabelklemme
Klemskrue
Johtopidike
Kabelklämma
Kabelová příchytka
Zacisk do kabla
Kablo sıkıştırıcı
Кабельный зажим
6
USB USBUSB iPod
VIDEO AUDIO OUT
CAM
IN
OUT
FRT
RR
SW
LINE IN
ANT
Ground (black)
12V ignition (red)
12V permanent (yellow)
Ground (black)
Steering wheel
control Interface
( Parrot UNIKA )
Fuse 15A
5V / 2A
Speakers
AUDIO OUT
FRT
RR
SW
USB
iPod
Jack / Jack
Not provided
Parking Brake ( light green)
Reverse lamp (orange)
VIDEO
CAM
Rear view camera
Not provided
IN
Not provided
OUT
External monitor
Amplifier
Subwoofer
Amplifier
Video source
Cable tie slot Cable tie slot
Parrot Asteroid
GPS

7
AB

8
C
D

9
E
F

10
G H

English 11
11English
Quick start
g
uide
Content
Before you begin
I
nstallation
G
etting started
P
hone
M
usic
I
nternet
V
ideo
T
roubleshooting
G
eneral information
p.11
p
.12
p
.15
p
.17
p
.18
p
.20
p
.22
p
.23
p
.24
Before you begin
About this guide
In order to limit our paper consumption and as
part of our environmentally friendly and
responsible approach, Parrot prefers to put
user documents online rather than print them
out. This simplified guide to the Parrot
ASTEROID Smart is therefore limited to
providing you with the main instructions that
will make it easy for you to use the device.
More information can be found on the support
section of our website, www.parrot.com: the
full manual, FAQs, tutorials, and more.
Note: iPod®, iPhone® (in iPod mode) and iPad®
will be referred to as an "iPod" in this manual.
Softw are updates
Download the latest update for free (and
consult the update procedure) on the Parrot
ASTEROID Smart support page on our website
www.parrot.com. These updates will enable
you to receive new features and improve the
product’s compatibility.
Note: You can also download the Parrot
ASTEROID Smart's updates while connected to
the Internet. The availability of an update is
indicated on the notification bar.
Warnings
All functions requiring an increased attention
should only be used while the vehicle is
stationary. Your safety and the one of the other
road users prevails over phone calls, music and
driving assistance applications. Be responsible:
drive carefully and pay full attention to your
surrounding. Parrot denies any liability should
you choose not to respect this warning.
Use the Parrot ASTEROID Smart with a
reasonable volume level so that you can hear all
external noises while driving.
The Parrot ASTEROID Smart includes NdFeB
magnets which can damage objects sensitive to
magnetic fields (pacemakers, credit cards,
mechanical clocks…).
The Parking Brake wire of Parrot ASTEROID
Smart's ISO cable detects whether or not the
parking brake is on. It must be connected
following the installation instructions provided
in this document. Incorrect installation or
connection may be dangerous and illegal in
many states / countries. Under no
circumstances should the screen within the
driver's field of vision broadcast any videos

12 English
12 English
while the vehicle is moving. The same applies
to any applications other than those for driving
or navigation assistance.
If you attempt to use an application that is not
intended for navigation or driving assistance
when you are driving, an on-screen warning will
be displayed. To watch a video on the Parrot
ASTEROID Smart's screen, make sure that the
vehicle is stopped in a safe area and that the
parking brake is on.
Steering w heel control interface
A steering wheel control interface can be used
to connect your vehicle’s steering wheel
controls to your Parrot car stereo. With this
interface, you will be able to make phone calls
via the steering wheel controls while keeping
your hands on the wheel. Refer to our website
www.parrot.com for more information.
Installation
Note: We advise our customers to have the
Parrot ASTEROID Smart fitted by a professional.
Safety instructions
Turn the ignition off before installing the
Parrot ASTEROID Smart.
Do not install the Parrot ASTEROID Smart
where it may injure the driver or a passenger if
the vehicle stops suddenly.
Do not install the Parrot ASTEROID Smart
where it may interfere with the driver
operation of the vehicle.
Do not drill holes in the dashboard or any panel
without first making sure there is nothing
behind it. Do not damage any fuel line,
electronic component or cable.
If you need to use screws, do not allow them to
come into contact with any power cable.
Install the Parrot ASTEROID Smart only on
vehicles with a 12 V battery.
Place all cables away from hot places (heater
outlet) and moving parts (gear shift, seat
rails...). Make sure they will never wind around
the steering column or gearstick.
Confirm the proper function of your vehicle's
other equipment after installing the Parrot
ASTEROID Smart.
Do not install the Parrot ASTEROID Smart or
one of its components where the airbag may
deploy.
Do not install the Parrot ASTEROID Smart in
places subject to high temperatures or
humidity.
Make sure you leave enough space behind the
Parrot ASTEROID Smart once installed so that
proper heat dispersal is ensured.
Before you begin
Remove your car stereo from your vehicle. You
may need release keys to do so.
Try to connect the audio and power connectors
of the Parrot ASTEROID Smart to the
connectors of your vehicle. If this connection is
impossible, you have to obtain an ISO adapter
before installing the Parrot ASTEROID Smart.
Refer to the Vehicle compatibility section on
the Parrot ASTEROID Smart support page for
more information.
Compare the Parrot ASTEROID Smart antenna
connector to the antenna connector of your
vehicle. If an adapter is necessary, contact your

English 13
13English
local car audio specialist.
Note : Make sure you also supply power to your
antenna if it is amplified. Power to the antenna
can be supplied using the Parrot ASTEROID
Smart ISO cable.
Installation using the holder
1. Loosen the 4 screws to remove the Parrot
ASTEROID Smart holder.
2. Insert the holder into the dashboard. To do
so, bend the tabs 90 degrees (diagram A p.7)
3. Install the Parrot ASTEROID Smart and
fasten the screws (diagram B p.7).
4. Attach the trim ring (diagram C p.8).
Installation using the side screw holes
1. Loosen the 4 screws to remove the Parrot
ASTEROID Smart holder.
2. Remove the two side brackets (diagram D
p.8).
3. Position the Parrot ASTEROID Smart so
that its screw holes are aligned with the
screw holes of the bracket.
4. Tighten as many screws as necessary
depending on the model of your vehicle.
Only use the provided screws.
Installing the GPS receiver
Stick the GPS receiver in an unobstructed area
inside the car.
Athermic windshields and windows with a
built-in antenna can interfere with GPS
reception and reduce the reliability of
information from navigation applications.
The GPS receiver antenna is located
o
n the side where "Parro
t
A
STEROID GPS" is written an
d
w
here the star-shaped logo is. Thi
s
l
ogo must always be directe
d
t
owards the sky.
If your vehicle has an athermic windshield, stick
the GPS receiver on the windshield on the non
athermic area. The side where the star-shaped
logo is must be stuck on the windshield
(diagram F p.9).
Note : The non athermic area of the windshield
depends on the model of your vehicle. It is
usually located near the rear view mirror.
If your vehicle does not have an athermic
windshield, stick the GPS receiver on the
dashboard. The side where the star-shaped
logo is must be visible (diagram E p.9).
To make sure the adhesive tape adheres well :
use the provided adhesive tape ;
clean the area with an appropriate cleaning
product before sticking the support ;
once you have stuck the support on the
dashboard, wait for approximately 2 hours
without handling it.
Connecting the parking brake lead
The parking brake lead allows you to use the
Parrot ASTEROID Smart video function or
applications only when the parking brake is set.
If this cable is not connected to your vehicle
parking brake system, the video function will
not be available.
1. Connect the parking brake extension lead
to the Parrot ASTEROID Smart green
cable.
2. Locate and test the parking brake signal
cable in the vehicle. This cable connects
your parking brake to the parking brake
signal on your dashboard.
3. Route the Parrot ASTEROID Smart parking
brake extension lead (green) safely and
securely from the Parrot ASTEROID Smart
and connect this to the parking brake signal
cable using a suitable method.

14 English
14 English
Warning: An improper connection or use of this
cable is dangerous and illegal in many states.
Installing a rear view camera
If you are to use the Parrot ASTEROID Smart
with a rear view camera (not provided), the
orange cable on the Parrot ASTEROID Smart
ISO cable will detect when the gearstick is
moved to "reverse". Connect this cable to the
one providing power to the reverse lamp of
your vehicle in order to display the rear view
camera image when backing your vehicle.
Connect the rear view camera video cable to
the Video CAM connector located at the back
of the Parrot ASTEROID Smart.
Installing the microphone
The optimum location for the microphone is in
the centre of the vehicles roof near the rear
view mirror. The microphone ideally needs to
be less than 60cm’s from the users mouth
pointing directly towards them with no
obstructions.
Please take care when routing the microphone
cable through the vehicle to the desired
location, we recommend routing alongside
existing manufacture’s wiring looms securing as
you go making sure the microphone cable is not
pinched or trapped.
Warning: Do not run the microphone cable in
such a way as to obstruct or interfere with the
vehicles operation or cause injury to its
occupants. In particular vehicle safety device
such as airbags and other SRS systems.
ISO cable connection
Connect the audio and power connectors of the
Parrot ASTEROID Smart to the ones of your
vehicle.
Note: Use the provided cable ties to make sure
the cables are well fixed to the car stereo. Insert
one of the cable ties into the slots in the top of
the back of the car stereo (refer to the diagram
p.4).
Once the connections are made, check your
installation. To do so, turn the ignition on then
off. The "Goodbye" message must be
displayed. If it is not the case, it is necessary to
swap the positions of the red and yellow wires.
Indeed, the red wire of the power cable must
be connected to the 12V ignition, the yellow
wire to the permanent 12V and the black wire to
the ground. This can be done simply by
reversing both bullet connectors located on the
Parrot wiring.
Installing the USB cables
Connect the USB cables to the Parrot
ASTEROID Smart. We recommend you
connect all audio cables to the Parrot
ASTEROID Smart even if you do not plan on
using them. Route the audio cables to a
suitable location in your vehicle such as the
glove box or arm rest compartment. It may be
necessary to drill a hole in your dashboard to do
so. Avoid using USB extension cables.
The USB cable (1.2m - 2A) to which you will
connect the USB / iPod cable extension must
be connected to its specific white USB port.
"iPod" is written above it.
To guarantee an optimal reception quality we
recommend you do not connect your internet
USB key 3G on the Parrot ASTEROID Smart
directly : use the USB cable to install your
device on the dashboard (or any other open
area).
Basic operations
The Parrot ASTEROID Smart faceplate can be
removed to protect your unit from theft. The
Parrot ASTEROID Smart cannot work without
its faceplate.

English 15
15English
Handle the faceplate with care. Do not force
while installing or removing it. Keep it away
from sunlight, humidity or high temperatures.
To remove the faceplate, hold down the button
on the top left and slide it downwards (diagram
G p.10).
To replace the faceplate, insert its magneted
inferior part then press the superior part until
you hear a click.
Getting started
Home screen
Slide your finger horizontally to the left. You
will discover more space for adding functions
shortcuts.
Touch an icon to get to the corresponding
function. Touch the Applications icon for
instance. The list of the available applications
is displayed. Slide your finger downward to
browse through the applications list.
Press to get back to previous menu. Press
to get to the home screen.
Press to access the pop-up menu
corresponding to the current application. The
pop-up menu allows you to change several
settings or to access more functions.
Press to display the last applications used
or currently in use.
Press to adjust the volume. Then slide the
cursor to the left or to the right.
Personalizing the home screen
To add an application shortcut on your home
screen:
1. Tap Applications.
2. Press and hold the application icon you are
interested in.
3. Drag the icon to the home screen where
you want to add it.
To remove an application shortcut:
1. Press and hold the shortcut you want to
remove.
2. Drag the icon upwards to the Remove
indication. When the icon turns red, lift
your finger.
Changing settings
To change the Parrot ASTEROID Smart
settings, tap Applications, then Settings. You
can also tap , then Settings.

16 English
16 English
Connecting a phone via Bluetooth
Note : Refer to the compatibility page of our
website to check if your phone is compatible
with the Parrot ASTEROID Smart and to consult
the specific pairing procedures for the most
common phones : www.parrot.com/uk/
compatibility.
If you are using the Parrot ASTEROID Smart
with your phone for the very first time, you
must initially pair both devices. Once your
telephone is paired with the Parrot ASTEROID
Smart, the 2 devices will automatically connect
when they are turned on (as well as
Bluetooth®
features) and in proximity of each other.
1. In the Settings menu, press Wireless &
networks > Bluetooth.
2. If necessary, activate the
Bluetooth
and
Discoverable options.
3. From your phone, search for
Bluetooth
peripherals and select «Parrot ASTEROID
Smart».
4. The pairing procedure depends on which
telephone model you have:
If the phone asks you to enter the
Bluetooth
PIN code, enter “0000”.
If the Parrot ASTEROID Smart and
your telephone display two codes,
verify that the codes are identical,
then either confirm or invalidate.
Note: Depending on the model of your phone,
you may need to authorize the connection to the
Parrot ASTEROID Smart to allow further
automatic connections. Refer to the user guide
of your phone for more information.
Connecting tw o phones
To activate multipoint telephony and connect
two phones :
1. Tap Phone.
2. Tap , then Bluetooth > Options.
3. Activate the Multipoint Telephony option.
When the Parrot ASTEROID Smart is switched
on, it attempts to connect to all paired phones
in the vehicle. If there are more than two paired
phones in the vehicle, the device connects to
the two phones with the oldest pairing.
When two phones are connected to the Parrot
ASTEROID Smart, one of them becomes the
main phone and the other is the secondary
phone. By default, the main phone is the one
with the oldest pairing to the Parrot ASTEROID
Smart.
You can receive calls to the main or secondary
phones.
Only the phonebook for your main phone may
be accessed through the Parrot ASTEROID
Smart. You can only make calls using the main
phone. However, you can easily switch
between the connected phones. To do so :
1. Tap Phone.
2. Tap , then Phone.
3. Select the main phone.
Synchronising the phonebook
With most of the
Bluetooth
phones, the
phonebook is automatically synchronized in the
system’s memory. Each time you change your
directory, synchronisation will start
automatically the next time it is connected.
Warning: Only the contacts stored in the phone
memory are synchronized. If your contacts are
stored in your SIM card memory, transfer them
onto your phone memory.
The automatic synchronization is limited to
5000 contacts (or phone numbers) for each
paired phone.

English 17
17English
Phone
Receiving a call
An incoming call is indicated by a ringtone. The
name of the caller is announced if his number is
recorded in the phonebook of the phone
connected to the Parrot ASTEROID Smart.
If you want to answer the call, tap the
green button on the Parrot ASTEROID
Smart screen. Then tap the red button to
end the call.
If you want to refuse this call, tap the red
button.
Making a call via voice recognition
You can make a call using voice recognition
directly after automatic synchronization. The
Parrot ASTEROID Smart will automatically
recognize the contact you wish to call.
1. Tap Voice Command > Contacts to launch
the voice recognition feature.
> The Parrot ASTEROID Smart asks you the
name of the contact you want to call.
2. Say the name of the contact and the type of
number («WORK», «CELLPHONE»...) if
there are several numbers associated to your
contact.
> The call is automatically launched if the
voice tag is correctly understood. If it is not
the case, a confirmation message is asked.
Confirm by saying «YES» or «CALL».
Note: At any time, press the the button to exit
voice recognition mode.
Music
Note: Several minutes of loading may be
necessary when connecting your audio
peripheral (USB / SD / iPod) to the Parrot
ASTEROID Smart for the first time, particularly if
you are using audio peripheral with a large
capacity or containing many audio files. This
loading time will allow your audio files to be
accessible via voice recognition.
Using vocal music search
The voice recognition function allows you to
select the artist / album you want to hear via
voice recognition. This function is only
available if you are using the Parrot ASTEROID
Smart with a USB / SD / iPod peripheral or
music applications compatible with this
feature.
1. Tap Voice Commands > Music.
2. Say the name of the artist / album when
asked to do so.
> The list of audio sources connected to
the Parrot ASTEROID Smart and
applications compatible with the vocal
music search function which contain the
artist / album that you selected will
appear.

18 English
18 English
Note: Check the albums and artists names in the
metadatas of your music files. These names may
be different from the ones displayed on your
music files titles.
Radio
1. Tap Music >Tuner.
2. Slide the slider to the left / right to change
the radio station.
To get the list of all available stations:
1. Tap Music >Tuner.
2. Press the button and select New scan
> OK.
1. Tap Music > Tuner.
2. Select the frequency manually or in
Fullscan mode.
3. Press the button then select Add to
presets.
> To select a stored station, select the
Presets mode.
Note: You can store as many stations as you
want.
iPod
1. Connect the USB / iPod extension lead to
the USB cable connected to the white USB
port and connect your iPod to it.
2. Tap Music > iPod. You can also tap Browse
to browse through the content of your iPod.
3. Tap a track to start playback.
USB storage device
The Parrot ASTEROID Smart is compatible
with the majority of USB keys / MP3 audio
player / external hard drive. There is no
restriction in terms of capacity of USB keys.
Only MP3, AAC or WMA formats are
supported.
1. Connect your USB storage device to the
Parrot ASTEROID Smart using the USB
cable or the USB connectors on the back of
the car stereo
2. Tap Music > USB. You can also tap Browse
to browse through the content of your
USB device.
3. Tap a track to start playback.
SD card
The SD card capacity must not exceed 32Gb.
Only MP3, AAC, WAV, OGG or WMA formats
are supported.
Note : To remove the SD card, put a fingernail
into the ridge on the exposed end of the SD card.
1. Remove the Parrot ASTEROID Smart
faceplate.
2. Insert the SD card into the appropriate slot
with the contact surface facing left
(diagram H p.10).
3. Reattach the faceplate.
4. Tap Music > SD. You can also tap Browse
to browse through the content of your SD
card.
5. Tap a track to start playback.
Audio player connected via Bluetooth
Note : The Parrot ASTEROID Smart allows you to
use the telephone and audio streaming
functions from 2 different phones without
having to disconnect one of them.
You can use the Parrot ASTEROID Smart to
listen to songs stored on your mobile phone or
Bluetooth
audio device. To do so, your phone /

English 19
19English
audio device must support the
Bluetooth
A2DP
profile (Advanced Audio Distribution Profile).
If you are using a
Bluetooth
audio player for the
first time, you have to pair both devices.
If both devices are already paired:
1. Tap Music > Bluetooth Audio.
2. Start playing a song on your audio player.
Screen commands
While playing a music track or the radio:
tap the screen to pause / resume playback
or mute the radio ;
slide your finger upwards to increase the
volume ;
slide your finger downwards to decrease
the volume.
While playing a music track (except audio
players connected using a jack / jack cable):
slide your finger to the right to skip to the
next track ;
slide your finger to the left to get back to
the previous track.
Note : If you are using the Parrot ASTEROID
Smart with an audio player connected via
Bluetooth, these commands are only available if
your audio player supports the AVRCP profile
(Audio/Video Remote Control Profile).
Internet
Warning: Internet connection via a 3G key
requires a subscription offer with a telephone
operator. Using this service can result in
significant roaming charges. Check the
conditions of your subscription and
consumption tracking with your operator.
Parrot disclaims any liability for associated
costs.
Connection w ith a 3G/4G key
Note : Refer to the compatibility section of our
website to see the list of 3G / 4G keys that are
compatible with the Parrot ASTEROID Smart.
1. Connect a 3G key to the Parrot ASTEROID
Smart with a USB cable.
> A pop-up will appear.
Note : To ensure optimum reception quality, do
not connect your 3G/4G key to the back of the
Parrot ASTEROID Smart: use a USB cable to
install the accessory on the dashboard (or any
other unobstructed area).
2. Enter your PIN code using the knob, then
select ENTER. Check the Memorise PIN
code option if you would like your PIN
code to be stored each time you turn on

20 English
20 English
the Parrot ASTEROID Smart.
Note: You will be able to change this setting by
selecting Settings > Wireless and network
settings > Mobile data networks. Among the
mobile access devices, select your 3G / 4G key,
tap Forget PIN code > Forget.
3. Select your APN (Access Point Name)
from the suggested list. This information
is available in the documentation provided
with your 3G / 4G key. If your APN is not in
the list, you can add it by selecting Settings
> Wireless and network settings > Mobile
data networks.
4. Among the mobile access devices, select
your 3G / 4G key.
5. Select Access point > Other > Preset
access points.
6. Wait approximately 30 seconds until the
connection is established. You can also
press the button and browse the
menus while the connection is being
established.
Connection via Bluetooth
If you have a telephone that supports the
Bluetooth®
profile, DUN (Dial-Up Networking)
or PAN (Personal Area Network), the
Bluetooth
connecting your telephone to the
Parrot ASTEROID Smart will allow for sharing
of the telephone's 3G connection.
Note : Refer to the compatibility section of our
website to check if your phone allows the 3G
connection sharing via Bluetooth® and to
consult the corresponding procedure :
www.parrot.com/uk/compatibility.
1. Connect your telephone to the Parrot
ASTEROID Smart via
Bluetooth
.
2. On the Parrot ASTEROID Smart, select
Settings > Wireless and network settings >
Mobile networks settings > Mobile access
devices.
3. Select your APN (Access Point Name)
from the suggested list, then check Select.
4. Press the button and select Connect.
5. Allow connection sharing on your
telephone. This procedure will vary
according to your telephone model.
Connection via USB
Note : Refer to the compatibility section of our
website to check if your phone supports 3G
connection sharing via USB and to consult the
corresponding procedure for the most common
phones : www.parrot.com/uk/compatibility.
1. Make sure that your phone’s keypad is
unlocked, then connect the phone to the
Parrot ASTEROID Smart using the USB
cable/micro-USB provided with your
phone. You can also connect the phone
using the USB extension cable provided
with the Parrot ASTEROID Smart. This
connection also enables you to recharge
your phone’s battery.
Note: Do not use the white iPod USB port to
connect your phone to the Parrot ASTEROID
Smart.
2. Select your APN (Access Point Name)
from the suggested list, then check the
option Select. You can then modify this
setting by selecting Settings > Wireless
and networks > Mobile data networks.
> A pop-up window indicating that USB
connection sharing has been activated will
appear.
Other manuals for ASTEROID Smart
9
Table of contents
Languages:
Other Parrot Car Navigation System manuals

Parrot
Parrot ASTEROID Smart User manual

Parrot
Parrot ASTEROID Smart User manual

Parrot
Parrot ASTEROID Smart User manual

Parrot
Parrot ASTEROID Smart User manual

Parrot
Parrot ASTEROID Smart User manual

Parrot
Parrot ASTEROID Tablet User manual

Parrot
Parrot ASTEROID Smart User manual

Parrot
Parrot ASTEROID Tablet User manual