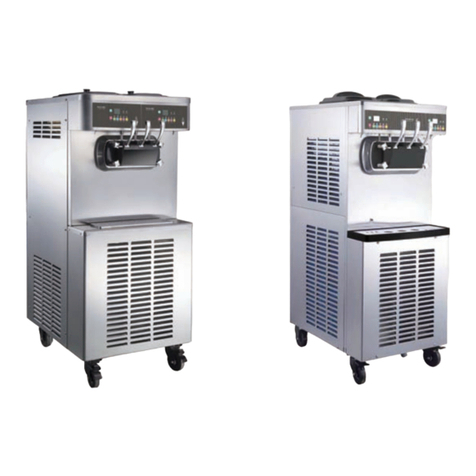
Pasmo S930-Turbo User manual

Commercial Soft Ice Cream Equipment
S930-Turbo
Instructions
Thank you for choosing the PASMO series soft ice cream equipment.
This manual will give you a detailed description of the operation and maintenance of the
equipment.
■
PASMO Food Technology Co., Ltd
■

Contents
Suggestion for purchasing the accessory products‥‥‥‥‥‥‥‥‥‥‥‥13
Assembly method of key parts
‥‥
‥‥‥‥‥‥‥‥‥‥‥‥‥
14 ~17
‥‥‥‥‥‥‥‥‥‥‥‥‥‥‥‥‥‥‥‥‥‥‥1
‥‥‥‥‥‥‥‥‥‥‥‥‥‥‥‥‥‥‥‥‥‥ 2
Equipment parts‥‥‥‥‥‥‥‥‥‥‥‥‥‥‥‥‥‥‥‥‥‥ 4
Introduction for control panel
‥‥‥‥‥‥‥‥‥‥‥‥‥‥‥‥‥‥‥ 5
Display screen content explanation ‥‥‥‥‥‥‥‥‥‥‥‥‥‥‥‥‥ 6
Adjusting method of the hardness value
‥‥‥‥‥‥‥‥‥‥‥ ‥‥‥‥ 7
Washing parts
‥‥‥‥‥‥‥‥‥‥‥‥‥‥‥‥‥‥‥‥‥‥‥ 9
Brush usage recommendation
‥‥‥‥‥‥‥‥ ‥‥‥‥‥‥‥‥‥
11
Recommendations for wearing parts replacement ‥‥‥‥‥‥‥‥‥‥‥‥12
Washing process ‥‥‥‥‥‥‥‥‥‥‥‥‥‥‥‥‥‥ ‥‥ ‥
Ice cream making process
‥‥‥‥‥‥‥‥‥‥‥‥‥‥‥‥‥
Daily operation process
‥‥‥‥‥‥‥‥‥‥‥‥‥‥‥‥‥‥
‥‥‥‥‥‥‥‥‥‥‥‥‥‥
‥‥‥‥‥‥‥‥‥‥‥‥‥ ‥
27 ~28
18 ~ 19
22 ~ 24
25 ~26
3~
8~
10~
20 ~ 2 1
Safety precautions
Equipment installation
Solutions for display screen alarm
Solutions for abnormal conditions

Warning
●●
2
◆
◆
◆
1
Safety precautions
Please comply with the safety-related contents described below.
The meaning of the logo is stated as follows.
Please read and understand the safety precautions carefully before use.
It is recommended to install the air switch if
the rated power supply is 220V.
Please connect 16A high-power socket if the
plug is needed. The blue line N is zero line for
380V. Red, white and black L-lines are live
lines. The yellow-green colorlines
are ground wire.
Do not damage the power line, or process,
stretch, bundle and bend it, otherwise it
may cause electric shock or fire accident.
Ground
Forbidden
Do not connect the live line and the zero line
in a wrong way, otherwise, it will burn out the
equipment main board or transformer.
If three live lines are connected incorrectly,
the screen will display “Phase Error” alarm.
You need to change the position of
each two wires. (Suitable for380V
model)
Forbidden
Caution
Notes: The equipment should use the power
lines of more than 4 square meters.
Pls entrust the electrician to connect the
ground wire in advance, otherwise it is easy
to cause the electricity leakage and electric
shock hazard of personnel.
It is easy to cause electrical shock hazards if you fail to follow the
circuit connection in the instructions.
The equipment must be grounded, otherwise it will easily lead to
static electricity.
The disassembly of equipment by non-professionals may lead to
equipment damage.
Danger! Electric shock!
No disassembly!
Grounding
Equipment installation
Heat dissipation
Air suction
Please install it on a horizontal and firm ground.
Otherwise, it may cause equipment dumping,
noise and vibration.
Please entrust the professionals for the
equipment installation, otherwise, it is easy to
cause the abnormal use of the equipment due
to the improper installation.
User notes
Do not use the equipment in extremely humid
environment, otherwise it is easy to cause
equipment electricity leakage and personnel
electric shock and other accidents.
Entrust
professionals
Please install it in a well ventilated place.Please
reserve more than 30cm for air suction and
more than 50cm for heat dissipation for the
equipment.
Forbidden
Please install
horizontally
Do not install in the place which under the direct
sunlight or has heating devices nearby. It will result
in production capacity decline if it is used under
the environmental temperature beyond the range
of 5- 38°C.
Forbidden
Do not use the machine in the places full of
sulfates like hot springs or other salty places
like bays and salt fields. Otherwise, it may cause
internal corrosion and equipment malfunction.

5
Equipment parts Equipment parts
34
(Gravity model) (Air pump model)
Hopper cover Hopper cover
Air tube
Agitator blade Agitator blade
Side piston
Piston reset ring
Side piston
Piston reset ring
Handle Handle
Piston
O-ring
Piston
O-ring
Discharge door
O ring
Clip scraper
Discharge door
O ring
Clip scraper
Beater Beater
Beater shaft Beater shaft
Tray-drip cover
Tray-drip
Tray-drip cover
Tray-drip
Discharge door Discharge door
Nut Nut
Air pump

Short press this button, the
main motor works only, which
is only for cleaning. When the
machine is under [Cleaning]
mode,the air pump stops
working when first short press
this button. The main motor
stops working when short
press this button for the
second time.
Press this button long to
activate the function of [Screen
Lock]; press this button long
again to unlock.
Press this button to enter into the
refrigeration mode. The screen displays
[Do not serve!];when the screen displays
[Product is ready!], you can make ice cream.
When making the first batch of ice cream,
do not touch the photoelectric sensor switch,
otherwise the refrigeration will stop and the
operation will be resumed automatically after
your hand moves out from the sensor switch.
If the signal light is on, mixture level the hopper
is too low , and the temperature will be kept
between 1~5 °C. The actual preservation period
will depend on the real material property used.
Press this button, the machine
enters into pre-cooling mode,
and the temperature of the
unused raw materials left
inside the hopper will be kept
between 1-5 °C . The
preservation period will be
different for the different
mixture,it depends on the
actual situation.Under
refrigeration mode, short
press this button to decrease
the hardness.
【RESET Pre-cooling】
Press this button for 5 seconds to
stop the current working mode and
enter into standby state.
【Wash button】
【Stop button】
Display screen
【Refrigeration button】
【Mix low alarm】
For detailed digital explanation,
please refer to page 6
Introduction for the control panel
5
【Heating button】
Short press this button to
start Heat mode, the machine
will stop automatically after
the cylinder temperature
reach 10 °C. Press this button
long to start [Pasteurization].
Under normal circumstances,
the duration of no-wash can
be extended. Under
refrigeration mode, short press
this button to increase the
hardness.
AC
Wednesday
Hopper
Cylinder
SET
=
Time
+
+
HOT
=
It indicates the current temperature of hopper.
It indicates the current voltage. If the voltage is too low or too high, the
machine protection program will be triggered and the machine will be stopped
automatically.
It indicates the current temperature of the cylinder.
It indicates that the machine is in refrigeration mode.
HOT indicates the current hardness value , and SET indicates the setting
hardness value .
Digital displays (status display)
「Temperature」
「Temperature」
「Hardness 」
「Voltage」
「 Date」
Display screen content explanation
6
AC
Wednesday
Hopper
Don’t serve
时钟
+
+
Cylinder
「Working mode」
「Calender」
「Time」
SET
=
HOT
=
It indicates that the current hardness value has not reached the setting
hardness value.
When the HOT value rises to the setting hardness value, the screen will display
“Product ready” and the ice cream can be made.
It indicates the current time.
Don not serve
AC
Wednesday
Hopper
Cylinder
SET
=
Time
+
+
HOT
=
Don not serve
Display Contents

AC
Wednesday
Hopper
Cylinder
SET
=
Time
+
+
HOT
=
Don not serve
In refrigeration mode, press this button to adjust
the hardness value.Now SET=092
Press this button to increase the current hardness value,
each time it will be increased by the value “1”. SET=093
1
2
3
Adjusting method of the
hardness value
Note
Each raw material has an optimum hardness value
corresponding to itself. It is recommended to set
the hardness value to 100. The hardness value
should not be set too high, otherwise it may
cause Frozen Cylinder. Please strictly follow the
instructions below.
7
SET
=
SET
=
Press this button to decrease the current hardness value,
each time it will be decreased by the value “1”. SET=092
SET
=
Piston
Piston
o-ring
Washing parts
●
●
●
8
Reset ring
Nozzle
(* Applicable to gravity model)
Hoper cover
Agitator blade
Beater
Beater shaft
Nut
Clip scraper
Discharge door
Tray drip cover
Tray-drip
Air tube o-ring
Air tube
Handle
Shaft seal
Discharge door
o-ring
User notes
Please handle the parts gently and contact the manufacturers for timely replacement if it is damaged
or lost.
Do not wash parts with hot water above 40℃ to prevent parts from deformation.
Do not immerse parts in sterilizing water for more than 30 minutes.

Clip scraper
Piston
Piston
o-ring
Reset ring
Nozzle
Air pump
Washing parts
9
Feed tube
(* Applicable to air pump model)
●
●
●
Brush usage
recommendation
10
Nozzle
(* Applicable to gravity model)
Hoper cover
Agitator blade
Beater Beater shaft
Nut
Clip scraper
Discharge door
Tray drip cover
Tray-drip
Handle
Shaft seal
Discharge door
o-ring
●
●
●
User notes
Please handle the parts gently and contact the manufacturers for timely replacement if it is damaged
or lost.
Do not wash parts with hot water above 40℃ to prevent parts from deforming.
Do not immerse parts in sterile water for more than 30 minutes.
Please use the brush attached to the kit for parts washing.
Small brush
Medium brush
Big brush
Hopper cover Inner air tube Outer air tube Agitator blade
Discharge door Piston Beater
Beater shaft
User notes
Please wash the parts which are connected with the raw materials carefully.
Pls be careful when washing the clip scrapers because the cutting edge is sharp. It is recommended
as well to use special disinfectant powder for washing the equipment.
The inside of the agitator blade needs to be washed carefully.

●
●
●
Recommendations for
wearing parts replacement
●Please refer to page 22 for the
use of disinfectant powder.
●
消毒粉
12
Air pump o-ring
Stainless steel fin Nozzle
●Please refer to page 23.24 for the
use of stainless steel fin.
●It is recommended to clean the nozzle
every day, because it is exposured to
the air which will easily breed bacteria.
Brush usage
recommendation
Air pump Feed tube
11
Nozzle
(* Applicable to air pump model)
Please use the brush attached to the kit for parts washing.
Small brush
Medium brush
Big brush
Hopper cover Agitator blade
Clip scraper
Discharge door Piston Beater
Beater shaft
●
●
●
User notes
The invisible scratches on the gasket ring may cause the problem of "ice cream leakage".
Therefore, it is recommended to replace the o-rings every 3 months.
Please replace them right away once you find scratches on them.
Air tube o-ring
Piston o-ring
Discharge door o-ring
Shaft seal
The clip scraper wear may cause the
ice cream to be too soft and forzen
cylinder.Therefore, it is recommended
to be replaced every 6 months.
Please replace it right away if it’s
found seriously worn.
If the washing brush is worn or fallen off, it may cause problems such as' poor washing '. When this happens,
please replace with the new brush in time.
Small brush Medium brush Big brush
Clip scraper Food grade lube
The gasket rings shown
above need to be coated
with proper amount of
lubricant before installation.
Disinfection powder
Please wash the parts which are connected with the raw materials carefully.
Pls be careful when washing the clip scrapers because the cutting edge is sharp. It is recommended
as well to use special disinfectant powder for washing the equipment.
The inside of the agitator blade needs to be washed carefully.

Please install the clip scraper and beater shaft on the beater according to the method below.
Suggestion for purchasing
the accessory products
PASMO
●Height is 153cm, large ice cream lamp model
冰淇淋系统运营服务商
PASMO PASCAL
PASMO
PASMO
●Height is 136cm, medium ice cream lamp model
●Height is 45cm, small ice cream
lamp model
13
●Desktop ice cream model
●Usage for the
drainage box,
please refer to
the page 23
Assembly method of key parts
。
●
●
1
2
14
Beater shaft
Beater
Clip scraper
Clip scraper
Assembly of beater
The clip scraper has a sharp cutting edge. Please be careful during installation. Don't install it in the reversed
direction. Otherwise, it may lead to poor taste and forzen cylinder.
The clip scraper has two sides. The side with alphabet is facing upward and fixed through two fixed holes on
the blade.
User notes
Beater installation ( * Note: Make sure the power switch is off before installation)
Please insert the beater into the cylinder. Slowly rotate with hand while inserting it to the beater motor
shaft.
The direction of the beater shaft is when inserted.(vertex of a triangle upwards).
Please apply proper amount of lubricating oil on the inner surface of the shaft seal and install it on the
main motor shaft.
Clip scraper
Main motor shaft
Cylinder
Beater
Shaft seal

3
Piston
Piston
o-ring
4
1
2
15
Reset ring
Nozzle
Assembly for the air tube
5
6
●
●
●
●
●
●
●
●
●
●
16
Discharge Door Installation
Please apply a small amount of
lubricating oil on the discharge door
o-ring and piston o-ring.
Discharge door
Discharge door
o-ring
Handle
Discharge door installation
Make the four fixed holes on the discharge door align with the bolts on the machine and install the
discharge door carefully
Install fixed nuts and tighten the four nuts diagonally.
Nut
Screw bolt Discharge door
User notes
1.Tighten the nuts diagonally, otherwise it may lead to poor sealing of the discharge door.
2.Poor sealing may lead to ice cream leakage from the crack.
Please check the O-ring carefully at the bottom of
the air tube. The outer air tube hole where the
protruding part of the inner air tube located is
the hole currently used.
* Notes: Do not install this accessory before
pouring into the mixture. Otherwise, the raw
material may notflow into the cylinder completely.
Air tube o-ring
Inner air tube
Hole position
Outer air tube
When the mixture level is higher than the bottom
hole, you can identify the hole used by checking
the top outer air tube hole position where the
protruding part located.
Operation for air tube
Air tube is able to transport raw materials to refrigeration
cylinder stably and continuously, to maintain the stability
and continuity of ice cream discharging. hole position the
air tube can be adjusted according to the business
conditions.(The adjustment method is as follows.)
The hole used can be identified according to the outer air
tube hole position where the inner protruding part located.
Protruding part of
the inner air tube
Hopper
Hole position Usage condition
Raw materials pouring into the equipment to start the ice cream
making of the first cylinder.
Pre-cooling function of raw materials.
Occasions for normal sales.
It is usually used when starting business in the morning with small
passenger flow.
Occasions for normal sales.
The raw material supplement can follow the amount of ice cream
discharging out under the normal traffic.
A large number of raw materials are needed to added to the
refrigeration cylinder with large passenger flow.
Big holes are needed to ensure that the thick material of poor
fluidity can be added into the cylinder.
Close
Protruding
part
Small hole
Medium hole
Big hole
Occasions for normal sales.
Users notes
Please adjust the hole size to the maximum size or pull it out when cylinder gives out abnormal
noise.
●Please disinfect hands or put on gloves before touching the air tube.
●We need to choose the appropriate hole size of the air tube hole according to the sales
volume. Otherwise, the ice cream will become too soft or too hard to be produced normally.
●

Assembly for the air pump
Make sure that it is lubricated on the gear
surfaces and o-rings.
5*
* Note: It is forbidden to make the air pump
work if there is no raw material in the hopper,
if not so, it will cause the gear to wear out.
Air pump screw
When installing, please make sure that it is
flush between the gear and the main body
of the air pump. Do not tighten the lock nut
one by one, both two sides should be
tightened together slowly.
Hole position
How to use the air pump (Applicable to air pump model)
6*
Usage occasion
●
The air pump can stably and continuously transport the
raw materials to the refrigerating cylinder, to maintain the
stability and sustainability of the ice cream discharging.
Adjust the gear stage of the air pump according to the
business conditions. (Please refer to the following figure for
adjusting the gear stage)
●The current hole position can be identified by checking the
number on the feed regulator which is exactly in front of the
air pump cover“dot”.
●
●It can be used for special ice cream overrun request (resulting in
the highest overrun).
Pre-cooling function
●Normal sales occasions
In Normal sales occasions, it can be used to ensure that the raw
material supplement can keep up with the amount of ice cream
discharging in the morning when the business starts with normal
traffic.
●Normal sales occasions
It ensures a large amount of raw materail flowing into the cylinder.
Big hole positions are needed to ensure that the thick material of
poor fluidity can be added into the cylinder.
First gear
Second gear
Third gear
Fourth gear
Hopper
Precaution
If the cylinder makes abnormal noise, adjust the air pump to the fourth gear or check if material
spraying from the pump body or not.
●Disinfect hands or wear gloves before touching the air pump.
●Choose the hole position based on sales volume. Otherwise, the ice cream will be too soft or too
hard when discharging out.
●
●
●
17
1
2
3
4
Inlet tube
Inlet tube o-ring Pressure
relief device
Air pump nut
Pressure relief
device o-ring
Gear Air pump o-ring
Feed regulator
(Applicable to air pump model) Ice cream making process
1
Before pouring the material, make sure that the storage hopper does not
have any water remaining.
1
2
Prepare 5L raw materials
Caution: Do not pour anything other than water or raw materials, otherwise, it will cause failure
for the equipment. Make sure that the hopper does not have any water remaining before pouring
the material.
Raw material
Pour the raw materials into the hopper , ensure that the raw material level exceeds the level meter
2
Precaution
Do not fill the cylinder with material completely.
Install the air tube when there is no bubbles
coming from the blanking hole any more to
ensure that the ice cream produced has a
stable expansion rate.
3
1
2
If the raw material contains particles such as non-meltable fibers,
please contact with PASMO.
18
Making ice cream
4
Press START button to make ice cream. When screen shows
'PRODUCT IS READY',it means the ice cream is ready and
you can discharge the ice cream.Please adjust the air tube
to small or medium hole,or adjust the hole position
according to the passenger flow.
(* Applicable to gravity model)
If the raw material is thick, adjust the air tube to the
medium or large hole.
3
The air tube should be in the status of closed hole.
Stop the material from flowing into the cylinder through
the feed downpipe so as to ensure that mixture quantity
in the refrigeration cylinder is fixed.
Place the hopper cover to prevent foreign objects from
falling into the hopper. The mix low alarm on the screen
will stop flashing when the material level higher than the
level meter
Air tube installation
Close hole
Air tube
Hopper cover
Blanking hole

Ice cream making process
1Prepare 5L raw materials
2
3
After installing the air pump and the feeding tube ,
adjust the air pump to 2nd gear.
1
Place the hopper cover to prevent foreign matter from
falling into the hopper. When the material exceeds the
level meter, the indicator on the screen will stop
flashing.
2
Install the air pump and feeding tube
Feeding tube
Hopper
Blanking hole
19
Making ice cream
4
Press the [START] button to wait for the ice cream to be ready.
When the screen shows "Product is ready", it indicates that the
current ice cream has been formed and you can discharge ice cream.
Adjust the gear of the air pump according to the traffic to prevent
the frozen cylinder.
(* Applicable to air pump model)
Raw material
Do not fill the cylinder with material completely.
Install the air tube when there is no bubbles
comes from the inlet hole any more to ensure
that the ice cream produced has a stable
expansion rate.
Pour the raw materials into the hopper , ensure that the raw material exceeds thelevel meter
Precaution
Before pouring the material, make sure that the storage hopper does not
have any water remaining.
1
2
Caution: Do not pour anything other than water or raw materials, otherwise, it will cause failure
for the equipment. Make sure that the hopper does not have any water remaining before pouring
the material.
If the raw material contains particles such as non-meltable fibers,
please contact with PASMO.
Air pump
If the raw material is thick,please adjust the air pump
to 3rd or 4th gears.
3
Daily operation
20
(* Applicable to gravity model)
●Sterilize and wash three times a week.
Washing of equipment accessory
●Turn off the power supply.
Installation of equipment accessorie
Quantity requested for raw material
Few raw materials remaining in the hopper. (Lower than the level meter)
●Discharge out the remaining ice cream and mixture.
●Wash equipment and accessories.
Excess materials remaining in the hopper.(Higher than the level meter)
●
●Wipe the remaining material on the hopper wall upon the material level and
start the pre-cooling function.
Operation of the next day
●Please refer to Page 22-24 for the detailed operation after the equipment
washing.
●Turn on the heating function if the machine being kept under precooling
function last night. Start “Wash”function for 3-5mins after heating function
stops automatically and then press “Start”to produce ice cream again.
Ice cream refrigeration and making
Close of business
●The air tube should be in closed status.
●We need to open the hole position of the air tube to the medium hole or small
hole when the sentence“Product is ready”shows.
●Discharge ice cream.
Pour enough material to make the level higher than the level meter.
●
* Notes: Few mixture will reduce the effcet of pre-cooling function.
Air tube is adjusted to the closed hole.

Daily operation process
●
●
●
●
●
●
●Turn on the heating function if the machine being kept under precooling
function last night. Start “Wash”function for 3-5mins after heating function
stops automatically and then press “Start”to produce ice cream again.
●Adjust air pump to the 2nd, to start refrigeration.
●When 'PRODUCT IS READY' shows on the screen,it means the ice cream is
ready and you can discharge the ice cream.
●
21
(* Applicable to air pump model)
1
2
3
4
5
●
●
●
WASH STOP
含氯消毒粉
22
Sterilize and wash three times a week.
Washing of equipment accessory
Turn off the power supply.
Installation of equipment accessorie
Quantity requested for raw material
Pour enough material to make the level higher than the level meter.
Few raw materials remaining in the hopper. (Lower than the level meter)
Discharge out the remaining ice cream and mixture.
Wash equipment and accessories.
Excess materials remaining in the hopper.(Higher than the level meter)
Wipe the remaining material on the hopper wall upon the material level and
start the pre-cooling function.
Close of business
* Notes: Few mixture will reduce the effcet of pre-cooling function.
Operation of the next day
Please refer to Page 19 for the detailed operation after the equipment
washing.
Ice cream refrigeration and making
Washing process
Ratio of food-grade disinfectant powder for machine washing and
disinfection.
The ratio is 1:9.5L (1 bag of sanitizer and 9.5L water).
9.5L
water
Install the agitator blade back into the hopper.
Turn on the power switch. Do not press the WASH button if there is no water or raw materials in the cylinder
to prevent the clip scrapers from wearing.
Pour 5L disinfectant water in total into the hopper. Press the WASH key to start the device.
Press the STOP button to stop after working for 1-2 minutes.
Press STOP
after 1-2 mins
Please wash the hopper with the brush and
disinfectant water for 2-3 times.
Small brush
Big brush Medium brush
Agitator shaft
Blanking hole Hopper
Please clean the blanking hole with big brush carefully.
Please wash the level meter with medium brush.
Please wash the agitator shaft with small brush.

9
●
●
Piston
o-ring
6
8
7
23
●
●
冰淇淋系统运营服务商
24
Note: Make sure the air pump is completely disassembled and cleaned
(Applicable to the air pump model)
10*
●Use the wrench in the kit bag to disassemble the pressure relief device and
fixing nut, then clean them.
Note: Make sure the feeding tube is completely disassembled and cleaned
(Applicable to the air pump model)
●Please use the stainless steel fin in the kit bag to remove the automatic pressure
relief valve , then clean it.
11*
Pressure relief device
o-ring
Nuts
Pressure relief device
Wrench
Stainless steel fin
Pressure relief
valve o-ring
Pressure relief valve
Press the handle down to discharge the disinfectant water.
Fix the contraction band of the drainage box onthe top two nuts of the discharge door.
Please discharge the remaining disinfectant water in the equipment by using the drainage box.
2M drain pipe
The pipe directly
connects to the
sewer
Drainage box
Please pour a proper amount of clean water into the hopper after the discharge of disinfectant
water and repeat the above steps for 2 to 3 times.
Please disassemble the drainage box after drainage and wipe inner drainage box clean with a towel
and keep it in a cool place.
Please wipe the refrigeration cylinder and hopper with a clean towel.
Make sure to turn off the power supply to avoid unnecessary safety hazards for the part washing.
Please remove the piston O-ring by using stainless steel fin in the accessory kits.
Pleas wash the piston groove with a small brush.
Small brush
Stainless steel fin
Table of contents
Other Pasmo Ice Cream Maker manuals