2 3
WARNING
For your protection please read the following:
Water and moisture: Electrical devices should not be used near water ( as per example,
near a bathtub, washbasin, kitchen sink, laundry tub, wet basement or swimming pool ).
Care should be taken such that objects do not have the opportunity to fall, and that liquid
is never spilled onto or into the device enclosure through openings.
Power Sources: An electrical device must be connected to a mains power source in strict
accordance with the supplied product owners manual. Please verify that the mainsAC
voltage specified in the product manual matches those requirements indicated on the unit
and the voltage provided to your location by the power company.AC
Grounding: Adequate precautions should be taken so that the grounding provisions built
into an electrical product are never defeated.
Power Cords: Pass Labs provides a power supply cord that meets all legislated
requirements for the market in which the product was originally sold. If you choose to
substitute an after-market product we urge you to choose one that is fully safety rated by
the necessary local authority.
Power Cord Protection: Power supply cords should be routed so that they are not likely
to be walked on, abraded, or pinched by items placed on or against them, paying particular
attention to cords where they enter plugs or exit from a device. Never under any
circumstance insert a cut or damaged power cord into a mains power socket.
Power and Signal: Cables should never be connected / disconnected with equipment
powered up. Failure to heed this warning may damage or destroy equipment.
Ventilation: Power-amplifiers run hot, but you should be able to place your hands on
them without discomfort. You must allow for this heat in installation, by providing for
free air circulation around the product. Electronics should not be subjected to sources of
excessive radiant heat. Excessive heat can shorten the life of the product and may cause
the electronics to self protect and shut down.
Servicing: To reduce the risk of fire, electrical shock or other injuries, the user should not
attempt to service the device beyond that which is described in the operating instructions.
All other servicing must be referred to qualified service personnel.
For Units With Externally Accessible Fuse Receptacle: Unplug the device from all
sources of power before changing or inspecting any fuse. Replace fuse with one of same
physical size, type and rating as that specified by the manufacturer for that product.
Quick set-up
1) Place the X Phono control anywhere you wish, keeping in mind that you will want thes
wiring from the phono cartridge to the X Phono as short as possible.s
2) Place the X power supply as distant from the control and any low level signals
components as is practical. Most low level components and their interconnects benefit
from electrically quiet environments.
3) If you're thinking of plugging the power supply into the wall, don't!
DO THIS FIRST:
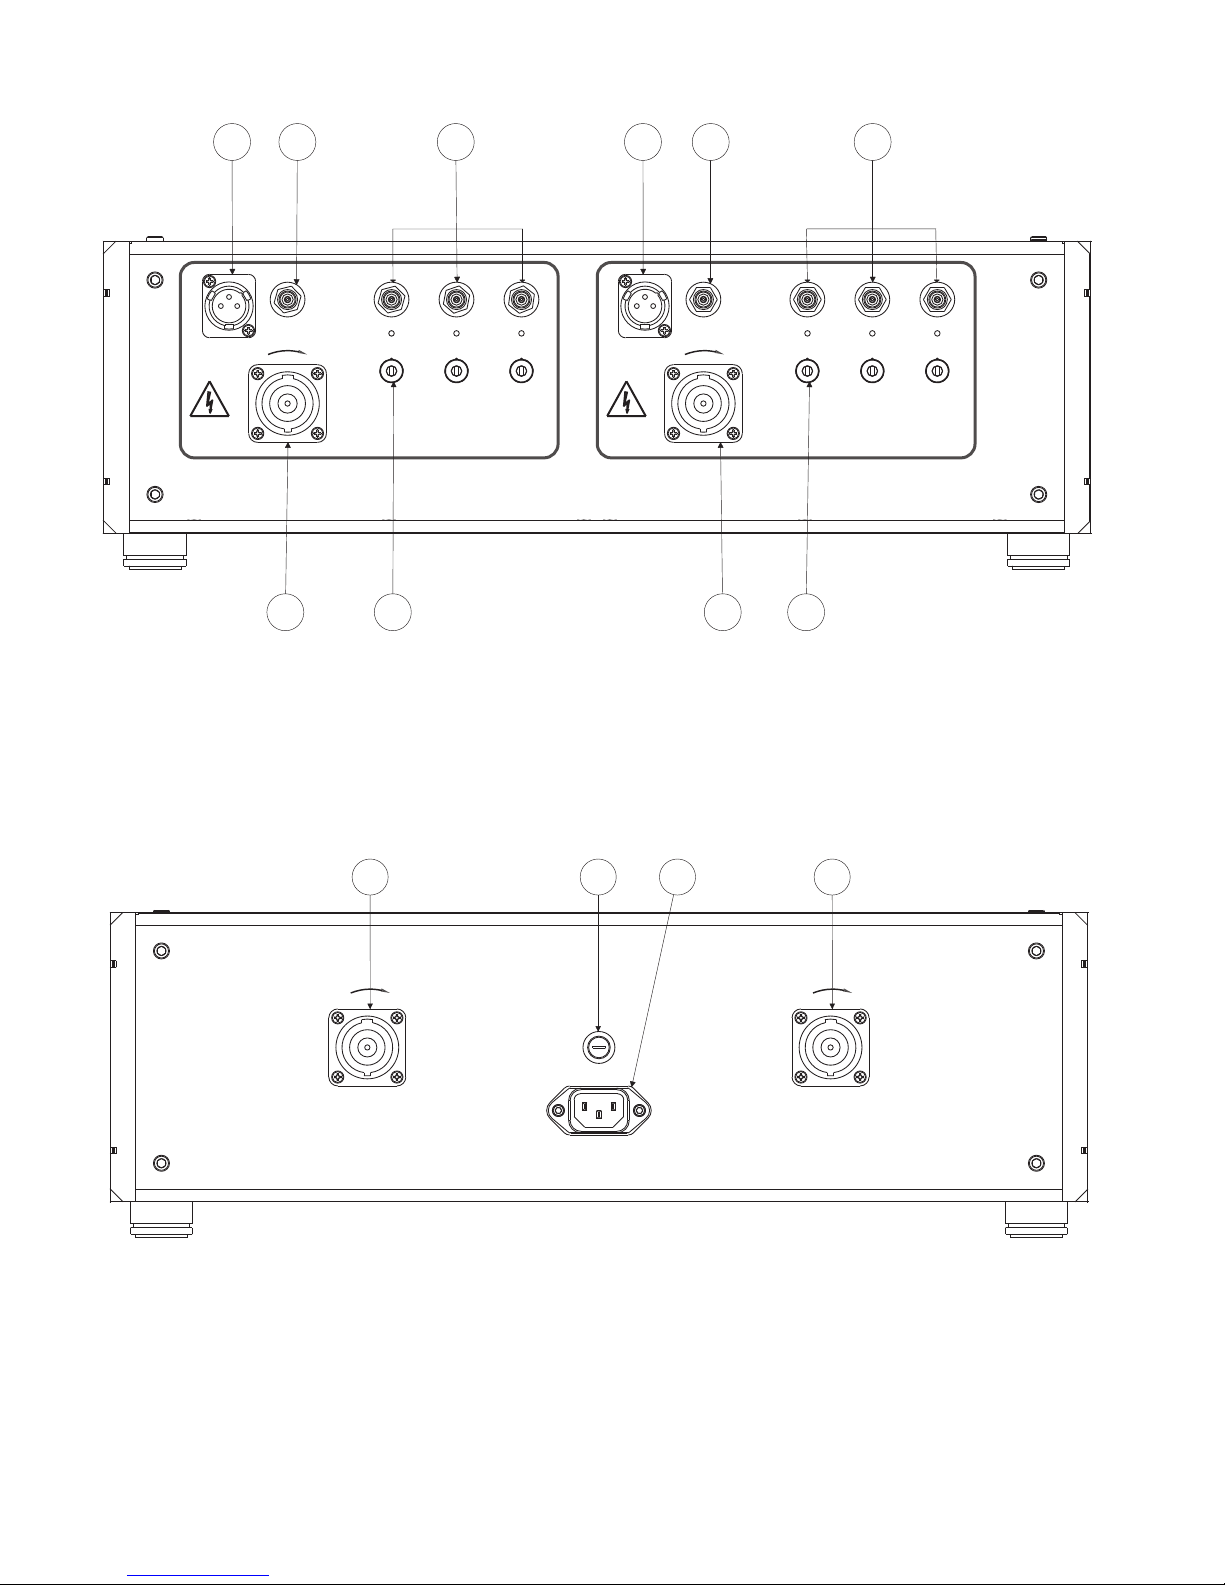
a) Connect the two Powercon ™cables to the power supply chassis. ( 4, #1, #4)FIG
Turn the connector clockwise till they click into place and lock (1/8 turn to the right)
b) Connect and the other ends of the cables to the gain chassis ( 2, #11, #13)FIG
Turn the connector clockwise till they click into place and lock (1/8 turn to the right)
c) There is no particular preference for which power supply socket feeds either gain chassis
socket, as long as both are connected.
4) Now you can plug the cord into the supply (Fig 4 #3) and the supply into theAC AC
mains.
5) , it takes upwards of a minute for the system to come up and perform variousWAIT
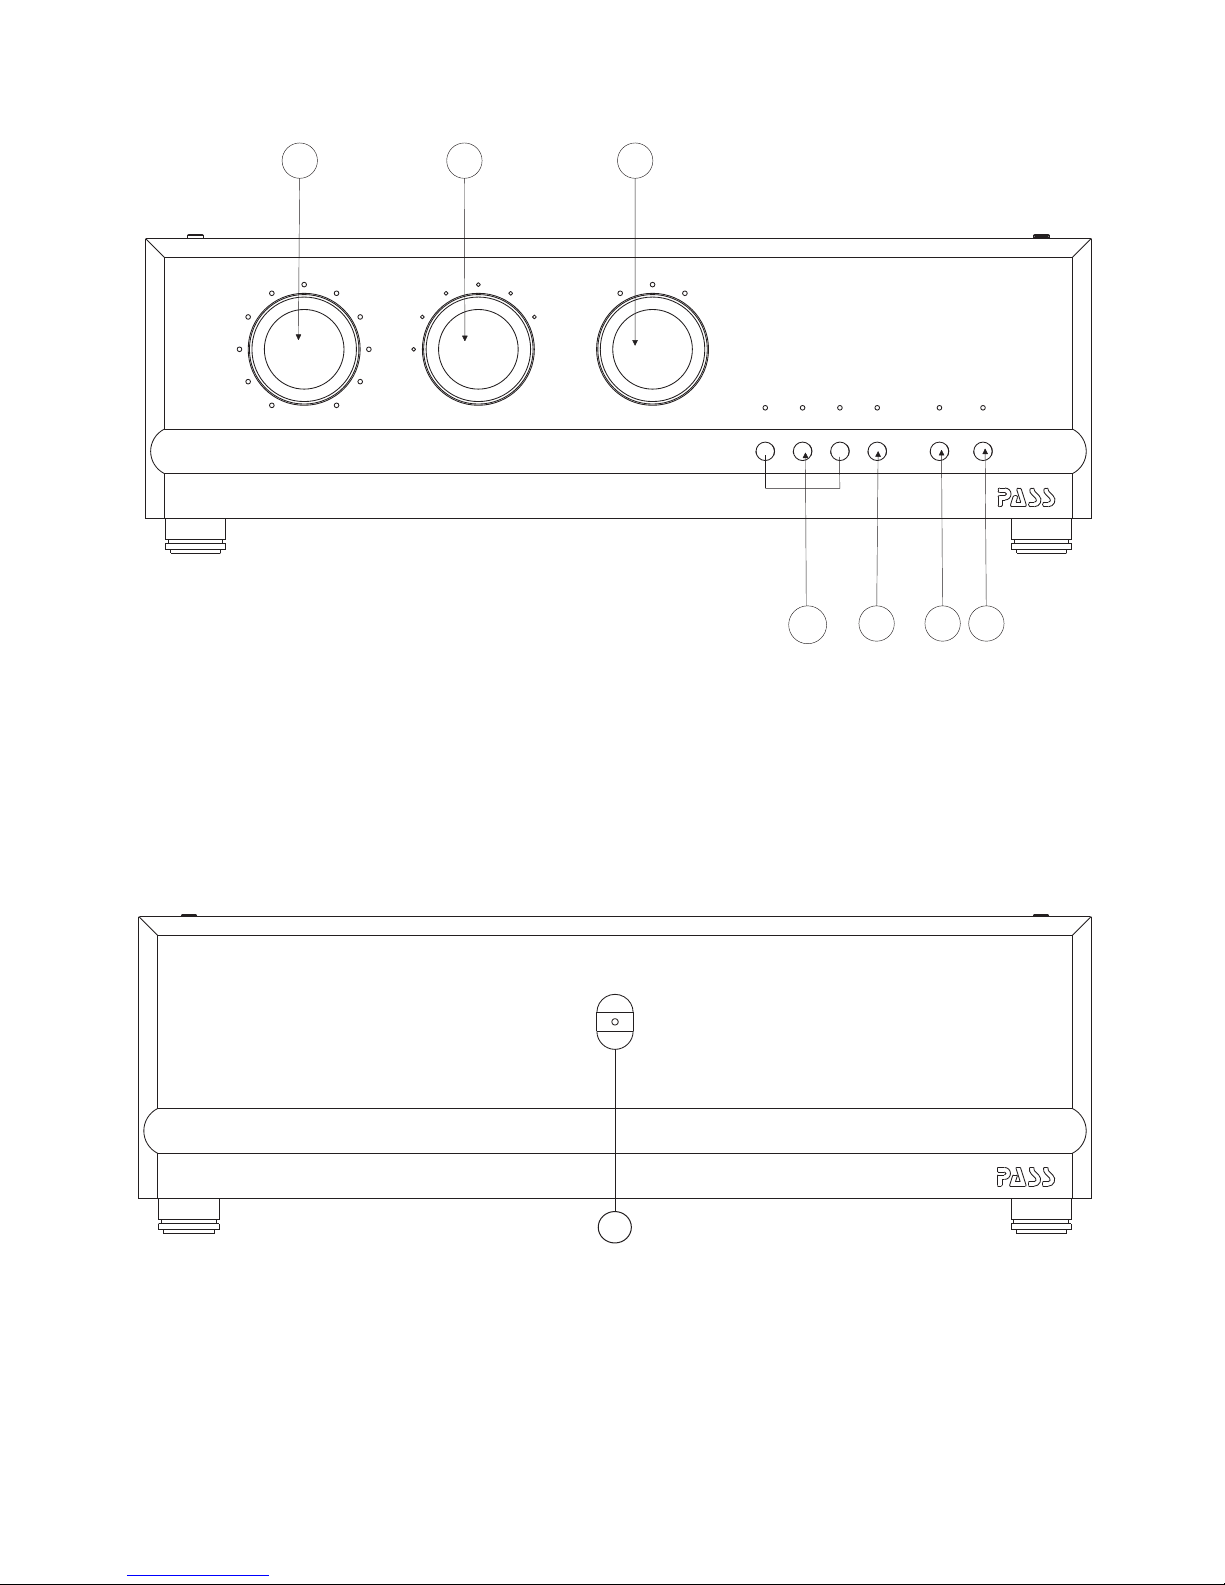
housekeeping functions. When ready, the mute will go out. ( 1, #7)LED FIG
6) Connect the X Phono to your preamp, and the turntable to your X Phono.s s
a) Select an input ( 1, #4)FIG
b) Select Gain ( 1, #3)FIG
c) Select Resistive Load ( 1, #1)FIG
d) Select a Capacitive Load ( 1, #2)FIG
7) Now go listen
Now go about refining your cartridge loading options
When you're done, select "save" from the front panel ( 1, #5)FIG
8) Sonically the Xs Phono will be good right out of the box but it will get better as it
warms up. This can take a few days. Once it does, revisit your cartridge loading selection.
If you need help, call us.