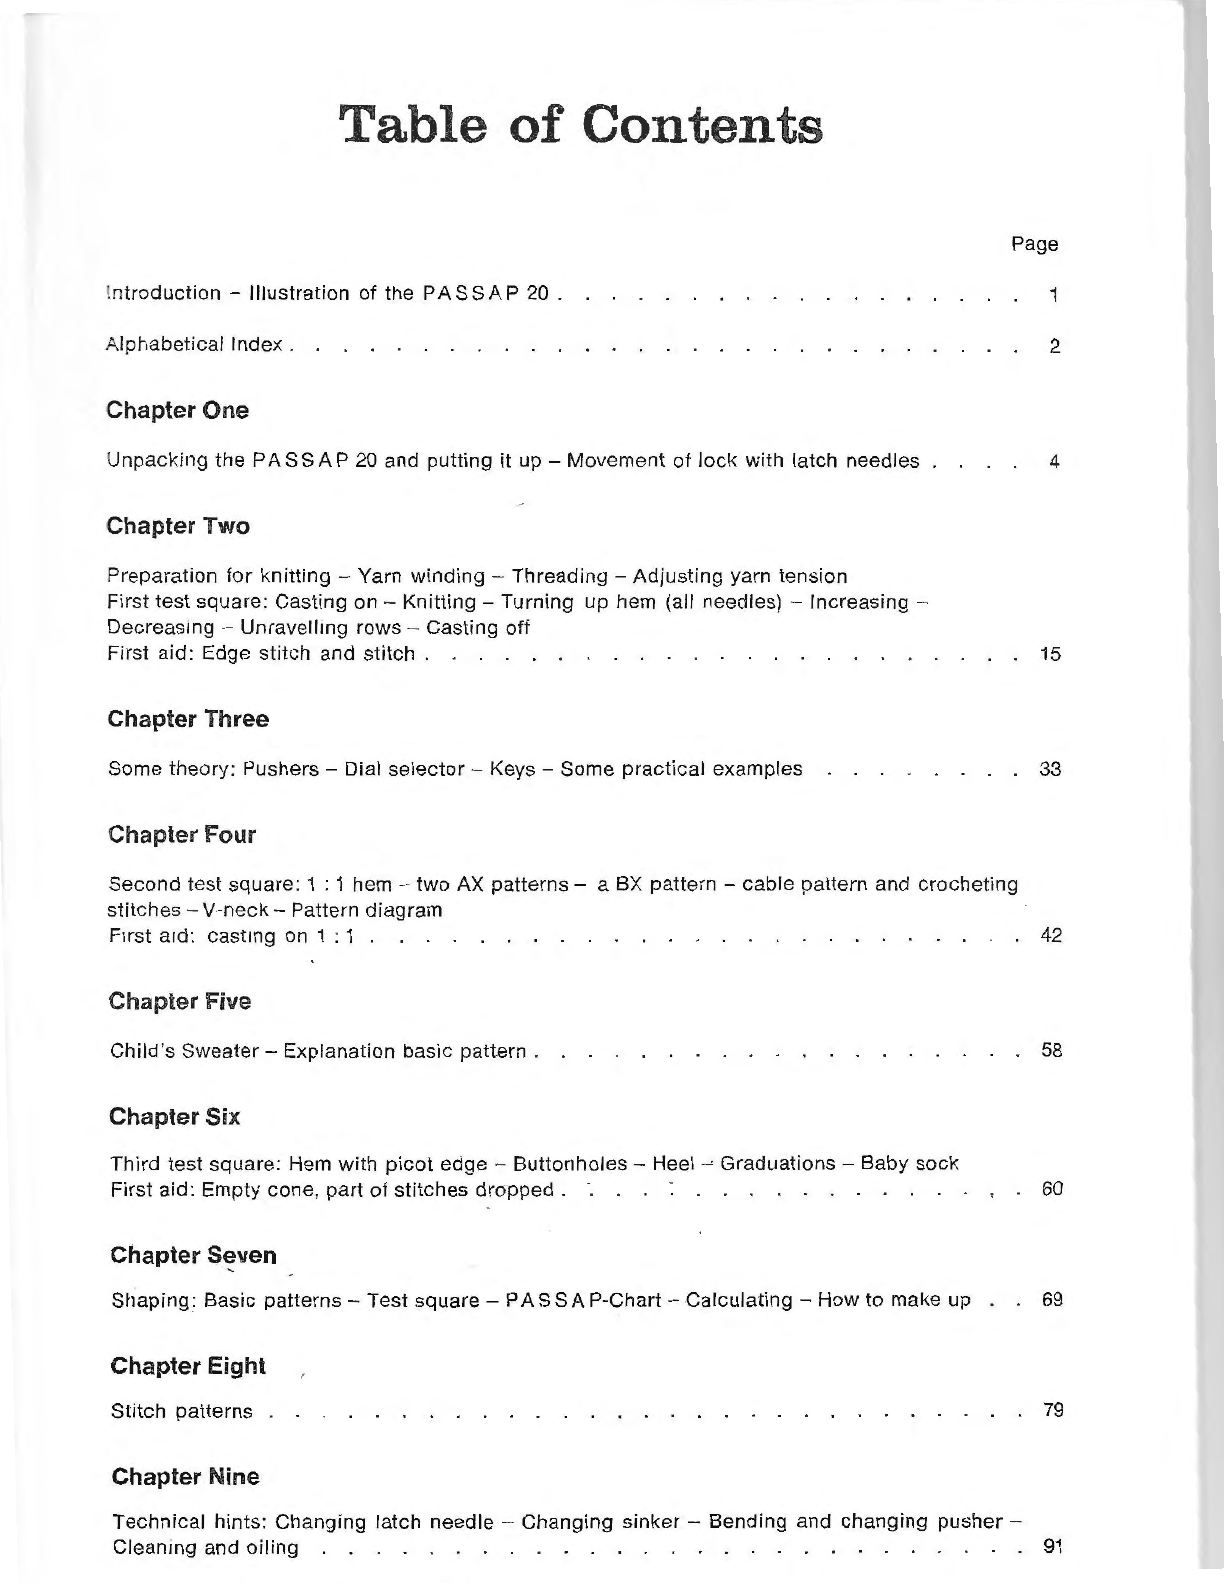
Table
of
Contents
I
nt
roduct
ion -Ill
us
tration
of
the P
ASS
A P 20 .
Alphabetical Inde
x.
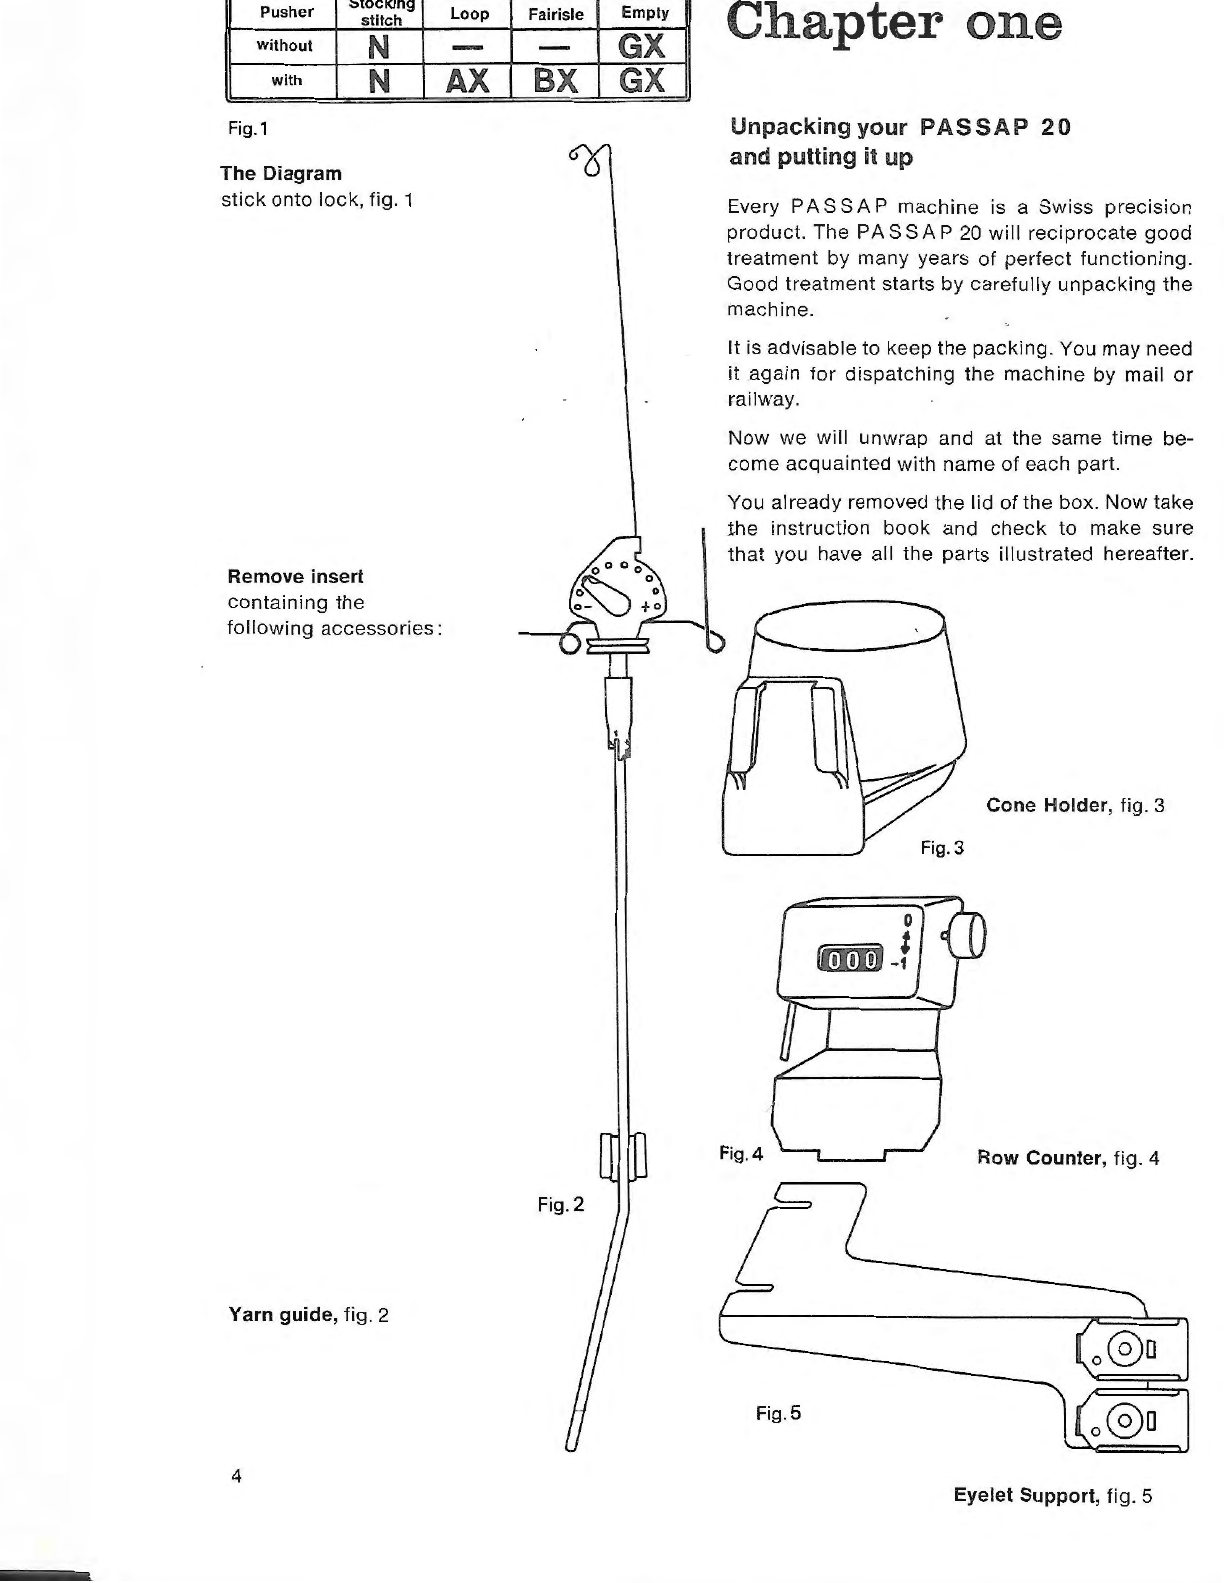
Chapter One
Un
packing
the
PASS
A P
20
and
putting
it
up
-Movement
of
lo
ck
with
latch
needles
Chapter
Two
Preparation
fo
r knitting -Yarn winding - Th
reading-
Ad
justing yarn tension
First
test
square: Casting on -
Knitting-
Turning
up
hem (all needles) - Increasing -
Decreasmg -
Unr
avelltng rows -Casting o
ff
First aid: Edge stitch and
stitch
.
Chapter Three
Pa
ge
1
2
4
. . .
15
Some theory: Pushers -Dial selector -Keys -Some
pra
ctical examples . . . . . . . .
33
Chapter Four
S
econd
test square: 1 : 1 hem -
two
AX
patterns-
a
BX
pattern -cable pattern and
crocheting
st
itches - V-ne
ck-
Pattern diagram
F1
rst a
1d:
casttng on 1 : 1 . . . . . . . . . . . . . . . . . . . . . . . . .
42
Chapter Five
Chi
ld's
Sweater-
Explanation basic pattern . . . . . . . . . . . . . . . . . . .
58
Chapt
er
Six
Th
ird
te
st
square: Hem with
picot
edge ·- Buttonholes - Heel
_,
Graduati
ons-
B
aby
sock
First aid: Empty
co
n
e,
part
of
s
titches
dropped . . . . . . . . . . . . . . . . .
60
Chapter
SE!ven
Shapin
g:
Basic patterns - T
est
square -
PASS
A P-C
hart
-
Ca
lculating - H
ow
to
make up . .
69
Chapt
er
Eight
St
it
ch patterns . . . . . . . . . . . . . . . . . . 79
Chapt
er
Nine
Tec
hnic
al
hint
s: Changing latch needle - Chang
ing
sinker - Bending and changing
pusher
-
Cl
ea
ntng
an
d oiling . . . . . . . . . . . . . . . . . . . . . . . . . . . 91