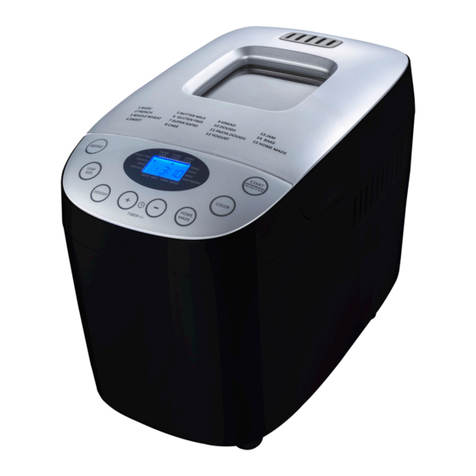
Paula Deen MBF-013 User manual

BREADMAKER
Instruction Manual
MODEL MBF-013
1

Meet Paula Deen
Culinary icon Paula Deen is a self-
made entrepreneur who learned
her savory secrets from her
grandmother. She started her
career in the food industry with a
small catering company called The
Bag Lady, but business quickly
outgrew her home kitchen. Taking
a leap of faith, she opened her first
restaurant, The Lady and Sons,
which has since become a tourist
hot spot in Savannah, GA. With
her huge personality, delectable
recipes and heart of gold, Paula
next found herself in talks with TV
execs after a friend introduced her
to some influential people in the
business. The rest, as they say, is
history.
In addition to her television
success, Paula has sold more
than 11,000,000 copies of her 14
cookbooks and launched the
Paula Deen Network, an
interactive digital portal that
combines cooking, lifestyle and
game shows with great recipes,
meal-planning tools and more.
2

Catulatis!
There is nothin’ like fresh baked bread. It has a way of elevating the simplest sandwich
to something more thoughtful and more delicious. In my house, we make fresh bread
just about every day and use it for French toast, sandwiches, croutons, and soakin’ up
our extra sauces and gravies.
Because I love fresh bread, I’m thrilled to offer my very own Paula Deen Bread Maker. I
love it because it comes with 16 preset settings. including settings to make your basic
bread, French bread, gluten-free bread, and even cake! If you just need it to knead your
dough, it can do that, too. I’m tellin’ y’all the options are nearly endless!
If you’re like me and follow a tight schedule, you’ll love that it has a delayed timer in
case you don’t want to start bakin’ right away. Maybe you want that fresh-out-the-oven
bread come dinnertime. It can start while you’re at work. Another fantastic feature?
Well, this bread maker lets you make three different loaf sizes. This is great for empty
nesters, like Michael and me, who never seem to have an empty nest. Whether we’re
eatin’ just the two of us or the whole family is comin’ over, we’ve got options.
I think the very best thing about my bread maker and what sets it apart from so many
others is how completely customizable it is. I already mentioned the loaf size, but you
can also adjust the color of the bread if you like it a little darker or a little lighter and
create your own settings for your personal recipes. Good gravy, you can even make
homemade jam, yogurt, and pasta dough in this do-it-all bread maker!
My new bread maker has really lifted mealtime to something extra special. I just have to
thank you for your purchase, and I know it will do the same for you. I know y’all will
absolutely love this product and the fresh bread and goodies it makes. Happy bakin’!
Love and best dishes,
3

PARTS IDENTIFICATION
4
*Please locate all parts before throwing away the box.
FRUIT DISPENSER
The fruit dispenser can be used for fruit, chocolate chips, nuts, etc.
disbursed throughout the cooking process. TO USE: Fill desired
ingredients inside the flat side of the fruit box that says Fruit. The fruit
box attaches to the inside with the ridged side facing the bread pan as
shown on the chart above before you begin cooking. The cake, knead,
dough, and yogurt function do not work with the fruit dispenser.

IMPORTANT SAFEGUARDS
When using electrical appliances, basic safety
precautions should be followed as follows:
• Read all instructions.
• Do not use for anything other than intended use.
• Do not leave the appliance unattended during operation.
• Do not place the unit on or near gas or electric cooktops or ovens to avoid
damages.
• Place the unit on a level surface away from walls and cupboards . Do not let the
cord hang over the edge of a table or counter or touch hot surfaces.
• Close supervision is necessary when any appliance is used by or near children.
• Keep hands, hair, clothing, and utensils away from the moving parts while in use
as to avoid injury and damage to the unit.
• Unplug unit from outlet before cleaning and clean after every use.
• Do not use unit with an extension cord, always plug into a wall outlet.
• To prevent electrical shock do not immerse cord, plugs or appliance in water or
other liquid.
• Do not let cord hang over the edge of a table or counter or touch any hot
surfaces.
• Do not operate any appliance with a damaged cord or plug or after the appliance
malfunctions, or is dropped or damaged in any manner.
• Do not use outdoors.
• The use of unauthorized attachments is not recommended by the appliance
manufacturer, this could cause injuries or damage to the unit.
• Never switch on the appliance without properly placed bread pan filled
ingredients.
• Before use, check that the voltage of the wall outlet corresponds to the one
shown on the rating label.
• Do not touch hot surfaces, always use handles and oven mitts when handling the
bread pan after baking.
• Do not place hands on window while the unit is in use.
• Avoid contact with moving parts during operation.
• To disconnect, turn OFF, the remove plug from wall outlet.
• The appliance is not intended to be operate by means of an external timer or
separate remote-control system.
• This appliance has a polarized plug (one blade is wider than the other). To reduce
the risk of electric shock, this plug will fit in a polarized outlet only one way. If the
plug does not fit fully in the outlet, reverse the plug. If it still does not fit, contact a
qualified electrician. Do not modify the plug in any way.
5
SAVE THESE INSTRUCTIONS.

CONTROL PANEL
6
MENU: Press MENU button to select desired program.
LOAF: Press LOAF SIZE button to select desired loaf size (Note: There are no loaf sizes on programs 1-9). The three
sizes are 1.0lb, 1.5lb. and 2.0lb.
+ & -: These are for delay purposes and setting the time on certain functions. Programs 1-7, 9-11 already have a set
time. To set the delay timer, press the + or - to delay time. The time goes in 10 minute increments, once desired time is
choose press START. Note: It is not suggested to use the delay timer with recipes that include perishable ingredients
such as eggs or milk. Program 12 it can be adjusted in 10 minute increments, 14 can be adjusted in 1 minute
increments, and 16 can adjust the time in 5 minute increments.
COLOR: Press COLOR to select light, medium or dark bread. (Note: There are no color choices on programs 9–13, 16).
START/ PAUSE/ STOP: Press START once all desired settings are chosen to start cooking. To pause the cooking
process at any point press PAUSE, the time will blink on the screen. To completely stop the cooking process hold down
STOP. The screen will display default program 1 and 3:11.
FUNCTIONS 1-7: Select these functions for making different types of bread. Each is preset for the type of bread listed.
FUNCTION 8: This function is for making cake.
FUNCTION 9: This function is for just kneading.
FUNCTION 10: Select this function when making dough such as pizza dough.
FUNCTION 11: This function is specially designed to make pasta dough.
FUNCTION 12: Use this function to make homemade yogurt.
FUNCTION 13: Use this function with the kneaders to make homemade jam.
FUNCTION 14: This is a general bake function that can be used for cakes or other baking needs.
FUNCTION 15: Use this function to customize a personal recipe. See page 11 for more directions.
FUNCTION 16: This function is used to make ice cream. (Ice cream accessory sold separate.)

COOKING CHART
7
SETTING
COOKING
TIME 1.0LB
COOKING
TIME 1.5 LB
COOKING TIME
2.0 LB
STIRRING ROD
INSTALLED
AUTO KEEP
WARM
(60 MINS.)
1. BASIC
3 hours 6
mins.
3 hours 11 mins.
3 hours 16
minutes
YES
YES
2. FRENCH
3 hours 9
mins.
3 hours 19 mins.
3 hours 24 mins.
YES
YES
3. WHOLE
WHEAT
3 hours 8
mins.
3 hours 18 mins.
3 hours 23 mins.
YES
YES
4. SWEET
2 hours 54
mins.
2 hours 59 mins.
3 hours 4 mins.
YES
YES
5. BUTTER
MILK
2 hours 59
mins.
3 hours 6 mins.
3 hours 13
minutes
YES
YES
6. GLUTEN
FREE
2 hours 50
mins.
2 hours 55 mins.
3 hours
YES
YES
7. SUPER
RAPID
1 hour 33
minutes
1 hour 38 mins.
1 hour 43 mins.
YES
YES
8. CAKE
n/a
n/a
1 hour 33 mins.
YES
NO
9. KNEAD
23 minutes
n/a
n/a
YES
NO
10. DOUGH
23 mins.
n/a
n/a
YES
NO
11. PASTA
DOUGH
1 hours 24
mins.
n/a
n/a
YES
NO
12. YOGURT
8 hours
n/a
n/a
NO
NO
13. JAM
1 hour 5
mins.
n/a
n/a
YES
NO
14. BAKE
10 mins.
n/a
n/a
NO
NO
15. CUSTOM
MODE
n/a
n/a
n/a
YES
YES
16. ICE
CREAM
20 mins.
n/a
n/a
NO
NO
Please note: For functions 1-7, 9-11 the time can only be set
for the delay timer. For functions 12, 14, 16 the time can be
adjusted.

BEFORE FIRST USE
1. Remove all packaging materials. Locate all parts
before throwing the box away.
2. Clean the pan and attachments with hot water,
dishwashing liquid, and a non-abrasive sponge.
3. Wipe the inside and outside of the appliance with a
clean cloth.
USING THE APPLIANCE
1. Insert the bread pan into the unit, make sure it locks in
place or the unit will not work. For bread making, insert
the stirring rod by aligning the square side on the shaft
in the bread pan then press down.
2. Add ingredients into the bread pan. Be sure to properly
measure all ingredients for best results. Before adding
yeast, make a small indentation on the top of the flour
with your finger, then add the yeast so that it does not
come into contact with salt or liquids. Please reference
below image for how to load ingredients into the bread
pan for best results.
3. Plug the appliance in. The screen will default to
program 1, showing 3:11.
8
!

USING THE APPLIANCE CONTINUED
4. Press MENU to select desired preset function or if
making homemade bread press Custom Mode and
set to desired preferences (See page 11 for more
details on Custom Mode).
5. For functions 1-7, select loaf size by pressing LOAF
SIZE. There are three different options: 1.0lb.,
1.5lb., and 2.0lb.
6. For functions 1-8 and 14-15, select the color of the
bread. Select the color by pressing COLOR. There are
three different options: LIGHT, MED., DARK.
7. If desired then set the delay timer (See page 6 for
more information on the timer). Please note that the
time is already preset on functions 1-7, 9-11 and does
not need to be set. This step can be skipped if no
delay timer is needed. Functions 12, 14, 16 can have
the time adjusted.
8. Press the START button to begin the cooking process.
The stirring rod will begin to knead and the colon
between the minutes and hour will flash.
9. Once the cooking time is complete, the unit will beep
once and will go into KEEP WARM mode for one hour.
If keep warm is not desired, press the START button
for three seconds and this will cancel the KEEP WARM
mode. Note: The bread will continue to darken during
the KEEP WARM mode due to the temperature of the
bread, if this is not desired it is highly recommended to
cancel KEEP WARM.
9

USING THE APPLIANCE CONTINUED
10. Let the bread cool for about five minutes and then
remove the bread pan by twisting it up from the unit.
Always use oven mitts when handling the bread pan.
Unplug the unit once the bread pan is removed.
CAUTION: The bread pan will be extremely hot after
cooking.
11. Using oven mitts (not included), turn the bread pan
upside down with the bread pan handle folded down
onto a cooling rack or a clean cooking surface, gently
shake until the bread is released.
12. The bread should cool for about 20 minutes after it is
removed from the baking pan then can be sliced.
Note: If the stirring rod remains in the bread remove
with the hook. Do not use your hand to remove the
stirring rod as they are extremely hot.
10

CUSTOM FUNCTION:
This function is for personal recipes. To customize this
function press 15. Then select how long for KNEAD 1
using the “+” or “-“, once the desired time is selected press
LOAF then repeat the same process for REST 1, KNEAD
2, FERMENT 1, FERMENT 2, FERMENT 3, BAKE, and
KEEP WARM. Once the times are set select the color of
the bread by pressing COLOR, when desired color is
selected press START. This function can be used to make
any personal recipes by customizing each function to a
specified time. Each function does not need to be used if it
is not necessary for the recipe, simply set the time at 0. It
is the only bread function that can customize the time, see
chart below for ranges for each function.
TROUBLESHOOTING
11
FUNCTION
TIME RANGE
Knead 1
0-30 mins.
Rest 1
0-30 mins.
Knead 2
0-30 mins.
Ferment 1
0-120 mins.
Ferment 2
0-120 mins.
Ferment 3
0-120 mins.
Bake
0-120 mins.
Keep Warm
0-60 mins.

12
PROBLEM
CAUSE
SOLUTION
Odor or burning smell.
Ingredients have spilled into
the baking chamber.
Stop the bread maker and
allow to cool completely. Wipe
excess ingredients from the
chamber with a paper towel.
Control panel displays “HHH”.
Internal temperature of bread
maker is too high.
Allow unit to cool down in
between programs. Unplug
unit, open lid, and remove
bread pan.
Control panel displays “EE0”
or “EE1”.
Defect with sensor.
Call Customer Care at
312-526-3760.
Dough is not blending
thoroughly; flour and other
ingredients are built up on
sides of pan; bread loaf is
coated with flour.
Bread pan or stirring rod may
not be installed properly. Too
many ingredients.
Make sure bread pan is
securely set in unit and
stirring rod are firmly on shaft.
Make sure all ingredients are
measured accurately and
added in the proper order.
Bread rises too high.
Ingredients not measured
properly. Too much yeast,
flour. Forgot to add salt.
Make sure all ingredients are
accurately measured for best
results. Decrease amount of
yeast by 1/4 teaspoon.
Bread does not rise.
Ingredients not measured
properly. Lifting lid during
baking.
Make sure all ingredients are
accurately measured for best
results.
Crust color is is too light.
Opening the lid during baking.
Do not open the lid during
baking. Select a darker crust
option.
Crust color is too dark.
Too much sugar in the recipe.
Decrease sugar amount
slightly. Select a lighter crust
option.

CLEANING
Always unplug the unit before cleaning. Clean the pan
and attachments after each use. If the stirring rod is still in
the bread pan, use the hook to remove it since it will still
be hot. To clean the pan and attachments hand wash with
water, non-abrasive liquids and a sponge, dry with a soft
cloth. To clean the unit, wipe with a dry cloth.
STORAGE
1. Unplug the cord from the wall outlet.
2. Make sure all parts are clean and dry.
LIMITED ONE YEAR WARRANTY
13

This warranty covers all defects in workmanship or materials in the electrical parts,
arising under normal use and care in this product for a period of one year from the date
of purchase and all other parts for one year provided you are able to present a valid
proof-of-purchase. A valid proof-of-purchase is a receipt specifying item, date
purchased, and cost of item. A gift receipt showing item and date of purchase is an
acceptable proof-of-purchase. Product is intended for household use only. Any
commercial use voids the warranty.
This warranty covers the original retail purchaser or gift recipient. During the
applicable warranty period within normal household use, we will repair or replace, at our
discretion, any mechanical or electrical part which proves defective, or replace unit with
a comparable model. Shipping and handling costs are not included for warranty
replacements and are the responsibility of the customer.
To obtain service under the terms of this warranty, call our customer care department
at 312-526-3760 (Monday- Friday 10am-6pm CST), or send an email to
this page when contacting us.
THIS LIMITED WARRANTY COVERS UNITS PURCHASED AND USED WITHIN
THE UNITED STATES AND DOES NOT COVER:
• Damages from improper installation.
• Non electrical parts after 60 days.
• Damages in transit.
• Defects other than manufacturing defects.
• Damages from misuse, abuse, accident, alteration, lack of proper care
and maintenance, or incorrect current or voltage.
• Damage from service by other than authorized dealer or service center.
• Shipping and handling costs.
• This warranty gives you special legal rights and you may also have other
rights to which you are entitled which may vary from state to state.
Manufacturer does not assume responsibility for loss or damage for return
shipment. We recommend that you keep your original packaging should you require
repair service. Before returning product please contact our customer care department
for return authorization. When returning product for repair please include your full name,
return address, and daytime phone number. Also include a brief description of the
problem you are experiencing and a copy of your sales receipt or other proof of
purchase in order to validate warranty status.
MODEL BM8901
14
Table of contents
Other Paula Deen Bread Maker manuals
