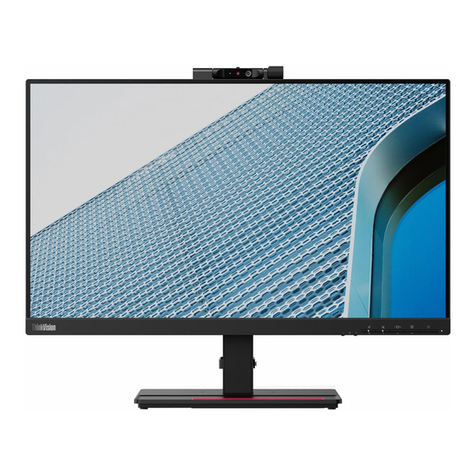
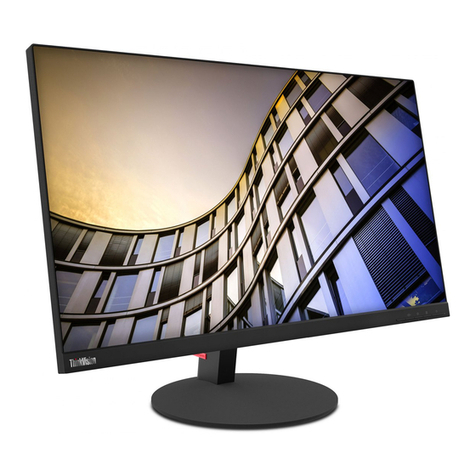
PcCom Elysium PRO 27 User manual


Elysium
PCC-27165IPS-FQHD

WARRANTY
Dear customer,
We apologize if your product is not working as expected or it has a manufacturing problem. Our authorized agent will
repair, replace, refund or provide replacement parts for the product according to the warranty conditions.
The warranty begins on the day of purchase of the product from an authorized dealer or through our website. The
warranty period for the laptop is 36 months (12 months warranty for the battery)
Warranty conditions
The warranty conditions are:
• The warranty is valid only upon presentation of the invoice.
• During the time between the contact with the technical service and product reparation, Pc Componentes will
not pay any amount.
• PcComponentes authorizes improvements that the user can make to the equipment without losing the
warranty, such as increased memory or storage. However, PcComponentes will not cover the extension with the
warranty of the device itself, so in case of an incident, the device must be sent with the original parts only.
• If in any incident the device is received at PcComponentes with non-original parts, PcComponentes reserves the
Out of Scope
•
• Damage caused as a result of improper installation or improper electrical connection.
• Aesthetic damage (such as scratches, chipping, etc.) arising from use.
• Damage caused by manipulation by the user and/or unauthorized technical service.
•
• Loss or damage of data, software or any removable storage media. It is recommended to have a data backup
plan. Please note that PcComponentes may choose to replace the product so any data stored on the original
equipment may be permanently inaccessible.
• Any non-original components of the equipment installed in any upgrades that are made, as well as any
non-original accessories.
• Any software not originally supplied with the equipment.
Product maintenance and problem’s resolution
•
relevant upgrades. Please, maintain the equipment on a regular basis to ensure longevity.
• If a product fails, PcComponentes will identify the cause of the problem and determine if the problem is covered
under warranty. If not, there may be an additional charge for diagnosing the problem as well as troubleshooting.
• It is necessary for the customer to assist in the evaluation of a defective product, PcComponentes may request
some simple manipulation on the product.
To make use of the warranty, please contact with the center where you purchased this product or contact us through our support center:
THE WARRANTY DOES NOT AFFECT THE CONSUMER'S LEGAL RIGHTS INTHE EVENT OF NON-CONFORMITY OF THE PRODUCTS WITH THE CONTRACT.
https://www.pccomponentes.com/soporte/ or QR code >

GARANTÍA
Estimado cliente:
que consulte primero las instrucciones de funcionamiento antes de ponerse en contacto con el servicio técnico.
Le pedimos disculpas si su producto es defectuoso o tiene algún problema de fabricación. Nuestro agente autorizado se
encargará de la reparación, sustitución, reembolso o proporcionará piezas de repuesto para el producto según las
condiciones de la garantía.
La garantía comienza el día de compra del producto en un distribuidor autorizado o a través de compra on-line. En cuanto
al plazo de garantía del portátil es de 36 meses
Condiciones de la garantía
Las condiciones de la garantía son:
• La garantía es válida sólo con la presentación de la factura de compra del producto.
• Durante el tiempo que pase entre el contacto con el servicio técnico y la reparación del aparato, no se
abonará importe alguno en concepto de daños y perjuicios por el tiempo que el aparato esté fuera de
servicio.
• PcComponentes autoriza las mejoras que el usuario pueda hacer al equipo sin perder la garantía, tales
como el incremento de memoria o almacenamiento. No obstante, PcComponentes no cubrirá la
ampliación con la propia garantía del aparato por lo que en caso de presentar incidencia se deberá enviar
el aparato con las piezas originales únicamente.
• Si ante cualquier incidencia el aparato es recibido en PcComponentes con piezas no originales, este se
reserva el derecho a descontar la diferencia económica en concepto de piezas originales faltantes.
Exclusiones de la garantía
•
externas, tales como: rayos atmosféricos o eléctricos, inundaciones, humedad, etc.
• Daños causados como consecuencia de inadecuada instalación o conexión eléctrica inadecuada.
• Daños estéticos (como rasguños, desconchados, etc) surgidos por el uso.
• Daños causados por manipulación del usuario y/o servicio técnico no autorizado.
• La pérdida o daño de datos, programa o cualquier medio de almacenamiento removible. Se recomienda
tener un plan de copia de seguridad de datos. Por favor, tenga en cuenta que PcComponentes puede optar
por reemplazar el equipo entregado por lo que cualquier dato almacenado en el equipo original podría ser
inaccesible de forma permanente.
• Los componentes no originales del equipo instalados en cualquier ampliación que se realice, así como los
accesorios no originales.
• Cualquier tipo de software no suministrado de manera original con el equipo.
Cuidado del producto y resolución de problemas
aire, control del polvo y actualizaciones pertinentes. Rogamos al cliente que realice el mantenimiento del
equipo de forma periódica para garantizar su longevidad.
cubierto por la garantía. En caso contrario, puede haber un sobrecoste por el diagnóstico del problema así
como su solución.
• Es necesario que el cliente ayude en la evaluación de un producto defectuoso, pudiendo solicitar
PcComponentes alguna manipulación sencilla sobre el producto.
Para hacer uso de la garantía acuda al centro donde compró este producto o bien contacte con nosotros a través de nuestro centro de soporte:
LA GARANTÍA NO AFECTA A LOS DERECHOS LEGALES DEL CONSUMIDOR ANTE LA FALTA DE CONFORMIDAD DE LOS PRODUCTOS CON EL CONTRATO.
https://www.pccomponentes.com/soporte/ o código QR >

Product Description.............................................................................................
Product Overview................................................................................................
Installation.................................................................................................
Wall Mounting......................................................................................................
Basic Operation...................................................................................................
Monitor Ports......................................................................................................
OSD Menu..........................................................................................................
OSD Menu Function............................................................................................
09
09
10
11
11
12
13
14
16
Contents

Descripción del producto.....................................................................................
USO BÁSICO......................................................................................................
Instalación...........................................................................................................
Instalación en pared............................................................................................
Uso básico...........................................................................................................
Puertos del monitor..............................................................................................
Menú OSD (dispuesto en pantalla)......................................................................
Funciones del menú en pantalla (OSD)...............................................................
19
19
20
21
21
22
23
24
26
ÍNDICE

EN
8
IMPORTANT SAFETY PRECAUTIONS
Operation
Keep the monitor out of direct sunlight and away from stoves or any other heat source.
Keep the monitor out of water source.
Remove any object that could fall into ventilation holes or prevent proper cooling of the monitor's electronics.
Do not block the ventilation holes.
Do not knock or drop the monitor during operation or transportation.
Maintenance Guidelines
CAUTION
Do not place the monitor in rain, humid environment or open the monitor case to avoid any shock electrical hazards,
and/or mechanical hazards.
Before cleaning the monitor, unplug the monitor power cable from the electrical outlet.
Caring for Your Monitor
To clean your screen, slightly dampen a soft, clean cloth with water.
lf possible, use a special screen-cleaning tissue or solution. Do not use benzene, thinner, ammonia, abrasive cleaners,
or compressed air.
Use a slightly dampened, warm cloth to clean the frame. Avoid using detergent of any kind as some detergents might
Unplug the monitor if you are not going to use it for an extendedperiod of time.
To avoid the risk of shock or permanent damage to the set, do not expose the monitor to dust,rain, water, or excessive
moistureenvironment. If your monitor gets wet, wipe it with dry cloth as soon as possible.

EN
9
1. Product Description
Packing list
Please check the following items in the packing case before installation:
lf any of above items is missing, please contact with the dealer.
Monitor×1 Stand stem×1
DP cable×1
Stand base×1
Power Adaptor×1 User Manual×1
2. Product Overview
2.1 Monitor Buttons
1
2
3
4
5
MMenu Button Press to display the OSD menu or enter sub-menus.
Down Button Press to move down in the menus.
Up Button Press to move up in the menus.
EExit Button Press to exit.
Power Button Press to turn the monitor on/off.
• Redundant screws can be used as spare screws.
1 2 3 4 5

EN
10
3. Installation
3.1 Installation of Base
Open the package, take outthe stand and base, insert2 screws into the base to lock the stand andattach the
rubber feet.
Take the monitor outfrom the package, keep the monitor at and face up, clip the stand into the monitor, push
them quickly, and release the buttontocomplete stand assembly.
1
2
Screw
Quick-disassembly button

EN
11
The iron stud found from the
accessory bag can be locked
in theM4 threaded hole of the
screwdriver.
Do not pinch the screen directly
with your hands during the
process of hanging the product
to prevent the screen from being
broken.
1
2
Wall
Wall stud lock position
4. Wall Mounting
5. Basic Operation
1. Insert one end of the DP cable intoyour PC's graphics card.A HDMl cable may also be used. A HDMl cables is not included.
2. Connect the other end of the cable to thecorresponding connectoron your monitor.
HDMI Connector
Adaptive-Sync
This feature is off by default. To activate,you must have hardware with Adaptive-Sync capability, a DP or HDMl cable,
and the latest graphic drivers. After connecting your computer andmonitor with a DP or HDMl cable, you may receive a
prompt to enable the feature on your computer. lf you do not, you may need to enable the function in your graphics card
menu. See your graphics card manufacturer's documentation for instructions.
DCDP2DP1 HDMI2HDMI1AUDIO
OUT

EN
12
Please connect the power
adapter to the power
adapter interface of a PC,
and plug the other end of
the power cable into the
power socket.
Use the DP cable to connect
the DP IN interface of the
producttothe DP OUT
interface of a PC.
Use the HDMI cable to connect the
HDMI IN interface of the product to
the HDMI OUT interface of a PC.
Connect audio outputting devices
suchas earphonestothe AUDIO
OUT interface.
OR
6. Monitor Ports
A
C
B
D
DCDP2DP1 HDMI2HDMI1AUDIO
OUT
Power Adapter
DP Interface
HDMI Interface
Audio Out

EN
13
Press one of the buttons ( ) to activate the browser screen.
Press to enter the OSD screen.
Press to exit from themenuscreen.
Press or toscroll throughthe functions.
Select the desired function, and press to enter the sub-menu.
Press or toscroll throughsub-menus, and press
Pressor to select one option, and press to c
1
2
4
3
7. OSD Menu
Thescreen display (OSD) menu can be used to adjust settings of the monitor and is shown on the screen after the
monitor is powered on and thebutton is pressed.
ll automatically adjust to theoptimal
values depending on the connected device (PC / console).

EN
14
7.1 OSD Menu Functions
BRACKET
Colors
move up and down
Size
Structure
Panel
Control
Weight
Front: BLACK
Back cover: BLACK
Back cover light: black
Stand: RED+BLACK
Base: BLACK
615.1mm*100.1mm*363.6mm
W/ Base
W/O Base
Pacakge
N.W
G.W
615.1mm*100.1mm*574.0mm
689*209*579mm
6.2KG
8.3KG
Base Function Forerake 5° ,Fadeaway 15°
Kendington Lock YES
VESA Mounting 100*100mm
Rotating angles 0-90°
High Adjustable Arm 90 mm
Swivel 20°/20°
Control Way 5 Keys OSD
Language Menu 12 languages max

EN
15
Environment
Key Functions
Working Temp.
Storage Temp.
Working Humidity
Altitude
-20ºC~60ºC
0ºC~40ºC
10~90%RH
≤5000m
1. Color Temp. (cold/warm/user)
2. Low blue color control;
3. Five key control ;
4. DCR;
5. Multi-language Memu ;
6. FreeSync ;
7.FPS/RTS Gaming mode switch
Certificate CE/ROSH
Accessories DP cable/Power cable/User Manual

EN
16
Model name
SPC
Ambiente PCC-27165IPS-FQHD
size 27"
Resolution 2560×1440
Refresh rate 165HZ
Panel SG 2701B01
Panel type IPS
Active Area 597.888H ╳336.312 V
Dot Pitch 0. 3114 (H) ╳0. 3114 (V)
Curvature
0
Aspect ratio
16:9
Backlight LED
Brightness MAX:350cd/M2
Contrast Ratio 2000:1
Color Temp. default default:7500K 6500/7500/9300

EN
17
Number of colors
SPC
PSU
16.7M
Color Gamut NTSC 85%
Viewing angle 178/178 (H/V)
Response time 1ms(GTG)
I/O Ports HDMI*2+DP*2+AUDIO OUT+DC
HDMI1.4 FHD 1920*1080 144Hz
NOTES
DP2.0 QHD 2560×1440 165Hz
Speakers Optional
100-240AC 50/60HZ
typical:30W,Max:36W STB≤0.5W
NAudio
Input
Type Built in
Power Consumption

ES
18
CONSEJOS DE SEGURIDAD
USO
Mantenga el monitor alejado de la luz solar directa y de estufas o cualquier otra fuente de calor
Mantenga el monitor alejado de fuentes de agua
componentes electrónicos del monitor
No toque ni deje caer el monitor durante el funcionamiento o el transporte.
CONSEJOS DE MANTENIMIENTO
PRECAUCIÓN
No coloque el monitor en la lluvia, ni en un ambiente húmedo, ni abra la carcasa del monitor para evitar cualquier riesgo
de descarga eléctrica, y/o riesgos mecánicos.
Antes de limpiar el monitor, desenchufe el cable de alimentación de la red eléctrica.
CUIDADOS PARA EL MONITOR
Para limpiar su pantalla, humedezca ligeramente un paño suave y limpio con agua
Si es posible, utilice unpaño o unasolución especial para la limpieza de la pantalla. No utilice benceno, diluyentes de
amoníaco, limpiadores abrasivos oaire comprimido.
Utilice un paño ligeramente humedecido y caliente para limpiar el marco. Evite el uso de cualquier tipo de detergente, ya
quealgunos pueden dejar unapelícula blanquecina en los plásticos.
Desenchufe elmonitor si no lo vaautilizar durante un periodo prolongado de tiempo.
Para evitar el riesgo de descarga eléctrica o daños permanentes en elaparato, no exponga el monitor al polvo, la lluvia, el
agua o la humedadexcesiva. Si elmonitor se moja, límpielo con un paño seco lo antes posible.

19
1. Descripción del producto
Contenido de la caja
Revise que el contenido esté completo antes de usarlo, en caso de faltar algún
componente por favor contacte con su vendedor.
Monitor×1 Brazo del
soporte×1
Cable DP x1
Base del soporte×1
Adaptador de
corriente x1
Manual de
instrucciones QR
×1
2. USO BÁSICO
2.1 Panel de selección del monitor
1
2
3
4
5
MBotón Inicio/Menú Presiona para entrar en el menú principal y acceder a los
submenús
Botón abajo Presiona para avanzar hacia abajo en los menus. Atajo para
seleccionar las mirillas integradas de juego.
Botón arriba Presiona para avanzar hacia arriba en los menus,Atajo para
acceder a los modos de escena.
EBotón salida/interfaz Presiona para avanzar hacia atrás en los submenús. Atajo para
seleccionar la fuente.
Botón de encendido Presiona para encender/apagar el monitor.
• Puede incluir tornillos adicionales en caso de repuesto.
1 2 3 4 5
ES

20
3. Instalación
3.1 Instalación del soporte
Abre la caja, saca el producto conjunto con el embalaje y colóc
mesa.Inserta la base al brazo y atornillalos usando2tornillos No.1.
Con cuidado, Colóquelo sobre un escritorio o una mesa y proteja la pantalla. Coloque el conjunto de la base
ensamblada en el hueco correspondiente de la carcasa trasera y asegurarlo hasta que se escuche el clic del
sistema de seguridad.
1
2
Tornillos
Botón del sistema demontaje rápido
ES
This manual suits for next models
1
Table of contents
Languages:
Other PcCom Monitor manuals
