QuickStart Owner’s Manual
Powerline Interface – Ethernet
PIM-IP
©2019 Powerline Control Systems,
Inc. All Rights Reserved v1.1
19215 Parthenia St. Suite D
Northridge, CA 91324
P: 818.701.9831
pcssales@pcslighting.com
www.pcslighting.com https://pcswebstore.com
FUNCTION
The Powerline Interface Module – Ethernet is a Powerline
Interface Module much like our PIM-R RS-232 version that
contains an IP Web server. This all-in-one device makes it
easy to enable UPStart Configuration Software or other IP
based device to communicate with a UPB network and
devices via a hardwired or wireless LAN network or even
over the internet.
The PIM-IP is simple to install – just plug it in to
any standard 120VAC wall outlet and connect a CAT-5 cable
between it and a network. The long distance capability of a
network and internet makes it possible to locate the PIM-IP
virtually anywhere on site. With standard port forwarding
the PIM-IP can even be securely accessed from outside the
local network for remote programming or the use of smart
phones or tablets with the appropriate application. No
additional wiring is required and no radio frequency signals
are used for communication.
IMPORTANT SAFETY INSTRUCTIONS
When using electrical products, basic safety precautions should
always be followed, including the following:
1. READ AND FOLLOW ALL SAFETY INSTRUCTIONS.
2. Keep away from water. If the product comes in contact with
water or other liquid, turn off the circuit breaker and unplug
the product immediately.
3. Never use products that have been dropped or damaged.
4. Do not use this product outdoors.
5. Do not use this product for other than its intended purpose.
6. Do not cover this product with any material when in use.
7. This product uses a grounded outlet to reduce the risk of
electric shock. These plugs and sockets fit only one way. If
they do not fit, consult an electrician.
8. SAVE THESE INSTRUCTIONS.
INSTALLATION
The PIM-IP is designed for indoor use with a router or hub connected to a
network. To install the PIM-IP module follow these steps:
1. Connect an Ethernet cable (sold separately) between the PIM’s RJ45
connector and any open port of the router, hub or network.
2. Plug the PIM-IP into any grounded wall outlet. The Status LED on the
front of the unit should start blinking and then stay solid blue.
3. The two Network LED’s on the RJ45 connector should be solid orange
and blinking green.
Status LED Indications
The PIM-IP contains a bi-color (blue/red) Status LED that will also give a
visual indication of what UPB information is currently on the powerline.
Transmitted a UPB Message
CONFIGURATION
The PIM-IP is the perfect interface device for use with PCS’ UPStart
Configuration Software. UPStart allows you to easily configure all of your
PulseWorx System devices. The UPStart User’s Guide explains how to
configure your system using UPStart. (www.pcslighting.com)
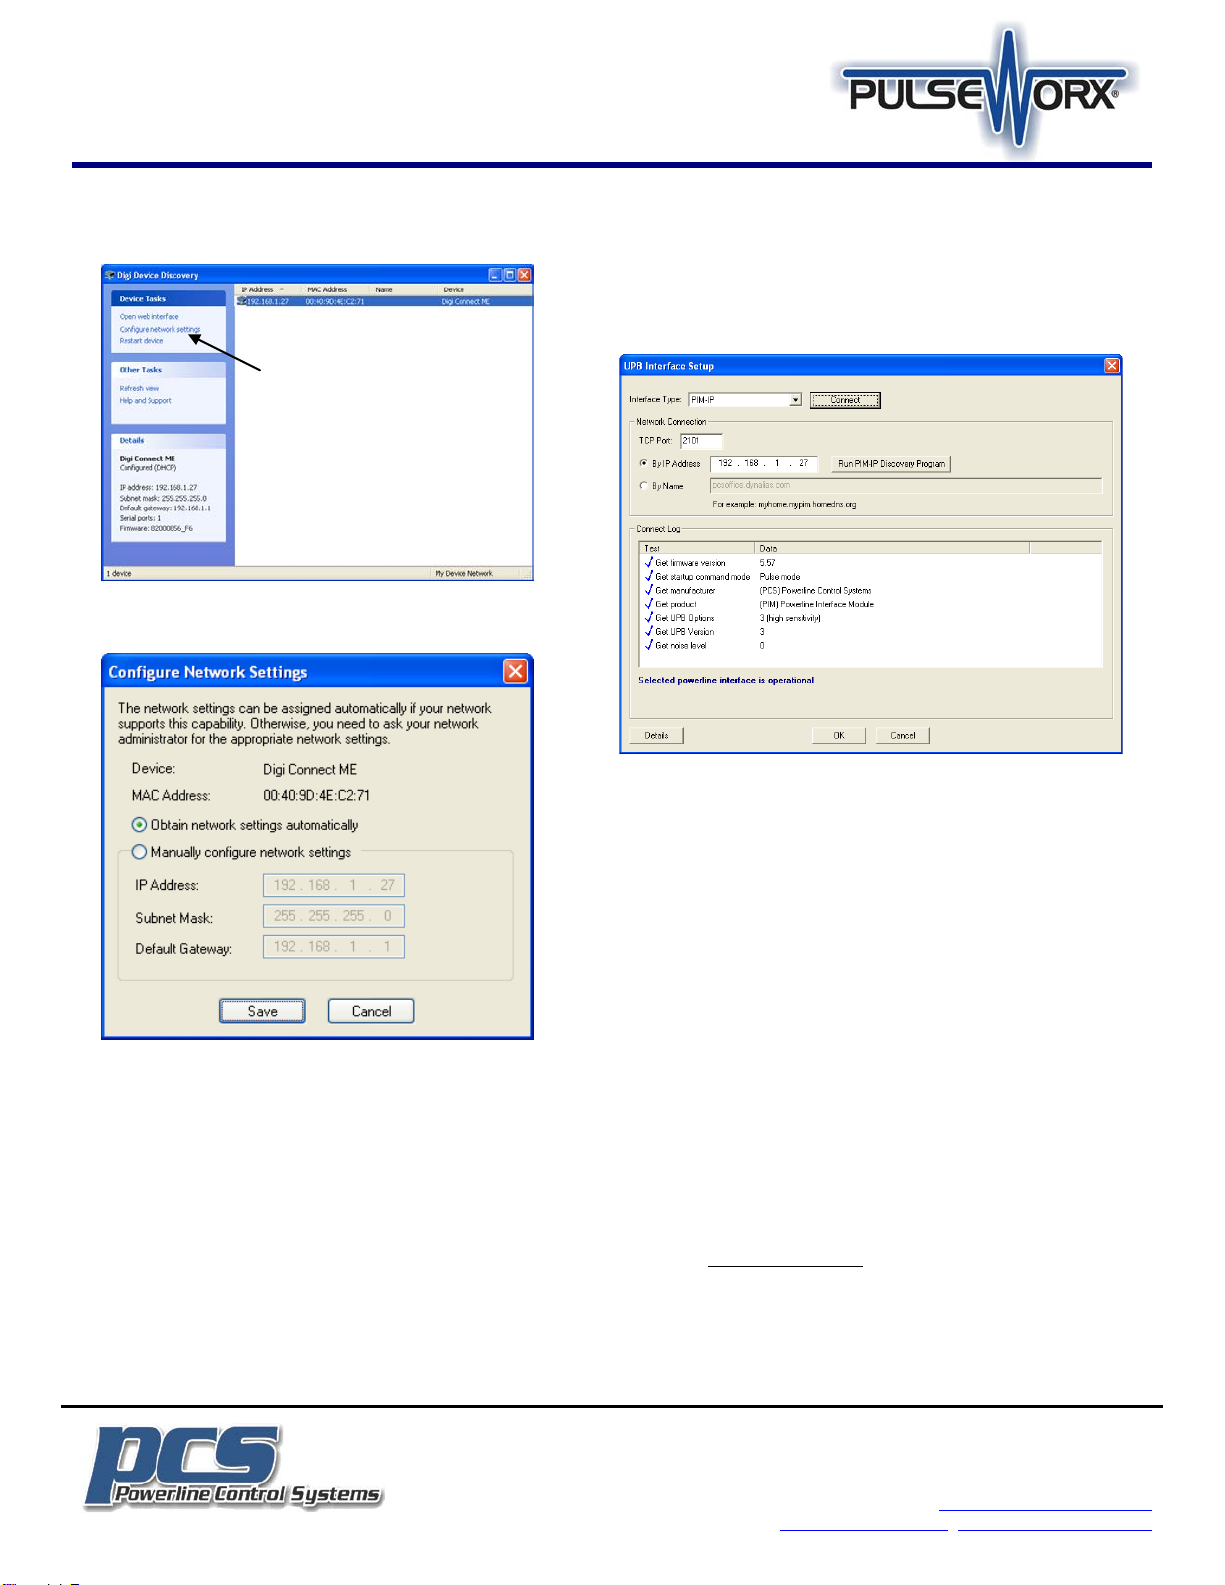
To use the PIM-IP with UPStart select ToolsPowerline Interface
Connection to bring up the UPB Interface Setup dialog.
Select the “PIM-IP” as the Interface and then press the “RUN PIM-IP
Discovery Program” button. UPStart will automatically run a Device
Discovery application to help locate the PIM-IP on your network. NOTE: The
PIM-IP is shipped in DHCP mode.
If the PIM-IP does not show up in the window, Press “Refresh View” until it
finds the PIM-IP. If it doesn’t then something is wrong with the network or
possibly the PIM-IP.