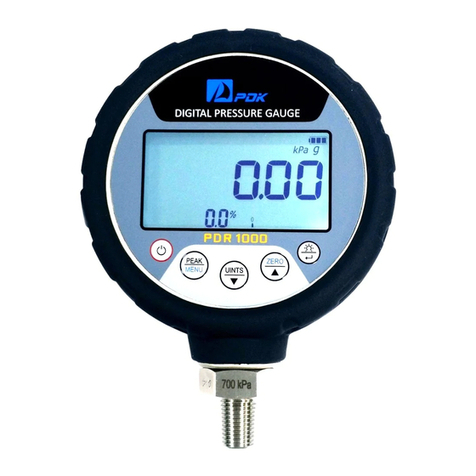
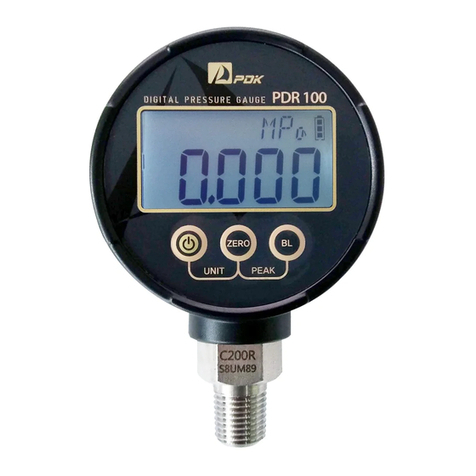
PDK PDR250 User manual

Digital Pressure Gauge PDR250 Users Manual
PDR250 - Range 1 2 - Port
1 K=kPa, M=MPa
2 G=Gauge, A=Absolute, C=Compound
Port N=1/4" NPT, P=1/4" PF, C=1/4" PT,
H=9/16-18 UNF(F) (Only > 150 MPa)
Ex) PDR250-70MG-N Range 70 MPa, Gauge Pressure, 1/4" NPT
Thanks for purchasing our product.
Check install place and connection prior to setting, caution the following
instruction.
1. Attention
※ Please keep these instructions and review them before using this unit.
※ Please observe the cautions that follow;
Warning If instructions are not followed exactly as written, serious injury may
occur.
Caution Product may be damaged. or injury may occur if instructions are
not followed.
※The following is an explanation of the symbols used in the operation manual.
Caution: injuries or dangers might occur under certain conditions.
Caution
1. In case of Using this unit with machineries, which may affect seriously
life or properties, such as Nuclear power plant, medical equipment,
vehicle, train, airplane, combustion apparatus, entertainment or safety
device etc., it should be installed with failsafe device.
It may result in serious damages or injuries.
2. Do not use this unit at place where there is vibration, inflammable
gas, explosive gas, moisture, the direct ray of light and the radiant
heat.
It may cause an explosion or risk of fire.
3. Do not disjoin and repair.
It may cause a breakdown.
4. Do not repair or not inspect when power on and measuring input
applied.
It may result in serious damages or injuries.
Attention
1. Do not apply beyond rated pressure.
It may cause a damage to the product.
2. Must use the product within the specification of the product.
It may cause shorten the product life span or fires.
3. Do not inflow dust or wire dregs into the unit.
It may cause a damage to the product or fires.
4. Please connect properly after checking the polarity of measuring
terminals.
It may cause an explosion or fires.
5. Do not use in corrosive materials.
It may cause a damage to the product or shorten the product life span.
2. Handle with care.
A. handling and installation.
1)Equip the pressure sensor with following our guideline in safety.
We can guarantee the quality of the product by the protective grade(IP) that is a
certificate for preventing from moisture, water or dust etc. If you need further
information, Please refer to catalogue or ask to the main office or agent.
2)Do not drop or shock the sensor.
It may cause a breakdown or malfunction.
3)Do not pull the cable strongly.
It may cause a breakdown or malfunction.
4)Do not insert a sharp-point like a needle into the pressure port.
It may cause a breakdown or malfunction.
5)Do not touch each setting key with a sharp-point.
It may cause a damage to the setting key.
6)Do not touch a diaphragm or a flush diaphragm(F/D)with hands or any
instruments.
It may cause a breakdown or malfunction.
7)Please install the sensor after getting rid of dust ,which remains in the
pressure line, or any pressurized materials, which may generate
overpressure when you tighten the product.
It may cause a breakdown. Especially, in case of being full of materials in the
pressure line, it may generate beyond rated pressure just to conjoin the pressure port.
8)Please tighten a hexagon head in the pressure port with a wrench when
installing.
It may cause a damage to the product if you tighten other part to install.
9)There will be a possibility of being changed the zero output itself after
equipping the product to the pressure line.
Please arrange the zero out after installment.
B. Connection
1)Do not bend, pull or overload on the cable repeatedly.
It may cause a disconnection.
2)Fix the cable close to the sensor minimizing vibration in a surrounding
quaked place.
It may cause a breakdown or malfunction.
3)Do not operate wiring works while the line is live.
It may cause a breakdown or malfunction.
4)Do not use the same route as a power supply cord and a high tension
wire.
It may cause a breakdown or malfunction owing to noises from the power
supply cord and the high tension wire.
5)Please check electrical insulation.
If electrical insulation occurred, the overvoltage or overcurrent were
applied to the pressure sensor. It may cause a breakdown or
malfunction.
6) In case of using a switching power, please ground it to the FG terminal.
C. Use environment
1)Do not use the pressure sensor at the place where there is possibility
of the electrical surge.
If there were an equipment which generated a mass of electric surge or a lightning
surge surrounding a pressure sensor, there would be possibilities of heat deterioration
or destruction of the internal circuit.
2)Do not use the pressure sensor nearby the devices which generate
strong high frequency noise.
It may cause malfunction owing to inpouring the high frequency noises from the
devices which generate strong high frequency noise(a high frequency welding machine,
mass capacity of SCR controls etc.)
3)Be careful not to freeze the pressure materials.
It may cause a breakdown.
4)Please install orifices in front of the pressure port to protect a diaphragm
from a electrical surge. When installation at the point such as on the
water hammer where there is possibility of generating impact pressure.
5)Be careful not to change the surrounding temperature abruptly.
It may cause falling the accuracy slightly.
D. Repair and Inspection
1)Please do the inspection and the repairing the pressure sensor after
shutting the power supply off.
It may cause a breakdown or malfunction.
2)Please do the inspection and the repairing the pressure sensor periodically.
3)When operating the calibration for Zero/Span output, must do with
authorized instruments.
There will be possibilities of malfunction due to the calibration with unauthorized
instruments. Please ask this company how to do.
4)Do not use water or any organic solvent but a dry towel for the
cleaning.
Cleaning with an wetted material, it may cause a breakdown, malfunction or damages
to the surface and a label.
3. Forms
4. Specification
Pressure Range
0~35kPa ... 70MPa(Gauge)
-100kPa~100 ... 3.5MPa(Gauge)
0~35kPa ... 70MPa(Absolute)
± 100 kPa ... 100 kPa
(Differential)
0~71 ... 500MPa(Gauge)
Accuracy
±0.25%FS ± 1digit
±0.5%FS ± 1digit
Thermal Effect on Zero
±0.03%FS /℃
±0.05%FS /℃
Thermal Effect on Span
±0.03%FS /℃
±0.05%FS /℃
Operating Temperature Range
-20 ~ 70 ℃
Display
4 1/2 Digits Backlight LCD
Excitation
1.5V
Display Time
1, 2, 5, 7, 10 times/ Sec.
Special Functions
Peak, Auto power off, Auto Zero
Proof Pressure
X3 or 140MPa
1)
≤150MPa : X1.5 or 150MPa
1)
>150MPa : X1.5 or 500MPa
1)
Burst Pressure
X4 or 210MPa
1)
≤150MPa : X2 or 150MPa
1)
>150MPa : X2 or 600MPa
1)
Pressure Port
G(PF)1/4", PT1/4", NPT1/4", 9/16"UNF Female(Only >150MPa)
Media-wetted
Materials
SS316L
SS316L, Ti 87%
Protection
IP65
Weight
Approx. 350g
5. Dimension and the name of parts
A. Out Dimension
B. Pressure Port(>150MPa)
① Display : A board of the digits

PDK CO., LTD
10-6, EXPO-RO 339BEON-GIL, YUSEONG-GU, DAEJEON, KOREA 34122
Tel : (042)862-6880 Fax : (042)862-6881 E-Mail : pdk@pdk.co.kr
② : Power Key
- Power On/Off
③ : Peak / Menu Key
- It displays Peak Hi or Low
- It goes to Menu mode pushing the key for 2 Sec.
④ : Unit Key
- It changes the Pressure unit
⑤ : Zero / Up Key
- It makes Zero at the current pressure value pushing the key for 2
Sec.
- It removes Peak(Hi/Low) value in the PEAK mode.
- It functions as Up key in the Menu mode.
⑥ : Display Backlight / Enter Key
- Backlight On/Off.
- It functions as Enter key in Menu Mode.
⑦ Battery Cover Fixing screw
6. How to use & DATA Setup
A. How to use
① Push (Power Key).
② All function Setups are operated in PV mode or Menu mode.
③ How to go to Menu mode : Pushing (PEAK Key) for 2 Sec. in PV mode
and move to other function setup pushing (PEAK Key).
④ Please refer to the below instruction for the function setup and DATA
setup.
① Zero Adjustment (Zero)
PV mode
The gauge reads Zero at the current pressure value.
Pushing key
for 2 sec., you can see
"----" on the disply and Zero adjustment is
completed and return to PV mode
automatically.
Make sure that release the pressure open
in the atmosphere.
※ It works in case of Zero value within
±10% of Full scale.
② Unit Change (Unit)
PV mode
Change the pressure unit conversion as an user's wish.
Pushing Key, the units are conversed
like this sequence; bar→mbar→psi→kPa→
MPa→mmH
2
O→mmHg→inHg→kgf/cm
2
→
atm→bar.
※in case of out of range, it
automatically moves to the next unit.
③ Display Backlight
PV mode
Display Backlight On / Off
Pushing Key in PV mode, Backlight
On. You can adjust its brightness pushing
Key repeatedly.
④ PEAK (Peak)
PV mode
Displaying the lowest and highest pressure applied to the gauge.
Pushing Key in PV mode, it shows
the highest pressure(HI) applied to the
gauge. Pushing Key again, it shows
the lowest pressure(LO). And then pushing
Key once more, it moves to PV mode.
※ Pushing Key in PEAK mode, it
removes the peak values.
⑤ Overpressure Alarm
PV mode
Warning the overpressure applied to the gauge with flickering current
pressure.
It flickers the current pressure in case of
overpressure(110% of the rate pressure)
applied to the gauge.
※Please be careful if applied more than
proof pressure, it badly damages the
gauge.
⑥ Sampling Speed (Speed) Menu mode
(How to enter : Pushing
Key for 2 sec. in PV mode)
Conversion of the sampling speed
Pushing Key, it moves each step as
the below sequence.
1-S : 1time/Sec.
2-S : 2times/Sec.
5-S : 5times/Sec.
7-S : 7times/Sec.
10-S : 10times/Sec.
Pushing Key, it moves to END
mode for the setup completion. And
then pushing
Key or Key to
move to PV mode.
⑦ Auto Power Off Menu mode
(How to enter : Pushing
Key for 2 sec. in PV mode)
Setup of the power off & off time
Using Key to operate the auto
power off as the below sequence.
5-m : Power off in 5 Min.
10-m : Power off in 10 Min.
20-m : Power off in 20 Min.
30-m : Power off in 30 Min.
Pushing Key, it moves to END
mode for the setup completion. And
then pushing
Key or Key to
move to PV mode.
⑧ Factory Reset (I)
Menu mode
(How to enter : Pushing
Key for 2 sec. in PV mode)
Initializing all setting to the factory setting.
Using Key or Key to initialize
the setting to the factory setting.
Factory Settings
Sampling Speed : 2 times/sec.
Zero : As per the order specification.
Unit : As per the order specification.
Auto Power Off : OFF
After moving to END mode, Pushing
Key or Key to move to PV
mode.
⑨ Completion of Menu mode (End)
Menu mode
(How to enter : Pushing
Key for 2 sec. in PV mode)
It completes the setup of Menu mode and moves to PV mode.
Pushing Key to move to PV mode
or to Menu mode.
YES : Key or Key to move to
PV mode
NO : Key or Key to move to
Menu mode.
Other PDK Measuring Instrument manuals
Popular Measuring Instrument manuals by other brands

Agilent Technologies
Agilent Technologies E5080 Series user guide

Tektronix
Tektronix AA 501 instruction manual

RKI Instruments
RKI Instruments GX-3R Operator's manual

Det-Tronics
Det-Tronics PIR9400 instructions

M-system
M-system 48NAV instruction manual

Twin-Star International
Twin-Star International ECS Instructions for use