INTRODUCTION ............................................................................................................................
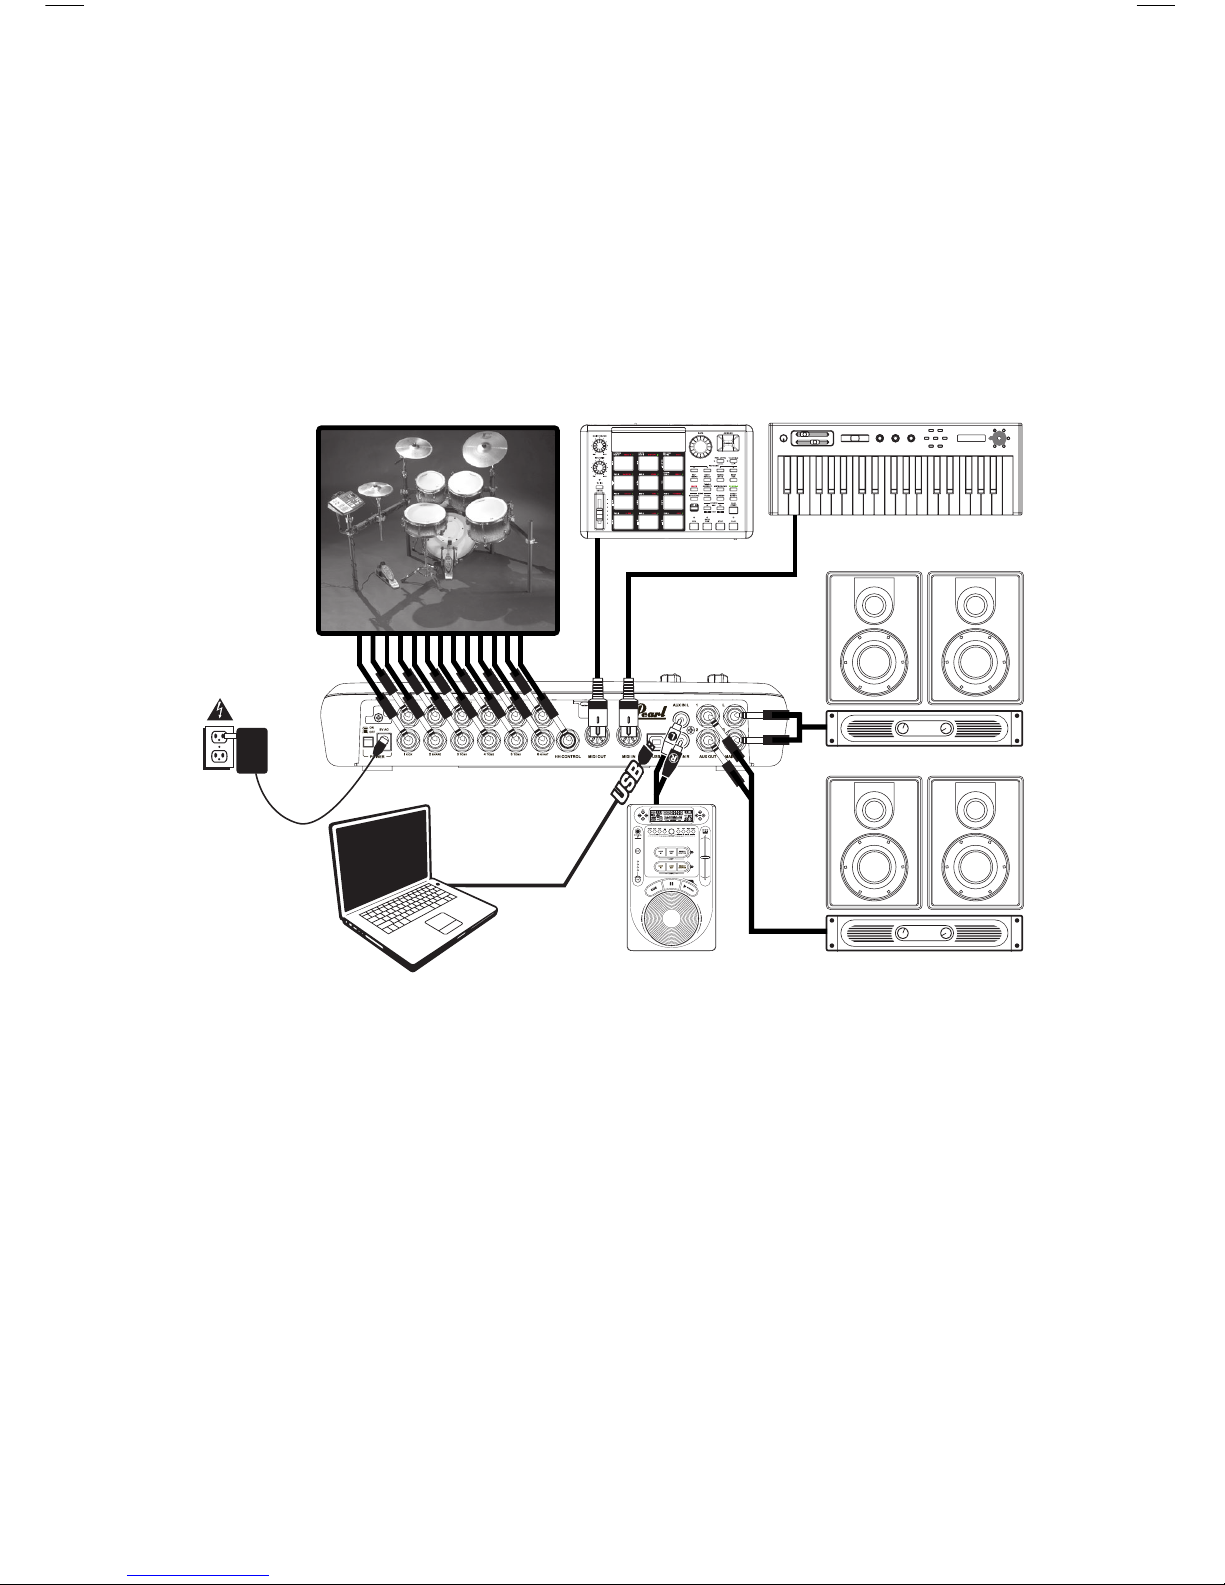
CONNECTION DIAGRAM .................................................................................................................
GETTING STARTED .......................................................................................................................
RESETTING THE MODULE TO FACTORY DEFAULTS ............................................................................
CHECK FOR UPDATES ...................................................................................................................
RIDE CYMBAL SETUP ....................................................................................................................
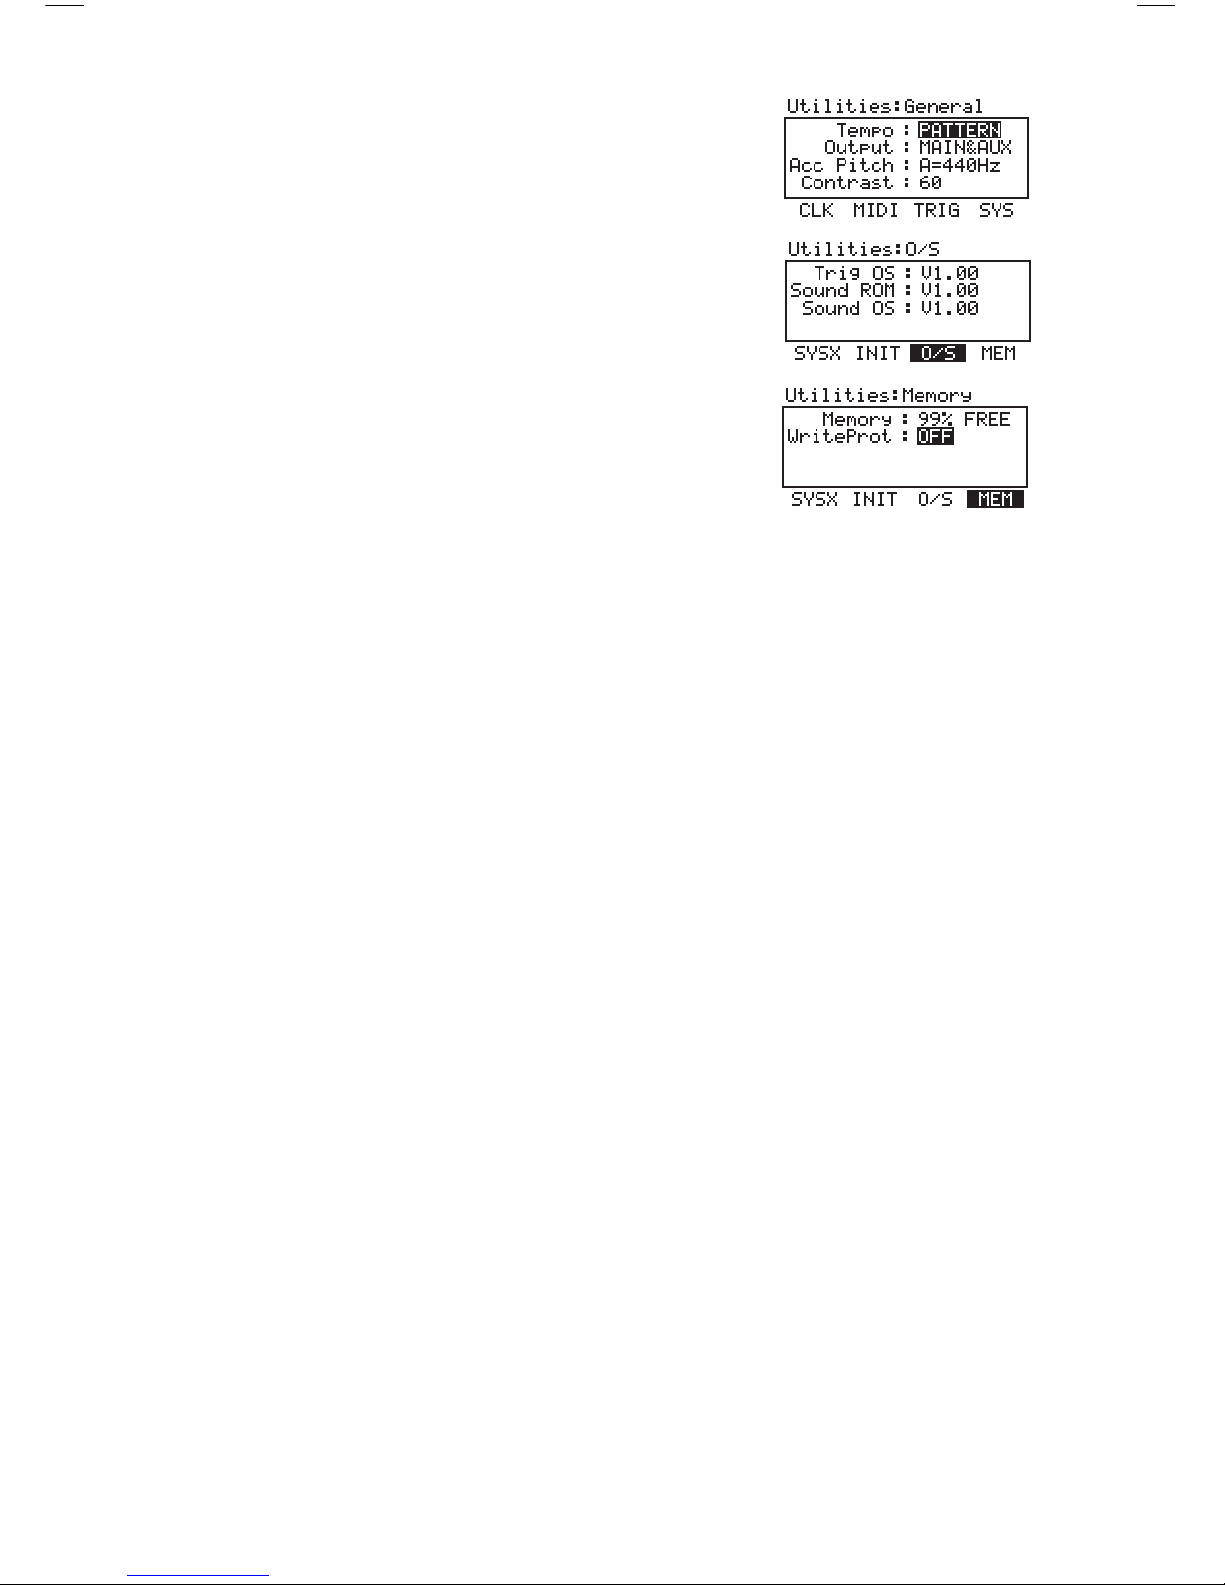
DEACTIVATE WRITE PROTECTION ...................................................................................................
THE BASICS ................................................................................................................................
NAVIGATING MENUS & ADJUSTING SETTINGS ..................................................................................
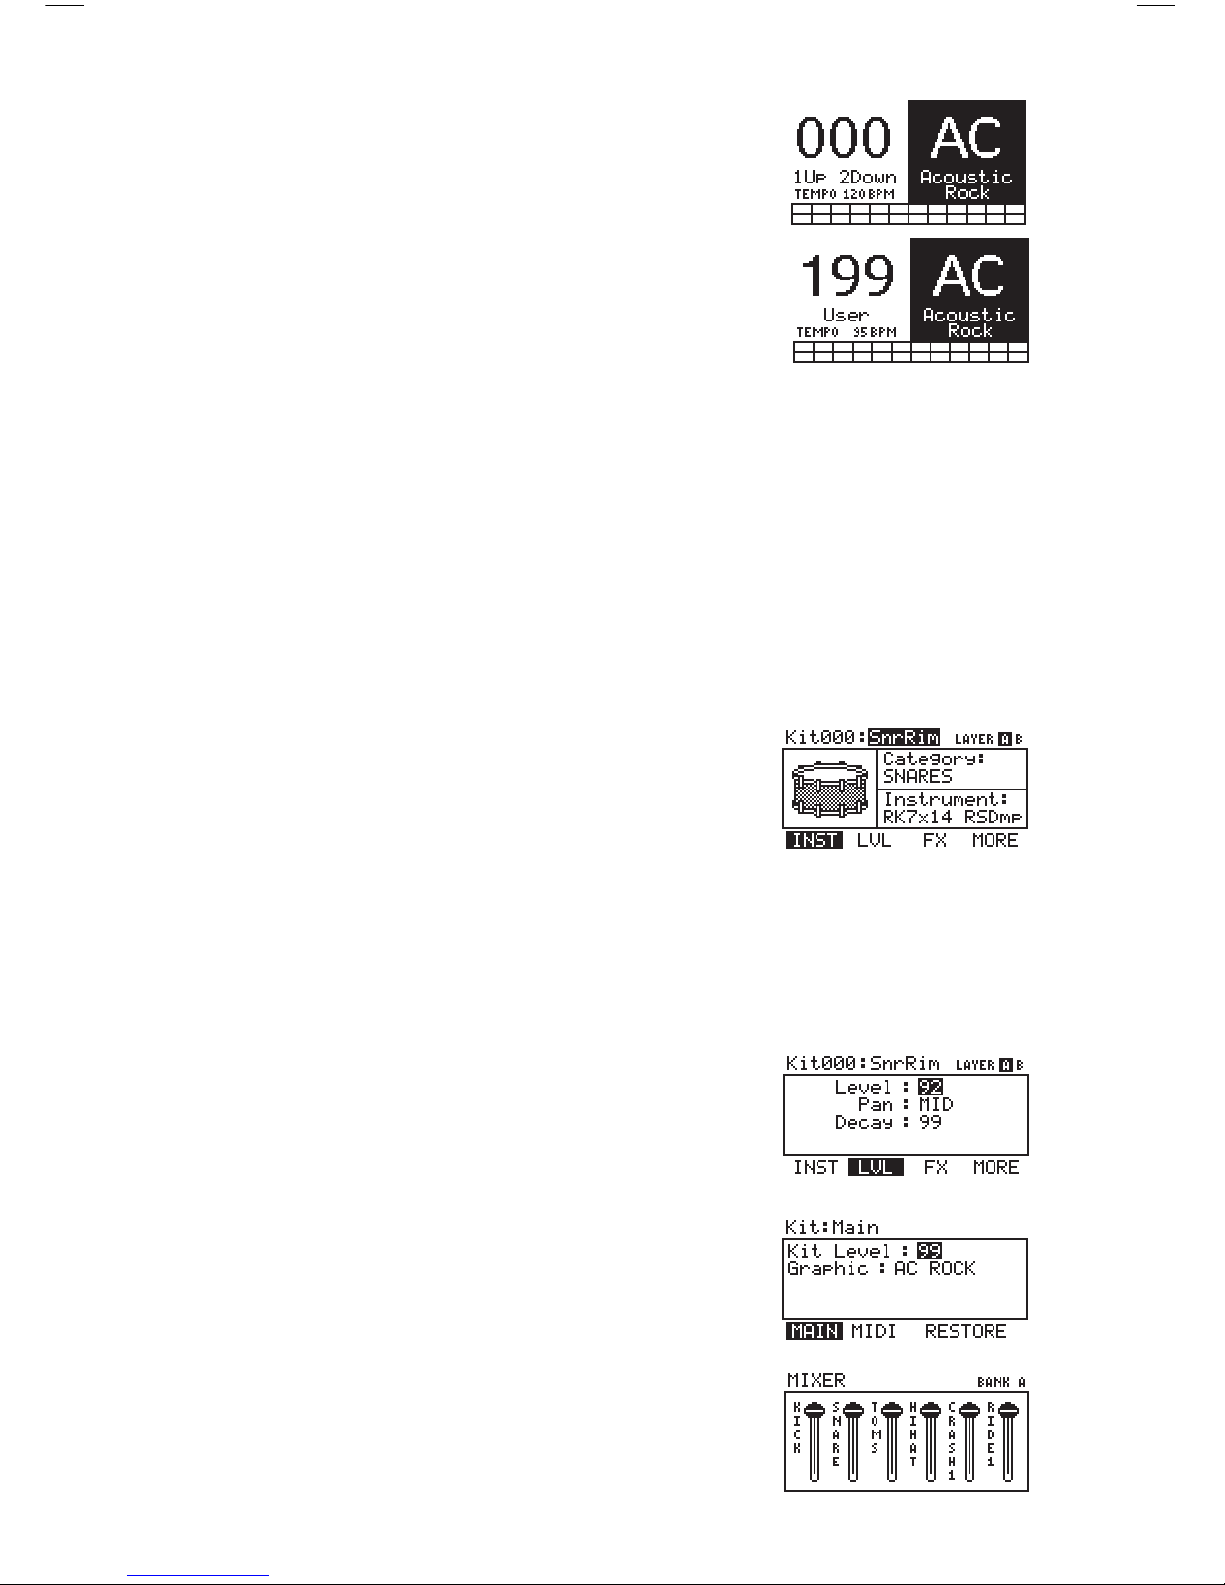
KITS ...........................................................................................................................................
VOICES: LAYERS & INSTRUMENTS ..................................................................................................
VOLUME ......................................................................................................................................
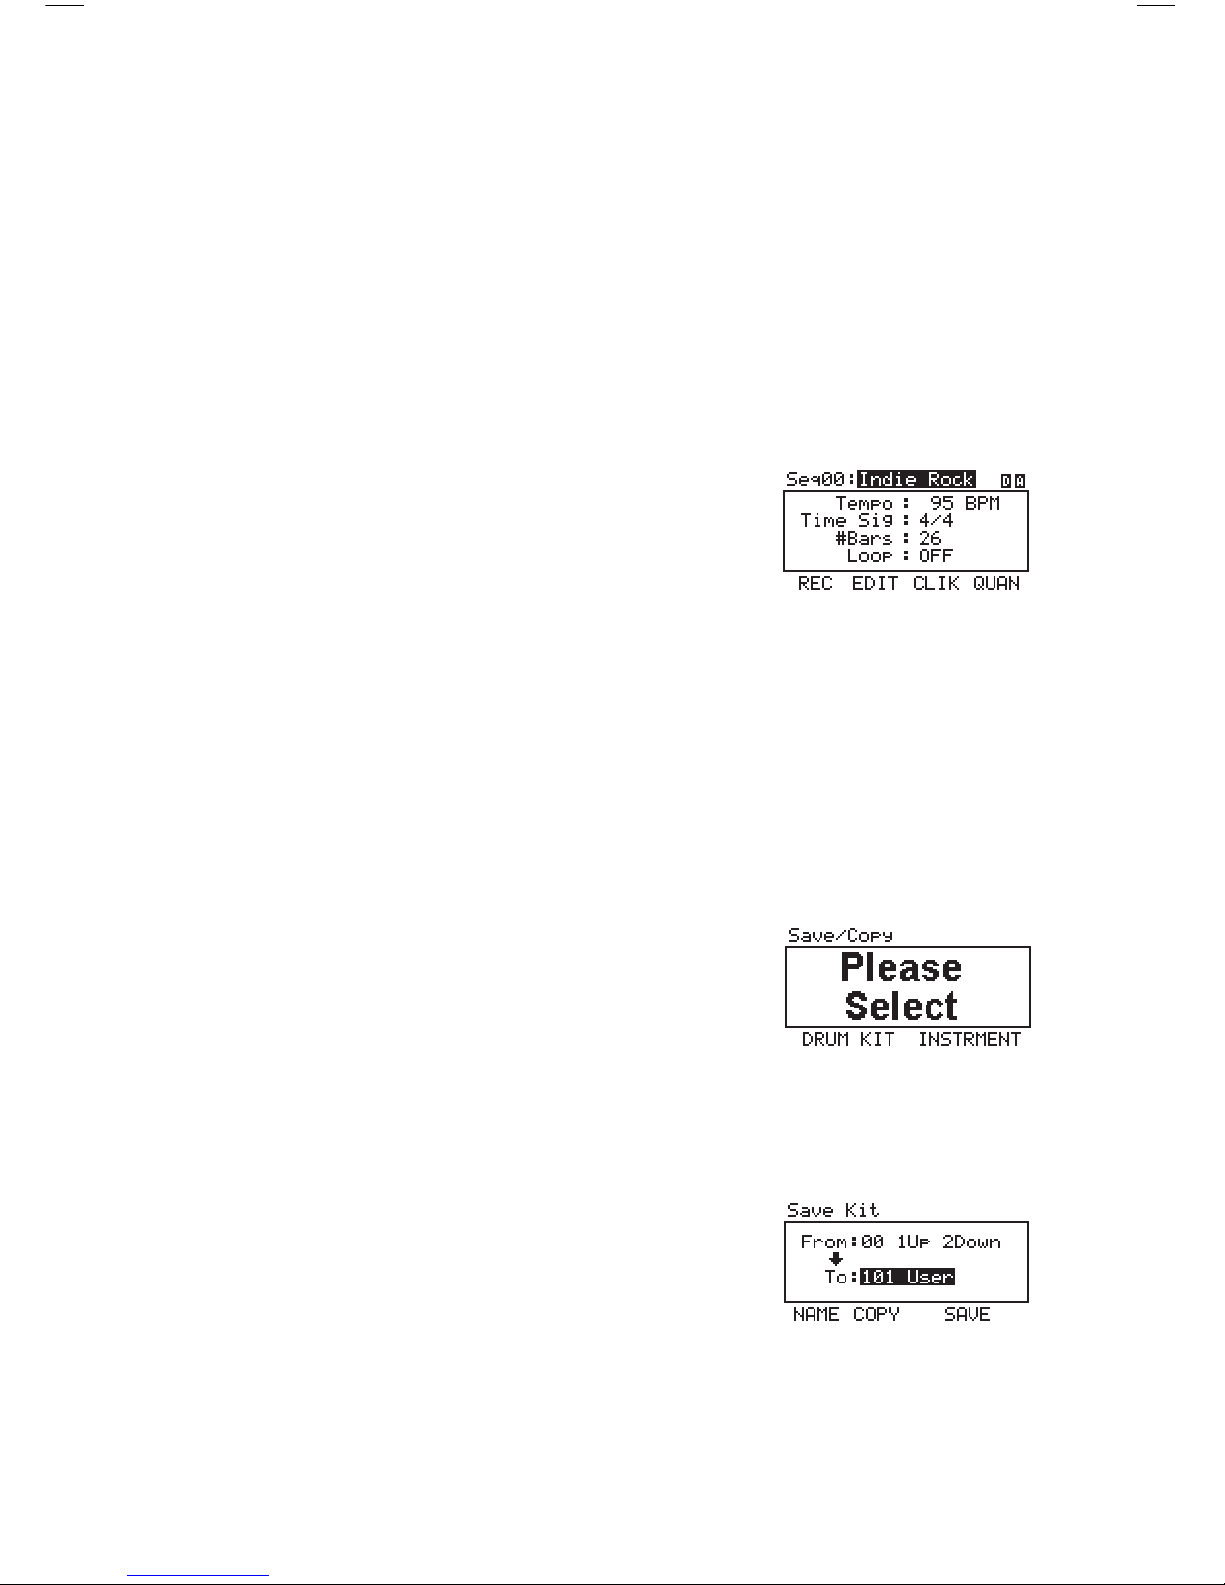
SEQUENCES ................................................................................................................................
STORING DATA ............................................................................................................................
UTILITIES ....................................................................................................................................
REAR PANEL FEATURES ................................................................................................................
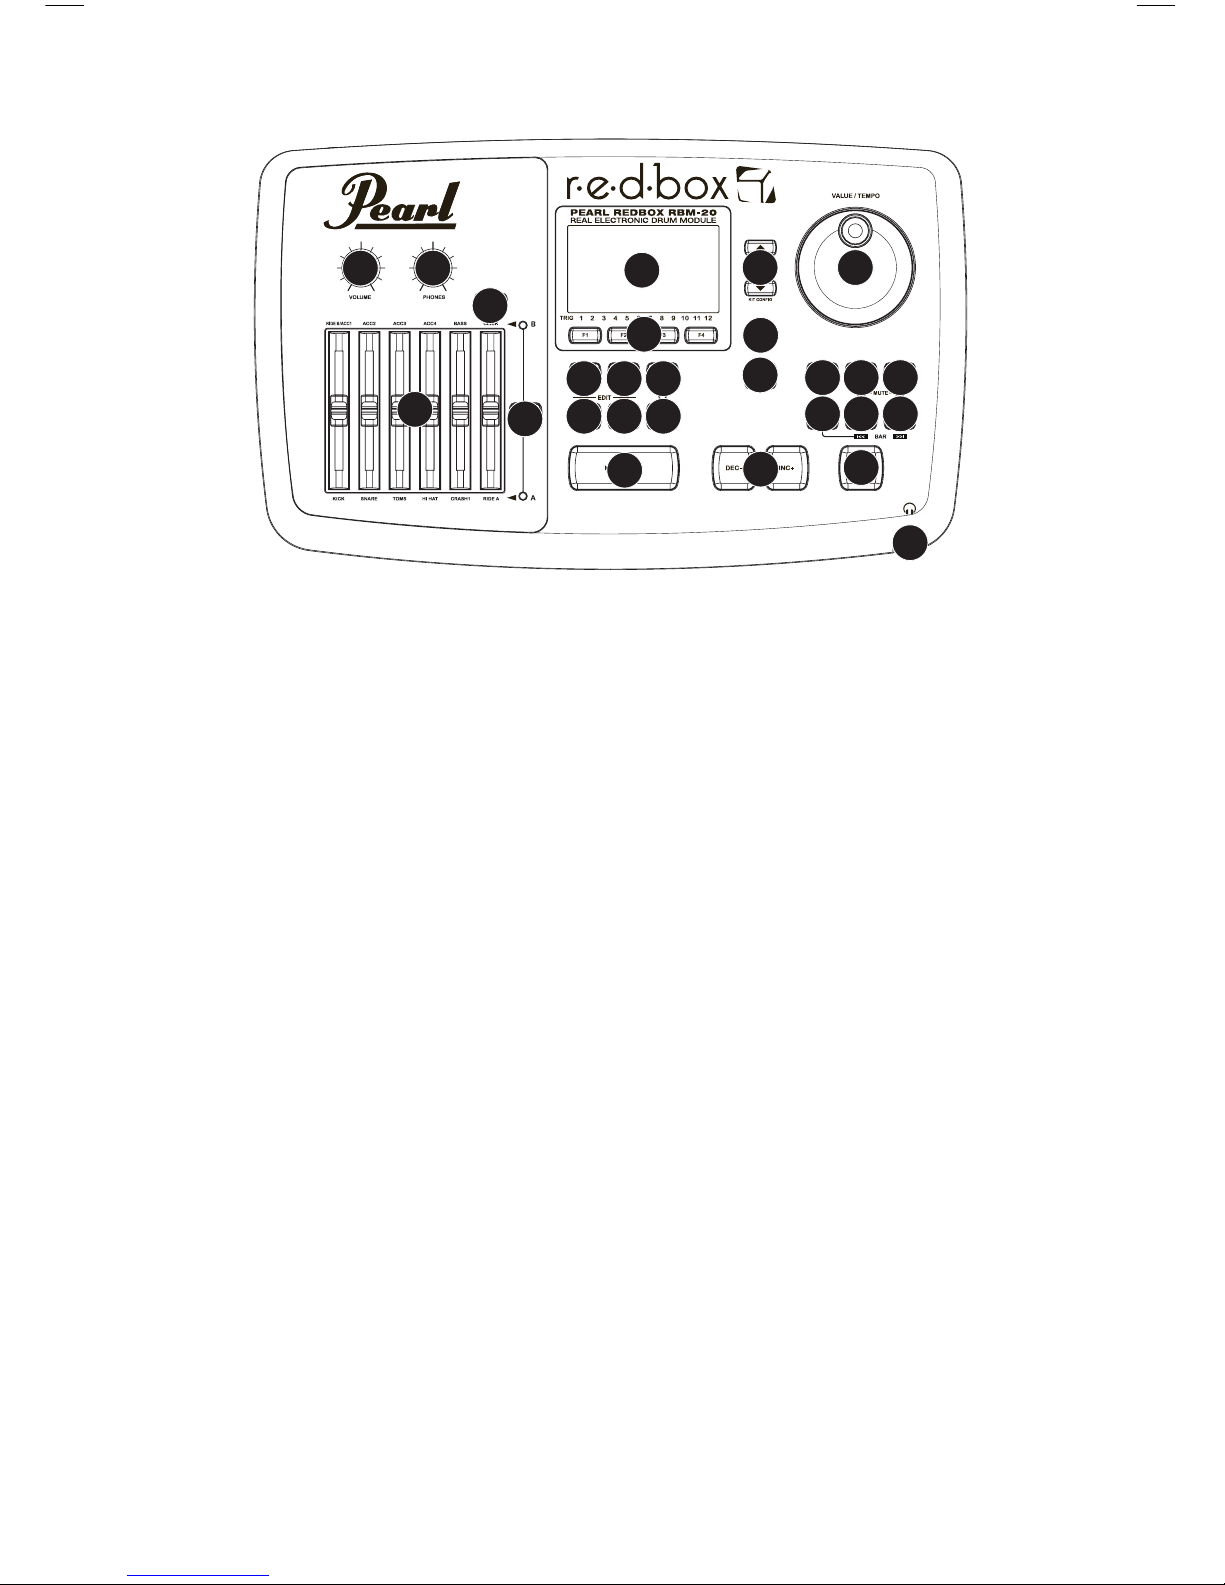
TOP PANEL FEATURES ..................................................................................................................
KITS, VOICES, ACCOMPANIMENT & INSTRUMENTS ...........................................................................
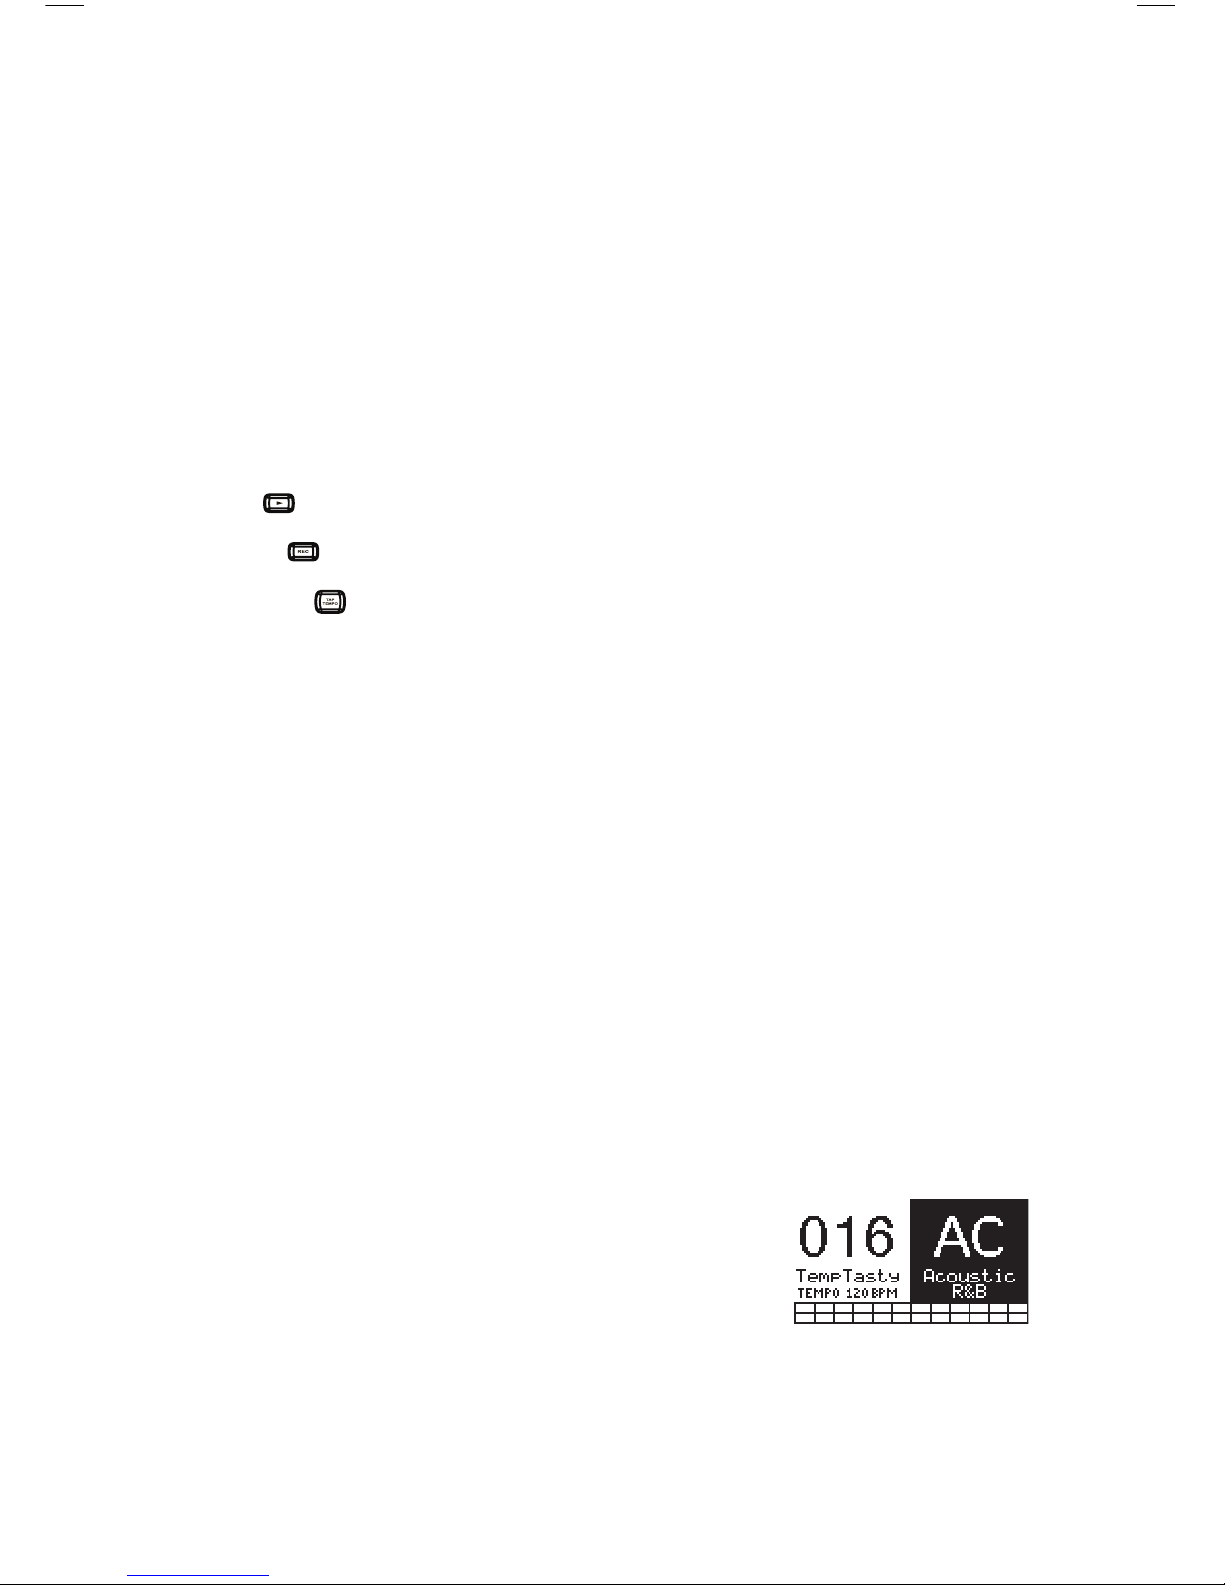
SELECTING A KIT .........................................................................................................................
EDITING INSTRUMENTS IN A KIT ....................................................................................................
EDITING ACCOMPANIMENT IN A KIT ................................................................................................
EDITING VOICE & ACCOMPANIMENT PARAMETERS ...........................................................................
EDITING MIDI PARAMETERS ..........................................................................................................
EDITING EFFECTS PARAMETERS ....................................................................................................
KIT SELECT SETUP .......................................................................................................................
SEQUENCES ................................................................................................................................
PLAYING SEQUENCES ...................................................................................................................
RECORDING SEQUENCES ..............................................................................................................
EDITING SEQUENCES (DRUMS) ......................................................................................................
EDITING SEQUENCES (ACCOMPANIMENT) ........................................................................................
SETTING UP THE CLICK TRACK ......................................................................................................
EDITING QUANTIZATION SETTINGS .................................................................................................
STORING & COPYING DATA ............................................................................................................
NAMING ......................................................................................................................................
STORING & COPYING KITS .............................................................................................................
COPYING INSTRUMENTS ...............................................................................................................
STORING SEQUENCES ..................................................................................................................
STORING TRIGGER SETTINGS ........................................................................................................
TRIG. EDIT MENU .........................................................................................................................
TRIGGER INPUT PARAMETERS .......................................................................................................
TRIGGERING PARAMETERS ............................................................................................................
VELOCITY CURVE .........................................................................................................................
MODE (RIDE BOW & BELL) ............................................................................................................
HI-HAT CALIBRATION ....................................................................................................................
STORING TRIG. EDIT SETTINGS ......................................................................................................
EXPLORING OPTIMAL SENSITIVITY AND THRESHOLD SETTINGS .........................................................
UTILITIES MENU ...........................................................................................................................
GENERAL ....................................................................................................................................
CLICK (F1) ..................................................................................................................................
MIDI (F2) ...................................................................................................................................
TRIG (F3) ...................................................................................................................................
SYS (F4) .....................................................................................................................................
UPDATING THE MODULE ................................................................................................................
MIDI SETUP .................................................................................................................................
USING THE RBM-20 TO TRIGGER SOUNDS FROM A SOFTWARE DRUM MODULE ...................................
USING AN EXTERNAL MIDI DEVICE WITH THE RBM-20’S SOUND LIBRARY ...........................................
MIDI IMPLEMENTATION CHART ......................................................................................................
RBM-20 SEQUENCES ....................................................................................................................
RBM-20 KITS ...............................................................................................................................
RBM-20 INSTRUMENTS ................................................................................................................
1
1
2
2
2
2
3
3
3
4
4
4
5
5
6
6
7-8
8
8
9
9
10-12
12-13
13-16
16
17
17
18
18
19
20
21
22
22
22
23
23
24
24
24
25
26
26
27
27
27
28
28
28
30
31
31
33
33
34
35
36
36
37
38-41