switch, still typically both signal and idle pins are in
the center.
4. Add the alligator clips and connect the RED
clip to the sensors POWER pin.
5. Connect the BLACK clip to the sensors
GROUND pin.
6. Turn meters range selector to 20K
Ω
range.
7. View and record the reading displayed.
The results should show a small amount of
resistance. If the meter shows over range the
circuit is open and the sensor is defective.
8. Move the RED alligator clip to the sensors
SIGNAL pin.
9. Find the linkage on the Throttle Position Sensor,
manually move the throttle linkage cycling from
closed to fully open.
10. Watch the meter display, the reading will either
increase or decrease resistance.
Some throttle position sensors include a WOT, Wide
Open Throttle switch. These switches are tested like
the other switches in the Fuse/Switch section.
11.
Find the vane on the Vane Air Flow Sensor,
typically on or near the multiport electronic fuel injector.
12. Slowly open the butterfly valve from closed to
open by pushing on it. This is the normal function of
the valve and will not harm the sensor.
13. Watch the meter display, the reading will either
increase or decrease resistance.
Some vane air flow sensors have an idle switch and
an intake air temperature sensor in addition to a
potentiometer. If so equipped these switches are
tested like the other switches in the Fuse/Switch
section.Refer to vehicle service manual for
recommended resistance outputs.
EGR Valve Position Sensor
1. Find the vacuum port on the EGR Valve
Position Sensor.
2. Remove the vacuum hose from EGR valve.
3. Connect a hand vacuum pump (W87030) to the
EGR valve.
4. Add the alligator clips and connect the RED
clip to the sensors signal pin (typically the center).
5.
Connect the BLACK clip to a good body GROUND.
6.
Slowly apply vacuum to the EGR valve. Typically,
6 - 10 inches of Hg. should fully open the valve.
7.
Watch the meter display, the reading will either
increase or decrease resistance. Refer to vehicle
service manual for recommended resistance outputs.
• A good sensor should show an increase or
decrease in the resistance as the sensor is opened
and closed.
• A bad sensor will have no change in resistance.
ENGINE SENSORS TESTS CONT.
MAF vs MAP
Manifold Absolute Pressure (MAP) is a sensor to
measure vacuum, the computer calculates the
engine air flow based on the vacuum, throttle
position, and intake air temperature.
Mass Air Flow (MAF) is a sensor that measures the
actual air flow going into the engine
MAP/BARO Sensors
These sensors send signals to the ECU indicating
atmospheric pressure and/or engine vacuum. There
are two different types of MAP sensors. The first,
depending on the vehicle manufacturer may be a
frequency generator used by Ford. The other type
MAP may send a DC voltage signal to the ECU.
This is the most common used by Honda, Toyota,
Honda, GM etc. Refer to your vehicle service
manual for the type MAP sensor your vehicle uses.
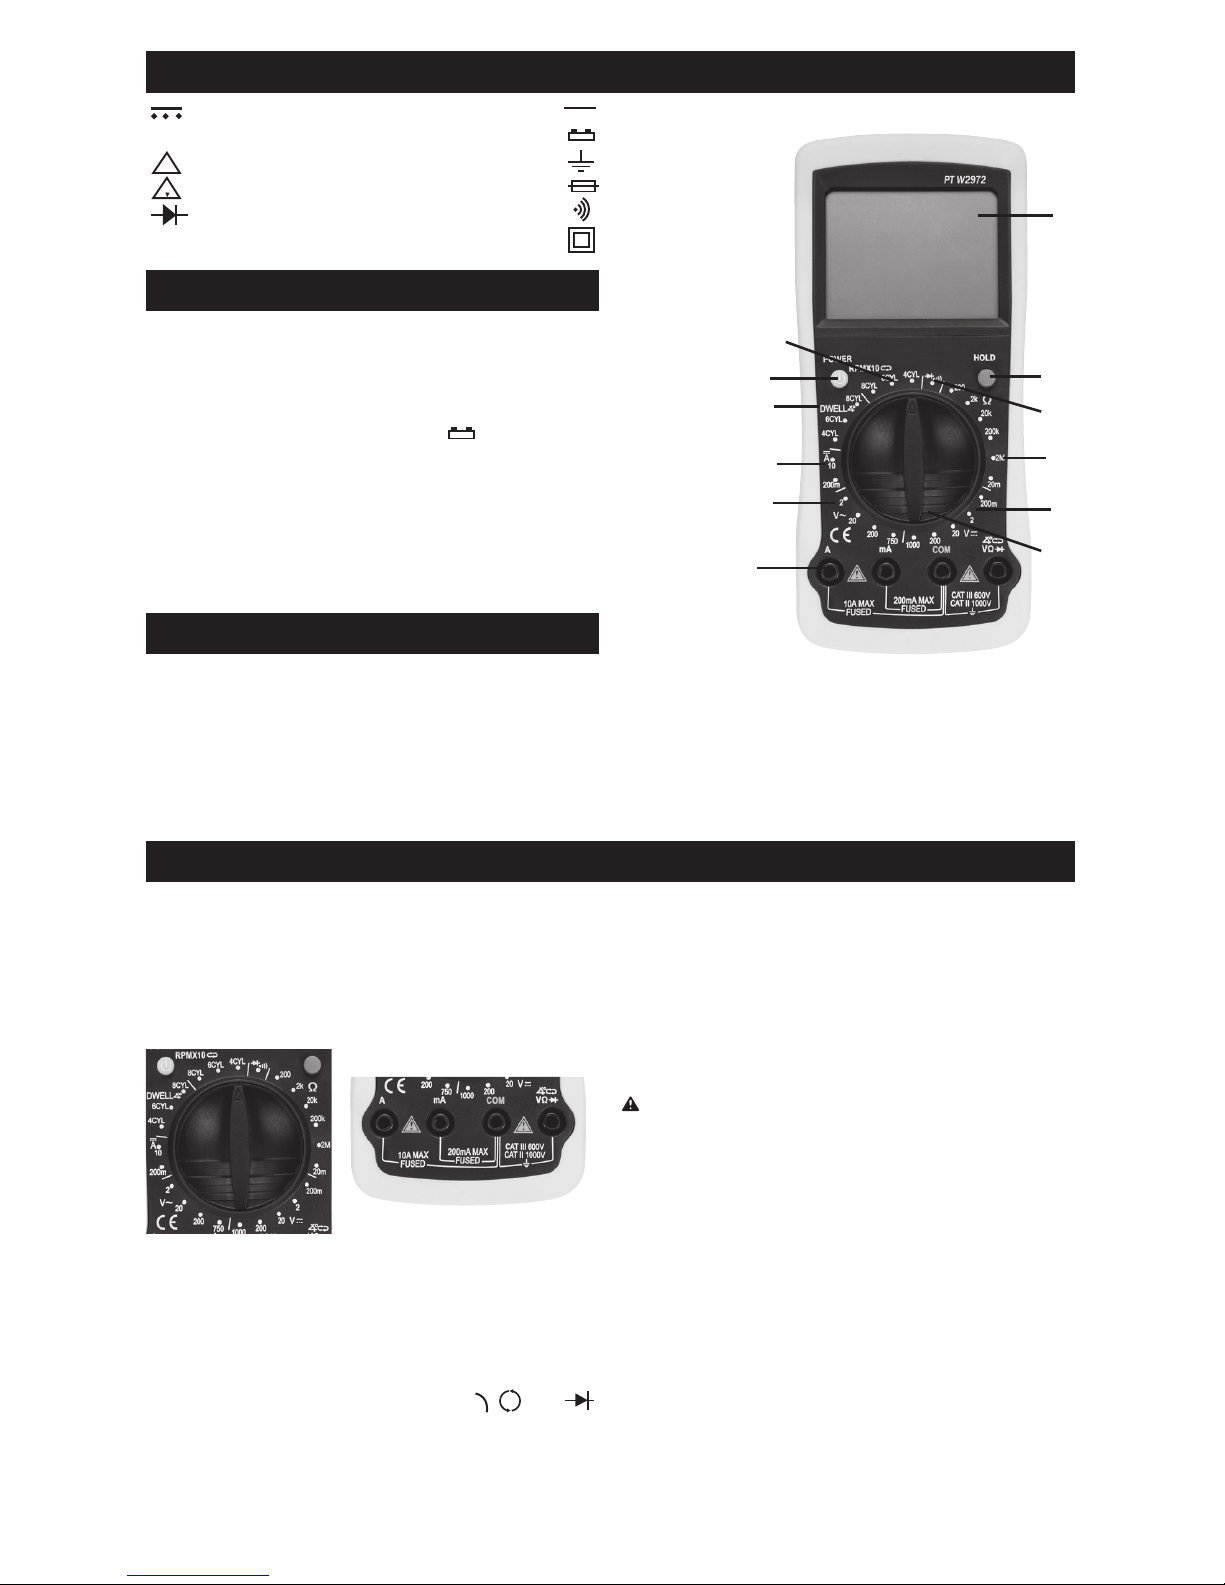
1. Insert BLACK test lead into COM test lead jack.
2.
Insert RED test lead into
test lead jack.
3. For this test you’ll need to back probe or add
jumper leads from the A and C pin in the harness. If
adding jump leads disconnect the MAP from the
wiring harness and the vacuum line from the sensor.
Special back probe lead attachments are available
from most electronic stores (not included).
4. Connect a hand held vacuum pump to vacuum
port on MAP sensor, our model W87030.
5. Identify the A, B, and C pin/wire location on the
MAP harness connection. Connect a jumper wire
between Pin A on wiring harness and sensor.
6. Connect another jumper wire between Pin C
on wiring harness and sensor.
7. Add the alligator clips and connect RED clip to
lead to sensor Pin B.
8.
Connect the BLACK clip to a good vehicle
body ground.
Jumper leads/back probes should be
isolated so they can’t touch each other.
9. Turn the Ignition to the ON position but do not
start the engine.
10.
Turn the meters range selector to 20V DC range
for DC signals, and 4CYL for Frequency signals.
11. With vacuum at 0 in. Hg. your DC volts should
be approximately 3V or 5V. With a Frequency MAP,
when testing a Ford, your display reading should be
between 4532 to 5021 RPM’s, (Display RPM x 10)
For other frequency type MAP sensors refer to your
vehicle service manual for MAP sensor specifications.
12. With the Vacuum pump attached to the MAP
slowly apply vacuum. Do not exceed 20 in. Hg or
you’ll damage the MAP sensor. Voltage and RPM
readings should decrease as vacuum increases.
Refer to your vehicle service manual for voltage and
frequency drops to increasing engine vacuum.
Ʊ
Ⅴ
Ʌ
°
7