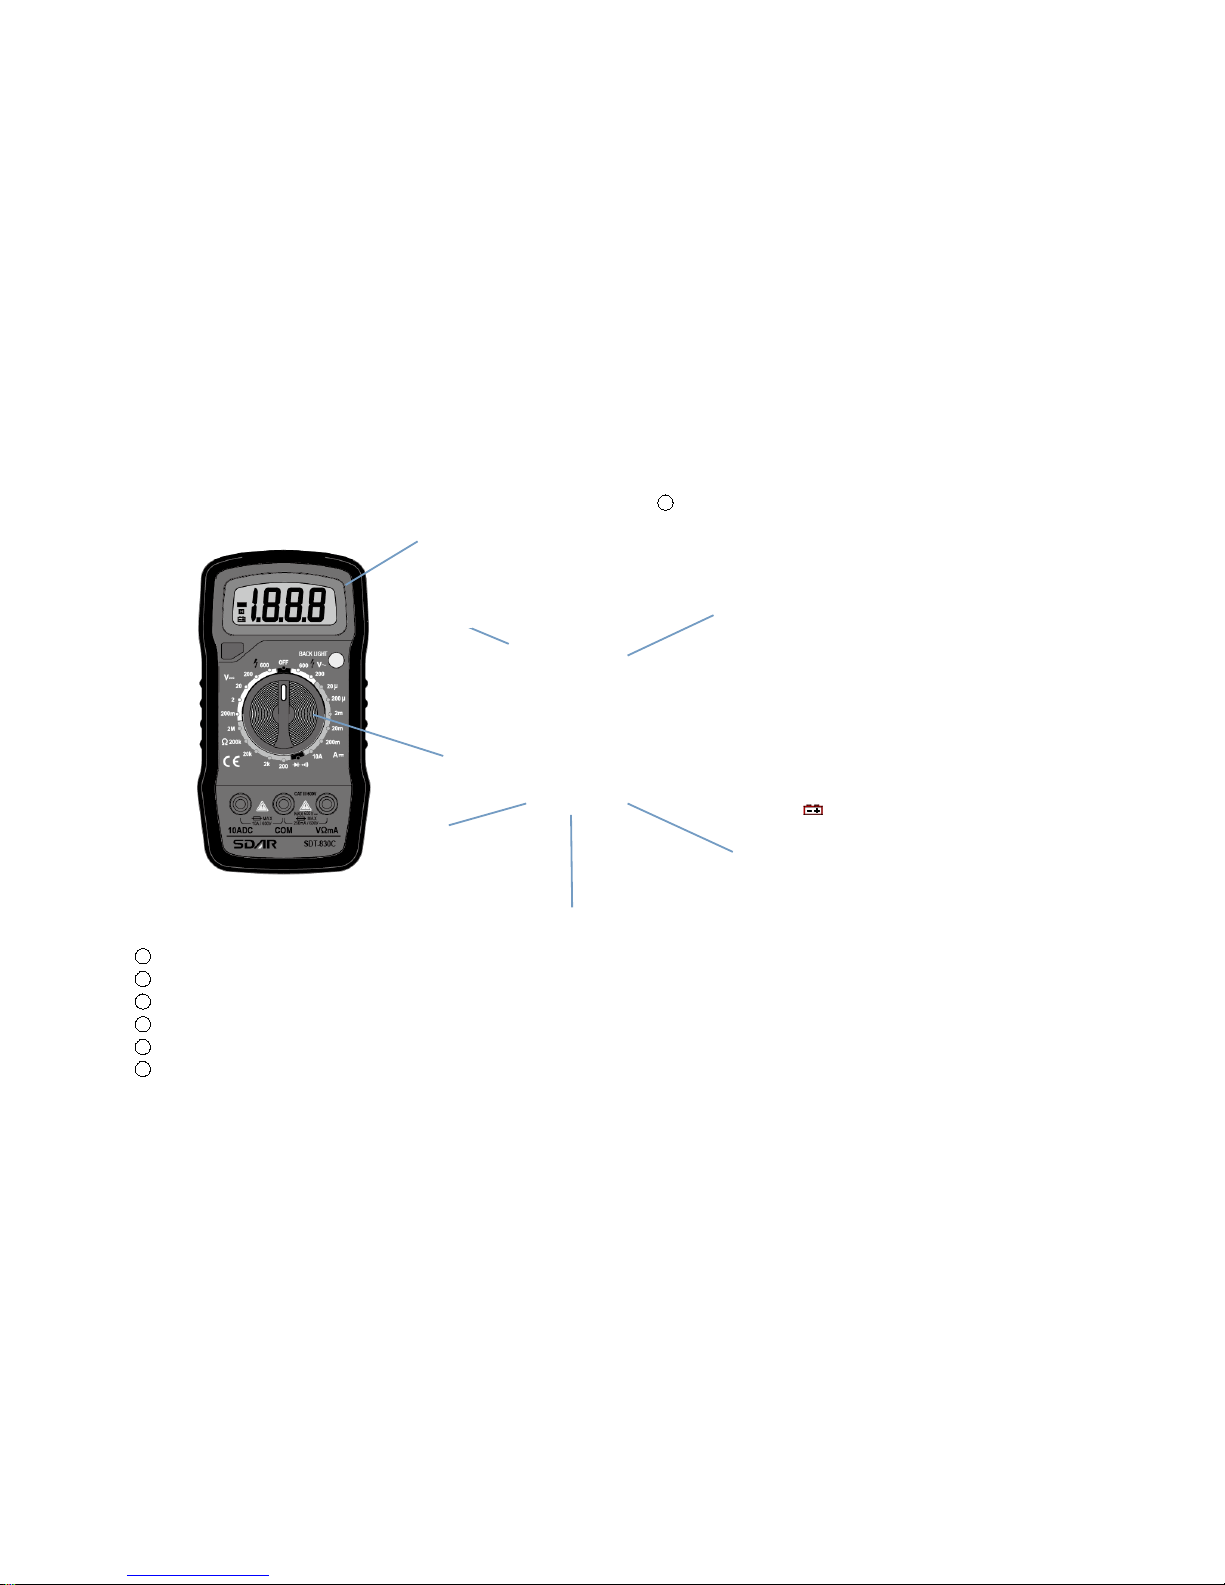
2. Set the rotary switch to proper resistance range..
3. Connect the test lead across with the object under testing.
The measured value will be show on the LCD display.
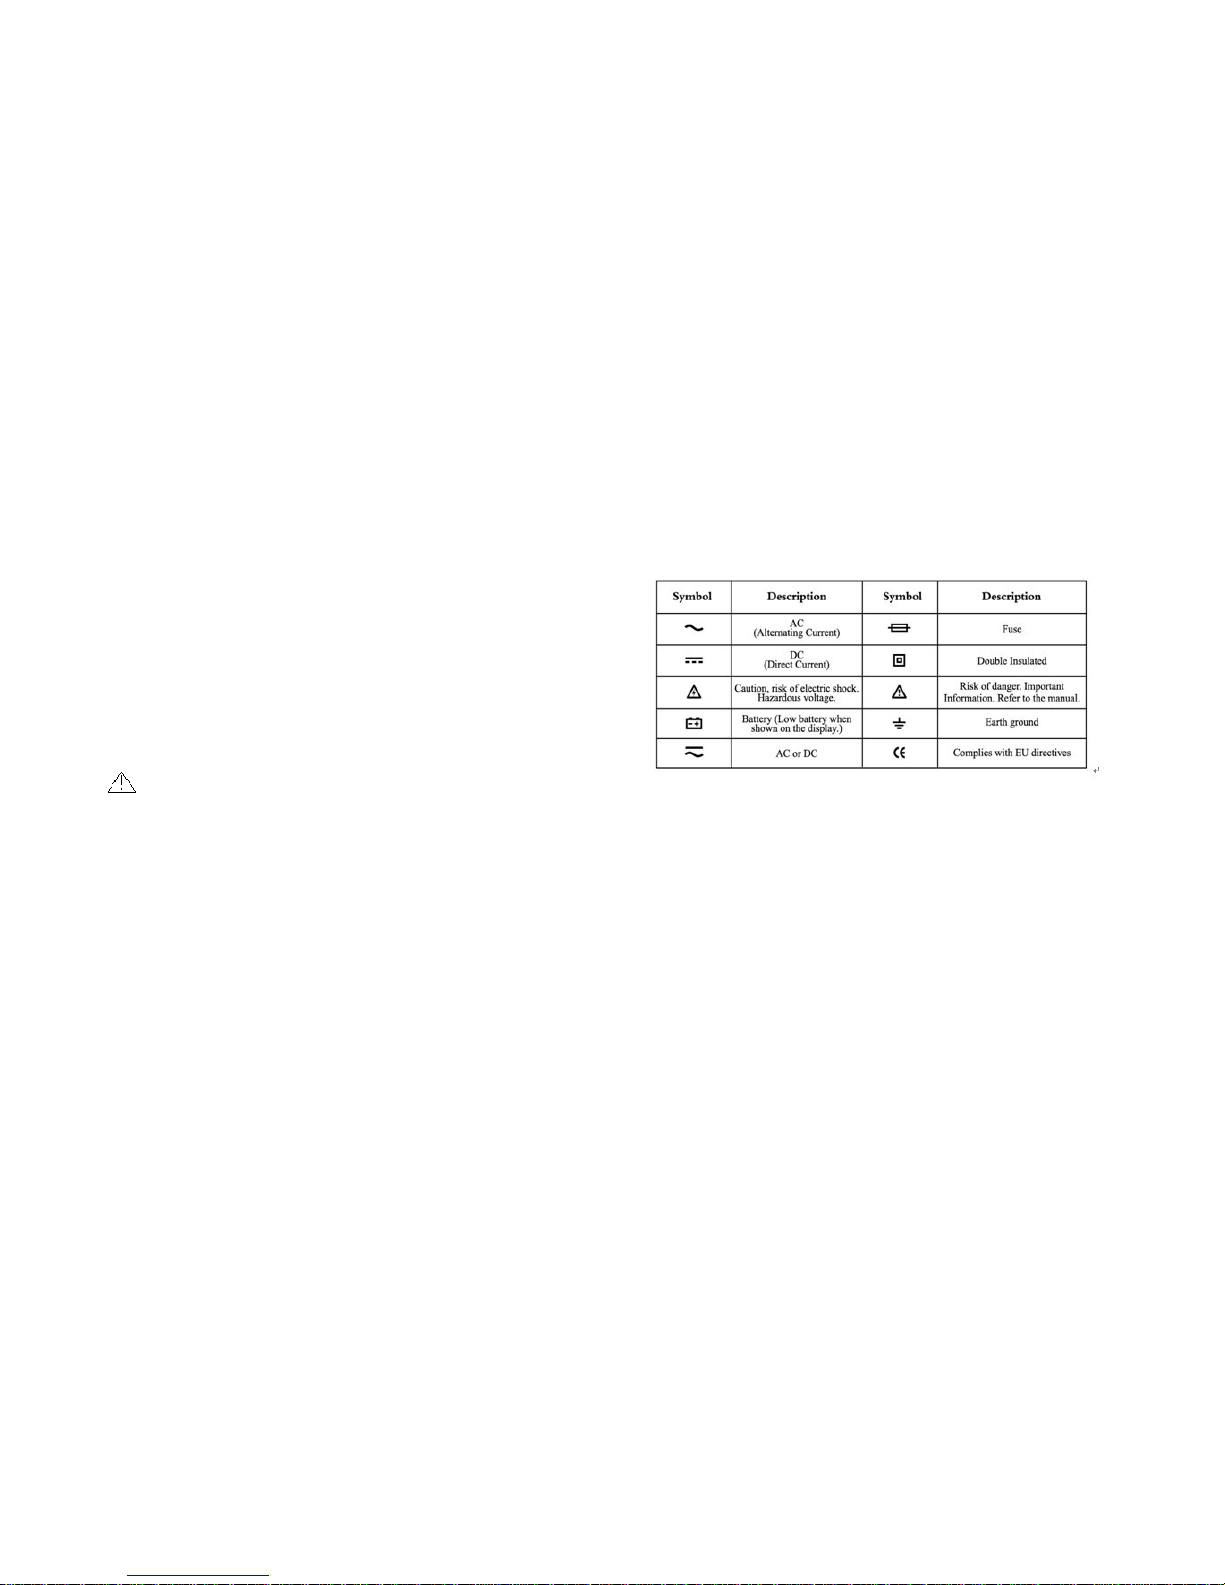
Note:
The test lead can add 0.1Ωto 0.3 of error to resistance measurement.
To obtain precision reading in low-resistance measurement, that is the
range of 200.0 Ω, short the input terminal before measuring. In this
time, the contact resistance displayed on the LCD. You can subtract
the contact resistance value from the measured value.
5-4. Diode measurement
1. Turn the rotary switch to the diode/continuity position.
2. Insert the red test lead into the “VΩmA”jack and the black test lead into the
“COM” jack.
3.Use the diode test mode to check diodes, transistors and other semiconductor
device. In the diode test mode sends a current through the semiconductor
junction, and the measure the voltage drop across the junction. A good silicon
junction drop between 0.5V and 0.8V.
4. For forward voltage drop reading on any semiconductor component, place the
red test lead on the component anode and place the black test lead on the
component cathode. The measured value show on the display.
5. Reverse the test lead and measure the voltage across the diode again.
If diode is good, the display shows “1”.
If diode is shorted, the display shows 0 (zero) in both direction.
If display shows “1” in both direction, the diode is open.
5-5. Continuity Measurement
1.Turn the rotary switch to the diode/continuity position.
2. insert the red test lead into the “VΩmA”jack and the black test lead into the
“COM” jack.
3. If the resistance is under 60Ω, the beeper will sound continuously.
5-6. DC current measurement
1. Turn off power to the circuit. Set the rotary switch to the desired
position.
2. Break the current path to be tested. Connect the red test lead to the
more positive side of the break and the black test lead to the more
negative side of the break.
3. Turn on power to the circuit. The measured value show on the display.
4. “10A” jack is used to measure 10A current..
Note:
For safety’s sake, the measuring time for high current should be
≤10 second for each measurement and the interval time between
two measurement should be greater than 5 minutes.
When current measurement has been completed, disconnect the
connection between the testing lead and the circuit under test.
5-7. Temperature Measurement (SDT-830D)
The Meter measures the temperature of a type-K thermocouple (included).
Warning
To avoid possible damage to the Meter or other equipment, remember that the
included K-Type thermocouple is rated below 400℃.
1. Set the rotary switch to the “TEMP” range.
2. Insert the K-type probe to the two “COM” and “VΩ℃”terminal.