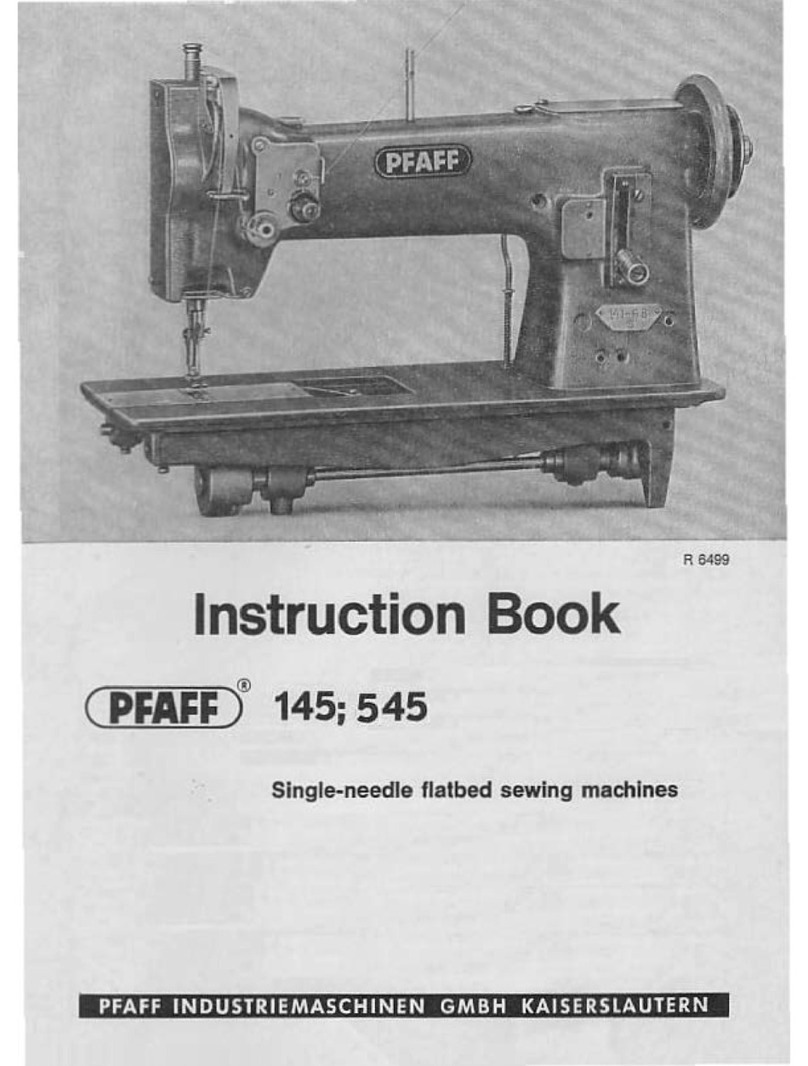
Pfaff 3566-2/02 User manual

3566
296-12-18 132
Betriebsanleitung engl. 07.98
Instruction Manual
For adjustment of the sewing machine of version
-2/02 use service manuals for PFAFF 563
and –900/57..
For adjustment of the sewing machine of version
-3/02 use instruction manual for PFAFF 1183.
Software status: -2/02: 16.12.1997
Software status: -3/02: 22.06.1998
-2/02
-3/02

Reprinting, copying or translation of PFAFF instruction manuals, whether in whole or in part,
is not permitted without our prior approval and not without written indication of the source.
G.M. PFAFF
Aktiengesellschaft
Postfach 3020
D-67653 Kaiserslautern
Königstr. 154
D-67655 Kaiserslautern
Editing / illustrations
Verlag Technische Dokumentation
D-77933 Lahr
This instruction manual applies to all versions and subclasses listed in the
chapter on "Specifications."

Safety
Contents ...............................................................................Chapter - Page
1Safety ........................................................................................................................ 1 -1
1.01 Regulations ................................................................................................................ 1 -1
1.02 General notes on safety............................................................................................. 1 - 1
1.03 Safety symbols .......................................................................................................... 1 - 2
1.04 Important notes for the user ...................................................................................... 1 - 2
1.05 Notes for operating and technical staff ...................................................................... 1 - 3
1.05.01 Operating staff ...........................................................................................................1- 3
1.05.02 Technical staff............................................................................................................ 1 - 3
1.06 Danger warnings........................................................................................................ 1 - 3
2Proper use................................................................................................................. 2 - 1
3Specifications ........................................................................................................... 3 - 1
4Disposal of the machine .......................................................................................... 4 - 1
5Transportation, packing and storage...................................................................... 5 - 1
5.01 Transportation to the customer’s premises ............................................................... 5 - 1
5.02 Tansportation inside the customer’s premises .......................................................... 5 - 1
5.03 Disposal of packing materials..................................................................................... 5 - 1
5.04 Storage ......................................................................................................................5- 1
6Explanation of symbols ........................................................................................... 6 - 1
7Controls .................................................................................................................... 7 - 1
7.01 On/off switch ............................................................................................................. 7 - 1
7.02 Foot switch ................................................................................................................ 7 -1
7.03 Control panel.............................................................................................................. 7 -2
7.03.01 Control panel displays ................................................................................................ 7 - 2
7.03.02 Mode keys .................................................................................................................7- 3
7.03.03 Programming station keys ......................................................................................... 7 - 3
7.03.04 Blue function key ....................................................................................................... 7 -3
7.03.05 Red function keys ...................................................................................................... 7 - 4
7.03.06 Green function keys ................................................................................................... 7 - 4
7.04 Control panel for quick-change of engaging depth ..................................................... 7 - 6
8Installation and commissioning .............................................................................. 8 - 1
8.01 Installation.................................................................................................................. 8 - 1
8.02 Commissioning .......................................................................................................... 8 - 2
8.03 Switching the machine on or off ................................................................................ 8 - 2
9Setting up ................................................................................................................. 9 - 1
9.01 Inserting the needle ................................................................................................... 9 - 1
9.02 Threading the needle thread and regulating the needle-thread tension
( PFAFF 3566-2/02 ).................................................................................................... 9 - 2

Safety
Contents ...............................................................................Chapter - Page
9.03 Winding the bobbin thread and regulating the winder tension ( PFAFF 3566-2/02 ) ... 9 - 3
9.04 Bobbin changing ( PFAFF 3566-2/02 )......................................................................... 9 - 4
9.05 Changing the guide blade ( PFAFF 3566-3/02 )........................................................... 9 - 5
9.06 Changing the work-holder bar ( PFAFF 3566-2/02 ) .................................................... 9 - 6
9.07 Adjusting the basic position of the guide blade ( PFAFF 3566-3/02 ) .......................... 9 - 7
9.08 Changing the guide blade........................................................................................... 9 - 8
9.09 Changing the work-holder bar .................................................................................... 9 - 8
9.10 Adjusting the basic position of the guide blade .......................................................... 9 - 9
10 Programming ......................................................................................................... 10 - 1
10.01 Brief explanation of inputs ....................................................................................... 10 - 1
10.01.01 Direct functions........................................................................................................ 10- 1
10.01.02 Table of functions in menu....................................................................................... 10 - 2
10.01.03 Description of the menu levels ................................................................................ 10 - 3
10.02 Selecting a function in a menu ................................................................................. 10 - 3
10.03 Explanation of the menu functions........................................................................... 10 - 4
10.04 Entering the loading point ........................................................................................ 10 - 10
10.05 Making up and correcting a seam pattern (sequence).............................................. 10 -11
10.06 Examples of how to make up seams ....................................................................... 10 - 12
10.06.01 Single-pointed darts ................................................................................................. 10 - 12
10.06.02 Correcting the engaging depth................................................................................. 10 - 15
10.06.03 Making waistband pleats ......................................................................................... 10 - 16
10.06.04 Making a waistband pleat with basting seam .......................................................... 10 - 17
10.07 Sequence programs (different darts/pleats in sequence) ......................................... 10 -18
11 Sewing .................................................................................................................... 11 - 1
11.01 Starting the sewing action ....................................................................................... 11 - 1
11.02 Sewing with sequence programs............................................................................. 11 - 1
11.03 Disturbances ............................................................................................................ 11 - 1
12 Care and maintenance ........................................................................................... 12 - 1
12.01 Cleaning the machine............................................................................................... 12 - 1
12.02 Oiling the machine ................................................................................................... 12 - 2
12.03 Lubricating the transverse slide ............................................................................... 12 - 3
12.04 Checking and adjusting the air pressure................................................................... 12 - 4
12.05 Cleaning the filter of the air filter/regulator ............................................................... 12 - 4
13 Making up styling parts ......................................................................................... 13 - 1
13.01 Making up guide blades for straight, single-pointed darts ........................................ 13 - 1
13.02 Making up guide blades for curved, pointed darts.................................................... 13 - 3

Safety
1 - 1
1 Safety
1.01 Regulations
This machine has been made according to the European regulations indicated in the
conformity and manufacturer’s declarations.
In addition to this instruction manual, please also observe all generally accepted statutory
and other legal requirements, including those of the user’s country, and the valid pollution
control regulations!
The regionally valid regulations of the social insurance institution responsible for
occupational accidents, or other supervisory authorities, must be strictly adhered to!
1.02 General notes on safety
●The machine must only be operated when the instruction manual has been fully read
and understood, and only by operators who have had the necessary training!
●All notes on safety and the instruction manual of the motor manufacturer must be read
before the machine is put into operation!
●All notices on the machine referring to danger and safety must be observed!
●The machine must be used for the purpose it is intended for and must not be operated
without its safety devices; all regulations relevant to safety must be adhered to.
●When part sets are changed e.g. needle, presser foot and needle plate), during threading,
when the workplace is left unattended and during maintenance work, the machine must
be isolated from the power supply by pressing the on/off switch or removing the plug
from the mains!
●Daily maintenance work must only be carried out by appropriately trained persons!
●Repairs and special maintenance work must only be carried out by qualified technical
staff or persons with the appropriate training!
●Work on the electrical equipment must only be carried out by technical staff who are
qualified to do so!
●Work on parts or equipment connected to the power supply is not permitted!
The only exceptions to this are specified in regulations EN 50110.
●Conversion or modification of the machine must only be carried out under observation
of all relevant safety regulations!

Safety
1 - 2
●Only spare parts which have been approved by us are to be used for repairs!
We draw special attention to the fact that spare parts and accessories not supplied by
us have not been subjected to testing nor approval by us.
Fitting and/or use of any such parts may cause negative changes to the design
properties of the machine. We shall not accept any liability for damage caused by the
use of non-original parts.
1.03 Safety symbols
Danger!
Special points to observe.
Danger of injury to operating or technical staff!
1.04 Important notes for the user
●This instruction manual is part of the equipment of the machine and must be available
to the operating staff at all times.
The instruction manual must be read before the machine is operated for the first time.
●Both operating and technical staff must be instructed on the safety devices of the
machine and on safe working methods.
●It is the duty of the user to operate the machine in perfect running order only.
●The user must ensure that none of the safety devices are removed nor put out of
working order.
●The user must ensure that only authorized persons operate and work on the machine.
For further information please refer to your PFAFF agency.

Safety
1 - 3
1.05 Notes for operating and technical staff
1.05.01 Operating staff
Operating staff are the persons responsible for setting up, operating and cleaning the
machine and for removing any disturbances in the sewing area.
The operating staff must be sure to observe the following items:
●always observe the notes on safety in this instruction manual in their work!
●refrain from any working methods which adversely effect the safety of the machine!
●avoid wearing loose clothing or jewelry such as necklaces or rings!
●also make sure that only authorized persons are allowed near the danger area of the
machine!
●immediately report to the user any changes to the machine that may affect its safety!
1.05.02 Technical staff
Technical staff are persons who have been trained in electrical engineering, electronics,
pneumatics and mechanical engineering. They are responsible for lubricating, servicing,
repairing and adjusting the machine.
The technical staff must be sure to observe the following items:
●always observe the notes on safety in this instruction manual in their work!
●press the on/off switch before carrying out adjustment and repair work, and ensure it
cannot be switched on a gain unintentionally!
●never work on parts or equipment still connected to the power supply!
Exceptions to this are only permissible according to regulations EN 50110.
●replace all safety covers after carrying out maintenance or repair work!
1.06 Danger warnings
A working area of 1 m must be kept free both in front of and behind the
machine, so that easy access is possible at all times.
Never put your hands or fingers in the sewing area during sewing!
Danger of injury by the needle!
While setting or adjusting the machine do not leave any objects on the table
nor in the needle plate area!
Objects may be trapped or slung out of the machine!

Proper use
2 - 1
2 Proper use
The PFAFF 3566-2/02 and the PFAFF 3566-3/02 is a mechanised sewing unit for sewing
darts and waistband pleats with or without basting seam.
Any use of this machine which is not approved by the manufacturer shall be
considered as improper use! The manufacturere shall not be held liable for
any damage arising out of improper use! Proper use shall also be considered
to include compliance with the operation, adjustment, service and repair
measures specified by the manufacturer!

Specifications
3 - 1
3 Specifications ▲
Sewing head 3566-2/02:..................................................................................... PFAFF 563
Sewing head 3566-3/02:................................................................................... PFAFF 1183
Stitch type:.................................................................................................................... 301
Maximum speed: ............................................................................................. 4,500 r.p.m.
Stitch lengths: ............................................................................................... 1.0 to 3.0 mm
Basting stitch lengths:................................................................................... 6.0 to 9.0 mm
(setting is automatically calculated, not adjustable)
Needle system:........................................................................................................ 134 KK
Needle sizes (NM) in 1/100 mm: .........................................................................80 , 90 , 100
Maximum dart length:............................................................................................ 250 mm
Maximum dart depth:............................................................................................... 70 mm
Waistband pleat lengths:................................................................................. 9 to 250 mm
Waistband pleat depths: ................................................................................... 6 to 70 mm
Maximum angle-seam depth: 28 mm
Table height: ............................................................................................. 740 to 1000 mm
Sewing motor: .....................................................................................brushless DC motor
Motor speed: ........................................................................................ 200 to 4,500 r.p.m.
Power input:.............................................................................................. approx. 1320 VA
Connection voltage: ................................................................single-phase 230V, 50/60 Hz
Minimum working pressure: ....................................................................................... 6 bar
Air consumption: ............................................................................ ~ 1 litre/per work cycle
(20 to 25 litres/min.)
Noise level at workplace:
at a speed of 4,500 s.p.m.: ............................................................................ LpA<77 dB(A)
(noise measurement according to DIN 45636-48-A-1)
Dimensions and weight of machine:
Length:................................................................................................................. 1250 mm
Breadth: ................................................................................................................. 700 mm
Height: .................................................................................................... 1120 to 1350 mm
Net weight: ........................................................................................................... ~ 223 kg
Gross weight:........................................................................................................ ~ 373 kg
▲Subject to technical alterations

Disposal of the machine
4 - 1
4 Disposal of the machine
●Proper disposal of the machine is the responsibility of the user.
●The materials used for the machine are steel, aluminium, brass and various plastics.
The electrical equipment comprises plastic materials and copper.
●The machine must be disposed of according to the locally valid pollution control
regulations; if necessary, a specialist will have to be contracted.
Care must be taken that parts soiled with lubricants are disposed of
separately according to the locally valid pollution control regulations!

Transportation, packing and storage
5 - 1
5 Transportation, packing and storage
5.01 Transportation to the customer’s premises
Within the Federal Republic of Germany, complete machines (with table and motor) are
delivered without packing.
Machines without table (sewing heads only) and machines intended for exports are
packed.
5.02 Tansportation inside the customer’s premises
The manufacturer cannot be made liable for transportation inside the customer’s premises
nor to other operating locations.
5.03 Disposal of packing materials
The packing materials of this machine comprise paper, cardboard and VCE fibre. Proper
disposal of the packing material is the responsibility of the customer.
5.04 Storage
If the machine is not in use, it can be stored as it is for a period of up to six months, but
after that it should be protected against dust and moisture.
If the machine is stored for longer periods, the individual parts, especially the surfaces of
moving parts, must be protected against corrosion, e.g. by a film of oil.

Explanation of symbols
6 - 1
6 Explanation of symbols
In this instruction manual, work to be carried out, or important information, is
accentuated by symbols. These symbols have the following meanings:
Note, information
Cleaning, care
Lubrication
Maintenance, repairs, adjustment, service work
(only to be carried out by technical staff)

Controls
7 - 1
7 Controls
7.01 On/off switch
●The power supply to the machine is
switched on or off by turning switch 1.
Fig. 7 - 01
1
7.02 Foot switch
●The following functions are carried out
by pressing the pedal 1:
Position 1: Engage dart blade
Position 2: Start sewing
If the machine is equipped
with loading plate
No. 95-752409-70/895, there is
no foot switch.
Loading of the workpiece and
sewing start are then triggered
by pushing the feed table in by
hand.
Fig. 7 - 02
1

Controls
7 - 2
7.03 Control panel
Fig. 7 - 03
7.03.01 Control panel displays
●In the top line the setting is indicated under the symbol concerned.
Program number (from 0 to 99)
Over-all seam length (in mm)
Stitch length (in mm)
Loading point/starting point (in mm; no symbol)
Speed (in r.p.m.)
Piece counter
●In the bottom line of the display different texts are shown (e.g. input prompts, error
signals, etc.). At the side of symbol # the text number of the indicated text is shown
(the text number serves for clear definition in the different languages).

Controls
7 - 3
7.03.02 Mode keys
It is possible to select two different modes on the control panel. The selected mode is
indicated by the luminous diode in the corresponding key.
SEWING mode
INPUT mode
Only certain functions can be enabled within each of the selected modes.
The red function keys are enabled in the SEWING mode, and the green ones
in the INPUT mode.
7.03.03 Programming station keys
These keys have a function both in the SEWING mode and in the INPUT
mode.
These keys are used for choosing between two programs.
The program station currently active is indicated by the luminous diode in the key.
Program station A
Select program station A
Program station B
Select program station B
7.03.04 Blue function key
This key is for enabling an optional positioning stop which is not available yet.

Controls
7 - 4
7.03.05 Red function keys
These keys only function in the SEWING mode.
Stop program
Interrupt sewing program
Start program
Start sewing program.
Continue program after interruption.
Cycle seam pattern forwards
Cycle seam pattern forwards step by step.
Used with the program key
this starts an automatic cycle of the seam.
Guide blade
Extend/retract guide blade.
Reset key
Verify removal of error.
Threading aid
This function serves to assist threading of the needle thread.
- Work-holder bar and presser foot are raised.
- Sewing start is inhibited.
Cycle seam pattern backwards
Cycle seam pattern backwards step by step.
Used with the program key
this starts an automatic cycle of the seam.
Basic position
The machine is set at its basic position.
7.03.06 Green function keys
These keys only function in the INPUT
mode.
Program selection
When this function is enabled (diode lights up) a stored program can be selected using the
number keys or the plus/minus keys.
Automatic station change
When this function is enabled (diode lights up) the program station is changed
automatically from A to B after every sewing cycle.
Seam-patternprogramming
When this function is enabled (diode lights up) a seam pattern can be made up or edited.
See Chapter 10.05 Making up and editing seam patterns.

Controls
7 - 5
Basting stitch seam
When this function is enabled (diode lights up) an additional basting seam is sewn.
Angular seam
When this function is enabled (diode lights up) an angular seam is sewn, i.e. a seam that
is not parallel with the end of the fabric.
Engaging depth
When this function is enabled (diode lights up) up to 40 mm is added to the engaging depth
of the guide blade at present in use.
Start backtack
When this function is enabled (diode lights up) a backtack is sewn.
Stitch condensation at beginning of seam
When this function is enabled (diode lights up), condensed stitches are sewn at the
beginning of the seam.
Finish backtack
When this function is enabled (diode lights up) a finish backtack is sewn.
Stitch condensation at end of seam
When this function is enabled (diode lights up), condensed stitches are sewn at the end of
the seam.
Enter key
This key is for verifying the input settings and dialogs (access to functions).
Clear key
For resetting input values.
Esc key
For interrupting functions without verifying inputs (reversing menus).
Plus key
For increasing input values step by step,
for answering dialog prompts with "yes" and
for scrolling through the menu guide.
Minus key
For decreasing input values step by step,
for answering dialog prompts with "no" and
for scrolling backwards through the menu guide.
Number keys
These serve to input values and
select menu functions direct.
070
. . .

Controls
7 - 6
7.04 Control panel for quick-change of engaging depth
Control panel 1only functions in the basic position of the machine and in the
SEWING mode.
Control panel Bis used for increasing or decreasing the engaging depth of the guide blade
in steps of 0.3 mm each for adaption to different material thicknesses (see also Chapter
10.06.02 Correcting the engaging depth). The selected change of engaging depth is
indicated by the luminous diode of the corresponding key.
Examples:
●Key +0 pressed: the engaging depth input in the seam program is used.
●Key +1 pressed: engaging depth of 0.3 mm is added to the depth input in the seam
program.
●Key –3 pressed: engaging depth of 0.9 mm is subtracted from the depth input in the
seam program, provided an engaging depth of higher than 0.9 is input.
The plus/minus keys of control panel 1have no function.
Fig. 7 - 04
B
+0
+1 -3

Installation and commissioning
8 - 1
8 Installation and commissioning
After unpacking, check the machine for transit damage. If any damage is found, report
this to the forwarding agent and to the PFAFF agency responsible.
The machine must only be installed and commissioned by qualified personnel!
All relevant safety regulations must be strictly adhered to!
On machines put into operation for the first time, or after longer periods of
storage, it is imperative to check the oil feed (see Chapter 12 Care and
Maintenance).
8.01 Installation
The site where the machine is installed must be provided with suitable connections for
electric current and compressed air (see
Chapter 3, Specifications).
It must be ensured that the standing surface of the machine site is firm and horizontal.
●Set the machine horizontal in its
location.
●Loosen screw 1at both sides and adjust
the table height for standing or seated
operation, as required.
●Fully tighten screw 1.
Fig. 8 - 01
1

Installation and commissioning
8 - 2
0
2
4
6 810
12
14
16
0
50
100 150
200
250
8.02 Commissioning
The machine must only be connected to a suitably earthed socket!
●Clean the machine thoroughly and check
the electric wiring and pneumatic tubes
for any damage.
●Oil the machine, or top up the oil (see
Chapter 12, Care and maintenance).
●Have the machine connected to the
electric mains by qualified personnel,
making sure that the machine can really
be used with the available mains
voltage.
If there is any discrepancy, do not put
the machine into operation!
●Connect the machine to the compressed
air supply.
●Gauge 1must then indicate a pressure
of 6 bar.
●If necessary, adjust this setting on
adjusting knob 2.
Fig. 8 - 02
2
1
0
2
4
6 810
12
14
16
0
50
100 150
200
250
8.03 Switching the machine on or off
●Check air presure on gauge 1and adjust
pressure on adjusting knob 2if
necessary.
●Turn main switch 3to the "ON" position.
The machine is automatically set in the
INPUT mode.
●To switch off the machine turn main
switch 3to the "OFF" position.
2
1
Fig. 8 - 03
3
This manual suits for next models
1
Table of contents
Other Pfaff Sewing Machine manuals

Pfaff
Pfaff 5483 Series User manual

Pfaff
Pfaff 1196 User manual

Pfaff
Pfaff 1295 User manual

Pfaff
Pfaff Automatic 260 User manual

Pfaff
Pfaff CREATIVE 2124 User manual

Pfaff
Pfaff 5625-657/01 User manual

Pfaff
Pfaff Powerline 2545 User manual

Pfaff
Pfaff 8301 User manual

Pfaff
Pfaff 1114 User manual

Pfaff
Pfaff Creative 2134 User manual

Pfaff
Pfaff 480 Series User manual

Pfaff
Pfaff 487 User manual

Pfaff
Pfaff CREATIVE 2170 SEWING User manual

Pfaff
Pfaff ClassicStyle 1525 User manual

Pfaff
Pfaff select 1520 User manual

Pfaff
Pfaff 2081 User manual

Pfaff
Pfaff Embroidery Machines User manual

Pfaff
Pfaff Creative Vision Technical manual

Pfaff
Pfaff 8304-020 User manual

Pfaff
Pfaff 1181 Guide