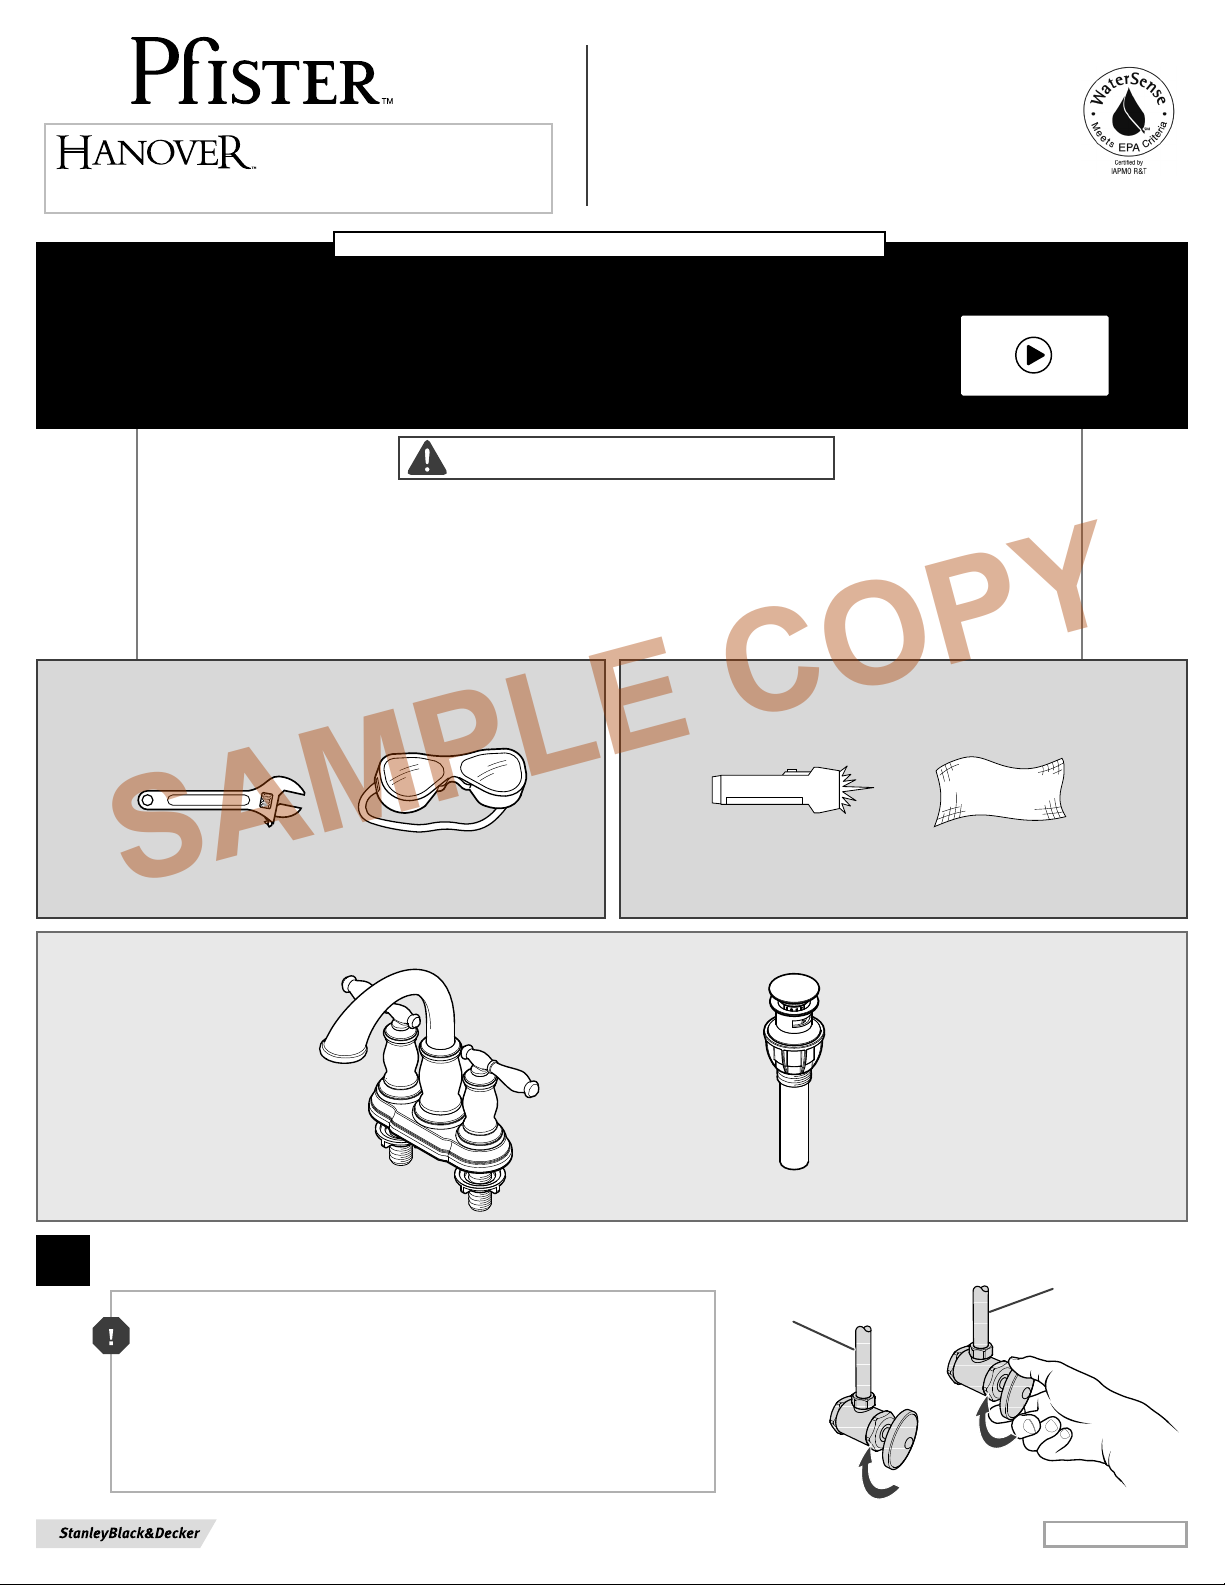
Pfister HANOVER F-043-TM User manual
Other Pfister Plumbing Product manuals

Pfister
Pfister Zanna F-529-7ZN3 User manual

Pfister
Pfister Lita User manual

Pfister
Pfister Avalon S10-40 User manual

Pfister
Pfister LG16 Series User manual

Pfister
Pfister Pot Filler GT533-PF User manual

Pfister
Pfister Avalon GT48-CB0K User manual

Pfister
Pfister Winfield LG89-XWF User manual

Pfister
Pfister Treviso LG26 Series User manual

Pfister
Pfister Courant F-048-CO User manual

Pfister
Pfister NIA GT529-NI User manual

Pfister
Pfister 801-PFL User manual

Pfister
Pfister Jovi F-529-7JI User manual

Pfister
Pfister LF-WK1-68 User manual

Pfister
Pfister Avalon 48 Series User manual

Pfister
Pfister Saxton 016-GL1 User manual

Pfister
Pfister Avalon 016-CB1 User manual

Pfister
Pfister Marielle LF-026-3N User manual

Pfister
Pfister Contempra LG40-N User manual

Pfister
Pfister Zanna F-529-EZN3 User manual

Pfister
Pfister Modern RT6-1MF User manual


Popular Plumbing Product manuals by other brands

Weka
Weka 506.2020.00E ASSEMBLY, USER AND MAINTENANCE INSTRUCTIONS

American Standard
American Standard DetectLink 6072121 manual

Kohler
Kohler K-6228 Installation and care guide

Uponor
Uponor Contec TS Mounting instructions

Fortis
Fortis VITRINA 6068700 quick start guide

Kohler
Kohler K-12183 Homeowner's guide


Hans Grohe
Hans Grohe AXOR Citterio E 36702000 Instructions for use/assembly instructions

baliv
baliv WT-140 manual

Kohler
Kohler Mira Eco Installation & user guide

BELLOSTA
BELLOSTA romina 0308/CC Installation instruction

Bristan
Bristan PS2 BAS C D2 Installation instructions & user guide

Crosswater
Crosswater Heir 18-31 installation instructions