manuals.online logo
Brands
  1. Home
  2. •
  3. Brands
  4. •
  5. Philips
  6. •
  7. Digital Photo Frame
  8. •
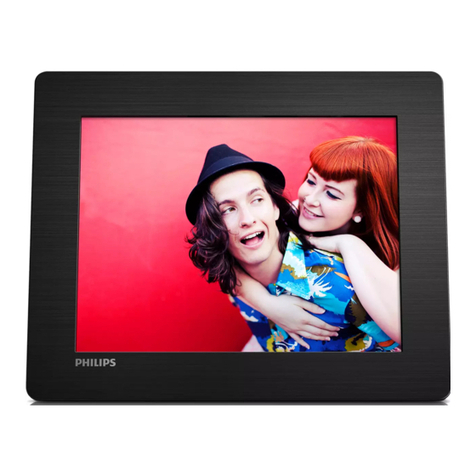
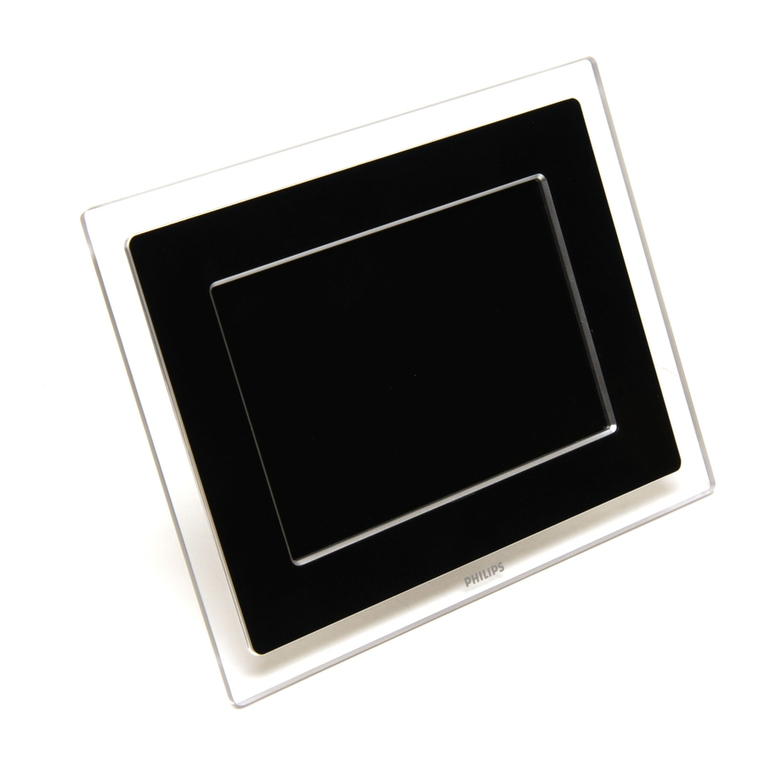
  9. Philips SPH8408/10 User manual

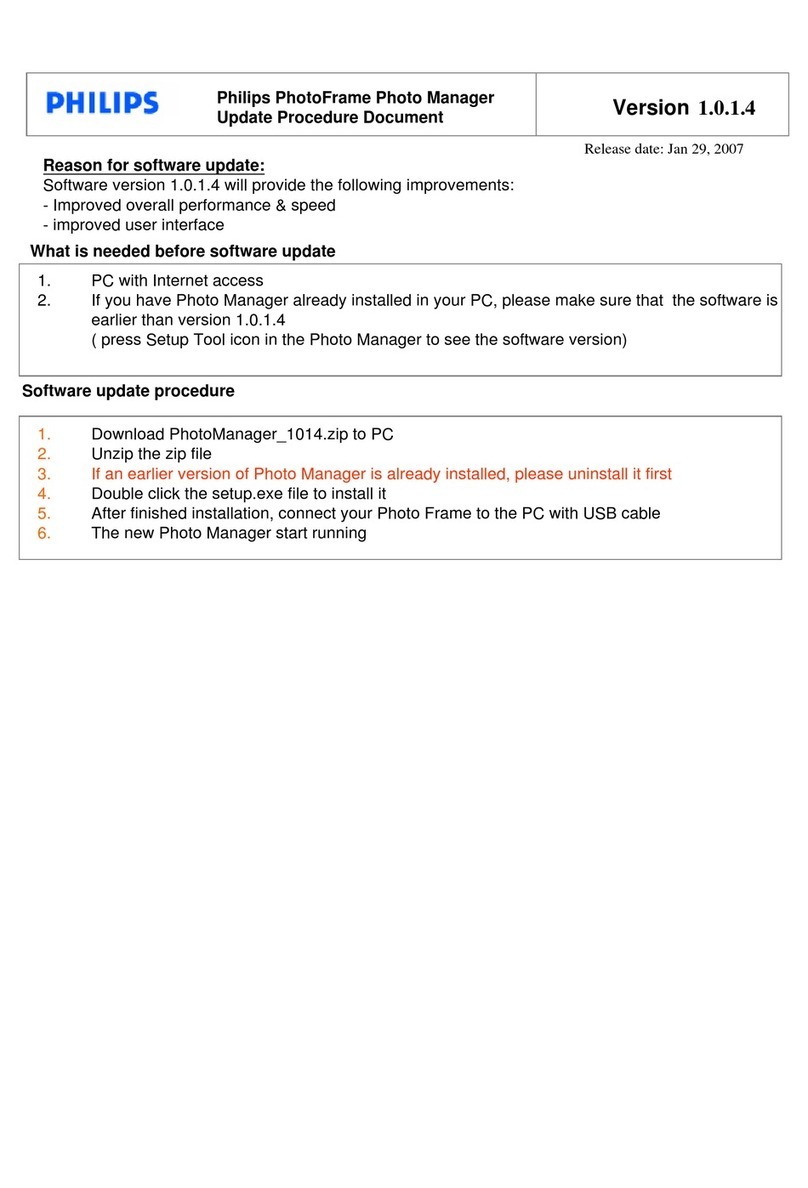
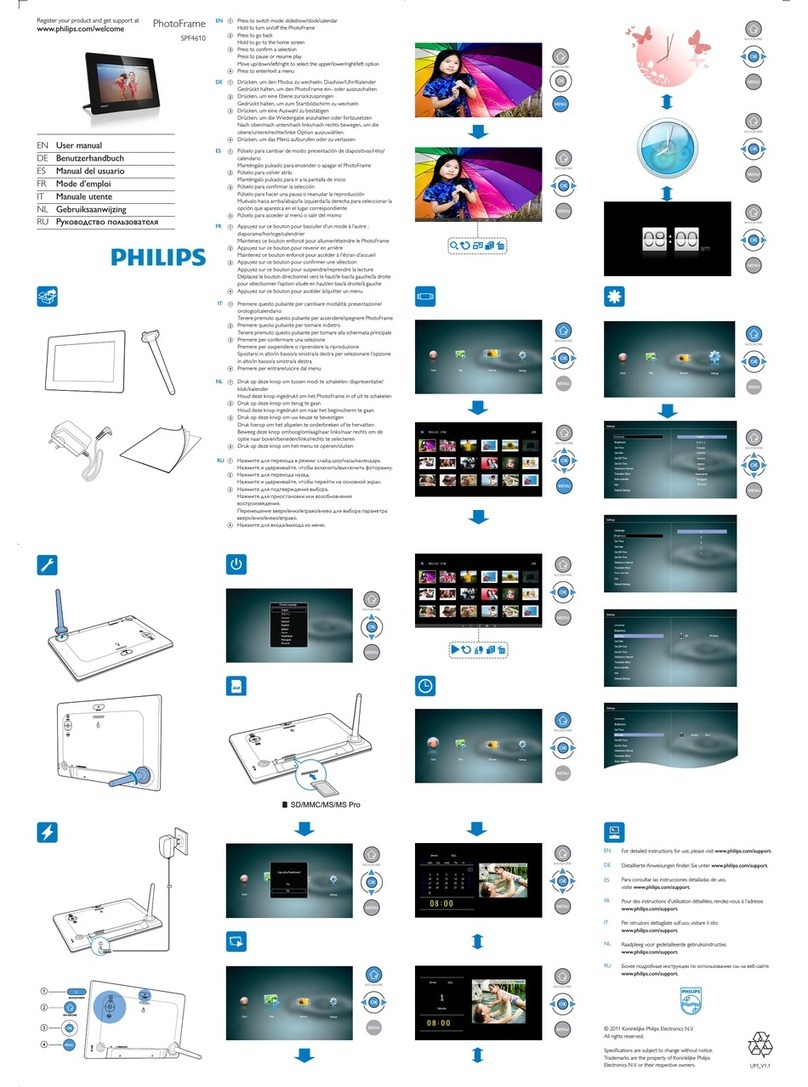
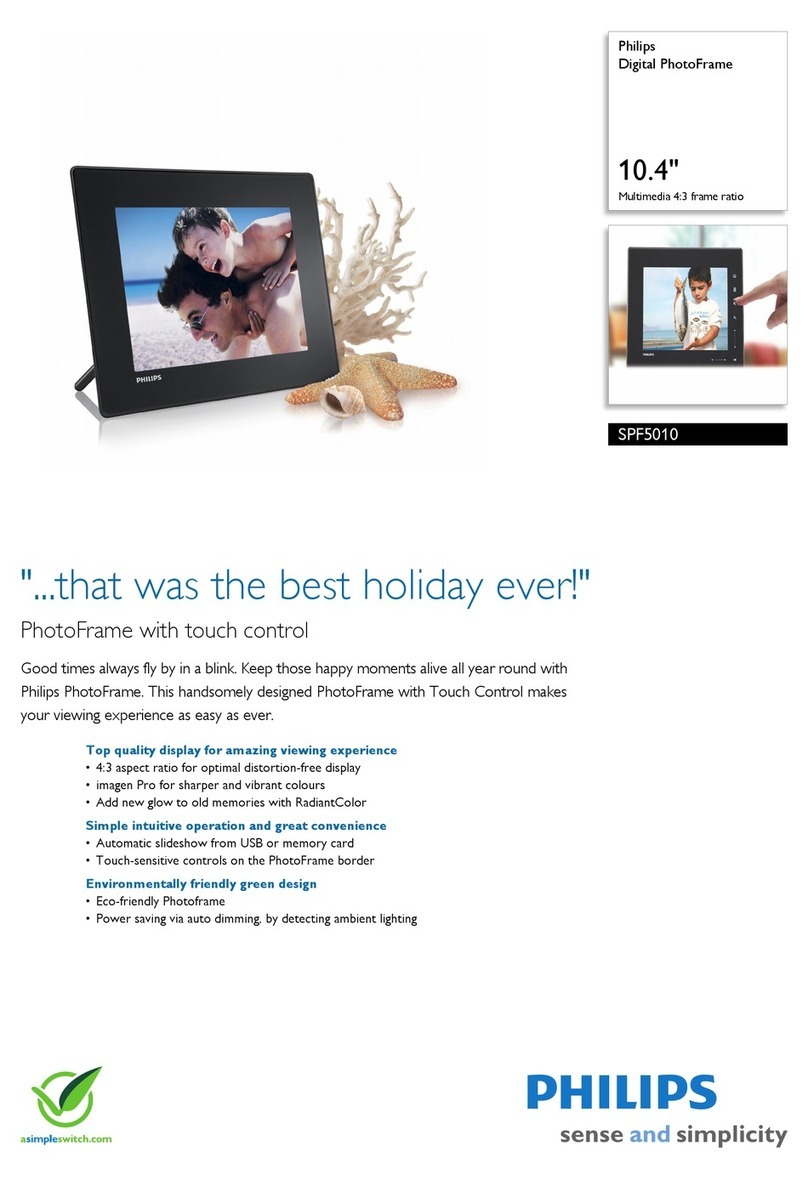
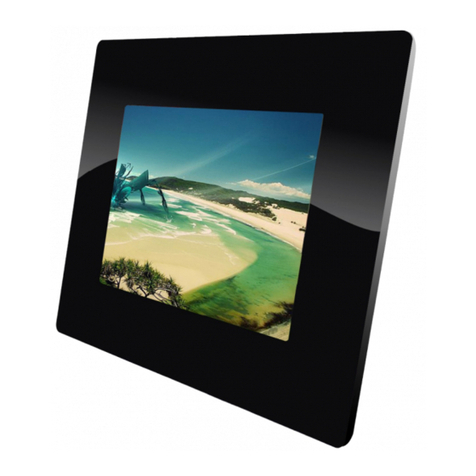
Philips SPH8408/10 User manual

English
© 2011 Koninklijke Philips Electronics N.V.
All rights reserved.
Specications are subject to change without notice.
Trademarks are the property of Koninklijke Philips
Electronics N.V. or their respective owners.
V2.0 Printed in China
Register your product and get support at
www.philips.com/welcome
SPH8408
SPH8428
PhotoAlbum
EN Quick start guide
DE Schnellstartanleitung
ES Guía de conguración rápida
FR Guide de mise en route
IT Guida di avvio rapido
NL Snelstartgids
RU  
- Press to turn on the PhotoAlbum
- Press and hold to turn off the PhotoAlbum
- Press to switch modes (between slideshow and clock/calendar; or,
between wave view and album view)
- Hold to go to the home screen
- Tap to go back to the upper-level menu
MENU - Tap to access or to exit the option menu
/ - Tap to zoom in/out
- Tap to switch modes (wave mode <-> album mode <-> slideshow
mode<-> zoom in twice <-> zoom in 4 times)
/- Tap to scroll up
- Tap to scroll down
OK - Tap to play/pause slideshow
- Tap to conrm a selection
/ - Tap to skip left
- Tap to skip right
Know these buttons
Input in English
Input in supported European languages
Input in Russian
/ ABC Switch to select symbols, punctuations, alphabet or numbers
aA Switch between upper and lower case
Enter a blank space
Enter a line break
Know these keypad icons
Registeryourproduct and get support at
www.philips.com/welcome PhotoAlbum
Quick Start Guide
PhotoAlbum
Startup
Note
Charge the built-in battery for about 2•
hours before using the PhotoAlbum for the
rst time.The fully charged built-in battery
lets you operate the PhotoAlbum for up
to 1 hour.
Battery level 0%~5%
Battery level 5%~20%
Battery level 20%~40%
Battery level 40%~60%
Battery level 60%~80%
Battery level 80%~100%
PhotoAlbum in charging
PhotoAlbum in dock,AC-powered,
not charging
1Connect the DC plug of the supplied power
cord to the DC jack of the supplied charging
dock.
2Feed the cord through the cord channel.
3Connect the AC plug of the power cord to
a power supply socket.
4 Connect the PhotoAlbum to the charging
dock.
5 Press to turn on the PhotoAlbum.
Select a language or set time and date if
• applicable.
6 Follow the on screen instructions to:
Play media
• Select or set clock/calendar• Create or view event reminders• Browse media• Adjust settings•
Transfer/Play media via a storage device
Caution
Do not disconnect the storage device from•
the PhotoAlbum during media transfer.
View a created event reminder
Create an event reminder
1 In the home screen, select [Event Reminder]
and then tap OK.
2Select [View Event Reminder], and then tap
OK.
3Select an event reminder, and then tap OK.
An event reminder is displayed.»
Tap
• MENU, and then select one of the
following options to continue.
• [Re-schedule]: Reschedule the event
reminder
• [Delete]: Delete the event reminder
To go back to view other event reminders,
• select [Done] and then tap OK.
1 In the home screen, select [Event Reminder]
and then tap OK.
2 Select [Create Event Reminder], and then
tap OK.
3 Tap / to select a template of event
reminder, and then tap OK.
Change image of event reminder.
• Edit the text of event reminder.• Set the real time and date if applicable.•
4 Select [Done], and then tap OK.
The screen prompts you to schedule the»
event reminder.
5 Schedule the message.
• [Event Name]: Enter the name.
• [Repeat]: Select a repeat frequency
• [Set Date]: Set the date or day
• [Set Time]: Set the time
6 After you complete the event reminder,
select [Done] and tap OK.
To go back to the home screen
• , hold .
Media type supported:
Photo (JPEG)•
Storage device supported:
SD/SDHC/MMC/MMC Plus/xD/MS/MS Pro•
1Insert a storage device into the PhotoAlbum.
An option menu is displayed.»
2Select an option, and then tap OK.
3Follow the on screen instructions to:
Play media on the storage device
• Browse media on the storage device• Copy media on the storage device to• PhotoAlbum
SPH84X8A_QSG_05&10_v2.0.indd 1 2011-2-18 15:30:50
Deutsch
- Drücken, um das PhotoAlbum einzuschalten
- Gedrückt halten, um das PhotoAlbum auszuschalten
- Drücken, um den Modus zu wechseln (Diashow und Uhr/Kalender oder
Waveansicht und Albumansicht)
- Gedrückt halten, um zum Startbildschirm zu wechseln
- Antippen, um zum nächst höheren Menüpunkt zurückzukehren
MENU - Antippen, um das Optionsmenü zu öffnen oder zu schließen
/ - Antippen, um Ausschnitt zu vergrößern/verkleinern
- Antippen, um zwischen den Modi umzuschalten (Wavemodus <-> Albummodus
<-> Diashow-Modus <-> 2-fach-Zoom <-> 4-fach-Zoom)
/- Antippen, um nach oben zu blättern
- Antippen, um nach unten zu blättern
OK - Antippen, um die Diashow wiederzugeben/anzuhalten
- Antippen, um eine Auswahl zu bestätigen
/ - Antippen, um nach links zu springen
- Antippen, um nach rechts zu springen
Tastenfunktionen
Eingabe auf Englisch
Eingabe in einer unterstützten europäischen Sprache
Eingabe auf Russisch
/ ABC Wechseln zwischen Symbolen,Zeichensetzung, Alphabet oder Ziffern
aA Wechseln zwischen Klein- und Großbuchstaben
Einfügen eines Leerzeichens
Einfügen eines Zeilenumbruchs
Wichtige Tastensymbole
Start
Hinweis
• Laden Sie den integrierten Akku, bevor
Sie das Philips PhotoAlbum zum ersten
Mal verwenden. Mit einem vollständig
geladenen Akku können Sie das
PhotoAlbum bis zu eine Stunde lang
verwenden.
Akkustand 0 % ~ 5 %
Akkustand 5 % ~ 20 %
Akkustand 20 % ~ 40 %
Akkustand 40 % ~ 60 %
Akkustand 60 % ~ 80 %
Akkustand 80 % ~ 100 %
PhotoAlbum wird geladen
Philips PhotoAlbum ist in der Station,
Wechselspannungsbetrieb, wird nicht
geladen
1Verbinden Sie den DC-Stecker des
mitgelieferten Netzkabels mit der DC-Buchse
der ebenfalls mitgelieferten Ladestation.
2 Führen Sie das Kabel durch den Kabelkanal.
3 Stecken Sie den Netzstecker in eine Steckdose.
4 Schließen Sie das Philips PhotoAlbum an die
Ladestation an.
5 Drücken Sie , um das PhotoAlbum
einzuschalten.
Wählen Sie ggf. eine Sprache aus, oder
• stellen Sie die Uhrzeit und das Datum ein.
6 Folgen Sie den Bildschirmanweisungen, um
Folgendes durchzuführen:
Medienwiedergabe
• Auswählen oder Einstellen von Uhr/Kalender• Erstellen oder Anzeigen von Ereignis-• Erinnerungen
Durchsuchen von Medien
• Anpassen von Einstellungen•
Übertragung/Wiedergabe von Medien über ein Speichergerät
Achtung
Trennen Sie das Speichermedium während•
der Medienübertragung nicht vom
PhotoAlbum.
Anzeigen einer erstellten Ereignis-Erinnerung
Ereignis-Erinnerung erstellen
1 Wählen Sie auf dem Startbildschirm
[Terminerinner.], und tippen Sie
anschließend auf OK.
2 Wählen Sie [Terminerinnerung anzeigen]
und anschließend OK.
3 Wählen Sie eine Ereignis-Erinnerung, und
tippen Sie dann auf OK.
Es wird eine Ereignis-Erinnerung angezeigt.»
Tippen Sie auf
• MENU, und wählen Sie zum
Fortfahren eine der folgenden Optionen.
• [Zeitplan ändern]: Neuterminieren der
Ereignis-Erinnerung
• [Löschen]: Löschen der Ereignis-Erinnerung
Um zurückzukehren und andere Ereignis-
• Erinnerungen anzuzeigen, wählen Sie
[Fertig], und tippen Sie dann auf OK.
1 Wählen Sie auf dem Startbildschirm
[Terminerinner.], und tippen Sie
anschließend auf OK.
2 Wählen Sie [Terminerinnerung erstellen]
und anschließend OK.
3 Tippen Sie auf / , um eineVorlage der
Ereignis-Erinnerung auszuwählen, und tippen
Sie anschließend auf OK.
Ändern Sie das Bild der Ereignis-Erinnerung.
• Bearbeiten Sie den Text der Ereignis-• Erinnerung.
Stellen Sie ggf. die richtige Uhrzeit und
• das richtige Datum ein.
4 Wählen Sie [Fertig] und anschließend OK.
Sie werden aufgefordert, einen Zeitplan»
für die Ereignis-Erinnerung zu erstellen.
5 Erstellen Sie einen Zeitplan für die Nachricht.
• [Terminname]: Geben Sie den Namen ein.
• [Wiederholen]:Wählen Sie eine
Wiederholungsfrequenz aus
• [Datum einstellen]: Stellen Sie Datum
oder Tag ein
• [Zeit einstellen]: Stellen Sie die Uhrzeit ein
6 Wenn Sie die Ereignis-Erinnerung erstellt haben,
wählen Sie [Fertig], und tippen Sie auf OK.
• Um zum Startbildschirm zurückzukehren,
halten Sie gedrückt.
Unterstützte Medientypen:
Foto (JPEG)•
Unterstützte Speichergeräte:
SD/SDHC/MMC/MMC Plus/xD/MS/MS Pro•
1 Legen Sie ein Speichermedium in das
PhotoAlbum ein.
Es wird ein Optionsmenü angezeigt.»
2 Wählen Sie eine Option aus, und tippen Sie
anschließend auf OK.
3 Folgen Sie den Bildschirmanweisungen, um
Folgendes durchzuführen:
Wiedergeben von Medien auf dem
• Speichergerät
Durchsuchen von Medien auf dem
• Speichergerät
Kopieren von Medien vom Speichergerät
• zum Fotoalbum
Español
- Púlselo para encender el PhotoAlbum
- Manténgalo pulsado para apagar el PhotoAlbum
- Púlselo para cambiar de modo (entre secuencia de diapositivas y reloj/calendario o
entre vista de ruleta y vista de álbum)
- Manténgalo pulsado para ir a la pantalla de inicio
- Toque para volver al menú de nivel superior
MENU - Toque para acceder o salir del menú de opciones
/ - Toque para acercar o alejar
- Toque para cambiar de modo (vista de ruleta <-> vista de álbum <-> secuencia de
diapositivas <-> acercar dos veces <-> acercar cuatro veces)
/- Toque para desplazarse hacia arriba
- Toque para desplazarse hacia abajo
OK - Toque para reproducir/poner en pausa una secuencia de diapositivas
- Toque para conrmar la selección
/ - Toque para desplazarse a la izquierda
- Toque para desplazarse a la derecha
Información sobre estos botones
Entrada en inglés
Entrada en idiomas europeos compatibles
Entrada en ruso
/ ABC Seleccionar símbolos, puntuación, alfabeto o números
aA Cambiar entre mayúsculas y minúsculas
Introducir un espacio en blanco
Introducir un salto de línea
Información sobre los iconos del teclado
Inicio
Nota
Cargue la batería integrada antes de usar•
el PhotoAlbum por primera vez. La batería
integrada completamente cargada permite
que funcione el PhotoAlbum hasta 1 hora.
Nivel de la batería: 0%~5%
Nivel de la batería: 5%~20%
Nivel de la batería: 20%~40%
Nivel de la batería: 40%~60%
Nivel de la batería: 60%~80%
Nivel de la batería: 80%~100%
PhotoAlbum cargándose
PhotoAlbum en la base, conectado a
la toma de CA, sin cargarse
1 Conecte la toma de CC del cable de
alimentación suministrado a la toma DC de
la base de carga suministrada.
2 Pase el cable por la guía.
3 Conecte la toma de CA del cable de
alimentación a una toma para la fuente de
alimentación.
4 Conecte el PhotoAlbum a la base de carga.
5 Pulse para encender el PhotoAlbum.
Seleccione el idioma o ajuste la fecha y la
• hora si procede.
6 Siga las instrucciones que aparecen en
pantalla para:
Reproducir archivos multimedia
• Seleccionar o ajustar el reloj/calendario• Crear o ver recordatorios de evento• Explorar archivos multimedia• Ajustar la conguración•
Transferencia/Reproducción de archivos multimedia mediante un
dispositivo de almacenamiento
Precaución
No desconecte el dispositivo de•
almacenamiento del PhotoAlbum durante
la transferencia de archivos multimedia.
Ver un recordatorio de evento creado
Creación de un recordatorio de evento
1 En la pantalla de inicio, seleccione [Record.
evento] y, a continuación, toque OK.
2 Seleccione [Ver aviso] y toque OK.
1 En la pantalla de inicio, seleccione [Record.
evento] y toque OK.
2 Seleccione [Crear aviso] y toque OK.
3 Toque / para seleccionar una plantilla de
aviso y toque OK.
Cambie la imagen del recordatorio de
• evento.
Edite el texto del recordatorio de evento.
• Ajuste la hora y fecha real si es necesario.•
4 Seleccione [Hecho] y toque OK.
La pantalla le solicitará que programe el»
recordatorio de evento.
5 Programe el mensaje.
• [Nombre del evento]: introduzca el
nombre
• [Repetir]: seleccione una frecuencia de
repetición
• [Congurar fecha]: ajuste la fecha o el día
• [Congurar hora]: ajuste la hora
6 Tras nalizar el recordatorio de evento,
seleccione [Hecho] y toque OK.
• Para volver a la pantalla de inicio, mantenga
pulsado .
Tipos de archivos compatibles:
Fotos (JPEG)•
Dispositivos de almacenamiento compatibles:
SD/SDHC/MMC/MMC Plus/xD/MS/MS Pro•
1 Inserte un dispositivo de almacenamiento en
el PhotoAlbum.
Aparece un menú de opciones.»
2 Seleccione una opción y toque OK.
3 Siga las instrucciones que aparecen en
pantalla para:
Reproducir los archivos del dispositivo de
• almacenamiento
Explorar los archivos del dispositivo de
• almacenamiento
Copiar los archivos del dispositivo de
• almacenamiento al PhotoAlbum
3 Seleccione un recordatorio de evento y, a
continuación, toque OK.
Aparece un recordatorio de evento.»
Toque
• MENU y, a continuación, seleccione
una de las siguientes opciones para
continuar.
• [Reprogramar]: vuelve a programar el
recordatorio de evento
• [Eliminar]: elimina el recordatorio de
evento
Para volver atrás y ver otros recordatorios
• de eventos, seleccione [Hecho] y, a
continuación, toque OK.
SPH84X8A_QSG_05&10_v2.0.indd 2 2011-2-18 15:31:54
Français
- Permet de mettre le PhotoAlbum sous tension
- Mainteniez ce bouton enfoncé pour mettre l’appareil hors tension
- Permet de basculer d’un mode à l’autre (entre le diaporama et l’horloge / le
calendrier ou entre l’afchage « vagues » et l’afchage album)
- Maintenez ce bouton enfoncé pour accéder à l’écran d’accueil
- Permet de revenir au menu de niveau supérieur
MENU - Permet d’accéder ou de quitter le menu d’options
/ - Permet d’effectuer un zoom avant/arrière
- Permet de basculer d’un mode à l’autre (mode « vagues » <-> mode album <->
mode diaporama <-> zoom avant 2x <-> zoom avant 4x)
/- Appuyez pour faire déler vers le haut
- Appuyez pour faire déler vers le bas
OK - Appuyez pour lire/suspendre la lecture du diaporama
- Appuyez pour conrmer une sélection
/ - Appuyez pour vous déplacer vers la gauche
- Appuyez pour vous déplacer vers la droite
Boutons les plus utiles
Saisie en anglais
Saisie dans les langues européennes prises en charge
Saisie en russe
/ ABC Basculer entre les symboles, la ponctuation, les lettres ou les chiffres
aA Basculer entre majuscules et minuscules
Saisir un espace
Retourner à la ligne
Boutons les plus utiles du pavé numérique
Démarrage
Remarque
Chargez la batterie intégrée avant d’utiliser•
le PhotoAlbum pour la première fois. Une
fois la batterie intégrée complètement
chargée, le PhotoAlbum peut fonctionner
pendant 1 heure.
Niveau de batterie entre 0 et 5 %
Niveau de batterie entre 5 et 20 %
Niveau de batterie entre 20 et 40 %
Niveau de batterie entre 40 et 60 %
Niveau de batterie entre 60 et 80 %
Niveau de batterie entre 80 et 100 %
PhotoAlbum en cours de charge
PhotoAlbum sur la base, alimenté en
CA, hors charge
1Branchez la che CC du cordon
d’alimentation fourni sur la prise DC de la
base de recharge fournie.
2 Faites passer le cordon d’alimentation dans
la ferrite.
3 Branchez la che CA du cordon
d’alimentation fourni sur une prise murale.
4 Branchez le PhotoAlbum sur la base de
recharge.
5 Appuyez sur pour allumer l’appareil.
Sélectionnez une langue ou réglez la date
• et l’heure, le cas échéant.
6 Suivez les instructions afchées à l’écran pour :
Supports de lecture
• Sélectionner ou régler l’heure/le calendrier• Créer ou afcher des rappels d’événement• Parcourir les chiers multimédias• Réglage des paramètres•
Transfert/lecture de chiers multimédias via un périphérique de
stockage
Attention
Ne débranchez pas le périphérique de•
stockage du PhotoAlbum pendant le
transfert de chiers multimédias.
Afcher un rappel d’événement déjà créé
Création d’un rappel d’événement
1 Dans l’écran d’accueil, sélectionnez [Rappel
d’évén.], puis appuyez sur OK.
2 Sélectionnez [Afcher le rappel
d’événement], puis appuyez sur OK.
1 Sur l’écran d’accueil, sélectionnez [Rappel
d’évén.], puis appuyez sur OK.
2 Sélectionnez [Créer un rappel
d’événement], puis appuyez sur OK.
3 Appuyez sur / pour sélectionner un
modèle de rappel d’événement, puis
appuyez sur OK.
Modiez l’image du rappel d’événement.
• Modiez le texte du rappel d’événement.• Réglez l’heure et la date exactes le cas• échéant.
4 Sélectionnez [Terminé], puis appuyez sur OK.
Vous êtes invité(e) à programmer le»
rappel d’événement.
5 Programmer le message.
• [Nom de l’événement] : permet de saisir
le nom.
• [Répéter] : permet de sélectionner une
fréquence de répétition
• [Dénir date] : permet de régler la date
ou le jour
• [Dénir heure] : permet de régler l’heure
6 Une fois le rappel d’événement programmé,
sélectionnez [Terminé] et appuyez sur OK.
• Pour revenir à l’écran d’accueil, maintenez
enfoncé .
Type de support pris en charge :
Photo (JPEG)•
Périphériques de stockage pris en charge :
Lecteur ash USB SD / SDHC / MMC /• MMC Plus / xD / MS / MS Pro
1 Insérez un périphérique de stockage dans le
PhotoAlbum.
Un menu d’options s’afche.»
2 Sélectionnez une option, puis appuyez sur
OK.
3 Suivez les instructions afchées à l’écran pour :
Lire les chiers multimédias sur le
• périphérique de stockage
Parcourir les chiers multimédias stockés
• sur le périphérique de stockage
Copier les chiers multimédias du
• périphérique de stockage sur le PhotoAlbum
Italiano
- Premere per accendere PhotoAlbum
- Tenere premuto per spegnere PhotoAlbum
- Premere questo pulsante per passare da una modalità all’altra (da presentazione a
orologio/calendario oppure da visualizzazione onda a visualizzazione album e viceversa)
- Tenere premuto questo pulsante per accedere alla schermata principale
- Toccare per tornare al menu di livello superiore
MENU - Toccare per accedere o uscire dal menu delle opzioni
/ - Toccare per ingrandire/ridurre
- Toccare per passare da una modalità all’altra (modalità onda <-> modalità album <->
modalità presentazione <-> ingrandimento 2 volte <-> ingrandimento 4 volte)
/- Toccare per scorrere su
- Toccare per scorrere giù
OK - Toccare questo pulsante per avviare/mettere in pausa la presentazione
- Toccare questo pulsante per confermare una selezione
/ - Toccare per spostarsi a sinistra
- Toccare per spostarsi a destra
Pulsanti e relativa funzione
Immissione in inglese
Immissione in lingue europee supportate
Immissione in russo
/ ABC Interruttore per selezionare simboli, punteggiatura, lettere o numeri
aA Passaggio da lettere maiuscole a minuscole
Immettere uno spazio
Immettere un’interruzione di riga
Icone del tastierino
Avvio
Nota
• Caricare la batteria integrata prima di
utilizzare PhotoAlbum per la prima volta.
Con la batteria integrata completamente
carica è possibile utilizzare il PhotoAlbum
no a 1 ora.
Livello della batteria 0%~5%
Livello della batteria 5%~20%
Livello della batteria 20%~40%
Livello della batteria 40%~60%
Livello della batteria 60%~80%
Livello della batteria 80%~100%
PhotoAlbum in carica
PhotoAlbum nella base docking,
collegato all’alimentazione CA, non
in carica
1Collegare la spina CC del cavo di alimentazione
in dotazione al jack DC della base docking.
2 Far passare il cavo attraverso il relativo canale.
3 Inserire la spina CA del cavo di
alimentazione in una presa di alimentazione.
4 Collegare PhotoAlbum alla base docking di
ricarica.
5 - Premere per accendere PhotoAlbum
Selezionare una lingua oppure impostare
• la data e l’ora, se applicabile.
6 Seguire le istruzioni sullo schermo per
eseguire le operazioni riportate di seguito:
Riproduzione di le multimediali
• Selezione o impostazione dell’orologio/• calendario
Creazione o visualizzazione dei
• promemoria eventi
Ricerca di le multimediali
• Regolazione delle impostazioni•
Trasferimento/riproduzione di le multimediali tramite un
dispositivo di archiviazione
Attenzione
Non scollegare il dispositivo di•
archiviazione da PhotoAlbum durante il
trasferimento di le multimediali.
Visualizzare un promemoria evento creato
Creazione di un promemoria
1 Nella schermata principale, selezionare
[Promemoria evento], quindi toccare OK.
1 Nella schermata principale, selezionare
[Promemoria evento], quindi toccare OK.
2 Selezionare [Crea un promemoria evento],
quindi toccare OK.
3 Toccare / per selezionare un modello di
promemoria evento, quindi toccare OK.
Cambiare l’immagine del promemoria
• evento.
Modicare il testo del promemoria
• evento.
Impostare la data e l’ora reale, se
• applicabile.
4 Selezionare [Fine], quindi toccare OK.
Sulla schermata compare la richiesta di»
programmare il promemoria evento.
5 Programmare il messaggio.
• [Nome evento]: consente di immettere
il nome.
• [Ripeti]: consente di selezionare una
frequenza di ripetizione
• [Imposta data]: consente di impostare la
data o il giorno
• [Imposta ora]: consente di impostare l’ora
6 Una volta completato il promemoria evento,
selezionare [Fine], quindi toccare OK.
• Per tornare alla schermata principale,
tenere premuto .
Formati multimediali supportati:
Foto (JPEG)•
Dispositivi di archiviazione supportati:
SD/SDHC/MMC/MMC Plus/xD/MS/MS Pro•
1Inserire un dispositivo di archiviazione
all’interno di PhotoAlbum.
Viene visualizzato un menu delle opzioni.»
2 Selezionare un’opzione, quindi toccare OK.
3 Seguire le istruzioni sullo schermo per
eseguire le operazioni riportate di seguito:
Riprodurre le multimediali sul dispositivo
• di archiviazione
Cercare le multimediali sul dispositivo di
• archiviazione
Copiare le multimediali sul dispositivo di
• archiviazione in PhotoAlbum
3 Sélectionnez un rappel d’événement, puis
appuyez sur OK.
Un rappel d’événement s’afche.»
Appuyez sur
• MENU, puis sélectionnez l’une
des options suivantes pour continuer.
• [Reprogrammer] : permet de
reprogrammer le rappel d’événement
• [Supprimer] : permet de supprimer le
rappel d’événement
Pour revenir à l’afchage d’autres rappels
• d’événement, sélectionnez [Terminé] et
appuyez sur OK.
2 Selezionare [Visualizza un promemoria
evento], quindi toccare OK.
3 Selezionare un promemoria evento, quindi
toccare OK.
Viene visualizzato un promemoria evento.»
Toccare
• MENU, quindi selezionare una delle
opzioni seguenti per continuare.
• [Riprogramma]: consente di
riprogrammare il promemoria evento
• [Elimina]: consente di eliminare il
promemoria evento
Per tornare a visualizzare altri promemoria
• eventi, selezionare [Fine] e toccare OK.
SPH84X8A_QSG_05&10_v2.0.indd 3 2011-2-18 15:32:09
Nederlands
- Druk op deze knop om het PhotoAlbum in te schakelen
- Houd deze knop ingedrukt om het PhotoAlbum uit te schakelen
- Druk hierop om tussen modi te schakelen (tussen diapresentatie en klok/kalender; of
tussen carrousel- en albumweergave)
- Houd deze knop ingedrukt om naar het beginscherm te gaan
- Raak deze knop aan om terug te gaan naar het bovenste menu
MENU - Raak deze knop aan om het optiemenu te openen of te sluiten
/ - Raak deze knop aan om in en uit te zoomen
- Raak deze knop aan om tussen modi te schakelen (carrouselmodus <-> albummodus
<-> diapresentatiemodus <-> twee keer inzoomen <-> 4 keer inzoomen)
/- Raak aan om naar boven te bladeren
- Raak aan om naar beneden te bladeren
OK - Raak deze knop aan om een diapresentatie af te spelen/te onderbreken
- Raak deze knop aan om uw keuze te bevestigen
/ - Raak aan om snel naar links te gaan
- Raak aan om snel naar rechts te gaan
Weet wat deze knoppen betekenen
Tekst in Engels invoeren
Tekst in een van de ondersteunde Europese talen invoeren
Tekst in Russisch invoeren
/ ABC Overschakelen naar een venster waarin u symbolen, leestekens,letters of cijfers kunt
selecteren
aA Wisselen tussen hoofdletters en kleine letters
Een spatie invoeren
Een regeleinde invoeren
Weet wat pictogrammen op het toetsenblok betekenen
Opstarten
Opmerking
Laad de ingebouwde batterij op voordat•
u het PhotoAlbum voor de eerste
keer gebruikt. Indien de ingebouwde
batterij volledig is opgeladen, kunt u het
PhotoAlbum tot wel 1 uur bedienen.
Batterijniveau 0%~5%
Batterijniveau 5%~20%
Batterijniveau 20%~40%
Batterijniveau 40%~60%
Batterijniveau 60%~80%
Batterijniveau 80 ~ 100%
PhotoAlbum wordt opgeladen
PhotoAlbum aangesloten op station,
op netvoeding, wordt niet opgeladen
1Sluit de gelijkstroomstekker van het
meegeleverde netsnoer aan op de DC-
aansluiting van het meegeleverde oplaadstation.
2Klem het snoer in de kabelgeleider.
3Steek de stekker van het netsnoer in een
stopcontact.
4Plaats het PhotoAlbum op het oplaadstation.
5Druk op om het PhotoAlbum in te
schakelen.
S
• electeer een taal of stel een datum en
tijd in (indien van toepassing).
6Volg de instructies op het scherm voor het
volgende:
• Media afspelen
Klok/kalender selecteren of instellen
• Eventherinneringen maken of weergeven• Media verkennen• Instellingen aanpassen•
Media overbrengen/afspelen via een opslagapparaat
Let op
Koppel het opslagmedium tijdens het•
overbrengen van de mediabestanden niet
los van het PhotoAlbum.
Een eventherinnering bekijken
Een eventherinnering maken
1Selecteer [Herinnering] in het beginscherm
en raak OK aan.
2Selecteer [Bekijk herinnering] en raak
vervolgens OK aan.
1 Selecteer [Herinnering] in het beginscherm
en raak OK aan.
2Selecteer [Maak een nieuwe herinnering]
en raak vervolgens OK aan.
3Raak / aan om een sjabloon voor een
eventherinnering te selecteren en raak
vervolgens OK aan.
Wijzig de afbeelding van de
• eventherinnering.
Bewerk de tekst van de eventherinnering.
• Stel de actuele tijd en datum in (indien• van toepassing).
4Selecteer [Gereed] en raak vervolgens OK
aan.
U wordt gevraagd om de»
eventherinnering in te plannen.
5Plan het bericht in.
[Naam event]
• : voer de naam in
[Herhalen]
• : selecteer een
herhalingsfrequentie
• [Datum instellen]: stel de datum of
dag in
[Tijd instellen]
• : stel de tijd in
6Nadat de eventherinnering is voltooid,
selecteert u [Gereed] en raakt u OK aan.
Houd
• ingedrukt om terug te gaan naar
het beginscherm.
Ondersteund mediatype:
Foto (JPEG)•
Ondersteund opslagapparaat:
SD/SDHC/MMC/MMC Plus/xD/MS/MS Pro•
1Plaats een opslagmedium in het PhotoAlbum.
Er wordt een optiemenu weergegeven.»
2Selecteer een optie en raak OK aan.
3Volg de instructies op het scherm voor het
volgende:
Media op het opslagapparaat weergeven
• Bladeren door media die zijn opgeslagen• op het opslagapparaat
Media die op het opslagapparaat zijn
• opgeslagen naar het PhotoAlbum
kopiëren

- ,   .
-   ,   .
-      (  -
 /     “”  ).
-   ,     .
- ,     ! .
MENU - ,     "  .
/ - ,  / .
-      ( “” <->
  <->  - <->   <->
 )
/-    
-    "
OK -   "/ -
-    .
/ -    
-    
 
#  !
#    "
#  
/ ABC $   , " &,   &
aA $     !
# 
'" 
  
 

*   •
 " .
$ " 
 1   
&! .
+ " 0 %~5 %
+ " 5 %~20 %
+ " 20 %~40 %
+ " 40 %~60 %
+ " 60 %~80 %
+ " 80 %~100 %
3 ".
3   -
&,   ,
"  ".
1$  !! 
 !   "7 DC
 ! " -&.
2 $  " 9
.
3 $   
!   " .
4 $   "
-&.
5   ,  
.
# "   
•    .
6 = &  .
#" 
• #   /• ="   • 
?" 
•  •
/   


#   •
"  "9
  .
 !  
"  
1    
[]   OK.
2 # [#  
], "  OK.
1    
[]   OK.
2 # ["#  
], "  OK.
3  / ,   
 ,  "  OK.
@" "  
• .
? , 9
•   .
$  
•    .
4 # [$], "  OK.
   "  »
   .
5 # &  9.
• [ ]:  ".
• []:   .
• [%# ]:  
 .
• [%# ]: 
.
6 $ "  
  [$] 
 OK.
• &    '
    .
( :
3! (JPEG)•
( :
SD/SDHC/MMC/MMC Plus/xD/MS/MS Pro•
1 $ "9  
.
?"  .»
2 # , "  OK.
3 = &  .
#"  
• "9 
?"   "9
• 
X  
• "9!  

3 #   
 OK.
?"  .»

• MENU,  " 
 " 9  
.
• [# ]: 
!    .
• [%#]:  
.
Y  ! 
•   [$] 
 OK.
3Selecteer een eventherinnering en raak OK
aan.
Er wordt een eventherinnering»
weergegeven.
Raak
• MENU aan en selecteer een van de
volgende opties om verder te gaan.
• [Opnieuw progr.]: de eventherinnering
opnieuw inplannen
• [Verwijderen]: de eventherinnering
verwijderen
Als u terug wilt gaan om de andere
• eventherinneringen te bekijken, selecteert u
[Gereed] en raakt u OK aan.
SPH84X8A_QSG_05&10_v2.0.indd 4 2011-2-18 15:32:23

This manual suits for next models

4

Other Philips Digital Photo Frame manuals

Philips 7FF2FPA User manual

Philips

Philips 7FF2FPA User manual

Philips 5FF2CMI User manual

Philips

Philips 5FF2CMI User manual

Philips SPF3007 User manual

Philips

Philips SPF3007 User manual

Philips SPF3402S/G7 User manual

Philips

Philips SPF3402S/G7 User manual

Philips 9FF2CME - annexe 2 User manual

Philips

Philips 9FF2CME - annexe 2 User manual

Philips 10FF2CME User manual

Philips

Philips 10FF2CME User manual

Philips SPF2007/12 User manual

Philips

Philips SPF2007/12 User manual

Philips 7FF1AW Mounting instructions

Philips

Philips 7FF1AW Mounting instructions

Philips SPF1902R User manual

Philips

Philips SPF1902R User manual

Philips SPF4528/93 User manual

Philips

Philips SPF4528/93 User manual

Philips 7FF3FPB User manual

Philips

Philips 7FF3FPB User manual

Philips PhotoViewer SPV3000/05 User manual

Philips

Philips PhotoViewer SPV3000/05 User manual

Philips SPF2017/10 User manual

Philips

Philips SPF2017/10 User manual

Philips SPF1428/93 User manual

Philips

Philips SPF1428/93 User manual

Philips 8FF3CDW User manual

Philips

Philips 8FF3CDW User manual

Philips SPF2327/10 User manual

Philips

Philips SPF2327/10 User manual

Philips SPF3480 User manual

Philips

Philips SPF3480 User manual

Philips 8FF3FPW/27 User manual

Philips

Philips 8FF3FPW/27 User manual

Philips SPF1208/10 User manual

Philips

Philips SPF1208/10 User manual

Philips 10FF3CME User manual

Philips

Philips 10FF3CME User manual

Philips 9FF2CME - annexe 2 User manual

Philips

Philips 9FF2CME - annexe 2 User manual

Philips SPF3410/G7 User manual

Philips

Philips SPF3410/G7 User manual

Philips 7FF3FPW User manual

Philips

Philips 7FF3FPW User manual

Philips SPH8628/12 User manual

Philips

Philips SPH8628/12 User manual

Popular Digital Photo Frame manuals by other brands

LENCO DPA-35 user manual

LENCO

LENCO DPA-35 user manual

Coby DP-558 Specifications

Coby

Coby DP-558 Specifications

Digital Spectrum MemoryFrame MF-1201 quick start guide

Digital Spectrum

Digital Spectrum MemoryFrame MF-1201 quick start guide

SWEEX MM009 manual

SWEEX

SWEEX MM009 manual

Insignia NS-DPF3G Guía De Instalación Rápida

Insignia

Insignia NS-DPF3G Guía De Instalación Rápida

vwin VJ201-S3 quick start guide

vwin

vwin VJ201-S3 quick start guide

Ceiva LF4007 quick start guide

Ceiva

Ceiva LF4007 quick start guide

Fotomate FM 115 user manual

Fotomate

Fotomate FM 115 user manual

Kogan KADPF08XXXB user manual

Kogan

Kogan KADPF08XXXB user manual

Sony S-Frame DPF-E710 operating instructions

Sony

Sony S-Frame DPF-E710 operating instructions

Samsung SPF-83V user manual

Samsung

Samsung SPF-83V user manual

HiTi Digital K65 quick start guide

HiTi Digital

HiTi Digital K65 quick start guide

Digital Spectrum NuVue NV-700 Plus user manual

Digital Spectrum

Digital Spectrum NuVue NV-700 Plus user manual

Aluratek ADMPF108F Instructional manual

Aluratek

Aluratek ADMPF108F Instructional manual

Nextar N3-502 user manual

Nextar

Nextar N3-502 user manual

Praktica D00461 specification

Praktica

Praktica D00461 specification

Insignia Infocast NS-DP8CH user guide

Insignia

Insignia Infocast NS-DP8CH user guide

Odys DPF 710 user manual

Odys

Odys DPF 710 user manual

manuals.online logo
manuals.online logoBrands
  • About & Mission
  • Contact us
  • Privacy Policy
  • Terms and Conditions

Copyright 2025 Manuals.Online. All Rights Reserved.