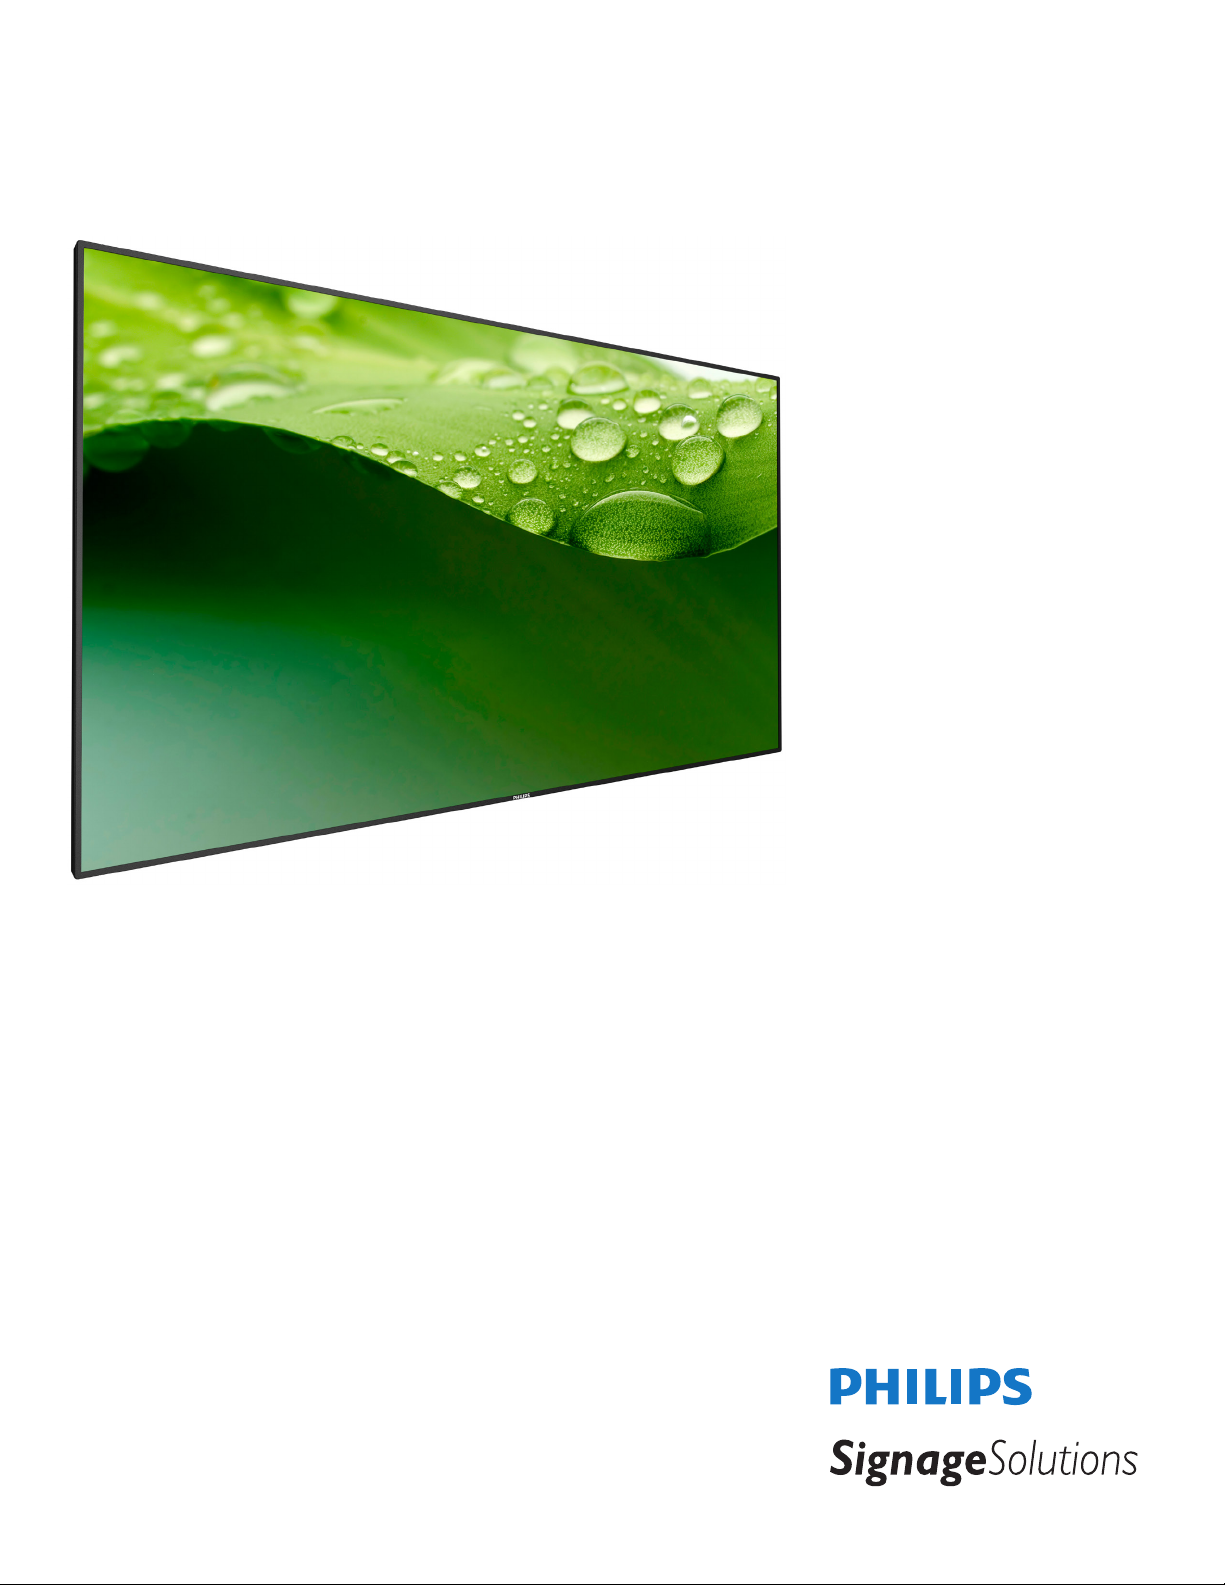
Philips BDL4970EL User manual

www.philips.com/welcome
BDL4970EL
V2.00
User Manual (English)

BDL4970EL
ii
Safety Instructions
Safety precautions and maintenance
WARNING: Use of controls, adjustments or procedures other than those specied in this documentation may result in exposure to
shock, electrical hazards and/or mechanical hazards.
Read and follow these instructions when connecting and using your display:
Operation:
• Keepthedisplayoutofdirectsunlightandawayfromstovesoranyotherheatsources.
• Removeanyobjectthatcouldfallintoventilationholesorpreventpropercoolingofthedisplay’selectronics.
• Donotblocktheventilationholesonthecabinet.
• Whenpositioningthedisplay,makesurethepowerplugandoutletareeasilyaccessible.
• Whenturningoffthedisplaybydetachingthepowercord,wait6secondsbeforere-attachingthepowercordfornormaloperation.
• EnsuretheuseofanapprovedpowercordprovidedbyPhilipsatalltimes.Ifyourpowercordismissing,pleasecontactyourlocalservicecenter.
• Donotsubjectthedisplaytoseverevibrationorhighimpactconditionsduringoperation.
• Donotknockordropthedisplayduringoperationortransportation.
Maintenance:
• Toprotectyourdisplayfrompossibledamage,donotputexcessivepressureontheLCDpanel.Whenmovingyourdisplay,grasptheframetolift;do
notliftthedisplaybyplacingyourhandorngersontheLCDpanel.
• Unplugthedisplayifyouarenotgoingtouseitforanextensiveperiodoftime.
• Unplugthedisplayifyouneedtocleanitwithaslightlydampcloth.Thescreenmaybewipedwithadryclothwhenthepowerisoff.However,never
useorganicsolvent,suchas,alcohol,orammonia-basedliquidstocleanyourdisplay.
• Toavoidtheriskofshockorpermanentdamagetotheset,donotexposethedisplaytodust,rain,wateroranexcessivelymoistenvironment.
• Ifyourdisplaybecomeswet,wipeitwithdryclothassoonaspossible.
• Ifaforeignsubstanceorwatergetsinyourdisplay,turnthepoweroffimmediatelyanddisconnectthepowercord.Thenremovetheforeignsubstance
orwater,andsendtheunittothemaintenancecenter.
• Donotstoreorusethedisplayinlocationsexposedtoheat,directsunlightorextremecold.
• Inordertomaintainthebestperformanceofyourdisplayandensurealongerlifetime,westronglyrecommendusingthedisplayinalocationthatfalls
withinthefollowingtemperatureandhumidityranges.
-Temperature:0-40°C32-104°F
-Humidity:20-80%RH
IMPORTANT:Alwaysactivateamovingscreensaverprogramwhenyouleaveyourdisplayunattended.Alwaysactivateaperiodicscreenrefresh
applicationiftheunitwilldisplayunchangingstaticcontent.Uninterrupteddisplayofstillorstaticimagesoveranextendedperiodmaycause“burnin”,
alsoknownas“after-imaging”or“ghostimaging”,onyourscreen.Thisisawell-knownphenomenoninLCDpaneltechnology.Inmostcases,the“burned
in”or“after-imaging”or“ghostimaging”willdisappeargraduallyoveraperiodoftimeafterthepowerhasbeenswitchedoff.
WARNING:Severe“burn-in”or“after-image”or“ghostimage”symptomswillnotdisappearandcannotberepaired.Thisisalsonotcoveredunderthe
termsofyourwarranty.
Service:
• Thecasingcovershouldbeopenedonlybyqualiedservicepersonnel.
• Ifthereisanyneedforrepairorintegration,pleasecontactyourlocalservicecenter.
• Donotleaveyourdisplayunderdirectsunlight.
Ifyourdisplaydoesnotoperatenormally,havingfollowedtheinstructionssetoutinthisdocument,pleasecontactatechnicianoryour
localservicecenter.

BDL4970EL
iii
Read and follow these instructions when connecting and using your display:
• Unplugthedisplayifyouarenotgoingtouseitforanextensiveperiodoftime.
• Unplugthedisplayifyouneedtocleanitwithaslightlydampcloth.Thescreenmanybewipedwithadryclothwhenthepoweris
off.However,neverusealcohol,solventsorammonia-basedliquids.
• Consultaservicetechnicianifthedisplaydoesnotoperatenormallywhenyouhavefollowedtheinstructionsinthismanual.
• Thecasingcovershouldbeopenedonlybyqualiedservicepersonnel.
• Keepthedisplayoutofdirectsunlightandawayfromstovesoranyotherheatsources.
• Removeanyobjectthatcouldfallintotheventsorpreventpropercoolingofthedisplay’selectronics.
• Donotblocktheventilationholesonthecabinet.
• Keepthedisplaydry.Toavoidelectricshock,donotexposeittorainorexcessivemoisture.
• WhenturningoffthedisplaybydetachingthepowercableorDCpowercord,waitfor6secondsbeforere-attachingthepower
cableorDCpowercordfornormaloperation..
• Toavoidtheriskofshockorpermanentdamagetothesetdonotexposethedisplaytorainorexcessivemoisture.
• Whenpositioningthedisplay,makesurethepowerplugandoutletareeasilyaccessible.
• IMPORTANT:Alwaysactivateascreensaverprogramduringyourapplication.Ifastillimageinhighcontrastremainsonthe
screenforanextendedperiodoftime,itmayleavean‘after-image’or‘ghostimage’onthefrontofthescreen.Thisisawell-known
phenomenonthatiscausedbytheshortcomingsinherentinLCDtechnology.Inmostcasestheafterimagewilldisappeargradually
overaperiodoftimeafterthepowerhasbeenswitchedoff.Beawarethattheafter-imagesymptomcannotberepairedandisnot
coveredunderwarranty.
CE Declaration of Conformity
ThisdevicecomplieswiththerequirementssetoutintheCouncilDirectiveontheApproximationoftheLawsoftheMemberStatesrelatingto
ElectromagneticCompatibility(2014/30/EU),Low-voltageDirective(2014/35/EU)andRoHSdirective(2011/65/EU).
ThisproducthasbeentestedandfoundtocomplywiththeharmonizedstandardsforInformationTechnologyEquipment,theseharmonizedstandards
publishedunderDirectivesofOfcialJournaloftheEuropeanUnion.
Warning:
ThisequipmentiscompliantwithClassAofEN55032/CISPR32.Inaresidentialenvironmentthisequipmentmaycauseradiointerference.
Federal Communications Commission (FCC) Notice (U.S. Only)
NOTE:ThisequipmenthasbeentestedandfoundtocomplywiththelimitsforaClassAdigitaldevice,pursuanttopart15ofthe
FCCRules.Theselimitsaredesignedtoprovidereasonableprotectionagainstharmfulinterferencewhentheequipmentisoperated
inacommercialenvironment.Thisequipmentgenerates,uses,andcanradiateradiofrequencyenergyand,ifnotinstalledandusedin
accordancewiththeinstructionmanual,maycauseharmfulinterferencetoradiocommunications.Operationofthisequipmentina
residentialareaislikelytocauseharmfulinterferenceinwhichcasetheuserwillberequiredtocorrecttheinterferenceathisown
expense.
Changesormodicationsnotexpresslyapprovedbythepartyresponsibleforcompliancecouldvoidtheuser’sauthoritytooperatethe
equipment.
UseonlyanRFshieldedcablethatwassuppliedwiththedisplaywhenconnectingthisdisplaytoacomputerdevice.
Topreventdamagewhichmayresultinreorshockhazard,donotexposethisappliancetorainorexcessivemoisture.
ThisdevicecomplieswithPart15oftheFCCRules.Operationissubjecttothefollowingtwoconditions:(1)Thisdevicemaynotcauseharmful
interference,and(2)thisdevicemustacceptanyinterferencereceived,includinginterferencethatmaycauseundesiredoperation.

BDL4970EL
iv
Polish Center for Testing and Certication Notice
Theequipmentshoulddrawpowerfromasocketwithanattachedprotectioncircuit(athree-prongsocket).Allequipmentthatworkstogether(computer,
display,printer,andsoon)shouldhavethesamepowersupplysource.
Thephasingconductoroftheroom’selectricalinstallationshouldhaveareserveshort-circuitprotectiondeviceintheformofafusewithanominalvalue
nolargerthan16amperes(A).
Tocompletelyswitchofftheequipment,thepowersupplycablemustberemovedfromthepowersupplysocket,whichshouldbelocatednearthe
equipmentandeasilyaccessible.
Aprotectionmark“B”conrmsthattheequipmentisincompliancewiththeprotectionusagerequirementsofstandardsPN-93/T-42107andPN-89/
E-06251.
Electric, Magnetic and Electromagnetic Fields (“EMF”)
1. Wemanufactureandsellmanyproductstargetedatconsumers,which,likeanyelectronicapparatus,ingeneralhavetheabilitytoemitandreceive
electromagneticsignals.
2. OneofourleadingBusinessPrinciplesistotakeallnecessaryhealthandsafetymeasuresforourproducts,tocomplywithallapplicablelegal
requirementsandtostaywellwithintheEMFstandardsapplicableatthetimeofproducingtheproducts.
3. Wearecommittedtodevelop,produceandmarketproductsthatcausenoadversehealtheffects.
4. Weconrmthatifitsproductsarehandledproperlyfortheirintendeduse,theyaresafetouseaccordingtoscienticevidenceavailabletoday.
5. WeplayanactiveroleinthedevelopmentofinternationalEMFandsafetystandards,enablingustoanticipatefurtherdevelopmentsinstandardization
forearlyintegrationinitsproducts.

BDL4970EL
v
Information for U.K. only
(A)
(B)
WARNING -THIS APPLIANCE MUST BE EARTHED.
Important:
Thisapparatusissuppliedwithanapprovedmoulded13Aplug.Tochangeafuseinthistypeofplug
proceedasfollows:+
1. Removefusecoverandfuse.
2. FitnewfusewhichshouldbeaBS13625A,A.S.T.A.orBSIapprovedtype.
3. Retthefusecover.
Ifthettedplugisnotsuitableforyoursocketoutlets,itshouldbecutoffandanappropriate3-pin
plugttedinitsplace.
Ifthemainsplugcontainsafuse,thisshouldhaveavalueof5A.Ifaplugwithoutafuseisused,thefuse
atthedistributionboardshouldnotbegreaterthan5A.
NOTE: Theseveredplugmustbedestroyedtoavoidapossibleshockhazardshoulditbeinserted
intoa13Asocketelsewhere.
How to connect a plug
Thewiresinthemainsleadarecolouredinaccordancewiththefollowingcode:
BLUE-“NEUTRAL”(“N”)
BROWN-“LIVE”(“L”)
GREEN&YELLOW-“EARTH”(“E”)
1. TheGREEN&YELLOWwiremustbeconnectedtotheterminalintheplugwhichismarkedwith
theletter“E”orbytheEarthsymbolorcolouredGREENorGREEN&YELLOW.
2. TheBLUEwiremustbeconnectedtotheterminalwhichismarkedwiththeletter“N”orcoloured
BLACK.
3. TheBROWNwiremustbeconnectedtotheterminalwhichmarkedwiththeletter“L”or
colouredRED.
Beforereplacingtheplugcover,makecertainthatthecordgripisclampedoverthesheathofthelead
-notsimplyoverthethreewires.
North Europe (Nordic Countries) Information
Placering/Ventilation
VARNING:
FÖRSÄKRADIGOMATTHUVUDBRYTAREOCHUTTAGÄRLÄTÅTKOMLIGA,NÄRDUSTÄLLERDINUTRUSTNINGPÅPLATS.
Placering/Ventilation
ADVARSEL:
SØRGVEDPLACERINGENFOR,ATNETLEDNINGENSSTIKOGSTIKKONTAKTERNEMTTILGÆNGELIGE.
Paikka/Ilmankierto
VAROITUS:
SIJOITALAITESITEN,ETTÄVERKKOJOHTOVOIDAANTARVITTAESSAHELPOSTIIRROTTAAPISTORASIASTA.
Plassering/Ventilasjon
ADVARSEL:
NÅRDETTEUTSTYRETPLASSERES,MÅDUPASSEPÅATKONTAKTENEFORSTØMTILFØRSELERLETTEÅNÅ.

BDL4970EL
vi
China RoHS
电子电气产品有害物质限制使用标识要求 (中国RoHS法规标识要求) 产品中有害物质的名称及含量。
零部件名称
有害物质
铅
(Pb)
汞
(Hg)
镉
(Cd)
六价铬
(Cr (VI))
多溴联苯
(PBB)
多溴二苯醚
(PBDE)
塑料外框 OOOOOO
后壳 OOOOOO
LCD
panel
CCFL X X O O O O
LED X O O O O O
电路板组件* X O O O O O
底座 OOOOOO
电源线 X O O O O O
其他线材 X O O O O O
遥控器 X O O O O O
*:电路板组件包括印刷电路板及其构成的零部件,如电阻、电容、集成电路、连接器等。
本表格依据SJ/T 11364的规定编制。
O: 表示该有害物质在该部件所有均质材料中的含量均在 GB/T 26572 标准规定的限量要求以下.
X: 表示该有害物质至少在该部件的某一均质材料中的含量超出 GB/T 26572 标准规定的限量要求.
上 表 中 打“ X”的部件中,应功能需要,部分有害物质含量超出GB/T 26572规定的限量要求,但是符合欧盟
RoHS法规要求(属于豁免部分)。
10 環保使用期限
此標識指期限(十年),電子信息產品中含有的有害物質在正常使用的條件下不會發生外泄或突變,
電子信息產品用戶使用該電子信息產品不會對環境造成嚴重污染或對其人身、財產造成嚴重損害的期限。

BDL4970EL
vii
《废弃电器电子产品回收处理管理条例》提示性说明
为了更好地关爱及保护地球,当用户不再需要此产品或产品寿命终止时,请遵守国家废弃电器电子产品
回收处理相关法律法规,将其交给当地具有国家认可的回收处理资质的厂商进行回收处理。
娤⌈
㨢᳸$䵥ᵥ⍿Ʋ◦䏝㯹䉭❁ᳫ濕媣ᵥ⍿⊭侻廞ノ㒞䵽䏳ⴰㄮƲ◦店䢋⾃濕⊭侻斾堿䏦ヵ
⪷ⴰㄮ悅⊔⩜⊭圊䕂㉨㑻Ʋ
單元 限用物質及其化學符號
鉛
(Pb) 汞
(Hg) 鎘
(Cd) 六價鉻
(Cr+ 6 )多溴聯苯
(PBB) 多溴二苯醚
(PBDE)
塑料外框 ○○○○○○
後殼 ○○○○○○
-○○○○○
電路板組件 -○○○○○
底座 ○○○○○○
電源線 -○○○○○
其他線材 -○○○○○
遙控器 -○○○○○
備考1.〝○〞係指該項限用物質之百分比含量未超出百分比含量基準值。
備考2.〝-〞係指該項限用物質為排除項目。
液晶面板
警語 : 使用過度恐傷害視力。
注意事項 :
(1) 使用30分鐘請休息10分鐘。
(2) 未滿2歲幼兒不看螢幕,2歲以上每天看螢幕不要超過1小時。
警告使用者 :
此為甲類資訊技術設備 , 於居住環境中使用時 , 可能會造成射頻擾動 , 在此種情況下 , 使用者會被
要求採取某些適當的對策。
Turkey RoHS:
TürkiyeCumhuriyeti:EEEYönetmeliğineUygundur
Ukraine RoHS:
ОбладнаннявідповідаєвимогамТехнічногорегламентущодообмеженнявикористаннядеякихнебезпечнихречовинвелектричномута
електронномуобладнанні,затвердженогопостановоюКабінетуМіністрівУкраїнивід3грудня2008№1057

BDL4970EL
viii
End-of-Life Disposal
YournewPublicInformationDisplaycontainsmaterialsthatcanberecycledandreused.Specializedcompaniescanrecycleyourproducttoincreasethe
amountofreusablematerialsandtominimizetheamounttobedisposedof.
PleasendoutaboutthelocalregulationsonhowtodisposeofyourolddisplayfromyourlocalPhilipsdealer.
(For customers in Canada and U.S.A.)
Thisproductmaycontainleadand/ormercury.Disposeofinaccordancetolocal-stateandfederalregulations.Foradditionalinformationonrecycling
contactwww.eia.org(ConsumerEducationInitiative)
Waste Electrical and Electronic Equipment-WEEE
Attention users in European Union private households
Thismarkingontheproductoronitspackagingillustratesthat,underEuropeanDirective2012/19/EUgoverningusedelectricaland
electronicappliances,thisproductmaynotbedisposedofwithnormalhouseholdwaste.Youareresponsiblefordisposalofthis
equipmentthroughadesignatedwasteelectricalandelectronicequipmentcollection.Todeterminethelocationsfordroppingoffsuch
wasteelectricalandelectronic,contactyourlocalgovernmentofce,thewastedisposalorganizationthatservesyourhouseholdorthe
storeatwhichyoupurchasedtheproduct.
Attention users in United States:
PleasedisposeofaccordingtoallLocal,StateandFederalLaws.Forthedisposalorrecyclinginformation,contact:www.mygreenelectronics.comorwww.
eiae.org.
End of Life Directives-Recycling
YournewPublicInformationDisplaycontainsseveralmaterialsthatcanberecycledfornewusers.
PleasedisposeofaccordingtoallLocal,State,andFederallaws.
AsanENERGYSTARPartner,wehavedeterminedthatthisproductmeetstheENERGYSTARguidelinesforenergyefciency.
Restriction on Hazardous Substances statement (India)
Thisproductcomplieswiththe“E-Waste(Management)Rules,2016”CHAPTERV,rule16,sub-rule(1).WhereasNewElectricalandElectronic
EquipmentandtheircomponentsorconsumablesorpartsorsparesdonotcontainLead,Mercury,Cadmium,HexavalentChromium,polybrominated
biphenylsandpolybrominateddiphenylethersbeyondamaximumconcentrationvalueof0.1%byweightinhomogenousmaterialsforlead,mercury,
hexavalentchromium,polybrominatedbiphenylsandpolybrominateddiphenylethersandof0.01%byweightinhomogenousmaterialsforcadmium.
exceptofexemptionssetinSchedule2oftheRule.
E-Waste Declaration for India
Thissymbolontheproductoronitspackagingindicatesthatthisproductmustnotbedisposedofwithyourotherhouseholdwaste.
Insteaditisyourresponsibilitytodisposeofyourwasteequipmentbyhandingitovertoadesignatedcollectionpointfortherecycling
ofwasteelectricalandelectronicequipment.Theseparatecollectionandrecyclingofyourwasteequipmentatthetimeofdisposal
willhelptoconservenaturalresourcesandensurethatitisrecycledinamannerthatprotectshumanhealthandtheenvironment.
FormoreinformationaboutE-wastepleasevisithttp://www.india.philips.com/about/sustainability/recycling/index.pageandtoknow
whereyoucandropoffyourwasteequipmentforrecyclinginIndiapleasecontactonbelowgivencontactdetails.
Helplinenumber:1800-425-6396(MondaytoSaturday,9a.m.to5:30pm)
CentralizedE-wastecollectioncenter
Address:TPVTechnologyIndiaPrivateLimited,
59,MaheswariNagar,1stMainRoad,MahadevapuraPost,WhiteeldRoad
Bangalore,Karnataka,PIN:560048,Tel:080-3023-1000
E-mail:[email protected]

BDL4970EL
ix
Batteries
ForEU:Thecrossed-outwheeledbinimpliesthatusedbatteriesshouldnotbeputtothegeneralhouseholdwaste!Thereisaseparate
collectionsystemforusedbatteries,toallowpropertreatmentandrecyclinginaccordancewithlegislation.
Pleasecontactyourlocalauthorityfordetailsonthecollectionandrecyclingschemes.
ForSwitzerland:Theusedbatteryistobereturnedtothesellingpoint.
Forothernon-EUcountries:Pleasecontactyourlocalauthorityforcorrectmethodofdisposaloftheusedbattery.
According to EU directive 2006/66/EC, the battery can’t be disposed improperly. The battery shall be separated
to collect by local service.
Após o uso, as pilhas
deverão ser entregues ao
estabelecimento comercial ou
e/ou baterias
rede de assistência técnica
autorizada.
Information for EAC
Month and year of manufacturing please refer information in Rating label.
Name and location of manufacturer ООО “Профтехника”
Адрес: 3-й Проезд Марьиной рощи, 40/1 офис 1. Москва, 127018, Россия
Importer and information Наименование организации: ООО “Профтехника”
Адрес: 3-й Проезд Марьиной рощи, 40/1 офис 1. Москва, 127018, Россия
Контактное лицо: Наталья Астафьева,
+7 495 640 20 20
nat@profdisplays.ru

BDL4970EL
x
Table Of Contents
1. Unpacking and Installation.......................................................1
1.1. Unpacking.........................................................................................1
1.2. PackageContents........................................................................1
1.3. InstallationNotes.........................................................................1
1.4. InstallingandRemovingTableStands(optional)........2
1.5. MountingonaWall....................................................................3
1.5.1. VESAGrid....................................................................3
1.6. MountinginPortraitPosition................................................4
1.6.1. Howtousethelogoguiderforportrait
position...........................................................................4
1.6.2. Howtoremovethelogo.....................................4
1.7. OperatingInstructionsofEdgeAlignmentKit............5
1.7.1. InstallingEdgeAlignmentKit..............................5
2. Parts and Functions...................................................................7
2.1. ControlPanel.................................................................................7
2.2. Input/OutputTerminals.............................................................8
2.3. RemoteControl...........................................................................9
2.3.1. Generalfunctions.....................................................9
2.3.2. IDRemoteControl..............................................10
2.3.3. Insertingthebatteriesintheremote
control..........................................................................11
2.3.4. Handlingtheremotecontrol..........................11
2.3.5. Operatingrangeoftheremotecontrol...11
3. Connecting External Equipment.......................................... 12
3.1. ConnectingExternalEquipment(DVD/VCR/
VCD)...............................................................................................12
3.1.1. UsingCOMPONENTvideoinput..............12
3.1.2. UsingVideoSourceinput..................................12
3.1.3. UsingHDMIvideoinput...................................13
3.2. ConnectingaPC.......................................................................13
3.2.1. UsingVGAinput.....................................................13
3.2.2. UsingDVIinput......................................................13
3.2.3. UsingHDMIinput.................................................14
3.2.4. UsingDisplayPortinput.....................................14
3.3. ConnectingAudioEquipment...........................................14
3.3.1. Connectingexternalspeakers........................14
3.3.2. Connectinganexternalaudiodevice........15
3.4. ConnectingMultipleDisplaysinaDaisy-chain
Conguration..............................................................................15
3.4.1. Displaycontrolconnection..............................15
3.4.2. Digitalvideoconnection....................................15
3.4.3. Analogvideoconnection..................................16
3.5. IRconnection..............................................................................16
3.6. IRPass-throughConnection...............................................17
3.7. Wire-connectingtoNetwork...........................................17
4. Operation................................................................................. 18
4.1. WatchtheConnectedVideoSource............................18
4.2. ChangePictureFormat.........................................................18
4.3. PlaymultimedialesviaLocalAreaNetwork..........18
4.3.1. Setupthenetwork..............................................18
4.3.2. HowtouseDLNA-DMP.................................18
4.3.3. HowtouseDLNA-DMRfromPC............19
4.4. PlaymultimedialesfromUSBdevice.........................19
4.5. Playoptions..................................................................................20
4.5.1. Playingmusicles..................................................20
4.5.2. Playingmovieles.................................................20
4.5.3. Playingphotoles.................................................20
4.6. HowtouseOperabrowser(HTML5).......................20
5. Change your settings ............................................................. 22
5.1. Settings............................................................................................22
5.1.1. Picture..........................................................................22
5.1.2. Sound...........................................................................23
5.1.3. Tiling..............................................................................23
5.1.4. Network.....................................................................24
5.1.5. Storage........................................................................25
5.1.6. Generalsettings......................................................25
5.1.7. Adv.................................................................................28
5.1.8. Webcontrol.............................................................28
5.1.9. FTPServer.................................................................32
6. USB device compatibility....................................................... 33
7. Input Mode............................................................................... 35
8. Pixel Defect Policy.................................................................. 36
8.1. PixelsandSub-Pixels...............................................................36
8.2. TypesofPixelDefects+DotDenition....................36
8.3. BrightDotDefects...................................................................36
8.4. DarkDotDefects.....................................................................37
8.5. ProximityofPixelDefects...................................................37
8.6. PixelDefectTolerances.........................................................37
8.7. MURA.............................................................................................37
9. Cleaning and Troubleshooting.............................................. 38
9.1. Cleaning..........................................................................................38
9.2. Troubleshooting.........................................................................39
10. Technical Specications ......................................................... 40

BDL4970EL
1
1. Unpacking and Installation
1.1. Unpacking
• Thisproductispackedinacarton,togetherwiththestandardaccessories.
• Anyotheroptionalaccessorieswillbepackedseparately.
• Duetothesizeandweightofthisdisplayitisrecommendedfortwopeopletomoveit.
• Afteropeningthecarton,ensurethatthecontentsarecompleteandingoodcondition.
1.2. Package Contents
Pleaseverifythatyoureceivedthefollowingitemswithyourpackagecontent:
• LCDdisplay
• RemotecontrolwithAAAbatteries
• Powercord
• RS232cable
• RS232daisy-chaincable
• VGAcable
• Quickstartguide
• Logoguider
• EdgeAlignmentKit-1:2PCS
• EdgeAlignmentKit-2:1PCS
• ThumbScrew:8PCS * The supplied power cord varies depending on destination.
Power Cord
Logo guider
Quick start guide
Edge Alignment Kit-1
Edge Alignment Kit-2
Thumb Screw
Remote Control
and AAA Batteries
RS232 Cable
RS232 daisy-chain cable
Video Signal Cable
(D-SUB to D-SUB Cable)
*Differencesaccordingtoregions.
Displaydesignandaccessoriesmaydifferfromthoseillustratedabove.
NOTES:
• Forallotherregions,applyapowercordthatconformstotheACvoltageofthepowersocketandhasbeenapprovedbyandcomplieswiththe
safetyregulationsoftheparticularcountry.
• Youmightliketosavethepackageboxandpackingmaterialforshippingthedisplay.
1.3. Installation Notes
• Duetothehighpowerconsumption,alwaysusetheplugexclusivelydesignedforthisproduct.Ifanextendedlineisrequired,pleaseconsultyour
serviceagent.
• Theproductshouldbeinstalledonaatsurfacetoavoidtipping.Thedistancebetweenthebackoftheproductandthewallshouldbemaintained
forproperventilation.Avoidinstallingtheproductinthekitchen,bathroomoranyotherplaceswithhighhumiditysoasnottoshortentheservicelife
oftheelectroniccomponents.
• Theproductcannormallyoperateonlyunder3000minaltitude.Ininstallationsataltitudesabove3000m,someabnormalitiesmaybeexperienced.

BDL4970EL
2
1.4. Installing and Removing Table Stands (optional)
To install table stands:
1. Ensureyourdisplayispoweredoff.
2. Spreadaprotectivesheetonaatsurface.
3. Grabthecarryinghandlesandplacethedisplayface-downontheprotectivesheet.
4. Afterinsertingthestandintheguideblock,tightenthescrewsonbothsidesofthedisplay.
NOTE: Thelongersideofthestandshouldfacethefrontofthedisplay.
Carrying handle
Thumbscrews
Table stand
Longer portions face the front
To remove table stands:
1. Poweroffthedisplay.
2. Spreadaprotectivesheetonaatsurface.
3. Grabthecarryinghandlesandplacethedisplayface-downontheprotectivesheet.
4. Removescrewsusingascrewdriverandplacetheminasafeplaceforreuse.

BDL4970EL
3
1.5. Mounting on a Wall
Tomountthisdisplaytoawall,youwillhavetoobtainastandardwall-mountingkit(commerciallyavailable).Werecommendusingamountinginterface
thatcomplieswithTUV-GSand/orUL1678standardinNorthAmerica.
Protective Sheet
Table
VESA Grid
Tabletop stand
1. Layaprotectivesheetonatable,whichwaswrappedaroundthedisplaywhenitwaspackaged,beneaththescreensurfacesoasnottoscratchthe
screenface.
2. Ensureyouhaveallaccessoriesformountingthisdisplay(wallmount,ceilingmount,tablestand,etc).
3. Followtheinstructionsthatcomewiththebasemountingkit.Failuretofollowcorrectmountingprocedurescouldresultindamagetotheequipment
orinjurytotheuserorinstaller.Productwarrantydoesnotcoverdamagecausedbyimproperinstallation.
4. Forthewall-mountingkit,useM6mountingscrews(havingalength10mmlongerthanthethicknessofthemountingbracket)andtightenthem
securely.
1.5.1. VESA Grid
BDL4970EL 400(H)x400(V)mm
Caution:
Topreventthedisplayfromfalling:
• Forwallorceilinginstallation,werecommendinstallingthedisplaywithmetalbracketswhicharecommerciallyavailable.Fordetailedinstallation
instructions,refertotheguidereceivedwiththerespectivebracket.
• Tolessentheprobabilityofinjuryanddamageresultingfromfallofthedisplayincaseofearthquakeorothernaturaldisaster,besuretoconsultthe
bracketmanufacturerforinstallationlocation.
Ventilation Requirements for enclosure locating
Toallowheattodisperse,leavespacebetweensurroundingobjectsasshowninthe
diagrambelow.
100 mm 100 mm
100 mm
100 mm

BDL4970EL
4
1.6. Mounting in Portrait Position
Thisdisplaycanbeinstalledinportraitposition.
1. Removethetablestand,ifattached.
2. Rotate90degreesclockwise.The“ ”logoshouldbeontheLEFTsidewhenfacingthedisplay.
90 90
1.6.1. How to use the logo guider for portrait position
1. Puttheguideronthelower-leftcornerofthefrontbezelofthedisplay.
Folddownbothofitsedges.
2. Peelofftheprotectivelmatthebackofthe“ ”logosticker.
Holdandpresstheguiderwithyourlefthand.Putthe“ ”logo
stickerwithitsadhesivesidedownintothelogoholewithyourright
hand,andpresstomakeitsticktightlyontothefrontbezel.
3. Removetheguider.
1.6.2. How to remove the logo
1. Prepareapieceofpaperwithacuttingareaoflogoasaprotectorto
preventthefrontbezelfromscratching.
2. Usingaknife,carefullyremovethelogostickerwiththepaperplacing
beneath.
3. Tearoffthelogosticker.
123
NOTE: Wheninstallingthedisplayonawall,pleaseconsultaprofessionaltechnicianforproperinstallation.Weacceptnoliabilityforinstallationsnot
performedbyaprofessionaltechnician.

BDL4970EL
5
1.7. Operating Instructions of Edge Alignment Kit
1.7.1. Installing Edge Alignment Kit
• Beforeinstalledgealignmentkit,displaysmustbemountedtovideowallframecorrectly.
• Using“ThumbScrew”foreasyinstalling.
• Using“EdgeAlignmentKit-1”onthetopandbottomsideofadjacenttwodisplays.
Top Side
Bottom Side
Display 1 Display 2
Display 1 Display 2
• Using“EdgeAlignmentKit-2”ontheleftandrightsideofadjacenttwodisplays.
Display 1
Left Side Right Side
Display 2
Display 1
Display 2

BDL4970EL
6
• Using“EdgeAlignmentKit-2”onadjacentfourdisplays.
Display 1
Display 3
Display 2
Display 4
NOTE: Wheninstallingtheedgealignmentkit,pleaseconsultaprofessionaltechnicianforproperinstallation.Weacceptnoliabilityforinstallationsnot
performedbyaprofessionaltechnician.

BDL4970EL
7
2. Parts and Functions
2.1. Control Panel
9
1
2
3
4
5
6
7
8
MUTE INPUT MENU
1[ ] button
Usethisbuttontoturnthedisplayonorputthedisplaytostandby.
2[MUTE] button
SwitchtheaudiomuteON/OFF.
3[INPUT] button
Choosetheinputsource.
• Usedas[ ]buttonintheOn-Screen-Displaymenu.
4[ ] button
IncreasetheadjustmentwhileOSDmenuison,orincreasethe
audiooutputlevelwhileOSDmenuisoff.
5[ ] button
DecreasetheadjustmentwhileOSDmenuison,ordecreasethe
audiooutputlevelwhileOSDmenuisoff.
6[ ] button
MovethehighlightbaruptoadjusttheselecteditemwhileOSD
menuison.
7[ ] button
MovethehighlightbardowntoadjusttheselecteditemwhileOSD
menuison.
8[MENU] button
ReturntopreviousmenuwhileOSDmenuison,ortoactivatethe
OSDmenuwhenOSDmenuisoff.
9Remote control sensor and power status indicator
• Receivescommandsignalsfromtheremotecontrol.
• IndicatestheoperatingstatusofthedisplaywithoutOPS:
-Lightsgreenwhenthedisplayisturnedon
-Lightsredwhenthedisplayisinstandbymode
-LightsamberwhenthedisplayentersAPMmode
-When{SCHEDULE}isenabled,thelightblinksgreenandred
-Ifthelightblinksred,itindicatesthatafailurehasbeen
detected
-Lightsoffwhenthemainpowerofthedisplayisturnedoff

BDL4970EL
8
2.2. Input/Output Terminals
20
21
22
23
24
13
5
2
8
19
914
10 11 12 13 15 16
418
17
7
6
1AC IN
ACpowerinputfromthewalloutlet.
2MAIN POWER SWITCH
Switchthemainpoweron/off.
3AC OUT
ACpowersupplytotheACINjackofamediaplayer.
4IR IN / 5IR OUT
IRsignalinput/outputfortheloop-throughfunction.
NOTES:
• Thisdisplay’sremote controlsensorwillstopworkingifthejack
[IR IN]isconnected.
• ToremotelycontrolyourA/Vdeviceviathisdisplay,refertopage
17forIR Pass Throughconnection.
6RS232 IN / 7RS232 OUT
RS232networkinput/outputfortheloop-throughfunction.
8RJ-45
LANcontrolfunctionfortheuseofremotecontrolsignalfrom
controlcenter.
9HDMI1 IN / 10 HDMI2 IN
HDMIvideo/audioinput.
11 DVI IN
DVI-Dvideoinput.
12 DVI OUT
DVIorVGAvideooutput.
13 DisplayPort IN / 14 DisplayPort OUT
DisplayPortvideoinput/output.
15 VGA IN (D-Sub)
VGAvideoinput.
16 COMPONENT IN (BNC)
ComponentYPbPrvideosourceinput.
17 Y/CVBS
Videosourceinput.
18 PC LINE IN
AudioinputforVGAsource(3.5mmstereophone).
19 SPEAKER SWITCH
Internalspeakeron/offswitch.
20 AUDIO IN
AudioinputfromexternalAVdevice(RCA).
21 AUDIO OUT
AudiooutputtoexternalAVdevice.
22 USB PORT
ConnectyourUSBstoragedevice.
23 SPEAKERS OUT
Audiooutputtoexternalspeakers.
24 SECURITY LOCK
Usedforsecurityandtheftprevention.

BDL4970EL
9
2.3. Remote Control
2.3.1. General functions
1
2
3
4
5
6
7
8
10
9
12
14
15
11
13
16
1[ ] POWER button
Turnthedisplayonorputthedisplaytostandby.
2[PLAY] buttons
Controlplaybackofmediales.
3[ ] SOURCE button
Chooseinputsource.Press[ ]or[ ]buttontochoosefrom
USB,Network,HDMI 1,HDMI 2,DisplayPort,Card
OPS,DVI-D,YPbPr,AV,orVGA.Press[ ]buttonto
conrmandexit.
4[ ] HOME button
AccesstheOSDmenu.
5[ ] LIST button
Nofunction.
6[ ] [ ] [ ] [ ] NAVIGATION buttons
Navigatethroughmenusandchooseitems.
7[ ] button
Conrmanentryorselection.
8[ ] ADJUST button
Accesscurrentlyavailableoptions,pictureandsoundmenus.
9[ ] MUTE button
Presstoturnthemutefunctionon/off.
10 [ ] [ ] [ ] [ ] COLOR buttons
Choosetasksoroptions.
11 [Number/ ID SET/ ENTER] button
Entertextfornetworksetting.
PresstosetthedisplayID.Referto2.3.2. ID Remote Control
formoredetail.
12 [ ] FORMAT button
Changepictureformat.
13 [ ] BACK button
Returntothepreviousmenupageorexitfromtheprevious
function.
14 [ ] INFO button
Displayinformationaboutcurrentactivity.
15 [ ] OPTIONS button
Accesscurrentlyavailableoptions,pictureandsoundmenus.
16 [ ] [ ] VOLUME button
Adjustvolume.

BDL4970EL
10
2.3.2. ID Remote Control
YoucansettheremotecontrolIDwhenyouwanttousethisremote
controlononeofseveraldifferentdisplays.
Press[ID]button.TheredLEDblinkstwice.
1. Press[IDSET]buttonformorethan1secondtoentertheID
Mode.TheredLEDlightsup.
Pressthe[IDSET]buttonagainwillexittheIDMode.TheredLED
lightsoff.
Pressthedigitnumbers[0]~[9]toselectthedisplayyouwantto
control.
Forexample:press[0]and[1]fordisplayNo.1,press[1]and[1]for
displayNo.11.
Thenumbersavailablearefrom[01]~[255].
2. Notpressinganybuttonwithin10secondswillexittheIDMode.
3. Ifanerrorpressingofbuttonsotherthanthedigitsoccured,wait
1secondaftertheredLEDlightsoffandthenlightsupagain,then
pressthecorrectdigitsagain.
4. Press[ENTER]buttontoconrm.TheredLEDblinkstwiceand
thenlightsoff.
NOTE:
• Press[NORMAL]button.ThegreenLEDblinkstwice,indicatingthe
displayisinnormaloperation.
• ItisnecessarytosetuptheIDnumberforeachdisplaybefore
selectingitsIDnumber.
Table of contents
Other Philips Display manuals