manuals.online logo
Brands
  1. Home
  2. •
  3. Brands
  4. •
  5. Philips
  6. •
  7. DVD Player
  8. •
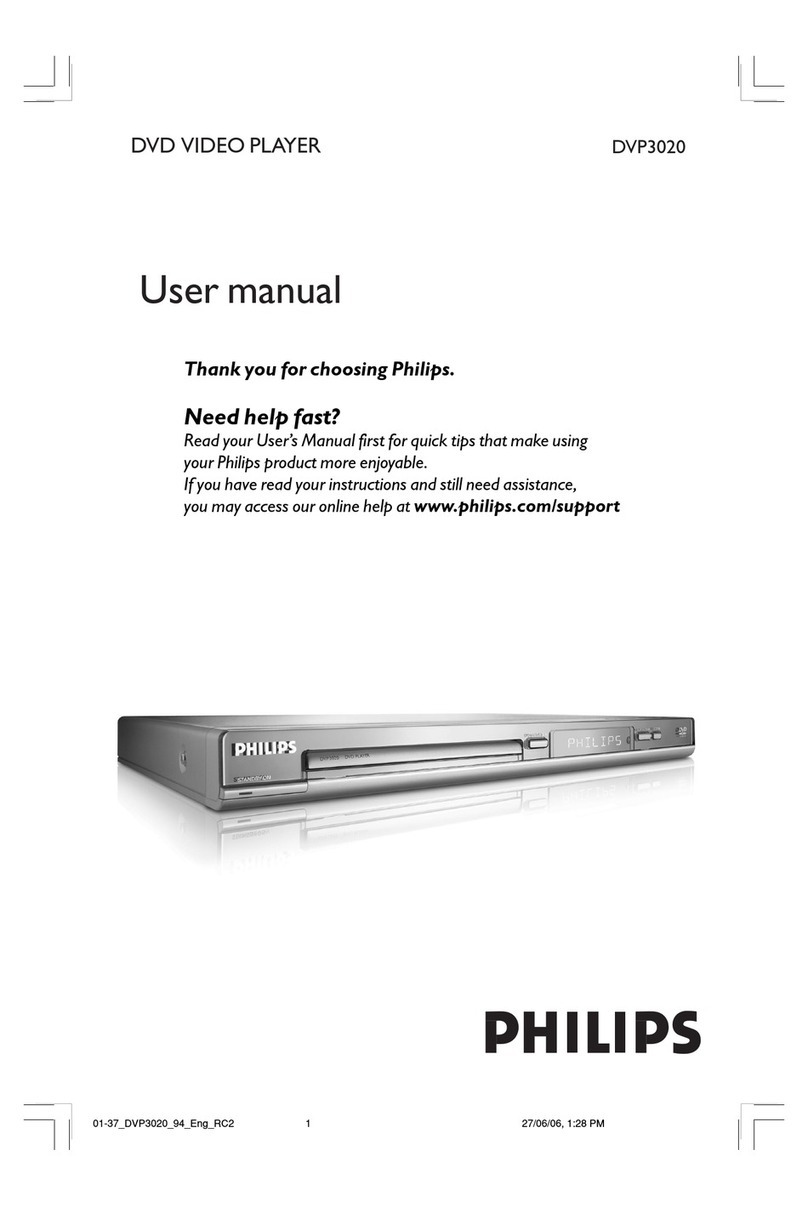
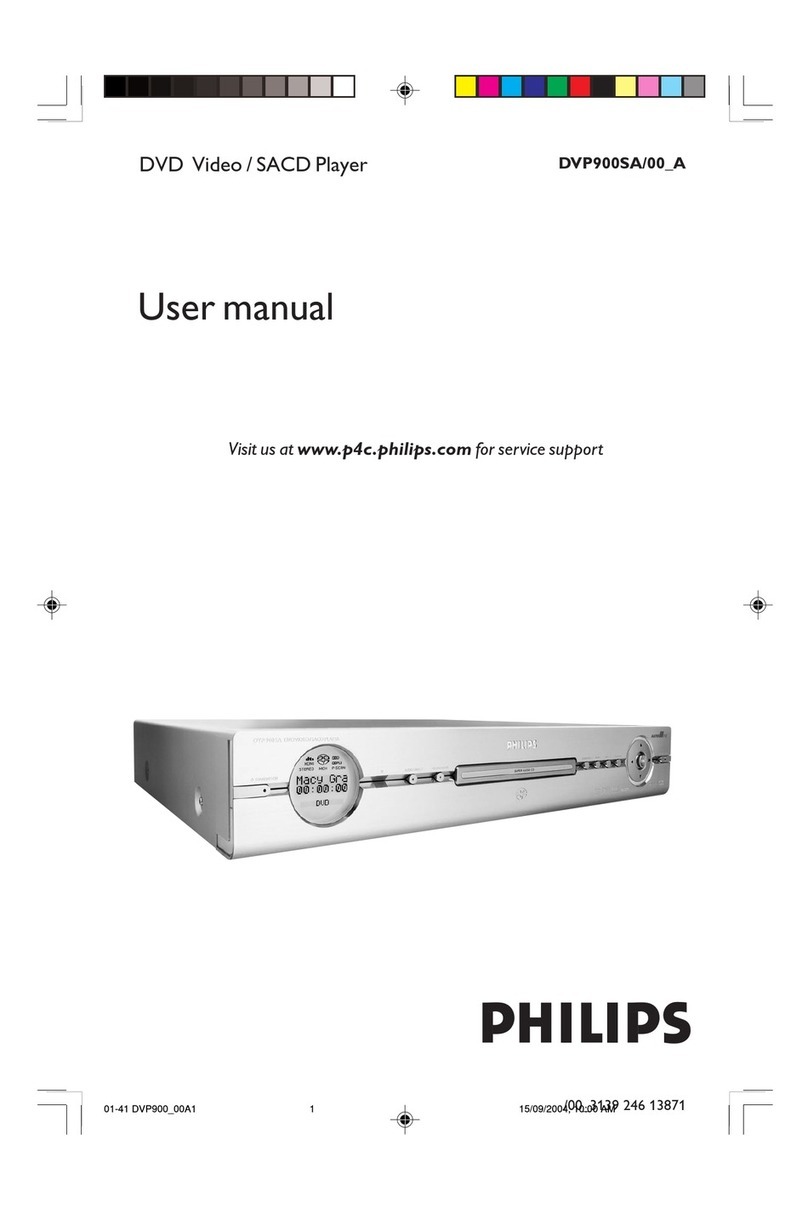
  9. Philips DVD700/004 User manual

Philips DVD700/004 User manual

INTRODUCTION ..................................................................P 5
INSTALLATION ....................................................................P 7
STANDARD CONNECTIONS ................................................P 9
GETTING STARTED ..............................................................P 11
PLAYING A DVD-VIDEO DISC ..............................................P 12
PLAYING A VIDEO CD..........................................................P 16
PLAYING AN AUDIO CD ......................................................P 18
SETTINGS ............................................................................P 20
PARENTAL CONTROL ..........................................................P 22
BEFORE REQUESTING SERVICE ..........................................P 23
CONTENTS
english
5
INTRODUCTION CONTENTS
THE ENTERTAINMENT MEDIUM FOR THE MILLENIUM
V deo was never l ke th s before! Perfect d g tal stud o-qual ty
p ctures w th truly 3-d mens onal d g tal mult channel aud o.
Story sequences screened from your own cho ce of camera
angle.
Language barr ers broken down by sound tracks n as many as
e ght languages, plus subt tles - f ava lable on d sc - n as
many as 32. And whether you watch DVD-V deo on w de-
screen or regular TV, you always see t the way t was meant
to be.
DIGITAL VIDEO
DVD-V deo uses state-of-the-art MPEG2 data compress on
technology to reg ster an ent re mov e on a s ngle 5- nch d sc.
DVD’s var able b trate compress on, runn ng at up to 9.8
Mb ts/second, captures even the most complex p ctures n
the r or g nal qual ty.
The crystal-clear d g tal p ctures have a hor zontal resolut on
of over 500 l nes, w th 720 p xels (p cture elements) to each
l ne. Th s resolut on s more than double that of VHS, super or
to Laser D sc, and ent rely comparable w th d g tal masters
made n record ng stud os.
DVD-V deo d scs conform to e ther the PAL or NTSC v deo
standard. Th s dual-standard player can play both types, and
present them n the best poss ble way on your mult standard
TV screen.
As the un versal v deo system of the future, DVD-V deo offers
opt mal p ctures on any TV screen.
Manufactured under l cense from Dolby Labarator es.
“Dolby” and the double-D symbol are trademarks of
Dolby Labarator es. Conf dent al Unpubl shed Works.
©1992-1999 Dolby Labarator es Inc. All r ghts reserved.
DVD-VIDEO
6
english
Your Ph l ps DVD-V deo player plays d g tal v deo d scs con-
form ng to the un versal DVD-V deo standard. W th t, you w ll
be able to enjoy full-length mov es w th true c nema p cture
qual ty, and stereo or mult channel sound (depend ng on the
d sc, and on your playback set-up). The un que features of
DVD-V deo, such as select on of sound track and subt tle lan-
guages, and of d fferent camera angles (aga n depend ng on
the d sc), are all ncluded. What’s more, Ph l ps Parental
Control lets you dec de wh ch d scs your ch ldren w ll be able
to see.
You w ll f nd your player remarkably easy to use, by way of
the On-Screen D splay and player d splay, n comb nat on w th
the remote control.
In add t on to DVD-V deo d scs, you w ll also be able to play
all V deo CDs and aud o CDs. The d sc types wh ch run on the
player feature one or more of these logos on the d sc packag-
ng:
F rst check and dent fy the contents of your DVD-V deo player
package, as l sted below:
- DVD-V deo player
- Remote Control Handset w th separately-packed batter es
- 2-core power cord
- Euroconnector cable (only for DVD710)
- User Manual
If any tem should be damaged or m ss ng, please nform your
suppl er w thout delay.
Keep the packag ng mater als; you may need them to trans-
port your player n the future.
• Place the player on a f rm, flat surface.
• Keep away from domest c
heat ng equ pment and d rect
sunl ght.
• In a cab net, allow about 2.5 cm
(1 nch) of free space all around
the player for adequate vent lat on.
• If the DVD-V deo player fa ls to read d scs correctly use a
commonly ava lable clean ng CD/DVD to clean the lens
before tak ng the DVD-V deo player for repa r. Avo d other
clean ng methods, wh ch may destroy the lens. Always
keep the tray closed to avo d dust on the lens.
• The lens may cloud over when the DVD-V deo player s sud-
denly moved from cold to warm surround ngs. Play ng a
CD/DVD s not poss ble n such a s tuat on. Leave the DVD-
V deo player n the warm env ronment unt l the mo sture
evaporates.
PAUSE
REPEAT PREVNEXT
ON/OFF
STOP
MPEGMultichannel
TITLE
PAUSE
TIME
TOTALREM
1 2 3 4 5 6 7 8 9 10 11 12 13 14 15
REPEAT
SHUFFLE
TITLE
A
..
............
+
DVD7X0 DVD/VIDEO CD/CD PLAYER
OPEN/CLOSE
PLACEMENT
UNPACKING
Recordable
ReWritable
INTRODUCTION
INTRODUCTION
1ON/OFF
2D sc tray
3Tray OPEN/CLOSE
4D splay
5REPEAT/chapter/track/t tle/d sc
6OPREV ous t tle/chapter/track
7PNEXT t tle/chapter/track
89STOP
9; PAUSE/St ll/Step
02PLAY
FRONT OF PLAYER
english
7
INSTALLATION
20 18 16 14 12 10 8642
19 17 15 13 11 9 7 5 3 1
21
1 2 3 4 5 6 7
TITLEPAUSE
TIMETOTAL REM
1 2 3 4 5 6 7 8 9 10 11 12 13 14 15
REPEAT
SHUFFLE
TITLE
A
......... . . . . .
+
PAUSE
REPEAT PREV NEXT
ON/OFF
STOP PLAY
MPEG Multichannel
DVD7X0 DVD/VIDEO CD/CD PLAYER
OPEN/CLOSE
DIGITAL OUT
1 2 3 4 5 6 7 8 9 10
1Power supply
2D g tal aud o output
3Aud o R; Aud o output R
Aud o L; Aud o output L
4V deo (CVBS); V deo output
5DC Power output (for opt onal external RF modulator)
6A/V Euroconnector
7NTSC/PAL sw tch (for player menus)
CAUTION
Do not touch the inner pins of rear-panel connectors.
Electrostatic discharge may cause permanent damage
to the unit.
REAR OF PLAYER
1Remote control act ve (flash ng)
2FTS (Favour te Track Select on) act ve
3SHUFFLE act ve
4PAUSE act ve
5SCAN act ve
6A-B REPEAT/CHAPTER/TITLE/TRACK mode act ve
7Chapter or track calendar
8TOTAL/REMa n ng/TRACK TIME n hours, m nutes and
seconds
9(V)CD d sc nserted
0DVD d sc nserted
!DVD CHAPTER or VCD/CD TRACK number
@DVD TITLE number
1OSD ........(On-Screen D splay) on/off
2ANGLE ....select DVD camera angle
SUBTITLE language selector or subt tle on/off
AUDIO ............spoken language selector
30-9....................numer cal key pad
4T-C ..................t tle/chapter mode selector
5MENU ............select DVD-def ned menu
OK....................acknowledge menu select on.
bolrup/down/left/r ght cursor movement
65 J ............prev ous chapter or track / search back
6 K ............next chapter or track/ search forward
2......................play
;......................pause or st ll frame /step frame
..................slow mot on (1/2, 1/4, 1/8 speed)
9......................stop
7SETUP ............select player sett ngs menu ( n stop mode
only)
REPEAT*/A-B REPEAT chapter, track, t tle, d sc
SHUFFLE/SCAN* shuffle or scan on/off
8RETURN..........go back to prev ous menu step
9..................standby
* Press key for about 1 second
123
456
789
0
OSD
ANGLE SUBTITLE AUDIO
T- RETURN
SETUP
MENU OK
SHUFFLE
S AN
A-B REPEAT
1
2
3
4
5
6
7
9
8
TRA KTITLEPAUSE
TIMETRA KTOTAL REM
HAPTER
1 2 3 4 5 6 7 8 9 10 11 12 13 14 15
CD
REPEAT
SHUFFLE
HAPTERTITLE TRA K
V
-BA
......... . . . . .
+
TRA KTITLEPAUSE
TIMETRA KTOTAL REM
HAPTER
1 2 3 4 5 6 7 8 9 10 11 12 13 14 15
CD
REPEAT
SHUFFLE
HAPTERTITLE TRA K
V
-BA
......... . . . . .
+
S AN
1 2 4 53 6
7
89
10
1112
....
+ j
REMOTE CONTROL
DISPLAY
english
8
INSTALLATION
- Depending on your TV and other equipment, there are vari-
ous ways you could connect the DVD-Video player. These
are shown below.
- Please refer to your TV, VC , Stereo System and any other
User Manual(s) as necessary to make the optimal connec-
tions.
Connect on to a TV w th an A/V Euroconnector socket.
1Connect the A/V Euroconnector on the rear of the player to
the
correspond ng connector on the TV us ng the cable sup-
pl ed.
2Opt onally you can also connect the aud o Left and R ght
channel sockets on the rear of the player to the correspond-
ng sockets on your stereo system.
NOTE
- Do not connect your DVD-player via your VC , because the
video quality could be distorted by the copy protected sys-
tem.
Connect on to a TV w th a v deo (CVBS) socket.
1Connect the V deo socket on the rear of the player to the
correspond ng socket on the TV us ng the cable suppl ed.
2Connect the aud o Left and R ght channel sockets on the
rear of the player to the correspond ng sockets on the TV
us ng the cable suppl ed. Alternat vely, you can use the
same cable to connect the aud o Left and R ght sockets on
the rear of the player to the correspond ng sockets on your
stereo system.
CAUTION
Do not connect the player’s audio output to the phono
input of your stereo system.
20 18 16 14 12 10 8642
19 17 15 13 11 9 7 5 3 1
21
VIDEO
IN
VIDEO CABLE
AUDIO CABLE
AUDIO
IN
TV
EXCELLENT A/V CONNECTION
A/V EUROCONNECTOR CABLE
TV
20 18 16 14 12 10 8642
19 17 15 13 11 9 7 5 3 1
21
HIGHEST QUALITY A/V CONNECTION
GENERAL NOTE
english
9
STANDARD CONNECTIONS
For mult channel sound, your player prov des both d g tal and
analog aud o outputs.
DIGITAL MPEG 2 MULTICHANNEL OR DOLBY
DIGITAL™) MULTICHANNEL SOUND
1For th s, wh ch prov des the h ghest mult channel sound
qual ty, you need a d g tal mult channel A/V rece ver.
2Connect the d g tal aud o output on the rear of the player to
a su table nput on the rece ver us ng a d g tal aud o cable
(ava lable as opt on). In th s case, do not use the player’s
aud o Left and R ght outputs.
3You w ll need to act vate the d g tal output of the player
(See Sett ngs p. 20).
4The aud o format of the d g tal output s dependent on the
aud o format of the selected aud o stream. Make sure that
the selected aud o stream matches the capab l t es of the
rece ver connected to the d g tal output.
ANALOG DOLBY PRO LOGIC™) MULTICHANNEL
SOUND
1If your TV set has a Dolby Pro Log c™ decoder, s mply hook
up the player to the TV us ng the A/V Euroconnector, or
V deo (CVBS) and aud o connect ons as on p. 9.
2If not, make the A/V Euroconnector, or V deo (CVBS) con-
nect on to the TV p. 9, and connect the player’s aud o Left
and R ght outputs to su table nputs on a Dolby Pro Log c™
Aud o/V deo rece ver, us ng the cable suppl ed.
3For speaker connect ons, follow the nstruct ons g ven n
the TV set or A/V rece ver user manual.
NOTE
-
You cannot use the F Modulator option for home theatre.
- If the audio format of the digital output does not match the
capabilities of your receiver, the sound will be muted.
For th s connect on, wh ch produces the h ghest poss ble
stereo sound qual ty, you need an aud o ampl f er w th d g tal
nput, and the d g tal output of the player must be act vated
(see Sett ngs p. 20). Connect the player’s d g tal aud o output
to the correspond ng nput on the ampl f er. In th s case, do
not use the player’s aud o Left and R ght outputs.
Use the NTSC/PAL sw tch on the rear of the player to set the
V deo CD and player menu accord ng to the standard used by
your TV-set.
NOTE
- The video output standard for video CD and DVD-Video discs
most corresponds to the disc being played.
1Plug the female end of the power cord suppl ed nto the
Power connector on the rear of the player.
2Plug the male end of the cord nto an AC outlet.
NOTE
- The player automatically adjust to the local AC voltage.
- When the player is in the “OFF” position, it still consumes
some power. If you wish to disconnect your player com-
pletely from the power supply, withdraw the plug from the
AC Outlet.
CAUTION
Only ualified service personnel should remove the
cover or attempt to service this device.
CONNECTING THE POWER SUPPLY
NTSC/PAL SETTING
DIGITAL AUDIO STEREO) SOUND
CONNECTION
20 18 16 14 12 10 8642
19 17 15 13 11 9 7 5 3 1
21
DIGITAL AUDIO
IN
RECEIVER
DIGITAL AUDIO
CABLE
MULTICHANNEL SOUND FOR HOME THEATRE
english
10
STANDARD CONNECTIONS
LOADING THE BATTERIES
1Open the battery compartment cover.
2Insert two 'AAA' (R03) batter es as nd cated ns de the
battery compartment.
3Close the cover.
CAUTION
Do not mix old and new batteries. and NEVER mix dif-
ferent types of batteries (standard, alkaline and so on).
NOTE
- Unless otherwise mentioned, all operations can be carried
out with the remote control. Always point the remote con-
trol directly at the player, making sure there are no obstruc-
tions in the path of the infrared beam.
- When there are corresponding keys on the front panel, they
can also be used.
1Sw tch on the TV and select the v deo nput for your DVD-
V deo player.
2To enjoy sound through your stereo system, turn on the sys-
tem and select the source nput for the DVD-V deo player.
or
To enjoy DVD-V deo w th mult channel (surround) sound,
sw tch on the Home Theatre system and select the source
nput for your DVD-V deo player.
3On the front of the DVD-V deo player, press ON/OFF. The
player d splay l ghts, and the OSD nv tes you to nsert a
d sc.
4W th Autoplay on (the factory sett ng) any d sc already
nserted n the player starts to play.
Insert disc
SWITCHING ON
OPERATION
INFRARED REMOTE CONTROL
english
11
STANDARD CONNECTIONS GETTING STARTED
1Press OPEN/CLOSE on the front of the player. The d sc tray
opens.
2Lay your chosen d sc n the tray, label s de up. Make sure t
s s tt ng properly n the correct recess.
3Gently push the tray, or press OPEN/CLOSE, to close the
tray.
- W th Autoplay on (the factory sett ng) play starts.
- W th Autoplay off, the (play) screen for the type of d sc
nserted appears on the OSD, and nformat on about the
d sc’s contents and total play ng t me appear on the
d splay.
- To turn Autoplay off or on, see Sett ngs (p. 20).
NOTE
- Since it is usual for DVD movies to be released at different
times in different regions of the world, all players have
region codes, and discs can have an optional region code. If
you insert a disc of a different region code to your player,
you will see the region code notice on the screen. The disc
will not play, and should be removed.
You w ll recogn ze DVD-V deo d scs by the
logo. Depend ng on the mater al on the d sc
(a mov e, v deo cl ps, a drama ser es, etc.)
t may have one or more T tles, and each
T tle may have one or more Chapters. Play stops at the end of
each T tle. To make access easy and conven ent, your player
lets you move between T tles, and also between Chapters.
NOTE
- During play, various icons will appear on the TV screen for
about 2 seconds to confirm that a function has been select-
ed. You can get rid of these icons by pressing OSD.
- At any time during play, you can press OSD to call up the
Play Banner, which shows you which functions are active,
for about 2 seconds. To keep the Play Banner on the screen,
hold down OSD for a couple of seconds. To get rid of the
Play Banner, press OSD again.
- List of icons:
..........................................Play
..........................................Pause
..........................................Stop
..........................................A-B repeat
..................................Search forward
..................................Search backward
........................Slow forward
..........................................Repeat d sc
..........................................Repeat t tle
..........................................Repeat chapter
..........................................Chapter shuffle
..........................................T tle nd cat on
..........................................Chapter nd cat on
..........................................D sable funct on
..........................................Angle
..........................................No alternat ve angle
..........................................Subt tle language
no
11
37
CHAPT
004
TITLE
02
hapter
shuffle
C
T
1/8
1/4
1/2
A - B
TITLE 1 TITLE 2
CHAPTER 1 CHAPTER 2 CHAPTER 1 CHAPTER 2 CHAPTER 3
DVD-VIDEO DISC
PLAYING A DVD-VIDEO DISC
POWER ON/OFF
TITLE
PAUSE
TIME
TOTALREM
1 2 3 4 5 6 7 8 9 10 11 12 13 14 15
REPEAT
SHUFFLE
TITLE
A
......... . . . . .
+
DVD7X0 DVD/VIDEO CD/CD
P
OPEN/CLOSE
INSERTING A DISC
english
12
GETTING STARTED PLAYING A DVD-VIDEO DISC
..........................................Aud o language
..........................................Aud o system
..........................................Rema n ng t me of t tle
..........................................Elapsed t me
..........................................Resume
..........................................Total t me
PLAYING A TITLE
• W th Autoplay on, play starts when you close the d sc
drawer.
• W th Autoplay off, press 2.
NOTE
- Some DVD-Video discs carry their own Autoplay, in which
case play always starts automatically.
• The d sc may nv te you to select an tem from a menu. If
the select ons are numbered, press the appropr ate numer -
cal key; f not, use bolrto h ghl ght your select on,
and press OK.
➜ As the d sc plays, the player d splay shows the current
t tle and chapter, and the elapsed play ng t me.
• Play w ll stop at the end of a T tle and th s can result n
return to menu. To go on to the next T tle, press 2.
• To stop play at any other t me, press 9.
• You can resume play from the po nt at wh ch you stopped.
Press 2tw ce.
• The RESUME feature appl es, not only to the d sc n the
player, but also to the last four d scs you have played.
S mply re- nsert the d sc, press 2f Autoplay s off, and
when you see the Resume con on the screen,
press 2aga n.
MOVING TO ANOTHER CHAPTER
When a t tle on a d sc has more than one chapter (wh ch you
can see from the player d splay), you can move to another
chapter as follows:
• Press Kbr efly dur ng play to step forward to the next chap-
ter.
• Press Jbr efly dur ng play to return to the beg nn ng of the
current chapter. Press Jbr efly aga n to step back to the
beg nn ng of the prev ous chapter.
• To go d rectly to any chapter, enter the chapter number
us ng the numer cal keys.
NOTE
- If the number has more than one digit, press the keys in
rapid succession.
- For more information about chapters, see “Checking the con-
tents of DVD-Video discs: Menus” p. 15.
MOVING TO ANOTHER TITLE
When a d sc has more than one t tle (wh ch you can see from
both the OSD and the player d splay f you press 9), you can
move to another t tle as follows:
• Press T-C, then press Kbr efly dur ng play to step forward
to the next t tle.
• Press T-C, then press Jbr efly dur ng play to return to the
beg nn ng of the current t tle. Press Jbr efly aga n to step
back to the beg nn ng of the prev ous t tle.
• To go d rectly to any t tle, press T-C, then enter the t tle
number us ng the numer cal keys.
NOTE
- If the number has more than one digit, press the keys in
rapid succession.
- For more information about titles, see “Checking the con-
tents of DVD-Video discs: Menus” p. 15.
PARENTAL CONTROL
• If you act vate Parental Control, only d scs that you have
already author sed as su table for all ages can be played as
above.
• To play any other DVD-V deo d sc, the OSD w ll ask you to
enter your Parental Control PIN code. When th s has been
done, play starts automat cally.
• To act vate Parental Control, and to author ze d scs, see
Act vat ng Parental Control (p. 22).
DVD video
1 eject disc 2
Parental Control is active.
Please enter your PIN
to play this disc
2:48:59
7:59
7:24:59
2 h
MPEG
ENG
AUDIO
english
13
PLAYING A DVD-VIDEO DISC
NOTE
- If you forget your PIN code, you can erase it when the code
is requested as above, by pressing 9 four times. Parental
Control will then be de-activated. To re-activate it, see
Activating Parental Control (p. 22).
STILL PICTURE AND STEP FRAME
• To get a st ll p cture, press ;dur ng play.
• To step forward to the next p cture frame, press ;aga n.
• To return to play, press 2.
SEARCH
• To search forwards or backwards through the d sc at 4x
normal speed, press Kor Jfor about 1 second dur ng play.
➜ Search beg ns, and sound s muted.
• To step up to 32x normal speed, press Kor Jaga n.
• To go d rectly to 32x normal speed, hold down Kor Junt l
the or con appears.
• To return to 4x normal speed, press Kor Jaga n.
➜ Search speed and d rect on are nd cated on the screen
for 2 seconds each t me Kor Js pressed.
• To end the search, press 2, ;, , or 9as des red.
SLOW MOTION
• Press to play v deo at 1/2 normal speed w th sound
muted.
• Press aga n to play at 1/4 normal speed.
• Press aga n to play at 1/8 normal speed.
• Press aga n to play v deo at 1/2 normal speed
• Play speed s nd cated on the screen for 2 seconds each
t me the button s pressed.
• To ex t slow mot on mode, press 2, ;, 5/6or 9 as
des red.
SHUFFLE
Th s shuffles the play ng order of chapters w th n a t tle, f the
t tle has more than one.
• Press SHUFFLE br efly dur ng play.
➜ appears on the screen for about 2 seconds.
• As each chapter s played, ts number d sappears from the
track calendar.
• To return to normal play, press SHUFFLE br efly.
REPEAT CHAPTER/TITLE/DISC
• To repeat the currently play ng chapter, press REPEAT for
about 1 second:
➜
REPEAT CHAPTER appears on the player d splay.
• To repeat the currenty play ng t tle, press REPEAT a second
t me for about 1 second:
➜
REPEAT TITLE appears on the d splay.
• To repeat the ent re d sc, press REPEAT a th rd t me for
about 1 second;
➜
REPEAT appears on the d splay.
• To ex t Repeat mode, press REPEAT a fourth t me for about
1 second.
A-B REPEAT
To repeat or loop a sequence n a t tle:
• Press A-B REPEAT br efly at your chosen start ng po nt;
➜
Aappears on the player d splay.
• Press A-B REPEAT br efly aga n at your chosen end po nt;
➜A-Bappears on the d splay, and the repeat sequence
beg ns.
• To ex t the sequence, press A-B REPEAT br efly aga n.
CAMERA ANGLE
• If the d sc conta ns sequences recorded from d fferent cam-
era angles, the angle con appears , show ng the
number of ava lable angles, and the
angle be ng shown. You can then change the camera angle
f you w sh.
• To get another angle, press ANGLE .
➜The angle con w ll show the next angle.
• To go to any angle d rectly, enter the angle number us ng
the numer cal keys (0-9).
NOTE
- The angle icon remains on the screen unless you turn off the
angle feature.
• To turn off the angle feature, press OSD :
➜ the angle con d sappears.
• To turn the angle feature on aga n, press angle aga n:
➜ the angle con reappears.
+ j
37
hapter
shuffle
english
14
PLAYING A DVD-VIDEO DISC
CHANGING THE AUDIO LANGUAGE AND CHANNEL
CONFIGURATION
Th s changes the language and the aud o channel conf gura-
t on when alternat ves are ava lable on the d sc.
• Press AUDIO dur ng play.
➜The aud o language and channel conf gurat on cons
appear on the screen
for 2 seconds.
• Press AUDIO repeatedly to step through the opt ons.
➜ At each step, the language changes. If the sound con-
f gurat on changes too (for example from mult channel
to stereo) th s s also nd cated.
SUBTITLES
• When subt tles are ava lable on a d sc, you can turn them
on by hold ng SUBTITLE down dur ng play unt l the
subt tles appear.
• To step through the language opt ons, press SUBTITLE
repeatedly.
• To turn the subt tles off, hold SUBTITLE down aga n.
SCAN
Plays the f rst 10 seconds of each t tle on the d sc.
• Press SCAN for about 1 second.
• To cont nue play at your chosen t tle, press SCAN aga n for
about 1 second or press 2.
CHECKING THE CONTENTS OF DVD-VIDEO DISCS:
MENUS
For t tles and chapters, select on menus may be ncluded on
the d sc. The DVD’s player’s menu feature allows you to make
select ons from these menus. Press the appropr ate numer cal
key; or use the b o l r keys to h ghl ght your select on,
and press OK.
• Press MENU.
➜ If the present t tle has a “root” menu, th s now appears
on the OSD.
• The “root” menu can l st camera angles, spoken language
and subt tle language opt ons, and chapters for the t tle.
• To ex t the “root” menu, press MENU aga n.
• Press T-C followed by MENU.
➜ If the d sc has a t tle menu, th s now appears on the
OSD.
• To remove the t tle menu, press T-C aga n.
....
....
....
2 h
MPEG
ENG
AUDIO
english
15
PLAYING A DVD-VIDEO DISC
You w ll recogn ze V deo CDs by the logo.
Depend ng on the mater al on the d sc (a
mov e, v deo cl ps, a drama ser es, etc.) t
may have one or more tracks, and tracks
may have one or more ndexes, as nd -
cated on the d sc case. To make access easy and conven ent,
your player lets you move between tracks, and between
ndexes.
Some V deo CDs have Playback Control (PBC), wh ch s a pre-
def ned playback sequence stored on the d sc.
NOTE
- During play, various icons will appear on the TV screen for
about 2 seconds to confirm that a function has been select-
ed. You can get rid of these icons by pressing OSD.
- At any time during play, you can press OSD to call up the
Play Banner, which shows you which functions are active,
for about 2 seconds. To keep the Play Banner on the screen,
hold down OSD for a couple of seconds. To get rid of the
Play Banner, press OSD again.
- List of icons:
..........................................Play
..........................................Pause
..........................................Stop
..........................................A-B repeat
..................................Search forward
..................................Search backward
..........................Slow forward
..........................................Repeat d sc
..........................................Repeat track
..........................................Shuffle
..........................................Track nd cat on
..........................................Index nd cat on
..........................................Rema n ng t me of t tle
..........................................Elapsed t me
..........................................Total t me
PLAYING A DISC
• W th Autoplay on, play starts when you close the d sc
drawer.
• W th Autoplay off, press 2.
• As the d sc plays, the d splay shows the current track, and
the elapsed play ng t me.
• Play w ll stop at the end of the d sc.
• To stop play at any other t me, press 9.
• You can resume play from the po nt at wh ch you stopped.
Press 2tw ce.
• The RESUME feature appl es, not only to the d sc n the
player, but also to the last four d scs you have played.
S mply re- nsert the d sc, press 2f Autoplay s off, and
when you see the Resume con on the screen , press
2aga n.
MOVING TO ANOTHER TRACK
When a d sc has more than one track (wh ch you can see
from both the OSD and the player d splay f you press 9), you
can move to another track as follows:
• Press T-C, then press Kbr efly dur ng play to step forward
to the next track.
• Press T-C, then press Jbr efly dur ng play to return to the
beg nn ng of the current track. Press Jbr efly aga n to step
back to the beg nn ng of the prev ous track.
• To go d rectly to any track, press T-C, then enter the track
number us ng the numer cal keys.
NOTE
- If the number has more than one digit, press the keys in
rapid succession.
MOVING TO ANOTHER INDEX
When a track has more than one ndex (as nd cated on the
d sc case), you can move to another ndex as follows:
• Press Kbr efly dur ng play to step forward to the next
ndex.
• Press Jbr efly dur ng play to return to the beg nn ng of the
current ndex. Press Jbr efly aga n to step back to the
beg nn ng of the prev ous ndex.
• To go d rectly to any ndex enter the ndex number us ng the
numer cal keys.
2:48:59
7:59
7:24:59
INDEX
004
TRACK
02
shuffleshuffle
1
1/8
1/4
1/2
A - B
PLAYING A VIDEO CD
english
16
PLAYING A VIDEO CD
NOTE
- If the number has more than one digit, press the keys in
rapid succession.
PLAYBACK CONTROL PBC)
• Insert a V deo CD w th PBC and press 2.
➜ The PBC menu appears on the TV screen.
• Go through the menu w th the keys nd cated on the TV
screen unt l your chosen passage starts to play. If a PBC
menu cons sts of a l st of t tles, you can select a t tle
d rectly.
• Enter your cho ce w th the J, K or numer cal keys.
• Press 2to start play of the selected t tle.
• Press RETURN to go back to the prev ous menu.
PARENTAL CONTROL
• If you act vate Parental Control, only d scs that you have
already author sed as su table for all ages can be played as
above.
• To play any other V deo CD, the OSD w ll ask you to enter
your Parental Control PIN Code. When th s has been done,
play starts automat cally.
• To act vate Parental Control, and to author ze d scs, see
Act vat ng Parental Control (p. 22).
NOTE
- If you forget your PIN code, you can erase it when the code
is requested as above, by pressing 9four times. Parental
Control will then be de-activated. To re-activate it, see
Activating Parental Control (p. 22).
STILL PICTURE AND STEP FRAME
• To get a st ll p cture, press ;dur ng play.
• To step forward to the next p cture frame, press ;aga n.
• To return to play, press 2.
SEARCH
• To search forwards or backwards through the d sc at 4x
normal speed, press K or Jfor about 1 second dur ng
play.
➜ Search beg ns, and sound s muted.
• To step up to 32x normal speed, press down K or Jaga n.
• To go d rectly to 32x normal speed, hold down K or Junt l
the or con appears.
• To return to 4x normal speed, press down K or Jaga n.
➜ Search speed and d rect on are nd cated on the screen
for 2 seconds each t me K or Js pressed.
• To end the search, press 2, ;, or 9as des red.
SLOW MOTION
• Press to play v deo at 1/2 normal speed w th sound
muted.
• Press aga n to play at 1/4 normal speed.
• Press aga n to play at 1/8 normal speed.
• Press aga n to play v deo at 1/2 normal speed.
• Play speed s nd cated on the screen for 2 seconds each
t me the button s pressed.
• To ex t slow mot on mode, press 2, ;, 5/6or 9 as
des red.
SHUFFLE
Th s shuffles the play ng order of the tracks, f the d sc has
more than one.
• Press SHUFFLE br efly dur ng play.
➜ appears on the screen for about 2 seconds.
• As each track s played, ts number d sappears from the
track calendar.
•To return to normal play, press SHUFFLE br efly.
REPEAT TRACK/DISC
• To repeat the currently play ng track, press REPEAT for
about 1 second:
➜
REPEAT TRACK appears on the player d splay.
• To repeat the ent re d sc, press REPEAT a second t me for
about 1 second;
➜
REPEAT appears on the d splay.
shuffleshuffle
video CD
1 eject disc 2
Parental Control is active.
Please enter your PIN
to play this disc
english
17
PLAYING A VIDEO CD
• To ex t Repeat mode, press REPEAT a th rd t me for about 1
second.
A-B REPEAT
To repeat or loop a sequence:
• Press A-B REPEAT br efly at your chosen start ng po nt;
➜
Aappears on the player d splay.
• Press A-B REPEAT br efly aga n at your chosen end po nt;
➜
A-Bappears on the d splay, and the repeat sequence
beg ns.
• To ex t the sequence, press A-B REPEAT br efly aga n.
SCAN
Plays the f rst 10 seconds of each t tle on the d sc.
• Press SCAN for about 1 second.
• To cont nue play at your chosen t tle, press SCAN aga n for
about 1 second or press 2.
Aud o CDs conta n mus c tracks only.
You w ll recogn ze CDs by the r logo.
You can play aud o CDs us ng the OSD or,
through a stereo system only, us ng keys on
the remote control and/or front panel.
PLAYING A DISC
• W th Autoplay on, play starts when you close the d sc
drawer.
• W th Autoplay off, press 2.
➜ The d sc starts to play; f the TV s on, the CD Play
screen appears on the OSD.
➜ Play w ll stop at the end of the d sc.
• To stop play at any other t me, press 9.
PAUSE
• Press ;dur ng play.
• To return to play, press 2.
SEARCH
• To search forwards or backwards through the d sc at 4x
normal speed, press K or Jfor about 1 second dur ng
play.
➜ Search beg ns, and sound s part ally muted.
• To step up to 8x normal speed, press K or Jaga n.
➜ Search goes to 8x speed, and the sound s muted.
• To go d rectly to 8x normal speed, hold down K or Junt l
the or con appears.
• To return to 4x normal speed, press K or Jaga n.
• If the TV s on, search speed and d rect on are nd cated on
the screen each t me K or Js pressed.
• To end the search, press 2, ;or 9as des red.
MOVING TO ANOTHER TRACK
• Press Kbr efly dur ng play to step forward to the next track.
• Press Jbr efly dur ng play to return to the beg nn ng of the
current track. Press Jbr efly aga n to step back to the
beg nn ng of the prev ous track.
• To go d rectly to any track, enter the track number us ng the
numer cal keys.
NOTE
- If the number has more than one digit, press the keys in
rapid succession.
SHUFFLE
• Press SHUFFLE br efly dur ng play.
➜ The order of the tracks s changed.
• As each track s played, ts number d sappears from the
player d splay.
• To return to normal play, press SHUFFLE br efly aga n.
REPEAT TRACK/DISC
• To repeat the current-play ng track, press REPEAT for about
1 second:
➜
REPEAT TRACK appears on the d splay.
audio CD
ti e tracks 1269:16
4:197:24
23 5678910111241
PLAYING AN AUDIO CD
english
18
PLAYING A VIDEO CD PLAYING AN AUDIO CD
• To repeat the ent re d sc, press REPEAT a second t me for
about 1 second;
➜
REPEAT appears on the d splay.
• To ex t Repeat mode, press REPEAT a th rd t me for about 1
second.
A-B REPEAT
To repeat or loop a sequence:
• Press A-B REPEAT br efly at your chosen start ng po nt;
➜
Aappears on the player d splay.
• Press A-B REPEAT br efly aga n at your chosen end po nt;
➜
A-Bappears on the d splay, and the repeat sequence
beg ns.
• To ex t the sequence, press A-B REPEAT br efly aga n.
SCAN
Plays the f rst 10 seconds of each t tle on the d sc.
• Press SCAN for about 1 second.
• To cont nue play at your chosen t tle, press SCAN aga n for
about 1 second or press 2.
FTS FAVOURITE TRACK SELECTION)
NOTE
- FTS Favourite Track Selections are compiled and played
using the OSD: ensure that the TV is on.
Playing an FTS program
If Auto FTS s set to on, play of the FTS program starts mme-
d ately. If Auto FTS s off:
1Insert a d sc and go to Stop mode.
2Press lor rto start comp l ng FTS programs.
3If ava lable the exc st ng FTS program appears.
4Follow nstruct ons under “To exclude tracks” or “To select
tracks”.
To turn Auto FTS on and off, see Sett ngs, p. 20
Compiling an FTS program
FTS programs can be comp led by select ng the tracks you
want to play (“Track Select on”) or by exclud ng the tracks you
don’t want to play (“Exclud ng Tracks”)
To exclude Tracks:
1Insert a d sc and go to Stop mode.
2Press l.
3Use lor rto move to the f rst track number you want to
exclude.
4Press o.
5Repeat steps 3 and 4 to exclude further track numbers n
the same way. If you change your m nd, you can re- nclude
any track number by mov ng back to t and press ng b.
6To clear your whole select on and start aga n, press 9.
audio CD exclude tracks
1 2 3 4 8765131211109142
play
7
exclude
play selection clear selection
29
english
19
PLAYING AN AUDIO CD
To select Tracks:
1Insert a d sc and go to Stop mode.
2Press r.
3Use lor rto move to the f rst track number you want to
select.
4Press b.
5Repeat steps 3 and 4 to select further track numbers n the
same way. If you change your m nd, you can de-select track
numbers n reverse order by press ng oas requ red.
6To clear your whole select on and start aga n, press 9.
When your FTS program s complete, press 2to start play, or
RETURN to go back to Stop mode. In e ther case, the FTS pro-
gram w ll be automat cally memor zed.
NOTE
- You can have a total of at least 100 FTS programmed discs.
If you exceed that number, the least frequently played FTS
program(s) are automatically deleted.
In the sett ngs menu, you can custom ze your player to su t
your own part cular requ rements.
In Stop mode:
• Press SETUP to obta n the Sett ngs screen.
• Move to the funct on you want to change us ng obthen
use lrto scroll to your preferred opt on.
• To ex t Sett ngs menu, press RETURN or SETUP.
The sound w ll be n the language you choose prov ded th s s
ava lable on the d sc n play. If not, speech w ll revert to the
f rst spoken language on the d sc.
The subt tles w ll be n the language you choose prov ded th s
s ava lable on the d sc n play. If not, subt tles w ll revert to
the f rst subt tle language on the d sc.
Parental Control s descr bed separately under ‘Parental
Control’ p. 22.
Parental Control
Subtitle
Audio
video CD
english
- +
all
video shift
digital output
OSD language
on
3D sound
settings
video CD settings
audio english
english
Not Active
16:9
on
on
subtitle
parental control
TV shape
auto play
auto FTS
SETTINGS
audio CD favourite tracks
1 2 3 4 8765131211109142
favourite
disc
play selection clear selection
29
3106 511
english
20
PLAYING AN AUDIO CD SETTINGS
Factory sett ng 16:9 (w de screen). If you have a regular (4:3)
TV, you can choose Letterbox for a ‘w de-screen’ p cture w th
black bars top and bottom, or Pan Scan, for a full-he ght p c-
ture w th the s des tr mmed. If a d sc has Pan Scan, the p c-
ture then moves (scans) hor zontally to keep the ma n act on
on the screen.
Factory sett ng ON means that d scs starts to play automat -
cally when nserted. Set to OFF f you prefer to start play
manually.
Factory sett ng ON means that when a d sc w th an FTS pro-
gram (see ‘Comp l ng an FTS program p. 19) s nserted, the
FTS program automat cally starts to play. Set to Off f you pre-
fer to control FTS play manually.
Factory sett ng OFF means that there s no aud o s gnal at the
d g tal output. If you are connect ng equ pment w th a d g tal
nput, change the sett ng to ALL.
If your equ pment doesn't nclude a d g tal decoder, (e.g. d g -
tal speakers) set the d g tal output to PCM.
Factory sett ng centers the v deo on your TV screen. Use th s
sett ng to personal ze the pos t on of the
p cture on your TV by scroll ng t to the left or r ght.
The player’s on-screen d splay w ll be n the language you
choose.
To enjoy mult channel sound even on two speakers, turn
3D Sound on.
3D Sound
OSD Language
Video Shift
Digital Output
Auto FTS
Auto Play
TV Shape
english
21
SETTINGS
ACTIVATING PARENTAL CONTROL
Th s can only be done n Stop mode
1Press SETUP to obta n the Sett ngs menu.
2Move to Parental Control us ng ob.
3Press lor rto change Parental Control to Act ve.
4You w ll be asked to enter a 4-d g t p n code of your own
cho ce, and then to conf rm your cho ce.
5Th s code must then be entered to play any DVD-V deo or
V deo CD d sc, unless you have prev ously author zed the
d sc as su table for all ages.
6To de-act vate Parental Control repeat the above procedure.
AUTHORIZING DISCS
1Insert the d sc you w sh to author ze and close the tray.
➜ The OSD w ll ask for your p n code.
2Enter your p n code.
3Press 9.
4Select Parental Control on the OSD by press ng r
➜ The OSD w ll ask for your p n code.
5The d sc s now author zed, and w ll play n the normal way,
w thout the p n code.
To cancel your author zat on, repeat steps 4 and 5.
NOTE
- You can have a total of 50 authorized discs. If you exceed
that number, the least frequently played disc(s) are automat-
ically de-authorized.
Enter Pin Code
NO
YES
Change
Au oriza ion
ENTER
PIN CODE
PRESS "STOP"
NOT OK
OK
OK
NO
YES
NOT
OK
1 back 2
This disc is not authorised
to BE VIEWED without PIN.
Please enter your PIN
to authoeise viewing
DVD video
DVD video
ti e titles
eject disc 1 2 parental control
23 567891011121341
09:16 45
TRY 3X
when Paren al Con rol is ac ive
insert disc
is his
disc au horized?
normal opera ion
select
Parental Control
change
au oriza ion
open ray
enter pin
PARENTAL CONTROL
english
22
PARENTAL CONTROL
If t appears that the DVD-V deo player s faulty, f rst consult
th s checkl st. It may be that someth ng s mple has been over-
looked. Under no c rcumstances attempt to repa r the system
yourself; th s w ll nval date the warranty.
Look for the spec f c symptom(s). Then perform only the
act ons l sted to remedy the spec f c symptom(s).
SYMPTOM
• Remedy
NO POWER................................................................................
• Check f the on/off button on the front of
the player s set to on.
• Check f both plugs of the ma ns cord are
properly connected.
• Check f there s power at the AC outlet by
plugg ng n another appl ance.
NO PICTURE..............................................................................
• Check f the TV s sw tched on.
• Select the same channel and source on the
TV as on the player.
• Check the v deo connect on.
DISTORTED PICTURE..............................................................
• Check the d sc for f ngerpr nts and clean
w th a soft cloth, w p ng from centre to
edge.
• Somet mes a small amount of p cture
d stort on may appear.Th s s not a
malfunct on.
COMPLETELY DISTORTED PICTURE WITH PLAYER MENU
• NTSC/PAL sw tch n wrong pos t on.
NO COLOUR IN PICTURE WITH PLAYER MENU................
• NTSC/PAL sw tch n wrong pos t on.
DISC CAN’T BE PLAYED ........................................................
• Ensure the d sc label s upwards.
• Clean the d sc.
• Check f the d sc s defect ve by try ng
another d sc.
NO SOUND................................................................................
• Check aud o connect ons.
• If us ng a H F ampl f er, try another sound
source.
DISTORTED SOUND FROM HIFI AMPLIFIER ......................
• Check that the player’s aud o L/R output s
not connected to the ampl f er’s phono
nput.
NO RETURN TO START-UP SCREEN WHEN DISC IS
REMOVED..................................................................................
• Reset by sw tch ng the player off, then on
aga n.
• Check to see f the program requ res
another d sc to be loaded.
THE PLAYER DOES NOT RESPOND TO THE REMOTE
CONTROL ..................................................................................
• A m the remote control d rectly at the sen-
sor on the front of the player.
• Avo d all obstacles wh ch may nterfere
w th the s gnal path.
• Inspect or replace the batter es.
DISTORTED OR BLACK AND WHITE PICTURE WITH DVD
OR VIDEO CD DISC ..................................................................
• The d sc format s not accord ng to the TV-
set used (NTSC/PAL).
NO AUDIO AT DIGITAL OUTPUT ..........................................
• Check the d g tal connect ons.
• Check the sett ngs menu to make sure that
the d g tal output s set to on.
• Check f the aud o format of the selected
aud o language matches your rece ver
capab l t es.
BUTTONS DO NOT WORK......................................................
• Reset by sw tch ng the player off, then on
aga n.
Some problems occur because the
d sc ns de the player s d rty. To avo d
such problems clean your d scs regu-
larly w th a soft cloth. W pe the d sc
from the center out.
CAUTION
Do not use solvents such as
benzine, thinner, commercially
available cleaners, or anti-static
spray intended for analog discs.
CLEANING DISCS
BEFORE REQUESTING SERVICE
english
23
BEFORE REQUESTING SERVICE
If the fault pers sts, you can run the D agnost c Program n the
player.
INSTRUCTIONS:
1Sw tch the player off.
2Hold both OPEN/CLOSE and ; pressed and sw tch on the
player.
➜ ‘BUSY’ appears on the d splay together w th a counter.
The counter nd cates the term nat on of the test when t
reaches zero.
➜ After a few m nutes, ‘BUSY’ changes to ‘ERROR’ or
‘PASS’.
3Sw th off the player to ex t the D agnost c Program.
4‘ERROR’ nd cates that your player needs repa r. Contact your
dealer or the Ph l ps Consumer Informat on Center (CIC).
5‘PASS’ nd cates that the D agnost c Program has found no
fault. In th s case, the malfunct on may be due to m s nter-
pretat on of the operat ng ntruct ons, or an unsu table d sc,
or ncorrect connect ons. If you st ll cannot solve the prob-
lem, contact your dealer or the Ph l ps CIC.
6You w ll f nd the phone number of the Ph l ps CIC n your
Warranty Booklet.
DIAGNOSTIC PROGRAM
english
24
BEFORE REQUESTING SERVICE

This manual suits for next models

4

Other Philips DVD Player manuals

Philips DVP3980K User manual

Philips

Philips DVP3980K User manual

Philips DVP3140 User manual

Philips

Philips DVP3140 User manual

Philips BDP2305X User manual

Philips

Philips BDP2305X User manual

Philips DVP3886X/94 User manual

Philips

Philips DVP3886X/94 User manual

Philips DVDQ50 User manual

Philips

Philips DVDQ50 User manual

Philips DVD793C User manual

Philips

Philips DVD793C User manual

Philips DVP3680/51 User manual

Philips

Philips DVP3680/51 User manual

Philips MATCHLINE DVD 955 User manual

Philips

Philips MATCHLINE DVD 955 User manual

Philips DVD727 User manual

Philips

Philips DVD727 User manual

Philips DVP3350K/98 User manual

Philips

Philips DVP3350K/98 User manual

Philips DVP3602 User manual

Philips

Philips DVP3602 User manual

Philips DVP3600 User manual

Philips

Philips DVP3600 User manual

Philips DVP3858 User manual

Philips

Philips DVP3858 User manual

Philips DVD615 User manual

Philips

Philips DVD615 User manual

Philips DVP2618 User manual

Philips

Philips DVP2618 User manual

Philips DVP3028 User manual

Philips

Philips DVP3028 User manual

Philips DVP5960/05 User manual

Philips

Philips DVP5960/05 User manual

Philips DVD950AT User manual

Philips

Philips DVD950AT User manual

Philips DVP3148K User manual

Philips

Philips DVP3148K User manual

Philips DVP3120/05B User manual

Philips

Philips DVP3120/05B User manual

Philips PD7030 User manual

Philips

Philips PD7030 User manual

Philips DVP762/02 User manual

Philips

Philips DVP762/02 User manual

Philips Cineos DVDR9000H User manual

Philips

Philips Cineos DVDR9000H User manual

Philips DVD-622 User manual

Philips

Philips DVD-622 User manual

Popular DVD Player manuals by other brands

Magnavox MDV443 - Dvd-video Player Quick use guide

Magnavox

Magnavox MDV443 - Dvd-video Player Quick use guide

Coby DVD-415 Troubleshooting

Coby

Coby DVD-415 Troubleshooting

Aiwa XD-DV170 Service manual

Aiwa

Aiwa XD-DV170 Service manual

Akai AMD02 user manual

Akai

Akai AMD02 user manual

Pioneer DVH-P5900MP Operation manual

Pioneer

Pioneer DVH-P5900MP Operation manual

Sanyo DVD-SL40 Service manual

Sanyo

Sanyo DVD-SL40 Service manual

Goodmans gdvd150 instruction manual

Goodmans

Goodmans gdvd150 instruction manual

Edis EM1003 user manual

Edis

Edis EM1003 user manual

Sytech SY-4096 user manual

Sytech

Sytech SY-4096 user manual

Sony SLV-D920 E1 Service manual

Sony

Sony SLV-D920 E1 Service manual

Audiovox 3200 Installation and owner's manual

Audiovox

Audiovox 3200 Installation and owner's manual

Pioneer DVD-V7200 Command list

Pioneer

Pioneer DVD-V7200 Command list

LG DK-7890 owner's manual

LG

LG DK-7890 owner's manual

Pioneer Sdvp7 - Din Sized Dvd Player installation manual

Pioneer

Pioneer Sdvp7 - Din Sized Dvd Player installation manual

Sony BDP-S1000ES - Blu-Ray Disc Player Connecting guide

Sony

Sony BDP-S1000ES - Blu-Ray Disc Player Connecting guide

Pioneer Elite DV-37 operating instructions

Pioneer

Pioneer Elite DV-37 operating instructions

LG DVX553 owner's manual

LG

LG DVX553 owner's manual

Toshiba SD-2108 owner's manual

Toshiba

Toshiba SD-2108 owner's manual

manuals.online logo
manuals.online logoBrands
  • About & Mission
  • Contact us
  • Privacy Policy
  • Terms and Conditions

Copyright 2025 Manuals.Online. All Rights Reserved.