manuals.online logo
Brands
  1. Home
  2. •
  3. Brands
  4. •
  5. Philips
  6. •
  7. DVD Player
  8. •
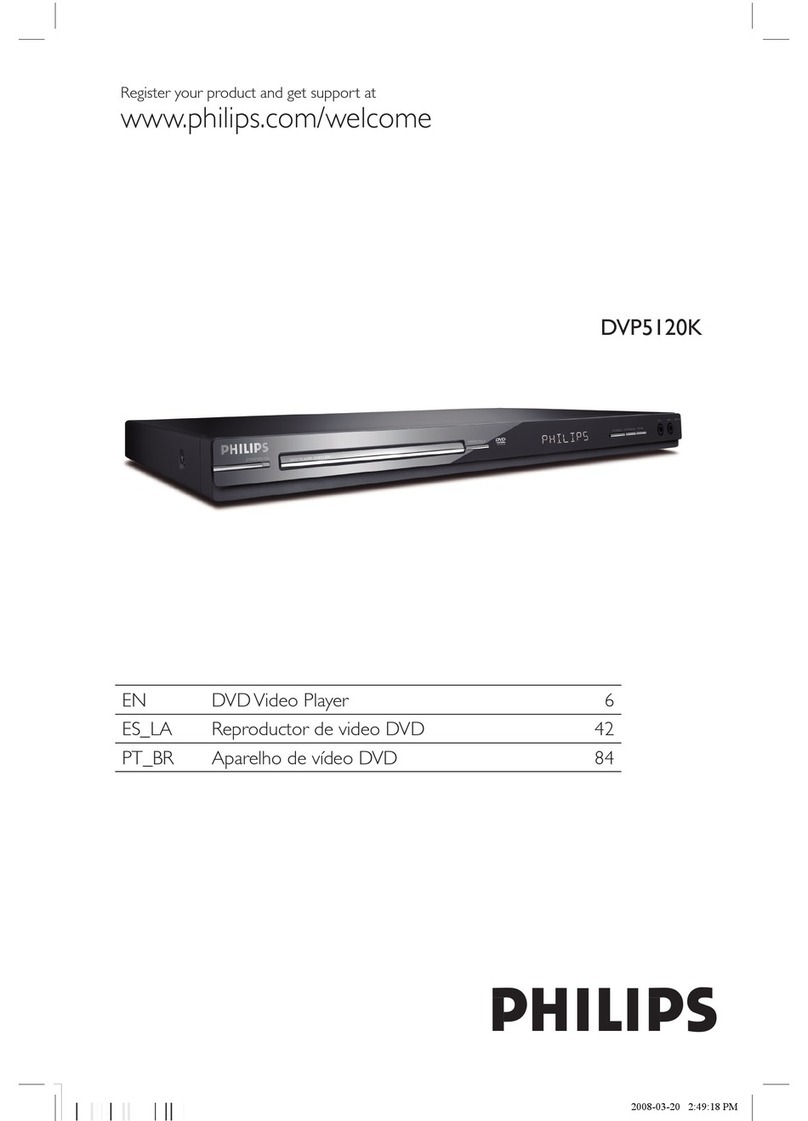
  9. Philips DVDR980 User manual

Philips DVDR980 User manual

980
980
Mode d'emploi
Bedienungsanleitung
Instrucciones de manejo
Istruzioni per l'uso
Gebruiksaanwijzing
®
Philips Customer Care Centers
Austria
tel: 43-0-810 001 203
Belgium
tel: 32-2-070 222 303
Denmark
tel: 808 82 814
Finland
tel: 358-09-6158 0250
France
tel: 33-1-825 889 789
Germany
tel: 49-0-180-535 6767
Greece
tel: 30-0-0800-3122 1280
Ireland
tel: 353-1-7640292
Italy
tel: 800-820026 (Toll Free)
Luxembourg
tel: 352-404061215
Netherlands
tel: 0900-8406
Nor ay
tel: 22-748 250
Portugal
tel: 352-1-4163063
Spain
tel: 34-902-113 384
S eden
tel: 08 5985 2250
S itzerland
tel: 0844 800 544
United Kingdom
tel: 44-0-208 665 6350
Poland
tel: 48-22-571 0571
INDEX 3
English___________________________________________________4
English
English
4GENERAL INFORMATION
Laser safety
This unit employs a laser. To prevent possible eye injury,
only a qualified service person should remove the cover
or attempt to service this device.
USE OF CONTROLS OR AD USTMENTS OR
PERFORMANCE OF PROCEDURES OTHER
THAN THOSE SPECIFIED HEREIN MAY
RESULT IN HAZARDOUS RADIATION
EXPOSURE.
WARN NG LOCAT ON: NS DE ON LASER COVERSH ELD
NEVER MAKE OR CHANGE CONNECTIONS
WITH THE POWER SWITCHED ON.
The DVD recorder is in conformity with
the EMC directive and low-voltage
directive.
CAUTION ONLY QUAL F ED SERV CE PERSONNEL
SHOULD REMOVE THE COVER OR
ATTEMPT TO SERV CE TH S DEV CE.
For Customer Use:
Read carefully the information located on the back of your
DVD recorder and entered below the Serial N°. Retain this
information for future reference.
Model N°. DVDR980
Serial N°. __________________________
CAUT ON V S BLE AND NV S BLE LASER RAD AT ON. WHEN OPEN
AVO D EXPOSURE TO BEAM
ADVARSEL SYNL G OG USYNL G LASERSTRÅL NG VED ÅBN NG
UNDGÅ UDSÆTTELSE FOR STRÅL NG
ADVARSEL SYNL G OG USYNL G LASERSTRÅL NG NÅR DEKSEL ÅPNES
UNNGÅ EKSPONER NG FOR STRÅLEN
VARN NG SYNL G OCH OSYNL G LASERSTRÅLN NG NÄR DENNA DEL
ÄR ÖPPNAD BETRAKTA EJ STRÅLEN
VARO! AVATTAESSA OLET ALTT NA NÄKYVÄLLE JA
NÄKYMÄTTÖMÄLLE LASER SÄTE LYLLE. ÄLÄ KATSO SÄTEESEEN
VORS CHT S CHTBARE UND UNS CHTBARE LASERSTRAHLUNG
WENN ABDECKUNG GEÖFFNET N CHT DEM STRAHL AUSSETSEN
DANGER V S BLE AND NV S BLE LASER RAD AT ON. WHEN OPEN
AVO D D RECT EXPOSURE TO BEAM
ATTENT ON RAYONNEMENT LASER V S BLE ET NV S BLE EN CAS
D’OUVERTURE EXPOS T ON DANGEREUSE AU FA SCEAU
CLASS 1
LASER PRODUCT
LASER
Type Semiconductor laser GaAlAs
Wavelength 660 nm (DVD)
780 nm (CD)
Output Power 20 mW (DVD writing)
(out of objective) 0.8 mW (DVD reading)
0.3 mW (CD reading)
Beam divergence 60 degree.
General information
Manufactured under license from Dolby
Laboratories. “Dolby”, “Pro Logic” and the double-
D symbol are trademarks of Dolby Laboratories.
Confidential Unpublished Works.
©1992-1997 Dolby Laboratories, nc. All rights
reserved.
The SHOWVEW system is a registered trademark of
the Gemstar Development Corporation. The
SHOWVEW system is manufactured under licence
from the Gemstar Development Corporation.
TRUSURROUND, SSRRSS, and symbol are
trademarks of SRS Labs, nc. TRUSURROUND
technology is manufactured under license from
SRS Labs, nc.
This product incorporates copyright protection
technology that is protected by method claims of
certain U.S. patents and other intellectual
property rights owned by Macrovision
Corporation and other rights owners.
Use of this copyright protection technology must
be authorized by Macrovision Corporation, and is
intended for home and other limited viewing uses
only unless otherwise authorized by Macrovision
Corporation. Reverse engineering or disassembly
is prohibited.
®
English
Contents
Introduction
DVD Video Recorder________________________________________8
Box contents_______________________________________________9
Placement _________________________________________________9
Cleaning discs ______________________________________________9
Remote control ____________________________________________9
Loading the batteries_______________________________________9
Installation
Connections - back side of your DVD recorder _________________10
Connecting to the antenna___________________________________10
Connecting to a TV set _____________________________________10
S-video (Y/C) connection __________________________________10
Video (CVBS) connection __________________________________10
Connecting to audio equipment_______________________________11
Connecting to A/V receiver or A/V amplifier with digital
Multi-channel decoder_____________________________________11
Connecting to a receiver equipped with two channel digital
stereo (PCM)____________________________________________11
Connecting to a receiver equipped with Dolby Pro Logic ________11
Connecting to a TV set equipped with a Dolby Pro Logic decoder_11
Connecting to a receiver with two channel analogue stereo ______12
Connecting to other equipment ______________________________12
Connections - frontside of your DVD recorder__________________12
Camcorder connection____________________________________12
Power supply _____________________________________________13
Switching on ______________________________________________13
First time set-up: virgin mode ________________________________13
Automatic setting ________________________________________13
Manual setting ___________________________________________14
Functional overview
Front of recorder __________________________________________16
Rear of recorder___________________________________________17
Display___________________________________________________18
Remote control ___________________________________________19
Operation
mportant notes for operation________________________________20
Loading discs______________________________________________20
Disc types _______________________________________________20
The following disc types can be used for recording and playback __20
The following disc types can be used for playback only __________20
The following disc types cannot be used at all, neither for
recording nor for playback _________________________________21
On-screen display information________________________________21
System menu bar_________________________________________21
User preference menu operation ____________________________22
Status box ______________________________________________22
Tuner info box __________________________________________23
Timer info box __________________________________________23
Warning box ____________________________________________23
ndex Picture Screen________________________________________24
User preferences __________________________________________25
Setting user preferences __________________________________25
Picture settings __________________________________________25
Sound settings ___________________________________________25
CONTENTS 5
English
Language settings_________________________________________26
Feature settings __________________________________________26
Remote Control settings __________________________________27
Record Settings __________________________________________27
nstallation ______________________________________________28
Recording
Before you start recording___________________________________30
Manual recording __________________________________________31
Checking input___________________________________________31
Recording_______________________________________________31
Manual audio control _____________________________________32
Recording with automatic switch-off (OTR One-Touch Recording)__32
Timer programming ________________________________________32
Timer programming with the SHOWVEW®system ______________33
Timer programming without the SHOWVEW system_____________34
Programming with ’NEXTV EW Link’ __________________________34
f a timer setting is incorrect _________________________________35
How to check or alter a timer block _________________________35
How to clear a timer block ________________________________35
Playback
Playing a DVD+RW or DVD+R disc ___________________________36
Playing a pre-recorded DVD-Video disc ________________________36
Playing a (Super) Video CD disc ______________________________36
General features ___________________________________________37
Moving to another title/track _______________________________37
Moving to another chapter/index______________________________37
Slow Motion ____________________________________________37
Still Picture and Step Frame ________________________________38
Search _________________________________________________38
Repeat _________________________________________________38
Repeat A-B _____________________________________________38
Scan ___________________________________________________39
Time search_____________________________________________39
Zoom__________________________________________________39
Special DVD+R(W) features _________________________________40
Recording date and date ___________________________________40
Special DVD-Video features__________________________________40
Menus on the disc ________________________________________40
Camera Angle ___________________________________________40
Changing the audio language________________________________40
Subtitles ________________________________________________41
Special VCD features _______________________________________41
Playback Control (PBC) ___________________________________41
Playing an audio CD ________________________________________41
Pause __________________________________________________41
Search _________________________________________________42
Moving to another track ___________________________________42
Repeat track/disc_________________________________________42
Repeat A-B _____________________________________________42
Scan ___________________________________________________42
6CONTENTS
English
Access control
Child Lock (DVD and VCD) _________________________________43
Activating/deactivating the child lock _________________________43
Authorizing discs when Child Lock is activated_________________43
Securing discs ___________________________________________44
Parental Level (DVD-Video only)______________________________44
Activating/Deactivating Parental Control ______________________44
Country__________________________________________________44
Changing the 4-digit code____________________________________45
Managing disc content
Title settings ______________________________________________46
Changing the title name ___________________________________46
Play full title _____________________________________________46
Erasing a title ____________________________________________46
Disc nfo Screen ___________________________________________47
Disc Settings ______________________________________________47
Changing the Disc Name __________________________________47
Protection of recordings___________________________________47
Erasing a disc ____________________________________________48
Finalising a DVD+R disc ___________________________________48
Making your edits DVD compatible __________________________48
Favorite Scene Selection_____________________________________49
Calling up the FSS menu ___________________________________49
nserting chapter markers __________________________________49
Hiding chapters __________________________________________49
Deleting chapter markers __________________________________50
Changing the index picture_________________________________50
Dividing a title ___________________________________________50
Append recording ________________________________________50
Troubleshooting
Troubleshooting checklist ___________________________________51
Diagnosis programme_______________________________________53
nstructions _____________________________________________53
System limitations__________________________________________53
Glossary
Appendix
Using your DVD recorder remote control with your TV set _______56
CONTENTS 7
English
INTRODUCTION 8
Introduction
DVD Video Recorder
DVD (Digital Versatile Disc) is the new storage medium
that combines the convenience of the Compact Disc
with the latest advanced digital video technology.
DVD Video uses state-of-the-art MPEG2 data
compression technology to register an entire movie on a
single 5-inch disc. DVD’s variable bitrate compression,
running at up to 9.8 Mbits/second, captures even the
most complex pictures in their original quality.
The crystal-clear digital pictures have a horizontal
resolution of over 500 lines, with 720 pixels (picture
elements) to each line. This resolution is more than
double that of VHS, superior to Laser Disc, and entirely
comparable with digital masters made in recording
studios.
DVD recording is the next step in video technology.
DVD+ReWritable (DVD+RW) uses phase-change media,
the same technology that formed the basis for CD-
ReWritable. A high-power laser is used to change the
reflectivity of the recording layer. This process can be
repeated more than a thousand times. DVD+Recordable
(DVD+R) uses discs based on an organic dye, a
technology pioneered with the successful CD-
Recordable format, to produce discs that keep your data
for a lifetime.
Your Philips DVD recorder is a recorder and player for
digital video discs, with a two-way compatibility to the
universal DVD Video standard. This means that:
- existing pre-recorded DVD Video discs can be
played on your Philips DVD recorder and
- recordings, made on your Philips DVD recorder, can
be played on most DVD Video players and DVD-ROM
drives.
With it, you will be able to record TV programmes or
to edit and archive your own camcorder recordings.
Superb digital picture and sound quality, quick access to
the tracks you have recorded and extensive playback
features contribute to a completely new video
experience.
From now on you will enjoy full-length movies with true
cinema picture quality, and stereo or Multi-channel
sound (depending on the disc, and on your playback set-
up).You will find your recorder remarkably easy to use,
by way of the On-Screen Display on your TV and the
display on the DVD recorder, in combination with the
remote control.
pre-recorded DVD DVD+R(W)
DVD Video
pla er
Philips DVD
recorder
English
INTRODUCTION 9
Box contents
First check and identify the contents of your DVD
recorder package, as listed below:
- DVD recorder
- Remote Control Handset with separately-packed
batteries
- 2-core power cord
- SCART cable
- S-video cable
- Antenna (aerial) cable
- Audio cable
- Video cable
- DVD+RW disc
- User Manual
- Warranty card
f any item should be damaged or missing, please inform
your supplier without delay.
Keep the packaging materials; you may need them to
transport your recorder in the future.
Placement
lPlace the recorder on a firm, flat surface.
lKeep away from domestic heating equipment and
direct sunlight.
ln a cabinet, allow about 2.5 cm (1 inch) of free
space all around the recorder for adequate
ventilation.
lThe lense may cloud over when the DVD recorder
is suddenly moved from cold to warm surroundings.
Playing a CD/DVD is not possible then. Leave the
DVD recorder in a warm environment for two
hours before use, so the moisture can evaporate.
lThe recorder should not be exposed to dripping or
splashing, no object filled with liquids, such as vases,
should be placed on the recorder.
Cleaning discs
Some problems may occur because the disc inside the
recorder is dirty. To avoid these problems clean your
discs regularly, in the following way:
lWhen a disc becomes dirty, clean it with a cleaning
cloth. Wipe the disc from the centre out.
Caution:
Do not use solvents such as benzine, thinner,
commercially available cleaners, or anti-static
spray intended for analogue discs.
Do not use commercially available cleaning discs
to clean the lens, as these discs may damage the
optical unit.
Remote control
Loading the batteries
lOpen the battery compartment cover.
lnsert two 'AA' (LR-6) batteries as indicated inside
the battery compartment.
lClose the cover.
Caution:
Do not mix old and new batteries. Never mix
different types of batteries (standard, alkaline,
etc.). This may reduce the lifetime of the
batteries.
English
10 INSTALLATION
Installation
Connections - back side of your
DVD recorder
- Please refer to your TV set, VCR, Stereo System and
any other User Manual(s) as necessary to make the
optimal connections.
- Do not connect the power until all other connections
are made.
- Do not connect your DVD recorder to your TV set
via your VCR, because the video quality could be
distorted by the copy protection system.
- For better sound reproduction you can connect the
recorder audio outputs to your amplifier, receiver,
stereo system or A/V equipment. For this see
‘Connecting to A/V receiver or A/V amplifier’.
Caution:
Do not connect the recorder’s audio output to
the phono input of your audio system in order to
avoid damage to your equipment.
Connecting to the antenna
lRemove the antenna (aerial) cable plug from your
TV set and insert it into the antenna socket at the
back of the DVD recorder.
lPlug one end of the antenna (aerial) cable supplied (1)
into the TV socket on the DVD recorder and the other
end into the antenna input socket on your TV set.
The antenna connection transmits TV channels through
the Recorder to the TV, you still need a video
connection to send DVD playback from the Recorder to
the TV. See ‘Connecting to a TV’ set.
Connecting to a TV set
To obtain the highest possible picture and sound quality
from your TV set it is recommended to use the SCART
connector on both DVD recorder and TV set.
lConnect the bottom SCART connector (EXT 1) to
the TV set, using the SCART cable supplied (2) as
shown in the drawing. f your TV set is equipped
with EasyLink or Cinema Link, make sure you use
the correct SCART connector. For this refer to the
user manual of your TV set.
f your TV set is not equipped with a SCART connector,
you can connect the DVD recorder with the S-video
(Y/C) sockets.
S-video (Y/C) connection
lConnect the S-video output socket to the
corresponding input socket on the TV set, using the
supplied S-video cable (3).
lConnect the audio Left (white) and Right (red)
output sockets to the corresponding sockets on the
TV set using the audio cable supplied (5).
f your TV set is not equipped with S-video sockets, then
connect the DVD recorder with the CVBS sockets to
your TV set.
Video (CVBS) connection
lConnect the Video (CVBS) output socket (yellow)
to the corresponding input socket on the TV set
using the video cable supplied (4).
lConnect the audio Left (white) and Right (red)
output sockets to the corresponding sockets on the
TV set using the audio cable supplied (5).
AUX- I/0
EXT 2
TO TV I/0
EXT 1
5
TV
EXT 4 EXT 3
AUX- I/0
EXT 2
TO TV I/0
EXT 1
5
TV
EXT 4 EXT 3
AUX- I/0
EXT 2
TO TV I/0
EXT 1
2
TV
EXT 4 EXT 3
English
INSTALLATION 11
Connecting to audio equipment
Connecting to A/V receiver or A/V
amplifier with digital Multi-channel
decoder
The best possible sound quality is obtained by
connecting your DVD recorder to an A/V receiver with
Multi-channel decoder (Dolby Digital, MPEG 2 and DTS).
Digital Multi-channel sound
Digital Multi-channel connection provides the optimum
sound quality. For this you need a Multi-channel A/V
receiver that supports one or more of the audio types
supported by your DVD recorder (MPEG 2, Dolby
Digital and DTS). For this you can check the receiver
manual and the logos on the front of the receiver.
lConnect the recorder’s digital audio output to the
corresponding input on the receiver. Use a digital
coaxial cable (7) or a digital optical audio cable (8).
f you do not own a digital coaxial audio cable (not
supplied), you may use the supplied video cable (4).
Note :
If the audio type of the digital output does not match the
capabilities of your receiver, the receiver will produce a
strong, distorted sound. The audio type of the DVD disc in
play is displayed in the Status indow, when changing the
language. 6 Channel Digital Surround Sound via digital
connection can only be obtained if your receiver is equipped
with a Digital Multi-channel decoder.
f you cannot connect your DVD recorder to an A/V
receiver with Multi-channel decoder, choose one of the
following alternatives.
Connecting to a receiver equipped with
two channel digital stereo (PCM)
lConnect the recorder’s digital audio output to the
corresponding input on your receiver. Use the
supplied video (CVBS) cable (7) or an optional
digital optical audio cable (8).
lAfter installation you will need to activate PCM on
the DVD recorder’s digital output (see ‘User
Preferences’).
Connecting to a receiver equipped with
Dolby Pro Logic
lConnect the recorder to the TV set and connect
the recorder’s audio Left and Right output sockets
to the corresponding inputs on the Dolby Pro Logic
Audio/Video receiver, using the audio cable supplied (6).
lMake the appropriate Sound settings for Analogue
Output in the user preferences menu.
Connecting to a TV set equipped with a
Dolby Pro Logic decoder
lConnect the recorder to the TV set as described in
chapter ‘Connecting to a TV set’.
AMPLIFIER
AUX- I/0
EXT 2
TO TV I/0
EXT 1
TV
EXT 4 EXT 3
AMPLIFIER
AUX- I/0
EXT 2
TO TV I/0
EXT 1
TV
EXT 4 EXT 3
English
12 INSTALLATION
Connecting to a receiver with two channel
analogue stereo
lf you have a receiver with two-channel analogue
stereo without any of the above mentioned sound
systems, connect the audio Left and Right output
sockets to the corresponding sockets on your
receiver, amplifier or stereo system. Use the audio
cable supplied (6).
Connecting to other equipment
Use the top SCART connector (EXT 2) on your DVD
recorder to make connections to a:
- Satellite receiver or Set top box,
- VCR,
- DVD Video player
Most pre-recorded video cassettes and DVD discs are
copy protected. f you try to copy them the display
shows ‘COPY PROTECT’.
For installation of a decoder, see ‘User Preferences’ -
‘ nstallation’.
Notes :
- If the power is off or Low Power Standby is selected (see
User Preferences - features), the signal from EXT 2 will not
be passed on to the TV set on EXT 1.
- EasyLink functionality will not be available to devices
connected via the DVD recorder’s EXT 2 SCART connector.
Connections - frontside of your
DVD recorder
Camcorder connection
lf you have a DV, Digital 8, Hi-8 or S-VHS(C)
camcorder, connect the S-video input socket to the
corresponding output socket on the camcorder,
using the S-video cable supplied (1) and connect the
audio cable (3) supplied.
lOtherwise connect the Video input socket (yellow)
to the corresponding output socket on the
camcorder using the video cable supplied (2) and
connect the audio Left (white) and Right (red) input
sockets to the corresponding sockets on the
camcorder using the audio cable supplied (3).
lf your camcorder has mono sound, use only the left
audio connector. n this case the sound will be
recorded on both audio channels.
AUD OS-V DEO V DEO LR
32
1
Camcorder
Camcorder
TV
Set top box
432 5
1
AUX- I/0
EXT 2
TO TV I/0
EXT 1
EXT 4 EXT 3
English
INSTALLATION 13
Power supply
lMake sure that all necessary connections are made
before connecting the DVD recorder to the power
supply.
lPlug the power cable supplied into the Power
connector on the rear of the recorder.
lPlug the mains plug into an AC outlet.
Note :
Always check if the local mains voltage matches the required
220V - 240V.
hen the recorder is in the Standby position, it is still
consuming some power.
If you wish to disconnect your DVD recorder completely from
the mains, withdraw the plug from the AC Outlet.
hen the DVD recorder is disconnected from the mains,
TV channels and timer data will be stored typically 1 year.
Switching on
lSwitch on the TV set and select the programme
number that you have chosen for video playback
(see operating manual for your TV set).
lPress BSTANDBY/ON.
‰ The recorder display lights up. f you have not
yet installed your DVD recorder, it will enter ‘virgin
mode’. n this mode you will have to set your
personal preferences. (See ‘virgin mode’.)
First time set-up: virgin mode
After switching on the DVD recorder for the very first
time the ‘virgin mode screen’ will appear.
n ‘virgin mode’ you may have to set your preferences
for some of the recorder features.
f the ‘virgin mode screen’ does not appear, your DVD
recorder has been installed already. You may still change
the settings via the ‘installation menu’.
Depending on the kind of TV set, preferences will have
to be set manually or they will be taken over
automatically from the TV set.
Automatic setting
When your TV set is equipped with EasyLinkTM, Cinema
LinkTM, NEXTV EW LinkTM, SmartLinkTM, Q-LinkTM or
MegaLogicTM, the TV settings will be taken over from the
TV set but they cannot be changed manually afterwards.
When preferences are taken over from your TV set,
the message ‘
Easy Link loading data from TV -
please wait
’ will appear.
Menus for which no preferences are available will be
displayed. They have to be set manually.
Notes:
Preferences have to be set in the order in which the item
menus will appear on the screen.
If the recorder is switched off while setting user preferences,
all preferences have to be set again after switching the
recorder on again.
The ‘virgin mode’ will only be concluded after the preferences
for the last item have been confirmed.
Follow TV
Easy Link
loading data from TV -
please wait
English
14 INSTALLATION
Manual setting
When a menu is displayed:
lUse the wv (down up cursor) keys to go through
the options in the menu. The icon of the selected
option will be highlighted.
lUse OK to confirm your selection and to select the
next menu.
The following items may have to be set in virgin mode:
Menu language
The on-screen menus of DVD Video discs will be
displayed in the language you choose.
Audio language
The sound of DVD Video discs will be in the language
you choose, provided this is available on the disc in play.
f not, speech will revert to the first spoken language on
the disc. Also the DVD Video disc menu will be in the
language you choose, provided this is available on the
disc.
Subtitle language
The subtitles of DVD Video discs will be in the language
you choose provided this is available on the disc in play.
f not, subtitles will revert to the first subtitle language
on the disc.
TV Shape
You can choose:
-
16:9
if you have a wide screen (16:9) TV set.
-
4:3
if you have a regular (4:3) TV set. n this case you
can also choose between:
-
Letterbo
for a ‘wide-screen’ picture with black
bars top and bottom,
-
Pan Scan
, for a full-height picture with the sides
trimmed. f a disc has Pan Scan, the picture then
moves (pans) horizontally to keep the main action
on the screen.
Virgin mode
TV Shape
Press OK to continue
4:3 letterbo
4:3 panscan
16:9
Virgin mode
Subtitle language
Press OK to continue
English
Español
Français
Português
Italiano
Virgin mode
Audio language
Press OK to continue
English
Español
Français
Português
Italiano
Virgin mode
Menu language
Press OK to continue
English
Español
Français
Italiano
Deutsch
English
INSTALLATION 15
Country
Select your country. This is used as input for the
‘Parental Control’ feature (see ‘Access Control’) as well
as the searching of TV channels.
Auto TV Channel Search
Make sure the antenna is connected. See ‘Connecting to
the antenna’. Your DVD recorder will search for all TV
channels.
t stores channels in the sequence they are found.
lConfirm with OK.
‰ Auto search starts. This can take several
minutes.
‰ When Auto search is completed ‘
Autom.
search complete
-
XX channels found
’ appears
on the TV screen.
After Auto channel search you can have TV channels
stored automatically in the same order as your TV set.
See ‘User preferences installation’ - ‘Follow TV’.
Time/Date
When Channel auto search is completed the actual Time
and Date are also set automatically.
f the time in the DVD recorder display is not correct,
the clock must be set manually.
lAdjust ‘
Time
’, ‘
Year
’, ‘
Month
’, ‘
Date
’ if required,
with the w(down cursor) or v(up cursor) key.
lChange values with the the t (left cursor) or u (right
cursor) key or the digit keys 0-9.
lTo end, press OK.
Note:
All these items may have to be set after first start up (‘virgin
mode’). After that they can always be adapted in the user
preferences menu. hen your TV set is equipped with Easy
Link the TV set presets will be taken over from the TV set
but they cannot be changed manually afterwards.
Virgin mode settings are now completed.
All settings can still be changed. See ‘User preferences’.
To continue
Press OK
Autom.search complete
XX channels found
Time
Year
Month
Date
09: 40
2001
02
09
Please wait
Autom.search
Searching for TV channels
XX channels found
Virgin mode
Country
Press OK to continue
Austria
Belgium
Denmark
Finland
France
English
16 FUNCTIONAL OVERVIEW
Functional overview
Front of recorder
AUD OS-V DEO V DEO LR
DIGITAL
BSTANDBY/ON
- switches the recorder to Power/Standby mode
Standby indicator
- lights up red when the recorder is in standby mode
- lights up green when the recorder is operative
MON TOR
- switches between disc mode and monitor mode
nfrared remote control
Display
- displays the current status of the recorder
0RECORD
- direct recording of the selected programme
on TV set or the recorder (depending on the
D RECT RECORD setting)
2PLAY
- starts video/audio play
9STOP
- stops video/audio play or recording
CHANNEL
- to select channels manually
/OPEN/CLOSE
- opens/closes the disc tray
AUTO/MAN REC VOLUME
- to adjust the recording level
automatically or manually
AUD O (Left/Right)
- Audio input socket left/right to
connect a camcorder or video
recorder
V DEO (CVBS)
- Video input socket to connect a
camcorder or video recorder
S-V DEO
- Video input socket to connect a
camcorder or video recorder
MANUAL
- 34to increase/decrease
the recording level
Disc loading tray
English
FUNCTIONAL OVERVIEW 17
Rear of recorder
Apparatus Claims of U. S. Patent Nos.
4,631,6 3, 4,577,216, 4,819, 98, and 4,9 7, 93
licensed for limited viewing uses only.
AUX- I/0
EXT 2
TO TV I/0
EXT 1
EXT 4 EXT 3
MA NS
- connection to the mains
ANTENNA
- RF connection to antenna/cable TV signal
V DEO (CVBS)
- OUT: for connection to a TV set, receiver or amplifier with CVBS video inputs
- N: for connecting a video source with CVBS outputs
S-video (Y/C)
- OUT: for connection to a TV set, receiver or amplifier with S-video (Y/C) inputs
- N: for connecting a video source with S-video (Y/C) outputs
AUX /O (EXT )
- for connection to a satellite receiver, decoder, video recorder, set top box
etc. via SCART
TV
- RF connection to TV set
TO TV /O (EXT )
- for connection to a TV set with SCART
AUD O OUT L/R
- connection to an amplifier, receiver, stereo system or
to a TV set that is not equipped with a SCART connector
AUD O N L/R
- connection to the audio output of a video source that
is not equipped with a SCART connector
OUT OPT CAL
- connection to an amplifier, receiver or stereo system
with a digital (optical) audio input
OUT COAX
- connection to an amplifier, receiver or stereo system
with a digital (coaxial) audio input
English
18 FUNCTIONAL OVERVIEW
Display
PCMDTS DIGITALMPEG
HQ SP LP EP+
VPS/PDC
DECODER
CHANNEL
DVD CDVRW
TITLE TRACK CHAPTER TOTAL TIME REMAINTRACK
MANUAL
TIMER
SAT
-30-40 -10-20 0 OVER-30-40 -10-20 0 OVER
SA
NICAM STEREO
RECORD
DVD
- DVD Video disc inserted
DVD+R
- DVD+Recordable disc inserted
DVD+RW
- DVD+Rewritable disc inserted
TITLE
- DVD title number
TRACK
- VCD/CD track number
VCD
- Video CD inserted
CD
- Audio CD inserted
SVCD
- Super Video CD inserted
HQ -SP -LP -EP
- Selected recording mode: High Quality,
Standard Play, Long Play or Extended Play
CHAPTER
- DVD chapter number
SAT
- Recorder prepared for or engaged in satellite
recording
NICAM
- N CAM digital stereo sound on current
preset
STEREO
- Stereo sound from tuner
dB scale
- indicates recording volume when using
manual level control
Disc bar
- Displays disc content, recording level or
formatting progress
MANUAL
- Manual recording level control
DIGITAL - DTS - MPEG - PCM
- Active audio format
DECODER
- Decoder activated for current preset
VPS/PDC
- Video Programming System/Programme
Delivery Control active on current preset
CHANNEL
- Preset name or number
RECORD
- Recording in progress
TIMER
- Timer programmed or active
TRACK TIME
- Track time in minutes and seconds
TOTAL TIME
- Total playback or recording time in hours,
minutes and seconds
TOTAL REMAIN
- Total remaining playback or recording time
in hours, minutes and seconds
- remote control active (flashing)
English
FUNCTIONAL OVERVIEW 19
Remote control
MONITOR ON/OFF
REC/OTR
PLAYSTOP FSS
FORWARDREVERSE
NEXT PREVIOUS
PAUSE SLOW
CLEAR
CH
VOL
SELECT
TIMER
MUTE
T/C
ZOOM ANGLE SUBTITLE AUDIO
DIM REPEAT REPEAT SCAN
A/CH
ZYa
MONITOR
- switches between disc mode and
monitor mode
J
- previous chapter, track or title
0
- direct recording of the currently
selected programme
K
- next chapter, track or title
Q
- search backward
;
- pause
H
- slow motion
R
- search forward
9
- stop
FSS
- displays Favorite Scene Selection
menu for DVD+RW or DVD+R
disc
2
- play
VOL +/–
- TV volume up/down
c
- TV Mute ON/OFF
CH +/–
- programme up/down
aaZOOM
- enlarge video image
ANGLE
- select DVD camera angle
ZZSUBTITLE
- subtitle language selector
YYAUDIO
- audio language selector
ON/OFF BB
DISC MENU
- displays DVD disc menu or index
picture screen
SYSTEM MENU
- displays recorder menu bar
w v u t
- down/up/right/left cursor
movement
RETURN
- return to previous menu on
(S)VCD disc
CLEAR
- delete last entry/clear timer
TIMER
- displays the ‘timer menu’
SELECT
- switches between different values
in a menu
- switches between record modes
in the ndex Picture Screen and in
monitor mode
OK
- acknowledge menu selection
0-9
- numerical key pad
T/C
- select title
- select chapter
A/CH Alternate Channel
- switches to the previous TV
channel
SIDE SWITCH
- enables other keys to operate
the TV set (see Appendix)
DIM
- changes brightness setting of
display
REPEAT
- repeat chapter, track, title, disc
REPEAT A-B
- repeat sequence
SCAN
- playback of the first 10 seconds
of each chapter within a title
(DVD) or the first 10 seconds of
each track on a disc (VCD/CD)
English
20 OPERATION
Operation
Important notes for operation
You can switch on the DVD recorder with the
BSTANDBY/ON key. Keep your DVD recorder
connected to the mains at all times to ensure that
programmed recordings can be made and that the
television functions normally.
Both the DVD recorder and the remote control have an
’Emergency interrupt’ button. You can use the
BSTANDBY/ON button to interrupt a function.
When you have an operating problem, you can interrupt
the function and start again.
When you switch off the DVD Recorder, the display will
briefly show “WAIT.”
Loading discs
1Press /OPEN/CLOSE on the front of the
recorder. The disc loading tray opens.
2Lay your chosen disc in the tray, label side up.
Make sure it is sitting properly in the correct recess.
3Press /OPEN/CLOSE, to close the tray.
‰ ‘READING’ appears in the status box and on the
recorder display. f the inserted disc is pre-recorded
or write-protected, playback always starts
automatically.
You can always unload a disc by pressing
/OPEN/CLOSE again or pressing 9STOP on the
remote control for two seconds.
Note :
If ‘Child Lock’ is set to ON and the disc inserted is not in the
‘child safe’ list (not authorized), the PIN code must be
entered and/or the disc has to be authorized. (see ‘Access
Control’)
Disc types
You will recognize the different types of discs, that can
be used in your DVD recorder by the logo. Depending
on the disc type you can either use it for recording and
playback or playback only. Some discs are not suitable at
all to be used in the DVD recorder.
n the next table a summary is given of all excisting disc
types and their DVD recorder compatibility.
The following disc type can be used for
recording and playback:
DVD+RW
Records and plays; n case of a new blank disc, after the
first recording, some more time (up to two minutes) is
needed to make the disc compatible with DVD video
players.
DVD+R
Records and plays.
The following disc types can be used for
playback only:
DVD-Video
DVD-R
Only plays if it contains DVD-Video.
MONITOR ON/OFF
REC/OTR NEXTPREVIOUS
FORWARDREVERSE PAUSE SLOW

Other manuals for DVDR980

7

Other Philips DVD Player manuals

Philips DVP4320BL/93 User manual

Philips

Philips DVP4320BL/93 User manual

Philips DVD622/051 User manual

Philips

Philips DVD622/051 User manual

Philips DVP5140K/03 User manual

Philips

Philips DVP5140K/03 User manual

Philips DVP5965K/55 User manual

Philips

Philips DVP5965K/55 User manual

Philips DVP3156/93 User manual

Philips

Philips DVP3156/93 User manual

Philips DVP4000MKI/69 User manual

Philips

Philips DVP4000MKI/69 User manual

Philips DVDR5500 User manual

Philips

Philips DVDR5500 User manual

Philips DVP5960 User manual

Philips

Philips DVP5960 User manual

Philips DVP3880/05 User manual

Philips

Philips DVP3880/05 User manual

Philips DVP3350V/01 User manual

Philips

Philips DVP3350V/01 User manual

Philips MMS 430 User manual

Philips

Philips MMS 430 User manual

Philips DVP 3100V Operating manual

Philips

Philips DVP 3100V Operating manual

Philips DVDR5520H User manual

Philips

Philips DVDR5520H User manual

Philips DVP5100 User manual

Philips

Philips DVP5100 User manual

Philips BDP2180K User manual

Philips

Philips BDP2180K User manual

Philips DVP3142 User manual

Philips

Philips DVP3142 User manual

Philips DVP3258/96 User manual

Philips

Philips DVP3258/96 User manual

Philips DVP3111 User manual

Philips

Philips DVP3111 User manual

Philips DVP2320BL User manual

Philips

Philips DVP2320BL User manual

Philips DVD405 User manual

Philips

Philips DVD405 User manual

Philips DVP5965K/98 User manual

Philips

Philips DVP5965K/98 User manual

Philips DVP5990 User manual

Philips

Philips DVP5990 User manual

Philips DVD756 User manual

Philips

Philips DVD756 User manual

Philips BDP2100K User manual

Philips

Philips BDP2100K User manual

Popular DVD Player manuals by other brands

Hitachi DV-P315U instruction manual

Hitachi

Hitachi DV-P315U instruction manual

LG DV622 owner's manual

LG

LG DV622 owner's manual

JVC XV-S65GDJ instructions

JVC

JVC XV-S65GDJ instructions

Disney DVD2100-C user guide

Disney

Disney DVD2100-C user guide

Toshiba SD4010KB owner's manual

Toshiba

Toshiba SD4010KB owner's manual

Samsung DVD P191 - MULTI REGION CODE FREE DVD PLAYER. THIS PLAYER PLAYS... user manual

Samsung

Samsung DVD P191 - MULTI REGION CODE FREE DVD PLAYER. THIS PLAYER PLAYS... user manual

Laser DVD-HD011 Quick user guide

Laser

Laser DVD-HD011 Quick user guide

RCA DRC310N user guide

RCA

RCA DRC310N user guide

Zenith DVB352 Installation and operating guide

Zenith

Zenith DVB352 Installation and operating guide

Toshiba SD800KY owner's manual

Toshiba

Toshiba SD800KY owner's manual

Sylvania SDVD1111 owner's manual

Sylvania

Sylvania SDVD1111 owner's manual

Jensen JN102 - 10.2" LCD Overhead Monitor System installation guide

Jensen

Jensen JN102 - 10.2" LCD Overhead Monitor System installation guide

Panasonic DVD-CP72S Operating operating instructions

Panasonic

Panasonic DVD-CP72S Operating operating instructions

JBL CINEMA VISION CVR700 Service manual

JBL

JBL CINEMA VISION CVR700 Service manual

Marantz DV8300 Service manual

Marantz

Marantz DV8300 Service manual

Sony DVP-K350 operating instructions

Sony

Sony DVP-K350 operating instructions

Laser DVD-HD007 instruction manual

Laser

Laser DVD-HD007 instruction manual

Western Digital WDBABY0000NBK - Livewire Product specifications

Western Digital

Western Digital WDBABY0000NBK - Livewire Product specifications

manuals.online logo
manuals.online logoBrands
  • About & Mission
  • Contact us
  • Privacy Policy
  • Terms and Conditions

Copyright 2025 Manuals.Online. All Rights Reserved.