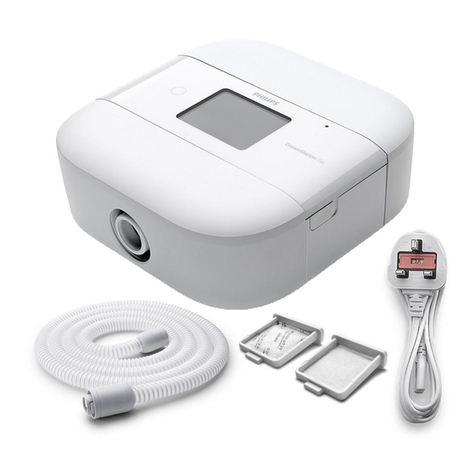
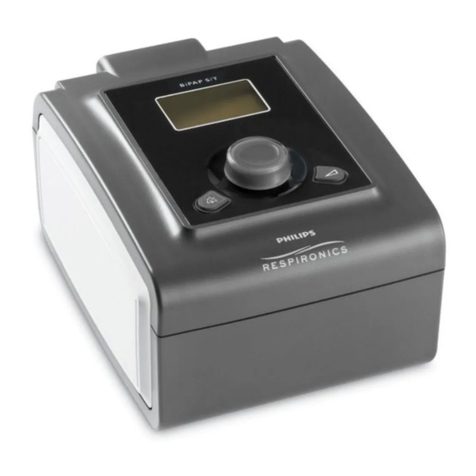
Philips DreamStation BiPAP autoSV User manual

1128728 R10
HM 06/13/2017
EN-INTL
Respironics Inc.
1001 Murry Ridge Lane
Murrysville, PA 15668 USA
Respironics Deutschland GmbH & Co. KG
Gewerbestrasse 17
82211 Herrsching, Germany User manual
DreamStation
BiPAP autoSV
REF 1128728

© Koninklijke Philips N.V., 2017. All rights reserved.

Warning!
Remove this guide before giving the device to the patient. Only medical professionals should adjust pressure
settings.
This guide provides you with instructions on how to access and navigate the provider screens used to modify
device settings. Refer to the user manual for more information on using the DreamStation BiPAP autoSV device.
The device is to be used only on the instruction of a licensed physician. The clinician or home care service
provider will make the correct pressure settings and device congurations including accessories, according to
the health care professional’s prescription.
If you need to contact Philips Respironics directly, call the Philips Respironics Customer Service department at
1-724-387-4000 or +49 8152 93060.
Accessing the Provider mode screens
Accessing Provider mode unlocks settings that cannot be modied by the user. To access Provider mode:
1. Supply power to the device.
2. Once the device is powered, press and hold both the control dial and the Ramp button on the device
for at least 5 seconds.
3. You are now in Provider mode. You can choose between the following Provider mode screens.
Therapy Alarms Comfort Device Info Patient
Mode
Navigating the Provider mode screens
The User Interface (UI) on this device allows you to adjust the device settings and view information about
therapy. The UI is composed of the display screen and the control dial. Rotate the control dial in either
direction to scroll through the menu options on the display screen.
To adjust a setting:
1. Rotate the control dial to your desired menu option.
2. Press the control dial to select that setting.
3. Rotate the control dial to change the setting. The rotate dial icon on any screen indicates to rotate the
dial to perform an action.
4. Press the control dial again to save the change. The click dial icon on any screen indicates to press the
dial to perform an action.
Notes
Pressing the dial when the down arrow appears on any screen will take you to a sub-menu with more menu
options. Pressing the dial when the up arrow appears on any sub-menu will return you back to the main
menu.
The screens shown throughout this guide are examples for reference only. Actual screens may vary based upon
device model and provider settings.
Provider guide
DreamStation BiPAP autoSV

2 | Provider guide
DreamStation BiPAP autoSV
Provider settings
The following sections will describe the options available from the Provider screens.
Therapy settings
Choosing this screen will take you to a sub-menu where you can adjust the device therapy
modes and pressure settings. These settings are described here.
Note
Not all settings shown here will display on the device. The display will vary based on therapy device model
and device settings.
Icon Text Description
Opti-Start Opti-Start This feature starts a therapy session at a starting pressure that is closer to
the previous session’s 90% pressure, in order to reduce the likelihood of
any residual events at the beginning of a therapy session. You can enable or
disable this feature.
Max Pressure This screen displays the current maximum pressure setting. You can adjust
the setting from 4 to 30 cmH2O in 0.5 increments.
EPAP Min This screen allows you to modify the Minimum EPAP setting. This setting
will be the minimum level of pressure applied during the expiratory breath
phase. You may adjust the setting from 4 cmH2O up to the lesser value of
either maximum pressure or 20 cmH2O.
EPAP Max This screen allows you to modify the Maximum EPAP setting. This setting
will be the maximum level of pressure applied during the expiratory breath
phase. You may adjust the setting from the minimum EPAP setting up to the
lesser value of either maximum pressure or 20 cmH2O.
PS Min This screen allows you to modify the Minimum Pressure Support setting.
This setting is the minimum dierence that is permitted between IPAP and
EPAP. You may adjust the setting from 0 cmH2O to the dierence between
the maximum pressure setting minus the maximum EPAP setting.
PS Max This screen allows you to modify the Maximum Pressure Support setting.
This setting is the maximum dierence that is permitted between IPAP
and EPAP. You may adjust the setting from the minimum pressure support
setting to thedierence between the maximum pressure setting minus the
minimum EPAP setting.
BPM BPM This screen allows you to modify the Breaths Per Minute setting. The
Breaths Per Minute setting is a back-up breath rate where there is a
machine-triggered breath to the patient within the dened timeframe per
breath. You can choose between O, Auto, or 4 through 30. This setting
only displays if PS max is greater than zero.
TiTi This screen allows you to modify the Inspiratory Time setting. You may
adjust the setting from 0.5 to 3.0 seconds in 0.1 increments. This setting only
displays if PS max is greater than zero and BPM is not set to O or Auto.

Provider guide | 3
DreamStation BiPAP autoSV
Alarm settings
Choosing this screen will take you to a sub-menu where you can enable or disable the alarms
described below.
Icon Text Description
Patient Disconnect
Alarm
You can enable or disable the Patient Disconnect alarm by
choosing 0, 15, or 60 seconds. The alarm will sound when a large,
continuous air leak is detected in the circuit for more than the
specied alarm setting. The default is 0.
Apnea Alarm The Apnea alarm detects the cessation of spontaneous
breathing. You can enable or disable the Apnea alarm by
choosing 0 (o), 10, 20, or 30 seconds. The alarm will sound
when the time between patient-triggered breaths is greater or
equal to the specied apnea alarm setting. The default is 0.
Low Min Vent Alarm You can enable or disable this alarm by choosing 0 (o) to 99
lpm in 1.0 increments. The alarm will sound when the calculated
minute ventilation is less than or equal to the specied setting.
The default is 0.
Comfort settings
Choosing this screen will take you to a sub-menu where you can adjust the humidication and
pressure comfort settings. These settings are described here.
Note
Not all settings shown here will display on the device. The display will vary based on therapy device model and
device settings.
Icon Text Description
Humidication This setting allows you to select the humidication mode being
used. You can choose between Fixed or Adaptive (A) humidication.
If a heated tube is attached to the device, then the device will
automatically switch to Heated Tube Humidication mode.
Fixed mode applies a constant heat on the humidier heater
plate. Under certain conditions and settings, this mode can allow
condensation to occur in the tube. Adaptive mode adapts the heater
plate temperature to the ambient conditions in the room, and is
designed to not allow condensation to occur in the tube.
Humidier This setting allows you to choose the desired humidity setting for the
humidier: 0, 1, 2, 3, 4 or 5.

4 | Provider guide
DreamStation BiPAP autoSV
Icon Text Description
Tube
Temperature
This setting allows you to choose the desired temperature for the
heated tube: 0, 1, 2, 3, 4 or 5.
SmartRamp When SmartRamp mode is enabled, the therapy device’s ramp function
utilizes an auto-titrating algorithm during the ramp period. It allows
patients the ability to stay at lower pressures during the ramp period,
to improve their acclimation to therapy.
SmartRamp mode functions dierently, depending on the therapy
mode that the device is using.
The SmartRamp period will terminate in either of two ways:
1) If SmartRamp pressure reaches the minimum pressure of the therapy
mode selected, then SmartRamp ends, and the device continues to
deliver therapy under the selected therapy mode, or:
2) If SmartRamp pressure does not reach the minimum pressure of the
therapy mode selected by the end of the Ramp Time, then pressure
is increased at a rate of approximately 1 cmH2O per minute. Once the
pressure reaches the minimum pressure of the therapy mode selected,
then the device will continue to deliver therapy for that mode.
If SmartRamp mode is not enabled, then the standard, linear pressure
ramp mode is active.
Ramp Time This enables you to modify the Ramp time setting in 5 minute
increments. The range for this setting is 0 (o) to 45 minutes.
Ramp Start You can increase or decrease the ramp starting pressure in 0.5 cmH2O
increments. You may adjust the setting from 4 cmH2O to the EPAP min
setting.
Flex This screen displays the comfort mode setting. You can select None or
Bi-Flex.
Flex Setting You can modify the Flex setting (1, 2 or 3) on this screen if you enabled
Bi-Flex. The Bi-Flex comfort feature allows you to adjust the level of
air pressure relief that the patient feels when exhaling during therapy.
The setting of 1 provides a small amount of pressure relief, with higher
numbers providing additional relief.
Flex Lock This enables you to lock the Flex setting if you do not want the patient
to change it.
Rise Time Rise time is the time it takes for the device to change from the
expiratory pressure setting to the inspiratory pressure setting. This
screen allows you to adjust the rise time so you can nd the desired
setting. A setting of 1 is the fastest rise time, while 6 is the slowest. This
is only available if Flex type is set to None and PS max is greater than
zero.
Provider guide | 5
DreamStation BiPAP autoSV
Icon Text Description
Tube Type This setting allows you to select the correct size diameter tubing
that you are using with the device. You can choose either (22) for the
Philips Respironics 22 mm tubing, or (15) for the Philips Respironics 15
mm tubing. When using Heated Tubing, the device will automatically
change this setting to the appropriate tubing type (15H).
Tube Type Lock This enables you to lock the Tube Type setting for either the 15 mm or
the 22 mm tubing if you do not want the patient to change it.
Mask Type This setting allows you to select the appropriate Mask Type resistance
setting (also known as System One Resistance Control) for your Philips
Respironics mask. This feature allows the device to adjust the level of
pressure compensation to match your mask. Refer to the packaging of
your mask to identify the resistance setting for your mask.
Note: It is important to use the appropriate Mask Type resistance
setting to ensure proper pressure delivery to the patient.
Mask Type
Lock
This enables you to lock the Mask Type resistance setting if you do not
want the patient to change it.
Check Mask Fit You can enable or disable the check mask t setting. This feature
allows the patient to check the t of their mask prior to starting
therapy. This is done by measuring the amount of leak in the patient
circuit.

6 | Provider guide
DreamStation BiPAP autoSV
Device settings
Choosing this screen will take you to a sub-menu where you can adjust the way the device
displays information. These settings are described here.
Note
Not all settings shown here will display on the device. The display will vary based on therapy device model
and device settings.
Icon Text Description
AHI Show AHI/Fit/PB You can select whether or not the Apnea/Hypopnea index, Mask
Fit averages, and Periodic Breathing averages are displayed on the
patient’s My Info screens.
Automatic On You can enable or disable this feature if you want the device to
automatically turn the airow on whenever the patient applies the
interface (mask) to their airway.
Language This feature allows you to choose which language to display on the
interface.
Clear Default
Reminders
This setting turns o the default patient reminders that are enabled in
the therapy device from the factory.
Note: This does not turn o additional reminders that you may have
activated in Encore. Encore messages must be cleared or modied in
Encore.
Reset Data Use the Reset Data function to clear patient data from the therapy
device, as well as an SD card and modem (if installed). After you pres
the control dial to execute Reset Data, the device will display a message
asking you to conrm the reset. Press the control dial again to reset data
in the device.
Note: Reset Data resets blower hours that are visible to the patient, but
it does not reset machine hours in the Provider Menu.
Info Screens
Choosing this screen will take you to a sub-menu where you can view information on patient
usage. The Info screens are described in Chapter 2 of the user manual.
Return to Patient Mode
Choosing this screen will exit Provider mode and the device will return to the Patient mode.
Provider mode will also time out after 5 minutes of inactivity and automatically return to the
Patient mode.

Provider guide | 7
DreamStation BiPAP autoSV
Performance check device screening tool
Performance Check troubleshooting tool is a self-diagnostic utility built into the therapy device. It allows you
to quickly evaluate a therapy device remotely. If a patient calls indicating that their therapy does not seem to
be operating properly, just direct them to click on Performance Check in the patient’s My Provider menu. The
check operates the blower and screens the device for any operation errors. The screen then displays whether
the device passed the check (displays a green check mark) or should be returned for service (displays a red
X). If a modem is installed, Performance Check will automatically upload a troubleshooting dashboard to
the Encore Anywhere patient management software. This dashboard gives you an overview of key device
settings and statistics to help make troubleshooting over the phone easier. If there is not a modem installed
in the therapy device, you can direct the patient to read you the ve codes o the Performance Check screen
over the phone. You can decode these codes in EncoreAnywhere, EncorePro or Encore Basic to populate the
troubleshooting dashboard.
Updating software using the SD card
You can update the device software using the SD card. The software update must be done when the therapy
is o.
1. Insert an SD card with the new software version into the device. A pop-up screen appears asking “Would
you like to upgrade software?”
2. Turn the control dial to select Yes and then press the control dial to start the upgrade. The busy icon
appears while the upgrade is in progress. Do not remove power from the device.
3. If the software update is successful, the Change Accepted icon appears on the screen. Removed the SD
card from the device to restart the device and use the new software.
4. If an SD card error is detected, the Change Rejected icon appears . Remove the SD card and reinsert. If
the alert continues to occur, contact Philips Respironics at 1-724-387-4000 or +49 8152 93060 for a new
SD card.
Clearing patient data for multiple users
If you are using the device on multiple users, you must use the Reset Data option, available through the
Device menu, to clear patient data from the device. See Device settings earlier in this document for more
information.
Specications
See Chapter 6 in the user manual for device specications.

8 | Provider guide
DreamStation BiPAP autoSV
1128728 R10
HM 06/13/2017
EN-INTL
Respironics Inc.
1001 Murry Ridge Lane
Murrysville, PA 15668 USA
Respironics Deutschland GmbH & Co. KG
Gewerbestrasse 17
82211 Herrsching, Germany

DreamStation BiPAP autoSV User Manual
Table of contents
1. Introduction ......................................................................................................................................................... 1
1.1 Package contents .............................................................................................................................................1
1.2 Intended use ......................................................................................................................................................1
1.3 Safety information ....................................................................................................................................2
1.4 Symbol key........................................................................................................................................................8
1.5 System overview..............................................................................................................................................9
1.6 How to contact Philips Respironics ..........................................................................................................12
2. Device setup.......................................................................................................................................................13
2.1 Installing and replacing the air lters .......................................................................................................13
2.2 Positioning the device...................................................................................................................................14
2.3 Supplying AC power to the device ............................................................................................................15
2.4 Connecting the breathing circuit................................................................................................................16
2.5 Starting the device .........................................................................................................................................17
2.6 Navigating the device screens....................................................................................................................18
2.7 Therapy screen features and optional humidication settings ....................................................... 19
2.8 Patient menu navigation ..............................................................................................................................21
2.9 Connecting to Wi-Fi (if available) .............................................................................................................26
2.10 Bluetooth® wireless technology* ............................................................................................................. 27
2.11 Check mask t ................................................................................................................................................29
2.12 Sleep progress...............................................................................................................................................29
2.13 Altitude compensation ................................................................................................................................30
3. Alarms, alerts, and troubleshooting..............................................................................................................31
3.1 Device alarms ..................................................................................................................................................31
3.2 Device alerts ....................................................................................................................................................31
3.3 Alarm and alert LED indicators ..................................................................................................................31
3.4 Alarm and alert audible indicators........................................................................................................... 32
3.5 Silencing an alarm......................................................................................................................................... 32
3.6 Alarm message screens............................................................................................................................... 33
3.7 What to do when an alarm occurs............................................................................................................ 33
3.8 Alarm summary table .................................................................................................................................. 34
3.9 Alert summary table ..................................................................................................................................... 37
3.10 Troubleshooting..............................................................................................................................................41
4. Accessories........................................................................................................................................................ 45
4.1 Humidier ........................................................................................................................................................ 45
4.2 SD card ............................................................................................................................................................. 45
4.3 Cellular modem.............................................................................................................................................. 45
4.4 Wi-Fi accessory.............................................................................................................................................. 45
4.5 Link module.....................................................................................................................................................46

ii Table of contents
DreamStation BiPAP autoSV User Manual
4.6 Oximeter...........................................................................................................................................................46
4.7 Philips Respironics proprietary compliance software........................................................................46
4.8 Roll stand.........................................................................................................................................................46
4.9 Supplemental oxygen .................................................................................................................................. 47
4.10 DC power cord................................................................................................................................................ 47
4.11 Carrying case and airline travel.................................................................................................................48
5. Care, cleaning, and disinfection ..................................................................................................................49
5.1 Caring for the lters ......................................................................................................................................49
5.2 Home cleaning: device and humidier....................................................................................................50
5.3 Home cleaning: tubing.................................................................................................................................50
5.4 Hospital and institution cleaning: device and humidier exterior..................................................50
5.5 Hospital and institution disinfection: device and humidier exterior.............................................51
5.6 Service .............................................................................................................................................................. 52
6. Specications, disposal, and EMC ............................................................................................................... 53
6.1 Specications ................................................................................................................................................. 53
6.2 Disposal............................................................................................................................................................56
6.3 EMC information............................................................................................................................................56
Limited warranty .....................................................................................................................................................59

DreamStation BiPAP autoSV User Manual
This chapter provides an overview of the DreamStation BiPAP autoSV device. Take time to read the entire
manual before using your device for the rst time. This chapter includes:
• Package contents
• Intended use
• Safety information
• System overview
1.1 Package contents
Your DreamStation system may include the following components. Some components are optional
accessories that may not be packaged with the device.
• Device • SD card
• User manual • Flexible tubing
• Carrying case • Reusable blue pollen lter
• Power cord • Disposable light-blue ultra-ne lter (optional)
• Power supply • Humidier (optional)
1.2 Intended use
The device is intended to provide mask-applied non-invasive ventilatory support to adult patients (>30 kg)
for the primary treatment of obstructive sleep-disordered breathing with secondary Central Sleep Apnea or
Cheyne-Stokes Respiration (CSR). The device may be used in the hospital or home.
1. Introduction

2 Introduction
DreamStation BiPAP autoSV User Manual
1.3 Safety information
1.3.1 Warnings
A warning indicates the possibility of injury to the user or operator.
Device usage This device is not intended for life support or invasive ventilation. The device
provides Positive Pressure Ventilation and is indicated for assisted ventilation
through a noninvasive interface. The device has the capability of providing a back-up
rate as needed.
The device does not provide ventilation with a guaranteed tidal volume delivery.
Patients requiring ventilation at a predetermined tidal volume are not candidates for
Pressure Support ventilation.
Personnel
qualifications
This manual serves as a reference. The instructions in this manual are not intended to
supersede your health care professional’s instructions regarding the use of the device.
The prescription and other device settings should only be changed on the order of
the supervising physician.
The operator should read and understand this entire manual before using the device.
SD card
prescription
changes
When making a therapy prescription or alarm setting change with the SD card, the
health care professional must review and verify any prescription changes before
using the device. The health care professional is responsible to ensure that the
prescription settings are correct and compatible with the patient after using this
feature. Installing the wrong prescription for a particular patient may result in
improper therapy, lack of appropriate safety monitoring, and injury to the patient.
Operating
and storage
temperatures
Do not use this device if the room temperature is warmer than 95˚ F (35˚ C) because
the temperature of the airow may exceed 109˚ F (43˚ C). This could cause thermal
irritation or injury to the patient’s airway.
Do not use the device while positioned in a warm place, such as direct sunlight or
near a heating appliance. These conditions can increase the temperature of the
airow and could cause thermal irritation or injury to the patient’s airway.
Device start-up Make sure the device is working properly at start-up. Always verify that the alarm
LEDs light red then yellow momentarily. Contact Philips Respironics or an authorized
service center for service if these indications do not occur at start-up. See Chapter 2
for more information about device start-up.
Bacteria filter If the device is used by multiple persons in a hospital environment (such as rental
devices), a low-resistance, main ow bacteria lter should be installed in-line
between the device and the circuit tubing to prevent contamination.

Introduction 3
DreamStation BiPAP autoSV User Manual
Patient circuits The ventilator should only be used with compatible patient interfaces (e.g., masks,
circuits and exhalation ports). Proper operation of the device, including alarms, with
other circuits has not been veried by Philips Respironics and is the responsibility of
the health care professional. A mask should not be used unless the device is turned
on and operating properly. The exhalation port(s) associated with the mask should
never be blocked.
Explanation of warning: The device is intended to be used with special masks
or connectors that have exhalation ports to allow continuous ow of air out of
the mask. When the device is turned on a functioning properly, new air from the
device ushes the exhaled air out through the mask exhalation port. However,
when the device is not operating, enough fresh air will not be provided through
the mask, and exhaled air may be rebreathed. Rebreathing of exhaled air can, in
some circumstances, lead to suocation.
If you are using a full face mask (a mask covering both your mouth and your nose),
the mask must be equipped with a safety (entrainment) valve.
An exhalation port is required. Do not block the exhalation port. This can reduce
airow and result in rebreathing of exhaled air.
At low expiratory pressures, the ow through the exhalation port may be inadequate
to clear all exhaled gas from the tubing – some rebreathing may occur.
Do not pull or stretch the tubing. This could result in circuit leaks.
Verify operation of the Patient Disconnect alarm with any changes in the patient
circuit.
Improperly
functioning
ventilator
If you notice any unexplained changes in the performance of the device, if it is
making unusual sounds, if water is spilled into the enclosure, or if the enclosure is
cracked or broken, discontinue use and contact your home care service provider.
Circuit disconnect You should not rely on any single alarm to detect a circuit disconnect condition. The
Low Minute Ventilation and Apnea alarms should be used in conjunction with the
Circuit Disconnect alarm.
Test the operation of the circuit disconnect function whenever a change is made to
the circuit. An increase in circuit resistance can prevent proper operation of some
alarms.
Power cord Route the power cord to the outlet in a way that will prevent the cord from being
tripped over or interfered with by chairs or other furniture.
This device is activated when the power cord is connected.
Use only power cords supplied by Philips Respironics for this device. Use of power
cords not supplied by Philips Respironics may cause overheating or damage to the
device.
Accessories To ensure that you receive safe, eective therapy, use only Philips Respironics
accessories. The use of accessories, transducers, and cables other than those
specied by Philips Respironics may result in increased emissions or decreased
immunity of the device.

4 Introduction
DreamStation BiPAP autoSV User Manual
Oxygen When administering xed-ow supplemental oxygen, the oxygen concentration
may not be constant. The inspired oxygen concentration will vary, depending on
the pressures, patient ows and circuit leak. Substantial leaks may reduce the
inspired oxygen concentration to less than the expected value. Appropriate patient
monitoring should be used, as medically indicated, such as an alarming pulse
oximeter.
When using oxygen with this system, the oxygen supply must comply with local
regulations for medical oxygen.
Do not connect the device to an unregulated or high pressure oxygen source.
When using oxygen with this system, a Philips Respironics pressure valve must be placed
in-line with the patient circuit between the device and the oxygen source. The pressure
valve helps to prevent the back ow of oxygen from the patient circuit into the device
when the unit is o. Failure to use the pressure valve could result in a re hazard.
Oxygen supports combustion. Oxygen should not be used while smoking or in the
presence of an open ame.
Do not use the device in the presence of a ammable anaesthetic mixture in
combination with oxygen or air, in the presence of nitrous oxide, or in an oxygen-
enriched environment.
Do not use the device near a source of toxic or harmful vapors.
When using oxygen with this system, turn the device on before turning on the
oxygen. Turn the oxygen o before turning the device o. This will prevent oxygen
accumulation in the device. Explanation of the Warning: When the device is not
in operation and the oxygen ow is left on, oxygen delivered into the tubing may
accumulate within the device’s enclosure. Oxygen accumulated in the device
enclosure will create a risk of re.
EMC Medical Electrical Equipment needs special precautions regarding EMC and needs
to be installed and put into service according to the EMC information provided in this
manual. The device should not be used adjacent to or stacked with other equipment.
For more information, contact your home care service provider.
Portable and Mobile RF Communications Equipment can aect Medical Electrical
Equipment. See the EMC section of this manual for distances to observe between RF
Generators and the ventilator to avoid interference.
The Health Industry Manufacturers Association recommends that a minimum
separation of six inches be maintained between a wireless phone and a pacemaker
to avoid potential interference with the pacemaker. The DreamStation on-board
Bluetooth communication should be considered a wireless phone in this regard.

Introduction 5
DreamStation BiPAP autoSV User Manual
Maintenance Never operate the device if any parts are damaged or if it is not working properly.
Replace damaged parts before continuing use.
Periodically inspect electrical cords, cables, tubing, and accessories for damage or
signs of wear. Discontinue use and replace if damaged.
Repairs and adjustments must be performed by Philips Respironics-authorized
service personnel only. Unauthorized service could cause injury, invalidate the
warranty, or result in costly device damage. Contact your home care service provider
for maintenance.
Cleaning To avoid electrical shock, always unplug the power cord from the wall outlet before
cleaning the device.
Do not immerse the device in any uids or spray the device with water or cleaners.
Clean the device with a cloth dampened with an approved cleaner.
Humidifier For safe operation when using a humidier, the humidier must always be positioned
below the breathing circuit connection at the mask. The humidier must be level for
proper operation.
1.3.2 Cautions
A caution indicates the possibility of damage to the device.
Electrostatic
Discharge (ESD)
Do not use antistatic or conductive hoses or conductive patient tubing with the
device.
Pins of connectors marked with the ESD warning symbol shall not be touched
and connections shall not be made without special precautions. Precautionary
procedures include methods to prevent build-up of electrostatic charge (e.g., air
conditioning, humidication, conductive oor coverings, non-synthetic clothing),
discharging one’s body to the frame of the equipment or system or to earth. It is
recommended that all individuals that will handle this device understand these
precautionary procedures at a minimum as part of their training.
Before operating the device, ensure that the SD card/lter access door and the
modem access door are both closed whenever any of the accessories such as the
Link Module or Modem are not installed. Refer to the instructions that came with
your accessory.
Condensation Condensation may damage the device. If the device has been exposed to either
very hot or very cold temperatures, allow it to adjust to room temperature (operating
temperature) before starting therapy. Do not operate the device outside of the
operating temperature range shown in the Specications chapter later in this manual.

6 Introduction
DreamStation BiPAP autoSV User Manual
Filters A properly installed, undamaged Philips Respironics blue pollen lter is required for
proper operation.
Clogged inlet lters may cause high operating temperatures that may aect device
performance. Regularly examine the inlet lters as needed for integrity and to check
for accumulated debris.
Never install a wet lter into the device. You must ensure sucient drying time for the
rinsed lter.
Extension cords Do not use extension cords with this device.
DC power Always ensure that the DC power cord securely ts into your therapy device prior to use.
Contact your home care service provider to determine if you have the appropriate DC cord
for your specic therapy device.
When DC power is obtained from a vehicle battery, the device should not be used while
the vehicle’s engine is running. Damage to the device may occur.
Only use a Philips Respironcis DC power cord and battery adapter cable. Use of any other
system may cause damage to the device.
Device placement Do not place the device in or on any container that can collect or hold water.
Do not place the device directly onto carpet, fabric, or other ammable materials.
Do not plug the device into an outlet controlled by a wall switch.
Tobacco use Tobacco smoke may cause tar build up within the device.
Humidifier The heated humidier can only be used when the ventilator is connected to AC
power. It cannot be used with a battery.
Cleaning Do not immerse the device or allow any liquid to enter the enclosure or the inlet lter.
Do not steam autoclave the ventilator. Doing so will destroy the ventilator.
Do not use harsh detergents, abrasive cleaners, or brushes to clean the ventilator
system.
1.3.3 Notes
• This product is not made with DEHP, natural latex rubber or dry natural rubber in patient or operator
accessible areas or in the air path or breathing circuit.
• See the Limited Warranty section of this manual for information warranty coverage.

Introduction 7
DreamStation BiPAP autoSV User Manual
1.3.4 Contraindications
The device is contraindicated on patients without a spontaneous respiratory drive. If any of the following
conditions apply to you, consult your physician before using the device:
• Inability to maintain a patent airway or adequately clear secretions
• At risk for aspiration of gastric contents
• Diagnosed with acute sinusitis or otitis media
• Allergy or hypersensitivity to the mask materials where the risk from allergic reaction outweighs the
benet of ventilatory assistance
• Epistaxis, causing pulmonary aspiration of blood
• Hypotension
When assessing the relative risks and benets of using this equipment, the health care professional should
understand that this device can deliver the pressure ranges indicated in the Control Accuracy table in
chapter 6. In the event of certain fault conditions, a maximum pressure of 60 cmH2O is possible.
Warning
Physicians should assess individual patient risks before prescribing autoSV therapy for patients
with chronic, symptomatic heart failure (NYHA II-IV) with left ventricular ejection fraction below
45% and moderate to severe predominant central sleep apnea.
The physician should assess the relative risks and benets of autoSV therapy on a case-by-case
basis in patients with severe heart conditions including unstable angina or unstable arrhythmias.
1.3.5 Patient precautions
• Immediately report any unusual chest discomfort, shortness of breath, or severe headache.
• If skin irritation or breakdown develops from the use of the mask, refer to the mask instructions for
appropriate action.
• The following are potential side eects of noninvasive positive pressure therapy:
— Ear discomfort
— Conjunctivitis
— Skin abrasions due to noninvasive interfaces
— Gastric distention (aerophagia)

8 Introduction
DreamStation BiPAP autoSV User Manual
1.4 Symbol key
The following symbols may appear on the device, power supply, and accessories:
Symbol Denition Symbol Denition
Consult accompanying
instructions for use.
For airline use. Complies with RTCA/
DO-160G section 21, category M.
AC power
Separate collection for electrical
and electronic equipment per EC
Directive 2012/19/EU.
DC power Bluetooth® symbol
IP22 Drip proof equipment This device contains an RF
transmitter.
Caution, consult
accompanying documents. Oximeter connection
ESD warning symbol Serial connection
Class II (Double Insulated) Avoid ultraviolet radiation
Type BF applied part Do not disassemble.
For indoor use only Audio pause
Table of contents
Other Philips Humidifier manuals

Philips
Philips HU5930 User manual

Philips
Philips HU5930 User manual

Philips
Philips HU4902 User manual

Philips
Philips HU4801 User manual

Philips
Philips HU4810 User manual

Philips
Philips HU4707 User manual

Philips
Philips HU4801 User manual

Philips
Philips HU4801 User manual

Philips
Philips HU4803 User manual

Philips
Philips HU4802 User manual

Philips
Philips HU4803 User manual

Philips
Philips HU3000 Series User manual

Philips
Philips HU4901 User manual

Philips
Philips HU4814 User manual

Philips
Philips HU2510 User manual

Philips
Philips 2000i Series Instruction manual

Philips
Philips HU4803 User manual

Philips
Philips AC4084 User manual

Philips
Philips HU5931 User manual

Philips
Philips AC3256 User manual