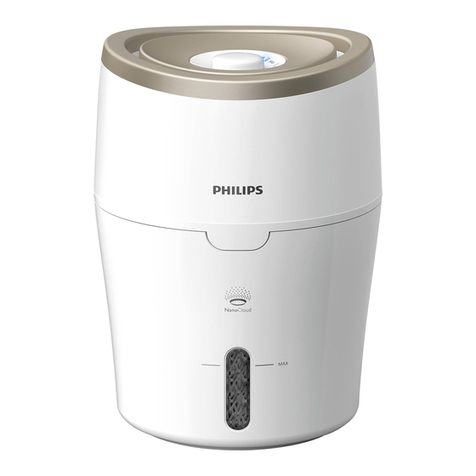
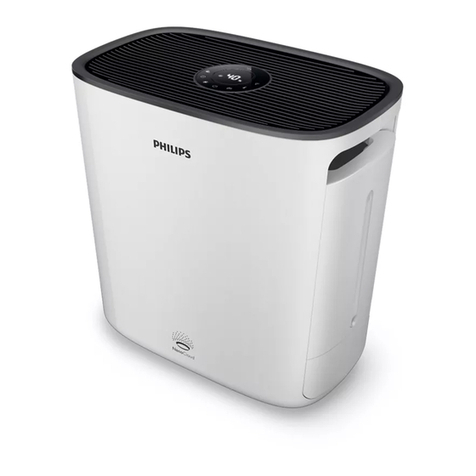
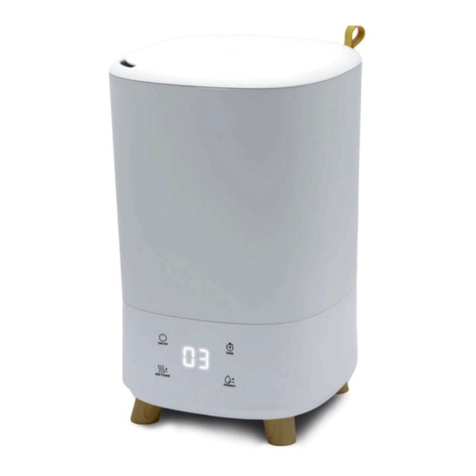
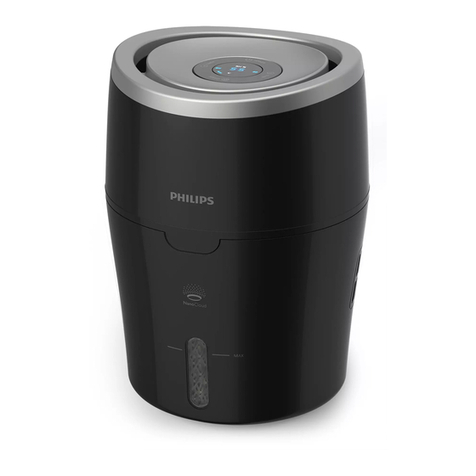
Philips HU2510 User manual

User manual
HU2510

Contents
1 Important�������������������������������������������������������������������������������� 1
Safety��������������������������������������������������������������������������������������������������������1
Electromagnetic elds (EMF) �������������������������������������������������������������3
Recycling��������������������������������������������������������������������������������������������������3
2 Yourhumidier ��������������������������������������������������������������������� 4
Product overview ���������������������������������������������������������������������������������5
3 Gettingstarted ���������������������������������������������������������������������� 6
Prepare for humidication������������������������������������������������������������������6
4 Usingthehumidier ������������������������������������������������������������ 6
Switching the humidier on and o������������������������������������������������6
Water level����������������������������������������������������������������������������������������������7
Relling water����������������������������������������������������������������������������������������7
5 Cleaningandmaintenance ������������������������������������������������ 8
Cleaning the body of the humidier �����������������������������������������������8
Cleaning the water tank����������������������������������������������������������������������8
Cleaning the humidication lter�����������������������������������������������������8
6 Replacingthehumidicationlter ���������������������������������� 9
7 Troubleshooting������������������������������������������������������������������10
8 Guaranteeandservice�������������������������������������������������������12
Order parts or accessories���������������������������������������������������������������� 12

1EN
1 Important
Safety
Read this user manual carefully before you use the appliance, and save it for future
reference�
Danger
• Do not spray any ammable materials such as insecticides or
fragrance around the appliance.
• Do not clean the appliance with water, any other liquid, or a
(ammable) detergent to avoid electric shock and/or a re
hazard.
• The water in the water tank is not suitable for drinking. Do not
drink this water and do not use it to feed animals or to water
plants. When you empty the water tank, pour the water down
the drain.
Warning
• Be aware that high humidity levels may encourage the growth
of biological organisms in the environment.
• Do not permit the area around the humidier to become damp
or wet. If dampness occurs, turn the output of the humidier
down. If the humidier output volume cannot be turned down,
use the humidier intermittently. Do not allow absorbent
materials, such as carpeting, curtains, drapes, or tablecloths, to
become damp.
• Never leave water in the reservoir when the appliance is not in
use.
• Empty and clean the humidier before storage. Clean the
humidier before next use.
• Check if the voltage indicated on the appliance corresponds to
the local mains voltage before you connect the appliance.
• If the supply cord is damaged, you must have it replaced
by Philips, a service center authorized by Philips, or similarly
qualied persons in order to avoid a hazard.
• Do not use the appliance if the plug, the power cord, or the
appliance itself is damaged.

2EN
• This appliance can be used by children aged from 8 years and
above and persons with reduced physical, sensory or mental
capabilities or lack of experience and knowledge if they
have been given supervision or instruction concerning use
of the appliance in a safe way and understand the hazards
involved. Children shall not play with the appliance. Cleaning
and user maintenance shall not be made by children without
supervision.
• Do not insert your ngers or objects into the air outlet or the
air inlet to prevent physical injury or malfunctioning of the
appliance�
• Make sure that foreign objects do not fall into the appliance
through the air outlet.
Caution
• The appliance is only intended for household use under normal
operating conditions.
• Always place and use the appliance on a dry, stable, at and
horizontal surface.
• Do not block the air inlet and outlet.
• Do not place anything on top of the appliance and do not sit or
stand on the appliance.
• Only use the original Philips lter specially intended for this
appliance. Do not use any other lter.
• Do not ll water from the air outlets on top of the appliance.
• Only ll the water tank with cold tap water. Do not use ground
water or hot water.
• Do not put any substance other than water in the water tank.
Do not add fragrance or chemical substance into the water. Use
only water (tap, puried, mineral, any sort of potable water).
• Avoid knocking against the appliance (the air inlet and outlet
in particular) with hard objects.
• Do not use the appliance near gas appliances, heating devices
or replaces.
• Do not place the appliance directly below an air conditioner to
prevent condensation from dripping onto the appliance.

3EN
• Do not use this appliance when you have used indoor smoke-
type insect repellents or in places with oily residues, burning
incense, or chemical fumes.
• Do not use the appliance in wet surroundings or in
surroundings with high ambient temperatures, such as
the bathroom, toilet, or kitchen, or in a room with major
temperature changes.
• Always unplug the appliance when you want to move,
clean appliance, ll the water, replace the lter or carry out
maintenance�
• Do not wash the lter in a washing machine or dish washer,
otherwise the lter will be deformed.
• When the appliance is not used for a long time, bacteria and
mold may grow on the lter. Clean the water tank and dry the
humidication lter. Check the lter before you start using the
appliance again. If the lter is very dirty with dark spots, replace
it�
Electromagneticelds(EMF)
This Philips appliance complies with all applicable standards and regulations
regarding exposure to electromagnetic elds.
Recycling
This symbol means that this product shall not be disposed of with normal
household waste (2012/19/EU).
Follow your country’s rules for the separate collection of electrical and electronic
products. Correct disposal helps prevent negative consequences for the
environment and human health.

4EN
2 Your humidifier
Congratulations on your purchase, and welcome to Philips!
To fully benet from the support that Philips oers, register your product at
www.philips.com/welcome.
The Philips humidier brings fresh, humidied air to your house for the health of
your family.
It oers you advanced evaporation system with NanoCloud technology, using a
special humidication lter which adds H₂O molecules to the dry air, and produces
healthy humid air without formation of water mist. Its humidication lter
retains bacteria, calcium and other particles from the water. It delivers only pure
humidied air in your home. No more dry air in the winter season or from the air
conditioning.
Read this user manual carefully before you install and use the humidier. Save it
for future reference.

5EN
Product overview
Humidication lter
(FY1190)
Upper unit
Filter support
Water tank
Gentle mode
Power o button
Turbo mode

6EN
3 Getting started
Prepareforhumidication
Note:
• In order to get the optimal humidication result, soak the lter in water for
30minutes before use.
54 61 2 3
1 Hold by both sides of the upper unit and lift it up.
2 Remove the packaging material of the new humidication lter.
3 Assemble the new humidication lter around the lter support.
4 Put the humidication lter and the lter support back into the water tank.
5 Fill the water tank with cold tap water until water reaches the maximum water
level indication.
6 Place the upper unit back onto the water tank.
4 Using the humidifier
Switchingthehumidieronando
1 Put the plug of the humidier into the power socket.
2 Press or switch on the humidier�
• : Gentle mode
• : Turbo mode
3 Press the power button to switch o the humidier.
Note:
• If the water level in the tank is getting very low, the
humidier stops humidifying. The indicator light is on.
• The humidier releases very ne invisible mist, so it is normal that you cannot
see the mist.

7EN
Water level
When there is not enough water in the water tank, the indicator is on, the
humidier stops working, The humidier will resume work when you rell water
into the water tank.
Note:
• It is normal to nd some water left in the tank.
Rellingwater
Note:
• When lling water, do not exceed the maximum water level, or water might leak
from the air inlets.
• Do not shake the water tank when moving it, or water might leak from the air
inlets.
• Do not ll water through the air outlets on top of the humidier.
1 Switch o the humidier and unplug it.
2 3 4
2 Remove the upper unit by holding it at both sides.
3 Fill the water tank with cold tap water until water reaches the maximum water
indication level.
4 Place the upper unit back onto the water tank.

8EN
5 Cleaning and maintenance
Note:
• Always unplug the humidier before you clean it.
• Avoid pouring water through the air inlets and outlets.
• Never use abrasive, aggressive, or ammable cleaning agents such as bleach or
alcohol to clean any part of the humidier.
Cleaningthebodyofthehumidier
Regularly clean the inside and outside of the humidier to prevent dust from
collecting�
1 Wipe away dust with a soft dry cloth from the body of the humidier.
2 Clean the air inlet and the air outlet with a soft dry cloth.
Cleaning the water tank
Clean the water tank every weeks to keep it hygienic.
1 Take out the humidication lter and the lter support.
2 Add some mild washing-up liquid mixed with water in the water tank.
3 Clean the inside of the water tank with a soft clean cloth.
4 Empty the water tank into a sink.
5 Put the humidication lter and the lter support back into the water tank.
Cleaningthehumidicationlter
Clean the humidication lter every week to keep it hygienic.
1 2
1h
3
1 Take out the humidication lter and the lter support from the water tank.
2 Remove the humidication lter from the lter support.
3 Soak the humidication lter in cleansing agent (e.g diluted citric acid
solution) for one hour�

9EN
Note:
• Please use mid or acid cleanser (24gcitric acid with 4L water).
4678
4 Rinse the humidication lter under a slowly running tap. Do not squeeze or
wring the lter when cleaning.
5 Let excess water drip o the humidication lter.
6 Assemble the humidication lter round the lter support.
7 Put the humidication lter and the lter support back into the water tank.
8 Put the upper unit back onto the water tank.
Note:
• Do not squeeze or wring the lter. This might damage the lter and impact
humidication performance.
• Do not dry the lter under direct sunlight, unless it is assembled back onto the
lter support.
6 Replacing the humidification filter
Note:
• Use only Philips original humidication lter FY1190.
• Always unplug the humidier before you replace the humidication lter.
• Register your product at www.philips.com for further information on how to
replace your lter.
• Do not dry the lter under direct sunlight, unless it is assembled back onto the
lter support.
Replace the humidication lter every 6 months for optimal performance. If the
lter is in good condition, you could use it for a longer period of time. Make sure
to replace the humidication lter at least once a year.

10 EN
54 61 2 3
1 Take out the humidication lter and the lter support from the water tank.
2 Remove the humidication lter from the lter support. Discard the used lter.
3 Remove the packaging material from the new humidication lter.
4 Assemble the new humidication lter around the lter support.
5 Put the lter and the lter support back into the water tank.
6 Put the upper unit back onto the water tank.
7 Troubleshooting
This chapter summarizes the most common problems you could encounter with
the appliance. If you are unable to solve the problem with the information below,
contact the Consumer Care Center in your country.
Problem Possible solution
The humidier does
not work.
• Make sure that there is power supply to the humidier.
• Make sure that the water tank is lled with water and
the upper unit is placed properly onto the water tank.
There is no air
humidication.
• Make sure that the water tank is lled with water and
the upper unit is placed properly onto the water tank.
The water tank leaks. • Make sure that the humidier is not overlled with
water.
• Make sure that the humidier is well assembled/
connected every time after you clean it or after you
remove the upper unit and/or water tank for relling.
• Make sure that the water tank is properly placed. If the
problem persists, contact the Consumer Care Center in
your country.

11EN
Problem Possible solution
I do not see the
humidity level
change through
hygrometer�
• Make sure that you have assembled the humidication
lter round the lter support.
• The humidication lter is dirty. Rinse and/or descale
the humidication lter (see the chapter ‘Clean the
humidication lter’).
• Your room might have too much ventilation. Please
close doors and windows.
• Your room size is too big.
There are some
white deposits on
the humidication
lter.
• The white deposits are called scale and they consist of
minerals from the water. Scale on the humidication
lter aects the humidifying performance, however it
does not harm your health. Please follow the cleaning
instructions in the user manual.
The lter discolors
after some time.
• The deposit is a natural eect of the lter material, and
it has no impact on humidication performance. Clean
the humidication lter frequently to remove the scale,
and replace the humidication lter every 6 months.
There is unpleasant
smell coming out
from the humidier.
• Make sure that the water tank is lled with water.
• Clean the humidication lter (see the chapter ‘Clean
the humidication lter’).
No air comes out of
the air outlet.
• Put the plug of the humidier into the power socket
and switch on the humidier.
I do not see visible
mist coming out of
the humidier. Is it
working?
• When mist is very ne, it is invisible. This humidier
has a NanoCloud humidication technology, which
produces healthy humid air from the outlet area
without formation of water mist. Therefore, you cannot
see the mist.
If the humidier is
not used for a long
time, How to store
and reuse it?
• When the humidier is not used for a long time,
bacteria and mold may grow on the lters. please
follow below steps for storage and reuse.
• Clean the water tank thoroughly and dry the
humidication lter before storage.
• Check the lters before you start using the humidier
again. If the lter is very dirty with dark spots,
replace it (Please refer to the chapter “Replacing the
humidication lter” in User manual )

12 EN
8 Guarantee and service
If you need information or if you have a problem, please visit the Philips website
at www.philips.com or contact the Philips Consumer Care Center in your country
(you can nd its phone number in the worldwide guarantee leaet). If there is no
Consumer Care Center in your country, go to your local Philips dealer.
Order parts or accessories
If you have to replace a part or want to purchase an additional part, go to your
Philips dealer or visit www.philips.com/support.
If you have problems obtaining the parts, please contact the Philips Consumer
Care Center in your country (you can nd its phone number in the worldwide
guarantee leaet).

© 2022 Philips Domestic Appliances Holding B�V�
All rights reserved�
HU2510_usermanual_v1.0(15/06/2022)
Table of contents
Other Philips Humidifier manuals

Philips
Philips DreamStation Go User manual

Philips
Philips HU4801 User manual

Philips
Philips HU4813 User manual

Philips
Philips HU4805/40 User manual

Philips
Philips HU4803 User manual

Philips
Philips BiPAP AVAPS User manual

Philips
Philips HU4810 User manual

Philips
Philips HU4901 User manual

Philips
Philips AC3829 User manual

Philips
Philips HU4801 User manual

Philips
Philips HU4804/41 User manual

Philips
Philips HU4802 User manual

Philips
Philips HU4707 User manual

Philips
Philips HU4814/10 User manual

Philips
Philips HU4810/10 User manual

Philips
Philips FY1410/30 User manual

Philips
Philips HU4901 User manual

Philips
Philips HU4802/01 User manual
Philips
Philips HU2510/00 User manual

Philips
Philips HU4811 User manual