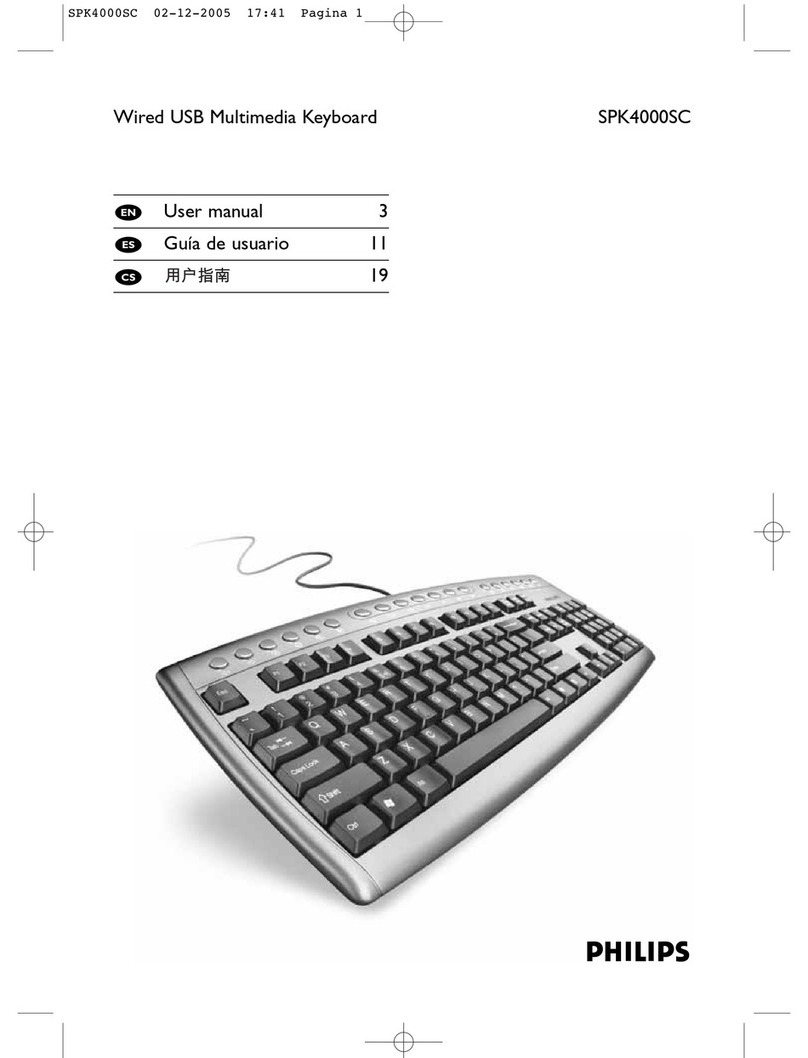
Philips SPK5000BC User manual

Wireless Multimedia Keyboard SPK5000BC
User manual 3
Guía de usuario 14
25
CS
ES
EN
SPK5000BC 23-01-2006 14:09 Pagina 1

If you have any questions about the Philips SPK5000BC Wireless Multimedia Keyboard,
please contact our helpline for assistance! You can find the number in the list below.
Country Telephone number
België/Belgique/Belgien (Belgium) . . . . . . .3070 222303
China ( ) . . . . . . . . . . . . . . . . . . . . . . . .34008 800 008
Danmark (Denmark) . . . . . . . . . . . . . . . .335-25-8759
Deutschland (Germany) . . . . . . . . . . . . . .30180 536767
Espana (Spain) . . . . . . . . . . . . . . . . . . . . .3902 888 784
Eda (Greece) . . . . . . . . . . . . . . . . . . .30 0800 3122 1280
France . . . . . . . . . . . . . . . . . . . . . . . . . . . .308 09165 0005
Italia (Italy) . . . . . . . . . . . . . . . . . . . . . . . . .3899 23 45 06
Luxembourg (Luxemburg) . . . . . . . . . . . .340 6661 5644
Nederland (Netherlands) . . . . . . . . . . . . .30900 8407
Norge (Norway) . . . . . . . . . . . . . . . . . . . .32270-8111
Österreich (Austria) . . . . . . . . . . . . . . . . .30810 001 203
Portugal . . . . . . . . . . . . . . . . . . . . . . . . . . .32 1359 1442
Schweiz/Suisse/Svizzera (Switzerland) . . .30844 800 544
Suomi (Finland) . . . . . . . . . . . . . . . . . . . . .309 6158 0250
Sverige (Sweden) . . . . . . . . . . . . . . . . . . . .308 5792 9100
United Kingdom . . . . . . . . . . . . . . . . . . . .30906 1010 016
U.S.A. (United States of America) . . . . . . .3(919) 573 7854
If your country is not mentioned in the list above, please check our website:
www.philips.com/support
for additional information.
Need help?
ñ
SPK5000BC 23-01-2006 14:09 Pagina 2

Contents
English - 3
What’s in the box ........................................................................4
1 Install .........................................................................................4-5
Inserting the batteries in the keyboard ..................................................................................4
Adjusting the keyboard legs.......................................................................................................5
Installing the palm rest................................................................................................................5
2 Connect.....................................................................................5-6
Connecting the keyboard to the computer.......................................................................5-6
3 Enjoy ........................................................................................7-10
Using the hot keys ...................................................................................................................7-9
Keyboard lights .............................................................................................................................9
Reassigning hot keys....................................................................................................................9
Tips for using your wireless keyboard..................................................................................10
Troubleshooting.........................................................................10
Important information ........................................................11-13
Environmental information ......................................................................................................11
System requirements ................................................................................................................11
Safety information......................................................................................................................12
FCC Compliance........................................................................................................................13
Guarantee ..................................................................................39
SPK5000BC 23-01-2006 14:09 Pagina 3

4 - English
What’s in the box
1Install
Inserting the batteries in the keyboard
1Remove the battery compartment and insert
2 AA batteries, noting the + and –
configuration in the battery compartment.
2Replace the cover.
Note:When the batteries are low, the battery-low
indicator ( ) lights up and a battery-low
icon appears on the Windows®taskbar. If this
is the case, change the batteries immediately.
SPK4000SC/93
iioiioiioi oiiioi oi ioioiiio ioio
iioiiiiioi oiiioiioi ioi
iioiiiiioioo
1 iioiiiiioioo oioioi io
2 ioioiio oioioiii
3 oioiioioi ioioioioi oioiioioiioioiooi
oiiooiiii oiio iioiiioi ioioiioiioo
iioiioiioi
Wireless multimedia keyboard SPK5000BC Palm rest
USB receiver User manual Driver CD-ROM
+
+
+
+
+
+
SPK5000BC 23-01-2006 14:09 Pagina 4

English - 5
Adjusting the keyboard legs
2
The keyboard legs are designed to accomodate
various body sizes, chairs and desks.
•Pull out or push in the keyboard legs to a
position that minimizes bending of your
wrists while typing.
Connect
Installing the palm rest
•Insert the palm rest tabs into the slots at the
bottom of the keyboard.
•Snap the tabs together and loosen them so
they click into the recesses in the slots.
Connecting the keyboard to the computer
1Switch on the computer.
2Plug the USB receiver into the computer USB
port.
SPK5000BC 23-01-2006 14:09 Pagina 5

6 - English
3Press the receiver CONNECT button.
4Press the keyboard Connect button
within 15 seconds.
The button is located at the top left side of
the keyboard bottom, under the keyboard leg.
Use a pen or paperclip to press the button.
> After 15 seconds the LED on the receiver lights
up, indicating that connection is established.
Your keyboard is now ready for use.
Notes:
– Distance between keyboard and receiver may not
exceed 6 meters (18 feet).
– If no connection is established after
15 seconds, repeat above steps.
– Once connection is established you do not have
to reconnect keyboard and receiver after e.g.
changing batteries or restarting the computer.
– If your computer runs on Windows®98, a pop-
up window may appear when you plug the
USB receiver into the computer USB port.
You will be asked to insert the Windows®98 CD-
ROM. Please do so and follow the on-screen
instructions for installing the required driver or
set the driver path as ‘Windows\system’ or the
other path that the driver located.
SPK5000BC 23-01-2006 14:09 Pagina 6

English - 7
3Enjoy
Using the hot keys
Hot keys are special shortcut keys, situated along the top of the keyboard.
They provide quick, one-press access to programs, files or commands.
Web and Internet hot keys
Web backward
Goes back to the previously viewed item in programs that support the
‘Back’ command, such as a Web browser.
Web forward
Goes to the next item (if it was previously viewed in the same session) in
programs that support the ‘Forward’ command, such as a Web browser.
Web stop
Stops loading or refreshing a Web page or the contents of a particular
window.
Web refresh
Updates the information on an active Web page or the contents of a
particular window.
Web search
Opens the Internet Explorer Search window.
My favorites
Opens the Internet Explorer Favorites window.This is where you can
store shortcuts to frequently used files, websites or other items for easy
access.
Home
Starts the default Web browser or goes to the Home Web page.
If the Web browser is already activated it opens the Home Web page.
E-mail
Starts the default e-mail program. If you are not sure what the default
e-mail program is, press this key to find out.
SPK5000BC 23-01-2006 14:09 Pagina 7

8 - English
Multimedia hot keys
Media Player
Plays CD and media content.
Mute
Turns off the sound. Press again to turn the sound back on.
Volume down
Decreases the volume. Hold down to decrease the volume more quickly.
Volume up
Increases the volume. Hold down to increase the volume more quickly.
Play / Pause
Plays or pauses media. Once paused, press this key again to resume
playback.
Stop
Stops playing media.
Previous track
Goes back to the previous media track. Press once for each preceding
track.
Next Track
Skips to the next media track. Press once for each subsequent track.
PC hot keys
My computer
Opens ‘My Computer’. My computer shows the contents of your floppy
disk, hard disk, CD-ROM drive and network drives.You can also search for
open files and folders, and gain access to options in ‘Control Panel’ to
modify the computer’s settings.
SPK5000BC 23-01-2006 14:09 Pagina 8

English - 9
• 1 = Num lock
• A = Caps lock
• = Scroll lock
Keyboard lights
Calculator
Activates Microsoft Calculator.
PC sleep
Puts the system into sleep mode if the PC supports power management
and has it enabled.You can put the computer to sleep by pressing any
button, protecting data and saving energy. If power management is not
enabled, this key will not work.
Reassigning hot keys
In order to reassign hot keys to another
function, the driver software has to be installed.
The driver supports Windows®98 / 2000 /
ME / XP.
1Remove any existing mouse drivers
completely.
2Insert the driver CD-ROM into the computer
CD / DVD drive.
3Open the ‘Keyboard’ folder and double click
‘Setup.exe’ to complete installation.
4Restart the computer.
> A ‘keyboard settings’ icon appears in the
Windows®task bar.
5Double click the icon to reassign the hot
keys.
SPK5000BC 23-01-2006 14:09 Pagina 9

10 - English
Tips for using your keyboard
• Avoid using the keyboard under following
conditions:
– in direct sunlight;
– in extreme hot, cold, dusty or magnetic
environments;
– near fax machines,TV sets, radios, mobile
phones or wireless devices;
• If the keyboard does not work properly, make
sure the computer USB port is valid.
Troubleshooting
Problem Tip
No reaction • Check if batteries are properly placed.
when pressing • Check if battery-low indicator ( ) is lit and if a
(hot) keys. battery-low icon is shown on the Windows®taskbar.
Change batteries immediately.
• Interference from another wireless device that operates on
the same channel and with the same Link ID.
Reconnect the keyboard to the computer.
See ‘Connecting the keyboard to the computer’.
Channel and Link ID will be changed automatically.
No connection can • Keyboard and receiver out of range. Reduce distance
be established between keyboard and receiver (max. 6 meters / 18 feet).
between keyboard • Check if receiver USB connector (2) is properly plugged
and receiver. into the computer USB port.
• Make sure computer USB port is a valid one.
SPK5000BC 23-01-2006 14:09 Pagina 10

English - 11
Important information
Environmental information
Disposal of your old product
Your product is designed and manufactured with high quality materials and
components, which can be recycled and reused.
When this crossed-out wheeled bin symbol is attached to a product
it means the product is covered by the European Directive
2002/96/EC.
Please inform yourself about the local separate collection system for
electrical and electronic products.
Please act according to your local rules and do not dispose of your old products
with your normal household waste.The correct disposal of your old product will
help prevent potential negative consequences for the environment and human health.
WARNING
Plastic bags can be dangerous.To avoid danger of suffocation, keep this bag
away from babies and small children.
System requirements
• Microsoft®Windows®98/2000/ME or XP;
• 1.5 MB free hard disk space;
• One free USB port and CD-ROM or DVD drive.
SPK5000BC 23-01-2006 14:09 Pagina 11

12 - English
Safety Information:
Electric, Magnetic and Electromagnetic Fields (‘EMF’)
1Philips Royal Electronics manufactures and sells many products targeted at
consumers, which, like any electronic apparatus, in general have the ability to emit
and receive electro magnetic signals.
2One of Philips’ leading Business Principles is to take all necessary health and
safety measures for our products, to comply with all applicable legal requirements
and to stay well within the EMF standards applicable at the time of producing the
products.
3Philips is committed to develop, produce and market products that cause no
adverse health effects.
4Philips confirms that, if its products are handled properly for their intended use,
they are safe to use according to scientific evidence available today.
5Philips plays an active role in the development of international EMF and safety
standards, enabling Philips to anticipate further developments in standardization
for early integration in its products.
Where to go for information and support?
Please visit our website: www.philips.com for the latest product information.
Go to: www.philips.com/support for for troubleshooting tips.
The helpline phone numbers can be found on page 2 of this User Manual.
SPK5000BC 23-01-2006 14:09 Pagina 12

English - 13
FCC compliance
This device complies with Part 15 of the FCC Rules.
Operation is subject to the following two conditions:
1this device may not cause harmful interference, and
2this device must accept any interference received, including interference that may
cause undesired operation.
Note!
This equipment has been tested and found to comply with the limits for a Class B digital
device, pursuant to Part 15 of the FCC Rules.These limits are designed to provide
reasonable protection against harmful interference in a residential installation.
This equipment generates, uses and can radiate radio frequency energy and, if not installed
and used in accordance with the instructions, may cause harmful interference to radio
communications.
However, there is no guarantee that interference will not occur in a particular installation.
If this equipment does cause harmful interference to radio or television reception, which can
be determined by turning the equipment off and on, the user is encouraged to try to correct
the interference by one or more of the following measures:
• Reorient or relocate the receiving antenna.
• Increase the separation between the equipment and receiver.
• Connect the equipment to an outlet on a circuit different from that to which the
receiver is connected.
• Consult the dealer or an experienced radio/TV technician for help.
Any unauthorized modification to this equipment could result in the revocation of the
authorization to operate the equipment.
NOTE:THE MANUFACTURER IS NOT RESPONSIBLE FOR ANY RADIO OR TV
INTERFERENCE CAUSED BY UNAUTHORIZED MODIFICATIONS TO
THIS EQUIPMENT. SUCH MODIFICATIONS COULD VOID THE USER’S
AUTHORITY TO OPERATE THE EQUIPMENT.
SPK5000BC 23-01-2006 14:09 Pagina 13

14 - Español
Índice de materias
Contenido de la caja......................................................................15
1 Instale ....................................................................................15-16
Inserción de las pilas en el teclado........................................................................................15
Ajuste de las patas del teclado ..............................................................................................16
Instalación del apoyamanos .....................................................................................................16
2 Conecte.................................................................................16-17
Conexión del teclado al ordenador................................................................................16-17
3 Disfrute..................................................................................18-21
Usando las teclas de acceso directo...............................................................................18-20
Luces del teclado .......................................................................................................................20
Reasignación de teclas de acceso directo............................................................................20
Consejos para utilizar su teclado inalámbrico....................................................................21
Resolución de problemas..............................................................21
Información importante......................................................22-24
Información medioambiental...................................................................................................22
Requisitos del sistema ..............................................................................................................22
Información de seguridad.........................................................................................................23
Cumplimiento de la FCC (Federal Communications Commission)..............................24
Garantía ..........................................................................................39
SPK5000BC 23-01-2006 14:09 Pagina 14

Español - 15
Contenido de la caja
1Instale
Inserción de las pilas en el teclado
1Retire el compartimiento de pilas e inserte
2 pilas AA, observando la configuración + y –
indicada en el compartimiento.
2Vuelva a colocar la tapa.
Nota: Cuando las pilas están casi agotadas, el
indicador de pila descargada ( ) se
enciende y aparece un icono indicador de pila
descargada en la barra de tareas de
Windows®. Si ocurre esto, cambie las pilas
inmediatamente.
SPK4000SC/93
iioiioiioi oiiioi oi ioioiiio ioio
iioiiiiioi oiiioiioi ioi
iioiiiiioioo
1 iioiiiiioioo oioioi io
2 ioioiio oioioiii
3 oioiioioi ioioioioi oioiioioiioioiooi
oiiooiiii oiio iioiiioi ioioiioiioo
iioiioiioi
Teclado multimedia inalámbrico SPK5000BC Apoyamanos
Receptor USB Manual del usuariol CD-ROM del driver
+
+
+
+
+
+
SPK5000BC 23-01-2006 14:09 Pagina 15

Ajuste de las patas del teclado
2
Las patas del teclado están diseñadas para
adaptarse a diversos tamaños de cuerpos, sillas
y escritorios.
•Abra o cierre gradualmente las patas del
teclado hasta una posición en la que tenga
que doblar las muñecas al mínimo cuando
mecanografíe.
Conecte
Instalación del apoyamanos
•Inserte las lengüetas del apoyamanos en las
ranuras de la parte inferior del teclado.
•Junte las lengüetas y suéltelas de forma que
se acoplen en las ranuras.
Conexión del teclado al ordenador
1Encienda el ordenador.
2Enchufe el conector USB del teclado en el
puerto USB del ordenador
16 - Español
SPK5000BC 23-01-2006 14:09 Pagina 16

Español - 17
3Pulse el botón CONNECT (CONEXIÓN)
del receptor.
4Pulse el botón Connect (Conexión) del
teclado antes de 15 segundos.
El botón está situado en la parte superior
izquierda de debajo del teclado, debajo de la
pata del mismo.
Use la punta de un bolígrafo o una
sujetapapeles para pulsar el botón.
> Después de 15 segundos, el LED del receptor
se enciende, indicando que se ha establecido la
conexión. El teclado está listo para utilizarse.
Notas:
– La distancia entre el teclado y el receptor no
puede superar los 6 metros.
– Si no se ha establecido la conexión después de
15 segundos, repita los pasos anteriores.
– Una vez la conexión ha sido establecida, no tiene
que reconectar el teclado y el receptor después
de cambiar las pilas o reiniciar el ordenador, por
ejemplo.
– Si su ordenador se ejecuta en Windows®98,
quizás aparezca una ventana emergente cuando
enchufe el receptor USB en el puerto USB del
ordenador. Se le pedirá que inserte el CD-ROM
de Windows®98. Hágalo y siga las instrucciones
en pantalla para instalar el driver requerido o
establezca la ruta del driver como
‘Windows\system’ o la otra ruta que el driver
haya localizado.
SPK5000BC 23-01-2006 14:09 Pagina 17

3Disfrute
Usando las teclas de acceso directo
Las teclas de acceso directo son teclas rápidas especiales, situadas a lo largo de la
parte superior del teclado. Proporcionan acceso rápido a programas, archivos o
comandos, con una sola pulsación .
Teclas de acceso directo a la red e Internet
Atrás en Web
Retrocede al elemento visto previamente en programas que admiten el
comando ‘Atrás’, como un examinador de Web.
Adelante en Web
Va al elemento siguiente (si se vio previamente en la misma sesión) en
programas que admiten el comando ‘Adelante’, como un examinador de
Web.
Parada enWeb
Para la carga o renovación de una página Web o el contenido de una
ventana particular.
Renovación en Web
Actualiza la información en una página Web activa o el contenido de una
ventana particular.
Búsqueda en Web
Abre la ventana de búsqueda de Internet Explorer.
Mis favoritos
Abre la ventana de favoritos de Internet Explorer.
Aquí es donde puede almacenar accesos directos a archivos, sitios web u
otros elementos usados para acceso fácil.
Inicio
Inicia el examinador de red por defecto o lleva a la página web de Inicio.
Si el examinador de red ya está activado, abre la página web de Inicio.
E-mail
Inicia el programa de correo electrónico por defecto.
Si no sabe cuál es el programa de correo electrónico por defecto pulse
esta tecla para averiguarlo.
18 - Español
SPK5000BC 23-01-2006 14:09 Pagina 18

Español - 19
Teclas de acceso directo multimedia
Media Player
Reproduce contenido de CD y multimedia.
Enmudecimiento
Desactiva el sonido. Púlsela de nuevo para volver a activar el sonido.
Reducción de sonido
Reduce el volumen.
Manténgala apretada para reducir el volumen más deprisa.
Aumento de sonido
Aumenta el volumen.
Manténgala apretada para aumentar el volumen más deprisa.
Reproducción / Pausa
Reproduce o hace una pausa.
Durante la pausa, pulse esta tecla de nuevo para reanudar la reproducción.
Parada
Para la reproducción.
Pista anterior
Retrocede a la pista anterior. Pulse una vez para retroceder una pista.
Pista siguiente
Salta a la pista siguiente. Pulse una vez para avanzar una pista.
Teclas de acceso directo del PC
Mi PC
Abre ‘Mi PC’. Mi PC muestra el contenido de su disquete, disco duro,
unidad de CD-ROM y unidades de red.Tambien puede realizar búsquedas
de carpetas y archivos abiertos y obtener acceso a opciones de ‘Panel de
control’ para modificar los ajustes del ordenador.
SPK5000BC 23-01-2006 14:09 Pagina 19

• 1 = Bloq Num
• A = Bloq Mayús
• = Bloq Despl
Luces del teclado
Calculadora
Activa la calculadora de Microsoft.
PC dormido
Pone el sistema en modo de ‘dormir’ si el PC incorpora la función de
gestión de energía y la tiene habilitada. Puede poner el ordenador a dormir
pulsando cualquier botón, protegiendo datos y ahorrando energía. Si la
función de gestión de energía no está habilitada, esta tecla no funcionará.
Reasignación de teclas de acceso directo
Para reasignar teclas de acceso directo a otra
función, el software del driver debe estar
instalado. El driver es compatible con Windows®
98 / 2000 / ME / XP.
1Retire completamente los drivers de ratón
existentes.
2Inserte el CD-ROM del driver en la unidad de
CD / DVD del ordenador.
3Abra la carpeta ‘Keyboard’ (Teclado) y haga
doble clic en ‘Setup.exe’ para finalizar la
instalación.
4Reinicie el ordenador.
> Aparece un icono ‘keyboard settings’
(configuración de teclado) en la barra de
tareas de Windows®.
5Haga doble clic en el icono para reasignar las
teclas de acceso directo.
20 - Español
SPK5000BC 23-01-2006 14:09 Pagina 20
This manual suits for next models
1
Table of contents
Languages:
Other Philips Keyboard manuals

Philips
Philips KM3322W User manual

Philips
Philips SPK2700BC/27 User manual

Philips
Philips SPK3700BC/61 User manual

Philips
Philips SPK1700BC/97 User manual

Philips
Philips SPK1000SC/93 User manual

Philips
Philips SPK1700BC/61 User manual

Philips
Philips SPT3700BC User manual

Philips
Philips SPK3700BC User manual

Philips
Philips SPK3700BC/97 User manual

Philips
Philips 5545URF User manual