Philips Home Access 1000 Series User manual

User
Manual
Electronic deadbolt
Home Access
Register your product and get
support at www.philips.com/support
1000 series


Contents
1 Warnings & Safety 02
2 How to Install
03
3 How to Setup 12
Parts List
Assembly View
Install the Lock
Download the Philips Home Access App
Create a User Account
Add the Device
5 Troubleshooting 21
4 How to Use 13
Factory Reset & Default Settings
Format of Entry Methods
Program the Lock
Lock & Unlock
Safety
Caution
Returns & Disposal 6 Warranty 24
1

◆Before using this product, please read and understand all instructions. Damage caused
by failure to follow the instructions is not covered by the warranty.
◆Only use components the manufacturer provided and suggested accessories.
◆Only use AA alkaline batteries.
◆Do not forcibly disassemble the product to trigger an alarm or damage the product.
◆
damage.
◆Do not remove the batteries during lock setup and operation.
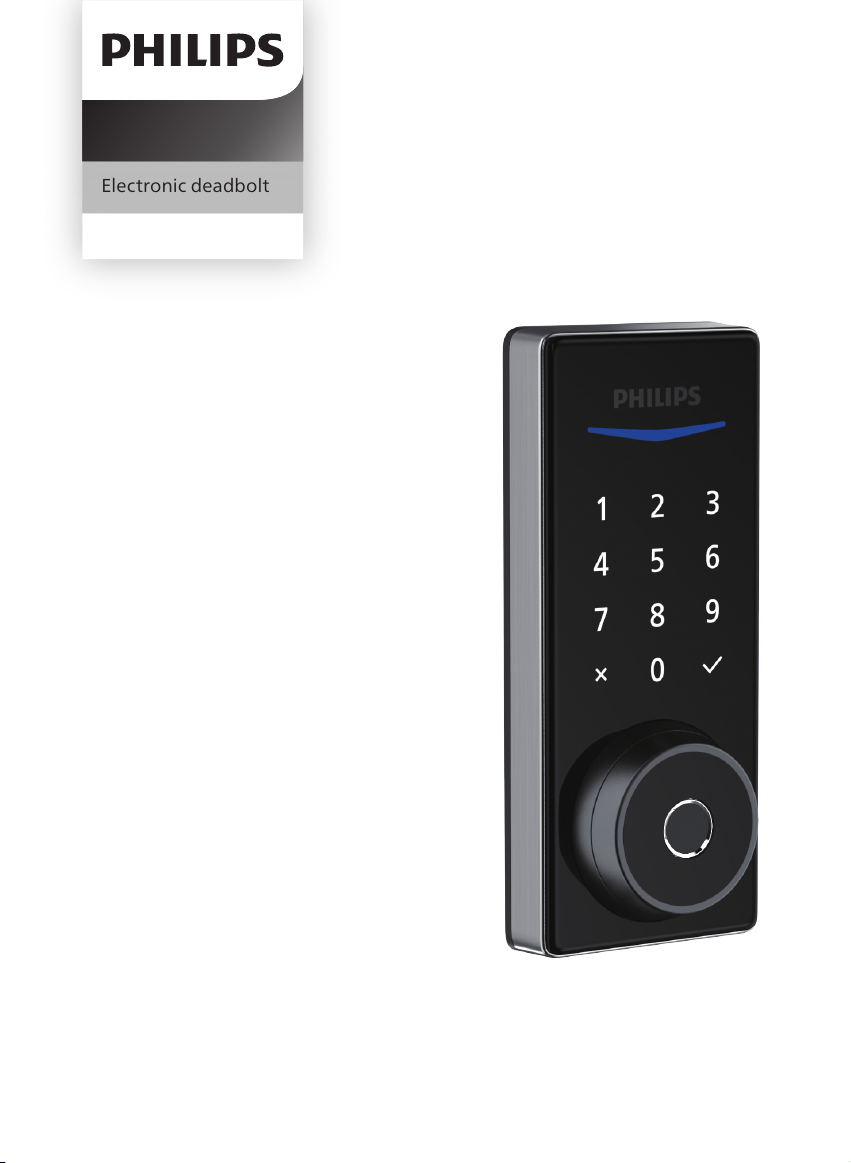
◆Change the default master PIN code immediately after completing the installation.
Caution
◆
◆Do not connect the 2 poles of the batteries to metals to avoid a short circuit and
potential explosion.
◆Any replacement component should be performed by Philips, a Philips-authorized
service center, or a professional technician.
◆Do not use parts or accessories manufactured by others, except batteries.
◆Do not expose products to places that have water leakage or splashing.
Returns & Disposal
◆Locks can be returned at an authorized Philips service center. Appropriate compensation
will be provided if the returned product meets Philips's conditions.
◆Please follow local regulations and do not throw the used products or batteries into
normal household waste.
1 Warnings & Safety
Safety
2

2 How to Install
Parts List
Upper Screw & Screw
Post (Optional)
Backup Keys Drive-In Collar Drilling Template
Exterior Assembly Latch Bolt Mounting Plate
AA Batteries (4) Battery Cover Interior Assembly
Screws (2)
Mounting Plate
Screws (2)
Reinforcement
Plate (Optional)
Strike Plate Strike Plate Screws (2) Latch Bolt
Reinforcement Plate
Screws (2)
(Optional)
Interior Assembly
4
User Manual
17
Screws (2)
Quick Start Guide
18
3

Assembly View
2 3
78101112
1.
2.
3.
4.
5.
Exterior Assembly
Latch Bolt
Mounting Plate
Interior Assembly
AA Batteries (4)
6. Battery Cover
7. Interior Assembly Screws (2) 13.Upper Screw and Screw Post (Optional)
14.Backup Keys (2)
8. Mounting Plate Screws (2)
9.
11.
12.
Reinforcement Plate (Optional)
Strike Plate Screws (2)
Reinforcement Plate Screws (Optional) (2)
10.Strike Plate
Latch Bolt Screws (2)
9
65
1
13 (Optional)14
413 (Optional)
4

Exterior Assembly
Interior Assembly
Status Indicator
Touchscreen Keypad
Cancel Key
Reset Button
Privacy Button
Thumb Turn
1
2
3
4
Fingerprint Sensor
5
Keyhole Cover
6
Keyhole
7
Battery Cover
Installation Buckle
1
2
3
4
5
1
2
4
3
5
1
2
4
3
6
7
5
5

door is 1-1/2’’ or 2-1/8" (38mm or 54mm).
door edge is 1" (25mm).
Install the Lock
1
either 2-3/8" or 2-3/4" (60mm or 70mm).
2
1’’
25 mm
Prepare the Door and Check the Dimensions
Required Tools
2-3/8’’ or 2-3/4’’
(60mm or 70mm)
Backset
1-3/8" to 2" (35mm to 50mm) thick.
3Make sure the hole in the door frame is
drilled a minimum of 1’’ (25mm) deep to
leave enough space for the deadbolt to
extend into the door frame when the
door is locked.
4
1-3/8’’ to 2’’
(35mm to 50mm)
1’’
25mm
Make sure the door frame is aligned with the door
and there are no obstructions in the door frame.
Attention
1-1/2" or 2-1/8"
(38mm or 54mm)
#2 Phillips Screwdriver
6

Drilling Template
OPTIONAL: Drill a hole for Upper Screw.
5
Installing this screw onto the Exterior Assembly is OPTIONAL. It is used for additional security or when a door is weak
or warped.
Attention
7

Install the Latch Bolt.
7
Chiseled
Not chiseled
Drive-In Collar
Latch Bolt.
6
Hold the Latch Bolt in front of the door hole,
door edge. Is the slotted hole centered in the
door hole?
required.
Proceed to the next step.
YES
The slotted hole is
NOT centered.
Rotate and pull the
Latch Bolt as
shown to extend it.
NO
2-3/4"
(70mm)
2-3/8"
(60mm)
pull
Latch Bolt Screws
1
2
up
1
3
2
4
8

Strike Plate Screws
Make sure the hole in door frame is drilled a minimum
of 1"(25mm) deep.
deadbolt locks and unlocks smoothly.
8Install the Strike Plate on the door frame.
9
Attention
Install the Exterior Assembly
Before installing the Exterior and Interior Assembly,
make sure the Latch Bolt is fully retracted (in the
unlocked position).
Attention
Unlocked
Locked
(Optional)
Measure the diameter of
the hole in the door.
1-1/2" or 2-1/8"
(38 or 54mm)
Remove the spacer
Proceed to next step
1-1/2" (38mm)
2-1/8" (54mm)
Attention
The Upper Screw & Screw Post on the top is OPTIONAL.
It is used for additional security, or when a door is weak
or warped.
10 With the Latch Bolt fully retracted (in the
unlocked position), route the cable below
the Latch Bolt, and insert the tailpiece
through the slot in the Latch Bolt.
Tailpiece
Move the Installation Buckles on both sides of
the Interior Assembly upwards to remove the
Mounting Plate from the interior base.
11
Do not insert the key when you are installing.
9

Attention
Route the cable through the hole in the mounting
plate.
The Upper Screw on the top is OPTIONAL.
Before installing the Upper Screw, fasten the Screw
Post into the hole of the Exterior Assembly.
Push the Battery Cover up in the direction
as illustrated.
13 Insert the cable connector of the Exterior
Assembly to the socket on the Interior
until it is completely attached.
14
Install the Interior Assembly
Attention
Secure the Mounting Plate with the
Mounting Plate Screws. Do not
overtighten screws.
12
10

Keep the Thumb Turn in the vertical position,
toggle the Installation Buckle upwards, and
install the Interior Assembly.
15 Attach the Interior Assembly to the Mounting
Plate, toggle the Installation Buckle downwards,
and fasten using the Interior Assembly Screws.
16
Interior Assembly
Screws
Install the AA alkaline batteries according
to the direction guide inside the battery
holder.
17 Press and hold the Reset Button for at
least 5 seconds until you hear a beep. This
activates the lock-handing process and
must be completed before setting up the
lock.
18
Note:
Do not use
other screws.
Need help?
U.S.A. & Canada: +1(833)599-9111
Ensure the cable is not pinched or the lock will not function properly.
Attention
11

Be sure to enter the correct Master PIN Code during
the pairing process, or it may cause the One-Time PIN
Code to fail.
Attention
3 How to Setup
Download the Philips Home Access App
Create a User Account
Register and log in to the Philips Home
Access app.
QR code
Home Access
Add the Device
Tap the “Add device” button on the app.
Scan the QR Code or manually enter the ESN
located on the back of the Battery Cover and
complete the pairing steps following the in-app
instruction.
Scan the QR Code to download the Philips Home Access app.
QR Code
12

4 How to Use
Feature De�nitions
deadbolt in Away Mode and Privacy Mode. The default Master PIN Code (12345678) must be
changed before programming. (Programming instructions refer to page 16.) The owner/manager
Master PIN Code
The unit will automatically lock after it has been unlocked. This function is disabled by default. It
can be set on the lock for a time delay between 30 and 180 seconds (Programming instructions
refer to page 18).
Auto-Lock
The sounds can be muted when pressing the keypad. However, you will still hear low battery
warnings and system alerts. (Programming instructions refer to page 18.)
Silent Mode
Push and hold the Privacy Button on the inside escutcheon for 3 seconds to activate the Privacy
Mode. This will restrict all User PIN Code access. Privacy Mode will be disabled automatically after
unlocking the door with the Thumb Turn or the Master PIN Code.
Privacy Mode
This is a safety feature when you leave your house for a vacation or long trip. Away Mode restricts
all user codes until the Master PIN Code is entered on the keypad. When the lock is unlocked by
the Thumb Turn, an alarm will sound for 1 minute.
By entering the Master PIN Code on the keypad, you can disable the alarm and the Away Mode.
(Programming instructions refer to page 19.)
Away Mode
Generated by the Philips Home Access app, the One-Time PIN Code can only be used once.
You can only generate One-Time PIN Codes for the 1000 series electronic deadbolt via the Philips
Home Access app.
One-Time PIN Code (in-app feature)
13

Limited lifetime for mechanical and 2 years for electronical warranty
This procedure deletes all user codes associated with
the lock.
Restoring the lock will also activate the lock-handing
process.
Press the Reset Button for at least 5 seconds until you
hear the tone prompting you to restore the default
settings.
Function
Master PIN Code
Auto-Lock
Silent Mode
Shut Down Time
Away Mode
Default Setting
12345678
Disabled
Disabled
3 minutes
Disabled
Factory Reset & Default Settings
14

1. Master PIN Code (4 to 10 digits): The default Master PIN Code is 12345678. Change the default Master
PIN Code before programming other codes.
2. User PIN Code (4 to 10 digits): A total of 20 User PIN Codes can be programmed and stored in the lock.
4. Both Master and User PIN Codes do not support the following combination of numbers:
12345678
87654321
22222222
5683
568391
915683
If
then
and
A.
A. Forward number
B. Backward number
C. Repeated number
D. Contain existing code
B.
C.
D.
Format of Entry Methods
15

Attention
The default Master PIN Code is 12345678. Change the default Master PIN Code before programming the lock. The
If no button is pressed for more than 10 seconds, the lock will exit programming mode.
Touch the Touchscreen Keypad with your hand palm to activate the lock before
setting it up.
1timePress
Green light is on
1timePress
Green light is on
2timesPress Enter Master
PIN Code
Enter Master
PIN Code
1timePress
Green light is on
Enter new
Master PIN Code
Re-enter new
Master PIN Code
1timePress
Change the Master PIN Code
Press 1
1timePress
Green light is on
Press 1
2timesPress 1timePress
Green light is on
Enter new
User PIN Code
Re-enter new
User PIN Code
1timePress
Add a User PIN Code
Press 2
Program the Lock
Change the Default Master PIN Code
2timesPress
(default is 12345678)
Enter Master
PIN Code
Enter new
Master PIN Code 1timePress Re-enter new
Master PIN Code 1timePress
Green light is on
16

Attention
Enter Master
PIN Code
Enter Master
PIN Code
Enter Master
PIN Code
Delete the User PIN Code
2timesPress 1timePress
Green light is on
Enter the unwanted
User PIN Code
1timePress
Green light is on
Press 3
Add a User Fingerprint
2timesPress 1timePress
Green light is on
Scan �ngerprint 8 times
Each successful scan along with a green light
Green light is on
Press 4
Delete the User Fingerprint
2timesPress 1timePress
Green light is on
Scan the unwanted �ngerprint 1time
Green light is on
Press 5
17

Enter Master
PIN Code
Enter Master
PIN Code
2timesPress 1timePress
Green light is on
Change the System Language
Press 6
1timePress Green light is on
OR
OR
Green light is on
Green light is on
Press 1
1timePress
Press 2
1timePress
Press 3
for English
for French
for Spanish
OR
Green light is on
1timePress
Press 4Silent mode
2timesPress 1timePress
Green light is on
Timed Auto-Lock Setting
Press 7
1timePress Green light is on
OR
OR
Green light is on
Green light is on
Press 1
1timePress
Press 2
1timePress
Press 3
Auto-Lock
OFF
for 30s
for 60s
OR
Green light is on
1timePress
Press 4for 120s
OR
Green light is on
1timePress
Press 5for 180s
18
Table of contents
Other Philips Keypad manuals
Popular Keypad manuals by other brands

Satel
Satel INT-TSG2 Quick installation guide

Visonic
Visonic CL-80 installation instructions

ERA
ERA KP700 installation guide

Rockwell Automation
Rockwell Automation Allen-Bradley 160 SSC Series user manual

urmet domus
urmet domus alpha 1168/49G installation manual

Kaba
Kaba Keyscan WSSKP-1 Installation & programming guide