manuals.online logo
Brands
  1. Home
  2. •
  3. Brands
  4. •
  5. Philips
  6. •
  7. TV
  8. •
  9. Philips 32RF82S User manual

Philips 32RF82S User manual

3121 233 42251
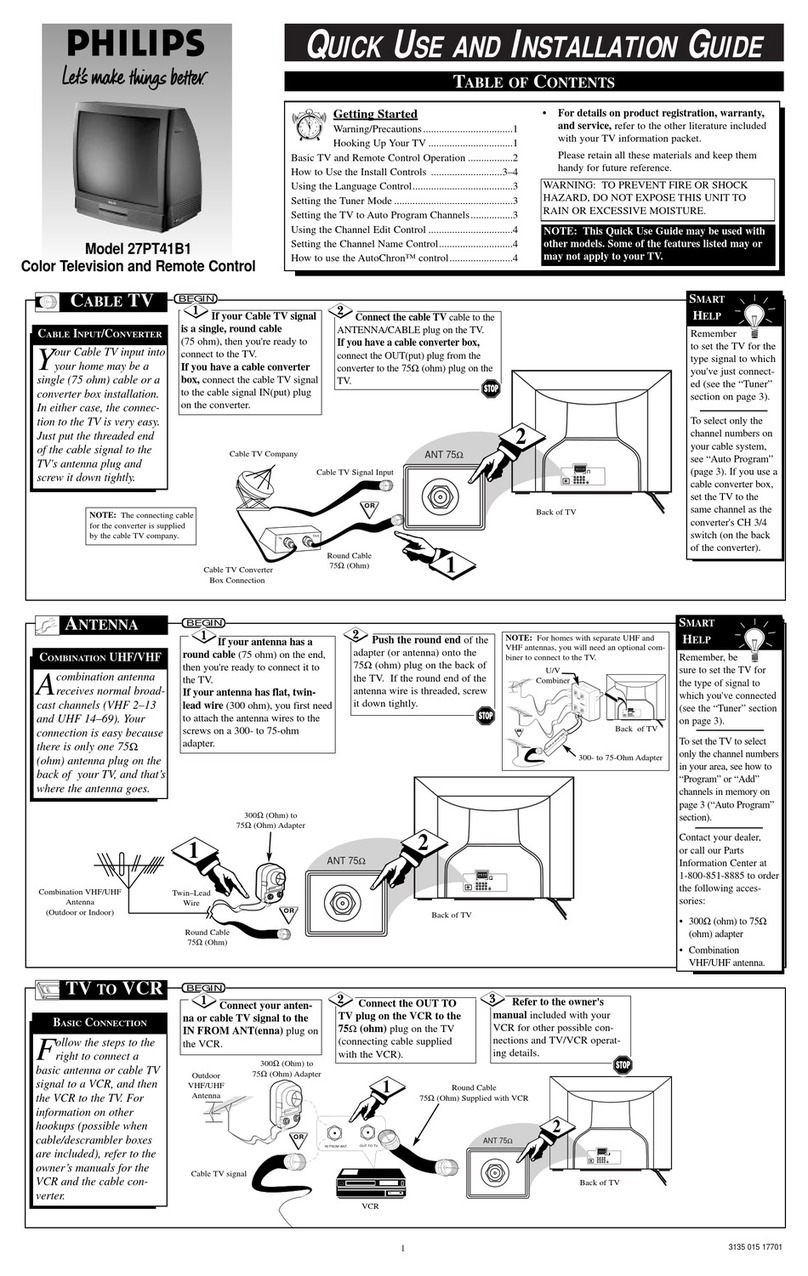
Quick Use and Setup Guide
BASIC TV CONNECTIONS
Important Notice/Warning . . . . . . . . . . . . . . . . . . . .1
Making Basic TV Connections
Antenna A and B Input Jack Connection . . . . . . . .1
Cable Box Connection . . . . . . . . . . . . . . . . . . . . . .1
Basic TV Operation . . . . . . . . . . . . . . . . . . . . . . . .2
Remote Battery Installation . . . . . . . . . . . . . . . . . . .2
Remote Control Button Descriptions . . . . . . . . . . . .2
How to Use the Installation Features . . . . . . . . . .3-4
Using the Language Control . . . . . . . . . . . . . . . . . .3
Setting the Tuner Mode A and B Controls . . . . . . . .3
How to Automatically Program Channels . . . . . . . .3
How to Add and Delete Channels . . . . . . . . . . . . . .4
How to set the AutoChron™ Feature (Clock) . . . . .4
How to Name (Label) Channels . . . . . . . . . . . . . . . .4
IMPORTANT
NOTE: This owner's manual is used with several
different television models. Not all features (and
drawings) discussed in this manual will necessar-
ily match those found with your television set.
This is normal and does not require that you con-
tact your dealer or request service.
WARNING: TO PREVENT FIRE OR SHOCK
HAZARD DO NOT EXPOSE THIS UNIT TO
RAIN OR EXCESSIVE MOISTURE.
Color TV
Color TV
CONTENTS
Your TV has two separate ANT(enna)/cable inputs on the
rear of the set. These two signal inputs offer convenient
hookup options for both normal TV program viewing and
Picture-In-Picture (PIP) features.
The ANT(enna) Ainput is intended for use and viewing on
the TV’s main screen. Your home’s primary antenna or cable
TV signal should be connected to this input for normal TV
setup, use, and feature operation.
The PIPANT(enna) B input is a second, or auxiliary, signal
source designed to supply your TV’s Picture-In-Picture (PIP)
feature. For many homes, the use of a single, existing antenna
or cable TV source for both ANT A and PIP ANT B will be the
preferred method of connection. This type of connection
(optional signal splitter required) will work properly for the
TV’s main onscreen features, as well as retain all the features
designed for PIP. For more details, refer to the Picture-In-
Picture section in your other owner’s manual.
1A typical ANT(enna) A and PIP ANT B connection (using
a common signal source and an optional signal splitter):
If your antenna or cable TV signal has a round cable con-
nector (75 ohm) on the end, then you're ready to connect it to
the 75-ohm signal splitter.
If your antenna has flat, twin-lead wire (300 ohm), you
first need to attach the antenna wires to the screws on a 300-
to 75- ohm adapter before connecting to the 75-ohm signal
splitter.
2Connect yourAntenna or Cable TV signal to the single,
75-ohm input plug on the two-way signal splitter (optional).
Then connect two lengths of RF coaxial cable to the two out-
put plugs on the two-way signal splitter (F-type connector on
both ends).
3Connect the twin output plugs on the signal splitter to the
ANT Aand PIPANT B inputs on the rear of the TV. Push the
round connector end of the RF coaxial cable onto the
ANT(enna) plug and screw it down finger tight (if using
threaded cables).
For homes with cable TV converter descrambler boxes
(with premium/movie channels scrambled), follow the
steps to the right for an alternative ANT A and PIP ANT B
feature hookup. Note that the Cable TV signal will be split
before connection to the converter box (an optional two-
way, 75-ohm signal splitter will be required).
1Connect your cable TV signal to the single, 75-ohm input
plug on a two-way signal splitter (optional).
2Connect one end of the RF coaxial cable to each of the
output plugs on the 75-ohm signal splitter. The two lengths
of RF coaxial cable need F-type connectors (screw-on or
push type) for both ends.
3
Connect one of the signal splitter outputs to the input termi-
nal on the Cable TV converter box. Then route another con-
nection from the cable converter output terminal to the ANT
A input on the rear of the TV.
4Connect the remaining signal splitter output from the
splitter to the PIP ANT B input on the rear of the TV.
CABLE BOX
3
12
IN
OUT
2
1
3 4
Round Cable
75Ω(Ohm) Cable TV Company
Cable TV Signal
300Ω(Ohm) to
75Ω(Ohm) Adapter
Twin–lead
Wire
Back of TV
Round Cable
75Ω(Ohm)
- Outdoor or Indoor Antenna -
Receives normal broadcast channels
2–13 (VHF) and 14–69 (UHF).
NOTE: Proper operation of your TV is not dependent upon connec-
tion of the PIPANT B input. The main purpose of the input is to pro-
vide an easily connected, dedicated picture source for use of the PIP fea-
ture. The PIPANT B input can, however, be used to connect and display
other signal source options such as a satellite dish system, an additional
external antenna, a VCR, or a video game, for example.
NOTE: Although the PIPANT B input can be used and swapped as
the source for the TV’s main picture, certain setup features (such as
AutoChron™) are based only on a signal being detected at the ANTA
input. To ensure that all features are operating properly, you may not
want to rely solely on the PIP ANT B input as your TV’s main screen
signal source.
OPTIONAL
TWO-WAY SIGNAL
SPLITTER
Combination VHF/UHF Antenna
(single, 75-ohm input to twin, 75-
ohm outputs – optional RF coaxial
connecting cables also required) ANT(enna) A
Input
PIP ANT(enna)
B Input
• The signal routed to
the TV’s PIP ANT B input
will allow for the selec-
tion and viewing of cable
channels at the TV
(except for the scrambled
premium/movie channels).
OPTIONAL TWO-WAY
SIGNAL SPLITTER
Cable TV Converter
Box Connection
Cable TV Company
• The signal routed to the TV’s ANTA
input will allow for premium/movie chan-
nels to be viewable on the TV.
• Channel selection will be at the converter.
• The ANTAinput channel on the TV
should be set to the same output channel as
the converter box (usually CH 3 or 4).
Connect to ANT A Input Connect to PIP ANT B Input
ANTENNA A AND B INPUTS
OR
OR
Be sure to set the TV for the type signal
to which you've connected. (See the
“Tuner Mode A/B” section on page 3.)
Your TV can set itself to select only the
channel numbers on your cable system
(see “Auto Program" on page 3). If you
use a cable converter box, set the TV to
the same channel as the converter's CH 3/4
switch (on the back of the converter).
HELPFUL HINT



䡲
2
BASIC TV AND REMOTE OPERATION
Y
our television has a set of controls located on the top of
the cabinet for use when the remote control is not needed.
1Press the POWER button to turn the TV ON.
Note: The time it takes the TV to startup can be affected
by the AutoChron™ feature (page 4). With AutoChron ON,
the TV will search for a PBS channel to set the clock
before powering itself on. This can take several seconds.
2Press the VOLUME (+) button to increase the sound
level or the VOLUME (–) button to lower the sound level.
Pressing both buttons at the same time will display the
onscreen menu. After you are in the menu, use these buttons
to make adjustments or selections.
3Press the CHANNEL– (down) or + (up) button to select
TV channels. Use these buttons to make adjustments or
selections in the onscreen menu.
There is also a set of Audio and Video Input jacks located on the
side of the television cabinet. This jack panel also contains a S-video
and headphone jack. These jacks are great for connecting a video
camcorder or any accessory device that will only be hooked up tem-
porarily.
TELEVISION
13
+–
VOLUME
+–
CHANNEL
2
Remote Sensor Window
Audio, Video, S-Video
and Headphone Jacks
located on the side of
the television.
Volume and Channel buttons are located
on the top of the television cabinet.
To load the supplied batteries into the remote:
1Remove the battery compartment door on the back of
the remote.
2Place the batteries (2-AA) in the remote. Be sure the (+)
and (–) ends of the batteries line up correctly (the inside of
the case is marked).
3Reattach the battery compartment door.
Be sure to point the remote at the Remote Sensor window on the
front of the television when using the remote control to operate the
television.
REMOTE CONTROL BATTERIES
Remote Control
(shown from the bottom)
Battery Compartment Door
2 “AA” Batteries
Battery Compartment
REMOTE CONTROL BUTTONS
Sleep Button
Press to set the TV to automatically turn itself OFF. Choose 15, 30, 45,
60, 90, 120, 180, or 240 minutes.
TV/VCR (A/CH) Button
TV/VCR – Press while in the VCR mode (the VCR indicator on the
front of the VCR will light) to view the playback of a tape. Press again to
place in the TV position (the VCR indicator light will go off) to view one
program while recording another program.
A/CH – Press to toggle between the currently viewed channel and the
previously viewed channel.
TV/VCR/ACC Mode Switch
Slide to the TV position to control TV functions, to the VCR position to con-
trol VCR functions, or to the ACC position to control the functions of acces-
sory devices (a cable converter, DBS, or DVD, for example).
Number Buttons
Press the number buttons to select TV channels. When selecting single-
digit channels, press the number of the desired channel. The TV will
pause for a few seconds and then tune to the selected channel. (Note:
You can press 0, then the number also.) For channels 100 and above,
first press 1then the next two numbers of the desired channel.
Sound Button
Press to select an AutoSound™ control. Choose from three factory-set
controls (VOICE, MUSIC, and THEATRE) and a PERSONAL control
that you set according to your own preferences through the onscreen
Sound menu. The three factory-set controls will tailor the TV sound so
as to enhance the particular type of program you are watching.
Menu Button
Press for the onscreen menu to appear. Pressing the menu button after
menu selections are made will eliminate the menu from the display.
Cursor Buttons (Left, Right, Up, Down)
Press these buttons to highlight, select, and adjust items on the TV's
onscreen menu.
Volume (+) or (–) Buttons
Press to adjust the TV sound level.
Source Button
Press repeatedly to select the different signal sources connected to the
A/V inputs on the TV.
Status/Exit Button
Press to see the current channel number on the TV screen. Also press to
clear the TV screen after control adjustments.
Incr. Surr. (Incredible Surround) Button
Press to to set the desired Incredible Surround mode.
Program List Button
Press to display a list of channel numbers and their names (see the
“Tuner,” “Auto Program,” “Channel Edit,” and “Name” sections on
pages 3 and 4 for proper setup). Each channel will appear as a selec-
table menu item. The current channel will be highlighted by default.
Only five channels will be shown onscreen at one time; use the CUR-
SOR UP or DOWN buttons to scroll the list.
Power Button
Press to turn the TV ON and OFF.
PIP Buttons
Press to operate Picture-In-Picture features. See the PIP section in the
Instructions for Use manual for details.
Light Button
Press to back-light the buttons on the remote control.
Picture Button
Press to select an AutoPicture™ control. Choose from four factory-set
controls (MOVIES, SPORTS, WEAK SIGNAL, and MULTI MEDIA)
and a PERSONAL control that you set according to your own prefer-
ences through the onscreen PICTURE menu. The four factory-set con-
trols will tailor the TV picture so as to enhance the particular type of
program you are watching, or to improve the picture of a program that
has a weak signal.
Active Control Button
Press repeatedly to toggle the Active Control to ON or OFF. When ON,
the sharpness and noise reduction will be continuously monitored.
Mute Button
Press to turn the TV sound OFF. Press again to return the sound to its
previous level.
Channel (+) or (–) Buttons
Press to change the tuned channel.
CC/REC • Button
CC: Press to select Closed Captioning options within the menu. (See
the Instructions for Use manual for details.)
REC: Press the REC • button and the Play 䊳button together to start a
VCR recording.
Clock Button
Press the CLOCK button to access the onscreen Clock menu.
Surf Button
Press to select previously viewed channels. You can place up to 10 chan-
nels in memory. Then by pressing the SURF button you can quickly view
the select channels. (See the “Using the Channel Surf Control” section in
your Instructions for Use manual to see how to select a series of channels
using the Surf button.)
VCR 䊴䊴, ■, 䊳, 䊳䊳, •, II Buttons
Press to rewind, stop, play, fastforward, record, or pause/freeze a video-
tape.
Tuner A/B Button
Press to select the signal coming from the ANT IN A or ANT IN B con-
nection.
Power ON LED



䡲
PICTURE
SOUND
FEATURES
INSTALL
LANGUAGE
TUNER MODE A
TUNER MODE B
AUTO PROGRAM
CHANNEL EDIT
LANGUAGE
TUNER MODE A
TUNER MODE B
AUTO PROGRAM
CHANNEL EDIT
INSTALL
INSTALL
LANGUAGE
TUNER MODE A
TUNER MODE B
AUTO PROGRAM
CHANNEL EDIT
INSTALL
LANGUAGE
TUNER MODE A
TUNER MODE B
AUTO PROGRAM
CHANNEL EDIT
AUTO
CABLE
ANTENNA
1
2
4
6
3
5
7
ENGLISH
FRANCAIS
ESPANOL
˜
AUTO
CABLE
ANTENNA
6
HOW TO USE THE INSTALLATION FEATURES
For or Spanish- and French-speaking TV owners, an onscreen
LANGUAGE option is present. The LANGUAGE control
enables you to set the TV’s onscreen menu to be shown in either
English, Spanish, or French.
1Press the MENU button on the remote control to show
the onscreen menu.
2Press the CURSOR DOWN button repeatedly until
INSTALL is highlighted.
3Press the CURSOR RIGHT button to shift the menu to
the left and highlight LANGUAGE.
4Press the CURSOR RIGHT button to highlight the
LANGUAGE control options.
5Press the CURSOR UP or CURSOR DOWN button to
select ENGLISH, ESPANOL (Spanish), or FRANCAIS
(French).
6Press the STATUS/EXIT button to clear the menu from
the screen.
LANGUAGE
The TUNER MODE A and B features allows you to change the
TV’s signal input to CABLE, ANTENNA, or AUTO mode for
both antenna A and Antenna B modes. It’s important for the TV to
know if you want to receive channels from a cable TV signal or a
normal antenna signal.
NOTE: The AUTO mode setting helps the TV determine the type
of signal or channels being received when AUTO PROGRAM is
activated.
1Press the MENU button on the remote control to show
the onscreen menu.
2Press the CURSOR DOWN button repeatedly until
INSTALL is highlighted.
3Press the CURSOR RIGHT button to shift the menu to
the left.
4Press the CURSOR DOWN button to highlight either
TUNER MODE A or TUNER MODE B controls.
5Press the CURSOR RIGHT button to highlight the tuner
options.
6With the TUNER MODE A or TUNER MODE B control
set to AUTO, Auto Program (see below) will detect
whether or not cable input is present.
If, however, you want to set the TUNER MODE A or
TUNER MODE B to CABLE or ANTENNA, press the
CURSOR UP or CURSOR DOWN button until either
CABLE or ANTENNA is highlighted.
7Press the STATUS/EXIT button to clear the menu from
the screen.
TUNER MODE A AND B
When CABLE is selected, channels 1–125 are available.
When ANTENNA is selected, channels 2–69 are available.
HELPFUL HINT
Your TV can automatically set itself for local area (or cable
TV) channels. This makes it easy for you to select only the TV
stations in your area by pressing the CHANNEL (+) or (–) button.
1Press the MENU button on the remote control to show
the onscreen menu.
2Press the CURSOR DOWN button repeatedly until
INSTALL is highlighted.
3Press the CURSOR RIGHT button to shift the menu to
the left. LANGUAGE will be highlighted.
4Press the CURSOR DOWN button repeatedly until the
AUTO PROGRAM control is highlighted.
5Press the CURSOR RIGHT button to start the Auto
Program scanning of channels.
6Press the STATUS/EXIT button to clear the menu from
the screen.
AUTO PROGRAM
3



䡲
PICTURE
SOUND
FEATURES
INSTALL
LANGUAGE
TUNER MODE A
TUNER MODE B
AUTO PROGRAM
CHANNEL EDIT
INSTALL
LANGUAGE
TUNER MODE A
TUNER MODE B
AUTO PROGRAM
CHANNEL EDIT
ENGLISH
FRANCAIS
ESPANOL
˜
LANGUAGE
TUNER MODE A
TUNER MODE B
AUTO PROGRAM
CHANNEL EDIT
INSTALL
1
2
5
3
4
ENGLISH
FRANCAIS
ESPANOL
˜
6



䡲
PICTURE
SOUND
FEATURES
INSTALL
LANGUAGE
TUNER MODE A
TUNER MODE B
AUTO PROGRAM
CHANNEL EDIT
LANGUAGE
TUNER MODE A
TUNER MODE B
AUTO PROGRAM
CHANNEL EDIT
INSTALL
INSTALL
SEARCH
INSTALL
LANGUAGE
TUNER MODE A
TUNER MODE B
AUTO PROGRAM
CHANNEL EDIT
CABLE
PLEASE WAIT
CHANNEL 12
LANGUAGE
TUNER MODE A
TUNER MODE B
AUTO PROGRAM
CHANNEL EDIT
ENGLISH
FRANCAIS
ESPANOL
˜
1
2
4
3
5
6
After you’ve run Auto Program, check out the results. Press the
CHANNEL (+) or (–) button and see which channels you can
select.
Remember, an antenna or cable TV signal must first be connect-
ed to your TV (see instructions for making connections on page
1 of this guide).
HELPFUL HINT
Remember, the LANGUAGE control makes only the TV’s
onscreen MENU items appear in English, Spanish, or French
text. It does not change the other onscreen text features, such as
Closed Captioning (CC), with TV shows.
HELPFUL HINT
HOW TO USE THE INSTALL ATION FEATURES
C
HANNEL EDIT makes it easy for you to add or delete channels
from the list of channels stored in the TV’s memory.
1Press the MENU button on the remote control to show the
onscreen menu.
2Press the CURSOR DOWN button repeatedly until
INSTALL is highlighted.
3Press the CURSOR RIGHT button to shift the menu to the
left. LANGUAGE will be highlighted.
4Press the CURSOR DOWN button repeatedly until the
CHANNEL EDIT control is highlighted.
5Press the CURSOR RIGHT button to access the CHAN-
NEL EDIT menu.
6Press the CURSOR UP or CURSOR DOWN button to
scroll through the list of available channels. Or press the num-
ber buttons on your remote control to select a specific channel
(for example, press 0and then 2to select channel 2).
7With the channel you want to edit selected, press the CUR-
SOR RIGHT button to mark the channel as SKIPPED. The
channel you’ve marked SKIPPED will not appear when you
are changing from channel to channel while watching TV.
NOTE: When you want to add a channel that has been marked
SKIPPED, press the CURSOR UP or CURSOR DOWN button
to highlight the channel; then press the CURSOR RIGHT button
to remove the word SKIPPED.
CHANNEL EDIT
T
he channel NAME feature allows you to list the “call” letters of
your favorite stations beside their channel numbers when they
appear on the screen. The TV has in memory a list of the 50 most
popular channel names (for example, ABC, NBC, FOX, etc.). You
also can enter a custom name (up to five characters).
1Press the MENU button on the remote control to show the
onscreen menu.
2Press the CURSOR DOWN button repeatedly until
INSTALL in highlighted.
3Press the CURSOR RIGHT button to shift the menu to the
left. LANGUAGE will be highlighted.
4Press the CURSOR DOWN button repeatedly until the
NAME control is highlighted.
5Press the CURSOR RIGHT button to highlight the NAME
options area.
6Press the CURSOR RIGHT button again; then press the
CURSOR UP or CURSOR DOWN button to scroll through
a list of options for the first character (A through Z, 0 through
9). Press the CURSOR RIGHT button and repeat for the
second, third, fourth, and fifth characters
7After you have selected a name for the channel, press the
MENU button to save the name in the TV’s memory.
8Press the STATUS/EXIT button to clear the menu from the
screen.
NAME
A
utoChronTM can automatically set the TV’s onscreen clock.
Because the time is received from a broadcast signal, you must
be sure that a cable TV or antenna signal is present before you
attempt to use the AutoChronTM feature.
1Press the MENU button on the remote to show the
onscreen menu.
2Press the CURSOR DOWN button repeatedly until
INSTALL is highlighted.
3Press the CURSOR RIGHT button to shift the menu to the
left. LANGUAGE will be highlighted.
4Press the CURSOR DOWN button until the AutoChron
control is highlighted.
5Press the CURSOR RIGHT button to start the
AutoChron™ feature. Then just follow the onscreen instruc-
tions to set the clock.
6Press the CURSOR RIGHT button to select AUTO.
Within a few seconds, a menu for choosing your time zone
will appear.
7Press the CURSOR UP or CURSOR DOWN button to
highlight your correct time zone.
8With your correct time zone highlighted, press the CUR-
SOR RIGHT button. Within a few seconds, you will be
given the option to choose whether you want to select
Daylight Savings Time.
9Press the CURSOR UP or CURSOR DOWN button to
navigate through the YES and NO selection list; then with
the item you want to select highlighted, press the CUR-
SOR RIGHT button. Follow the onscreen instructions
(shown below) to set the AutoChron™ time either automati-
cally or manually.
AUTOCHRON™
4



䡲
PICTURE
SOUND
FEATURES
INSTALL
LANGUAGE
TUNER MODE A
TUNER MODE B
AUTO PROGRAM
CHANNEL EDIT
LANGUAGE
TUNER MODE A
TUNER MODE B
AUTO PROGRAM
CHANNEL EDIT
INSTALL
INSTALL
LANGUAGE
TUNER MODE A
TUNER MODE B
AUTO PROGRAM
CHANNEL EDIT
66 SKIPPED
67 SKIPPED
68 SKIPPED
69 SKIPPED
AV1
INSTALL
LANGUAGE
TUNER MODE A
TUNER MODE B
AUTO PROGRAM
CHANNEL EDIT
1
2
4
6
3
5
7
6
ENGLISH
FRANCAIS
ESPANOL
˜
66 SKIPPED
67 SKIPPED
68 SKIPPED
69 SKIPPED
AV1



䡲
INSTALL INSTALL
TUNER MODE B
AUTO PROGRAM
CHANNEL EDIT
AutoChron
NAME
TUNER MODE B
AUTO PROGRAM
CHANNEL EDIT
AutoChron
NAME
W-
PICTURE
SOUND
FEATURES
INSTALL
LANGUAGE
TUNER MODE A
TUNER MODE B
AUTO PROGRAM
CHANNEL EDIT
LANGUAGE
TUNER MODE A
TUNER MODE B
AUTO PROGRAM
CHANNEL EDIT
INSTALL ENGLISH
FRANCAIS
ESPANOL
˜
1
7
2
4
6
3
5
6
8
6
WX- WXY- WXYZ- WXYZ3
PICTURE
SOUND
FEATURES
INSTALL
BRIGHTNESS
COLOR
PICTURE
SHARPNESS
TINT
PICTURE
SOUND
FEATURES
INSTALL
LANGUAGE
TUNER MODE A
TUNER MODE B
AUTO PROGRAM
CHANNEL EDIT
LANGUAGE
TUNER MODE A
TUNER MODE B
AUTO PROGRAM
CHANNEL EDIT
INSTALL
TUNER MODE B
AUTO PROGRAM
CHANNEL EDIT
AutoChron
NAME
INSTALL TUNER MODE B
AUTO PROGRAM
CHANNEL EDIT
AutoChron
NAME
INSTALL
SET TIME
AUTO
MANUAL
TUNER MODE B
AUTO PROGRAM
CHANNEL EDIT
AutoChron
NAME
INSTALL
TIME ZONE?
CENTRAL
MOUNTAIN
PACIFIC
TUNER MODE B
AUTO PROGRAM
CHANNEL EDIT
AutoChron
NAME
INSTALL
DAYLIGHT
SAVING TIME?
YES
NO
ENGLISH
FRANCAIS
ESPANOL
˜
TUNER MODE B
AUTO PROGRAM
CHANNEL EDIT
AutoChron
NAME
INSTALL
SEARCH FOR
TIME . . .
(Please wait)
12 PBS
TUNER MODE B
AUTO PROGRAM
CHANNEL EDIT
AutoChron
NAME
INSTALL
SEARCH FOR
TIME . . .
Time Found
END: PRESS STATUS
12 PBS
TUNER MODE B
AUTO PROGRAM
CHANNEL EDIT
AutoChron
NAME
INSTALL
SEARCH FOR
TIME . . .
Time Found
11:00 AM
SET TIME
AUTO
MANUAL
TUNER MODE B
AUTO PROGRAM
CHANNEL EDIT
AutoChron
NAME
INSTALL
SET TIME
AUTO
MANUAL
The channels available for you to edit are the ones that the AUTO
PROGRAM feature found through a search of your TV antenna
or cable TV signals. Channels not found during the search are
marked SKIPPED.
HELPFUL HINT
The five characters that the channel NAME feature allows you
to input can be letters, a dash character, or the numbers 0
through 9.
HELPFUL HINT
TUNER MODE B
AUTO PROGRAM
CHANNEL EDIT
AutoChron
NAME
INSTALL
SET TIME
AUTO
MANUAL
TUNER MODE B
AUTO PROGRAM
CHANNEL EDIT
AutoChron
NAME
INSTALL
ENTER TIME
1_:__ AM
TUNER MODE B
AUTO PROGRAM
CHANNEL EDIT
AutoChron
NAME
INSTALL
ENTER TIME
11:30 AM
Setting the
AutoChron Feature
Automatically:
Setting the
AutoChron Feature
Manually:
Note: When turned ON, the AutoChron™ feature can affect the start up of your television. When the power
button is press and the AutoChron™ feature is set to the AUTO position, the TV will scan the channels for a
PBS channel to set the clock automatically. It may take SEVERAL seconds before the TV powers itself ON.

Other manuals for 32RF82S

2

This manual suits for next models

3

Other Philips TV manuals

Philips 19PFL3504D/F7 User manual

Philips

Philips 19PFL3504D/F7 User manual

Philips 25PT9001 User manual

Philips

Philips 25PT9001 User manual

Philips 40PFL4901 User manual

Philips

Philips 40PFL4901 User manual

Philips 6805 Series User manual

Philips

Philips 6805 Series User manual

Philips 29PT9413/58 User manual

Philips

Philips 29PT9413/58 User manual

Philips 19HFL5014W User manual

Philips

Philips 19HFL5014W User manual

Philips 14PT2683/58 User manual

Philips

Philips 14PT2683/58 User manual

Philips 28PW6312/00 User manual

Philips

Philips 28PW6312/00 User manual

Philips 40PFL9704H/12 User manual

Philips

Philips 40PFL9704H/12 User manual

Philips S42SD-YD09 User manual

Philips

Philips S42SD-YD09 User manual

Philips HFL2819 Series User manual

Philips

Philips HFL2819 Series User manual

Philips LC4.3E User manual

Philips

Philips LC4.3E User manual

Philips 20PT6245/37 User manual

Philips

Philips 20PT6245/37 User manual

Philips 6917 Series User manual

Philips

Philips 6917 Series User manual

Philips 29PT9457 User manual

Philips

Philips 29PT9457 User manual

Philips 29PT8303/19 User manual

Philips

Philips 29PT8303/19 User manual

Philips Matchline 28ML8765 Instruction Manual

Philips

Philips Matchline 28ML8765 Instruction Manual

Philips L9H.2E User manual

Philips

Philips L9H.2E User manual

Philips 24PHS5507 User manual

Philips

Philips 24PHS5507 User manual

Philips Q552.1A User manual

Philips

Philips Q552.1A User manual

Philips 22PFL3805H/12 User manual

Philips

Philips 22PFL3805H/12 User manual

Philips 29PT6433 User manual

Philips

Philips 29PT6433 User manual

Philips 40PFL7007H/12 User manual

Philips

Philips 40PFL7007H/12 User manual

Philips Matchline 28PW9509 User manual

Philips

Philips Matchline 28PW9509 User manual

Popular TV manuals by other brands

Panasonic Genus TX-G10 operating instructions

Panasonic

Panasonic Genus TX-G10 operating instructions

Samsung 55S9 B Series Quick setup guide

Samsung

Samsung 55S9 B Series Quick setup guide

LG 29FS2AL Service manual

LG

LG 29FS2AL Service manual

Haier HTAF29C user manual

Haier

Haier HTAF29C user manual

Sony BRAVIA XR-48A90K reference guide

Sony

Sony BRAVIA XR-48A90K reference guide

RCA P52937 user guide

RCA

RCA P52937 user guide

Toshiba 20AS22 Service manual

Toshiba

Toshiba 20AS22 Service manual

Panasonic CT-27C8 operating instructions

Panasonic

Panasonic CT-27C8 operating instructions

Sony KV-BZ212 operating instructions

Sony

Sony KV-BZ212 operating instructions

Sanyo DP15657 Service manual

Sanyo

Sanyo DP15657 Service manual

Loewe Spheros R 32 HD+ operating instructions

Loewe

Loewe Spheros R 32 HD+ operating instructions

Vidao 82V42UHD user manual

Vidao

Vidao 82V42UHD user manual

Panasonic TX-32PB50 Service manual

Panasonic

Panasonic TX-32PB50 Service manual

Panasonic TX-51PS72Z Service manual

Panasonic

Panasonic TX-51PS72Z Service manual

Sanyo CP28WF1 Service manual

Sanyo

Sanyo CP28WF1 Service manual

Sanyo C29ZK80 Service manual

Sanyo

Sanyo C29ZK80 Service manual

Samsung CS21Z40 Owner's instructions

Samsung

Samsung CS21Z40 Owner's instructions

Sony KDL-32S5600 Service manual

Sony

Sony KDL-32S5600 Service manual

manuals.online logo
manuals.online logoBrands
  • About & Mission
  • Contact us
  • Privacy Policy
  • Terms and Conditions

Copyright 2025 Manuals.Online. All Rights Reserved.