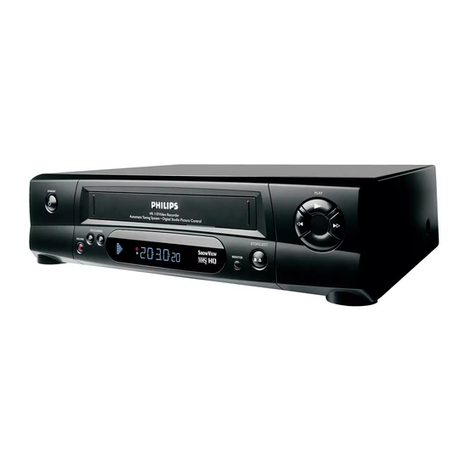
Philips VR850/07 User manual

Congratulations ! You now have one of the most sophisticated
and easy-to-use videorecorders (VCR) on the market.With
this VCR you can record and play standard VHS cassettes.
Please take the time to read this manual before you use your
video recorder.
Safety instructions and other notes
ADanger: High voltage!
Do not remove the top coveron the machine.You may get an
electric shock!
AYou will not be able to repairany of the parts in thisvideo
recorder yourself.When the machine is plugged in,some of the
parts willbe working all the time.To switch off the video
recorder completely,you must unplug it.
BThis video recorderis designed for a powersupply of
220-240V/50Hz.
BMake sure that aircan flow freely through the ventilationslots
on the video recorder.
BDo not allow any objectsor liquids to get into the video
recorder. If you spill anythingon it, unplug it immediatelyand
callour After-Sales Servicefor advice.
BDo not use your video recorder immediatelyafter moving it from
a cold area to a hot area or if the roomis very humid.
Once you have unpacked the video recorder, leave it to stand
for at least three hours before you install it.This gives the
machine chance to get used to the room temperature.
CWe have printed these instructionson environment-friendly
paper.
CPlease take your oldbatteries to proper battery collection
points.
CPlease dispose of the packagingfrom this video recorderin a
way that willnot harm the environment.
CThis video recordercontains many materialsthat can be
recycled. Pleaseask about recycling yourold machine.
DVIDEO Plus+ and PlusCodeare registered trademarksof
Gemstar DevelopmentCorporation. The VIDEOPlus+ systemis
manufactured under licence from GemstarDevelopment
Corporation.
1. Installing your video recorder 2......................
Connecting your video recorder to the TV set 2.........
Automatic tuning (autoinstall) 4.......................
Tuning in your video recorder for the first time 4........
Tuning in your video recorder at other times 4..........
Automatic TV channel store (FOLLOWTV) 4............
Connecting a decoder or other equipment 5............
Manual TV channel search 5.........................
Monitorfunction 6..................................
Sorting and clearing TV channels manually 6...........
Setting the time and date 7...........................
On-screendisplay (OSD) 7...........................
Emergencyinterrupt 7...............................
Saving energy 7....................................
2. Playback functions 8................................
Searching for a tape position 8.......................
JOG and SHUTTLE 8................................
Selecting the picture setting (SMART PICTURE) 9.......
Pictureinterference 9...............................
3. Manual recording 10................................
Recording with and without automatic switch-off 10....
Automatic recording from a satellite receiver (SAT
RECORDING) 11....................................
Directrecord 11....................................
4. Programmed recording 12...........................
VPS (video programming system)and PDC (pro-
gramme delivery control) 12..........................
Programming with VIDEO Plus+ 12....................
Manual programming without VIDEO Plus+ 13..........
How to check or change a TIMER 13..................
NexTViewLink 14...................................
5. Other functions 15..................................
Changing the TV system 15..........................
Child lock 15.......................................
Switching the remote control command 16.............
Continuousplay 16..................................
Automaticswitch-off 17.............................
Using your video recorder remote control with your
TV set 18..........................................
Audio dubbing 19...................................
Selecting the soundtrack 20..........................
’Synchroedit’ 20....................................
Before you call an engineer 22.......................
Operating instructions PHILIPS VR850/07
1
SDDHHMMJWWTOPERAT


Important for the United Kingdom
This machine is fitted with an approved moulded 13 Amp plug.
To change a fuse in this type ofplug, please follow these
instructions.
aTake off the fuse cover and take out the fuse.
bPut in a new fuse which should be a BS13623A, A.S.T.A.
or BSI approved type.
cRefit the fuse cover.
If the plug fitted is not suitable for your socket, cut it off and fit
another type.
If the plug you fit containsa fuse, it should be a 3Ampfuse. If
you fit a plug which does not need a fuse, make sure the fuse
on your fuse box is not greater than 5 Amps.
DNote: Please destroy the plug you have cut off so that it
cannot be used in a 13 Amp socket somewhere else.
How to connect a plug
The wires in the lead from the video recorder are coloured as
follows.
* Blue - ’neutral’ (’N’).
* Brown - ’live’ (’L’).
dConnect the blue wire to the terminal in the plug which is
marked with the letter ’N’ or coloured black.
eConnect the brown wire to the terminal in the plug which
is marked with the letter ’L’ or colouredred.
fDo not connect either of the wires to the terminal in the
plug which is marked with the letter ’E’, the symbol \or
coloured green or green and yellow.
Before you refit the plug cover, make sure thatthe grip at the
bottom of the plug is clamped over the plastic cover of the
lead, not just over the two wires.
Connecting your video recorder to the
TV set
To install your video recorder, you willneed to read one of the
following.
EIf your TV set has ’Easy Link’ or ’NexTView’ - the
paragraph ’Connecting with a scart cable and Easy Link
or NexTView’.
EIf your TV set does not have ’Easy Link’ or ’NexTView’ -
the paragraph ’Connecting with a scart cable without
Easy Link or NexTView’.
EIf you do not use a scart cable - the paragraph
’Connecting without a scart cable’.
Connecting with a scart cable and Easy link
or NexTView
Easy Link and NexTView allow your video recorder to
exchange information with the television. Please follow the
operating instructions you received with your television.
aTake the aerial cable plug out of your TV set and put it
into the 2socket on the back of the video recorder.
bPlug one end of the aerial cable provided into the TV
socket on the video recorder. Then plug the other end
into the aerial input socket on your TV set.
cPlug one end of the scart cable provided into the
AV1EXT1 scart socket on the back of the video recorder.
Then plug the other end into the scartsocket on your
TV set.
1. Installing your video recorder
2

dSwitch on the TV set.
ePlug one end of the mains cable into the mains socket
4on the back of the video recorder. Then plug the
other end into the wall socket.
fYour video recorder will automatically store all the
TV channels on your TV, in the same order.
This may take several minutes.
When your video recorder has stored all the information
it needs from your TV (TV channels, language, country),
the following text will appear on your TV screen:
’EASY LINK LOADING COMPLETE’.
gCheck that the time and date on the video recorder
display are correct. If they are not, pleaseread the
paragraph ’Setting the time and date’ in this chapter.
Connecting with a scart cable without
Easy Link or NexTView
If your television does not have a scart (EURO-AV)socket,
please see the next paragraph ’Connecting without a scart
cable’.
aTake the aerial cable plug out of your TV set and put it
into the 2socket on the back of the video recorder.
bPlug one end of the aerial cable provided into the TV
socket on the video recorder. Then plug the other end
into the aerial input socket on your TV set.
cPlug one end of the scart cable into the AV1 EXT1 scart
socket on the back of the video recorder. Then plug the
other end into the scart socketon your TV set.
dSwitch on the TV set.
ePlug one end of the mains cable into the mains socket
4on the back of the video recorder. Then plug the
other end into the wall socket.
fIf your TV set automatically switches to a programme
number, a text will appear on your TV screen.
If not, select your programme as shown in the instruction
manual for your TV set.
Connecting without a scart cable
aTake the aerial cable plug out of your TV set and put it
into the 2socket on the back of the video recorder.
bPlug one end of the aerial cable provided into the TV
socket on the video recorder. Then plug the other end
into the aerial input socket on your TV set.
cPlug one end of the mains cable into the mains socket
4on the back of the video recorder. Then plug the
other end into the wall socket.
dSwitch on your TV set and select the channel number you
have chosen for playing videos.
eYou will then see some texton your TV screen.
fTune in the TV set on the UHF waveband until this picture
appears.
Read the instructions in the manual for your TV set.
CONGRATULATIONS ON THE
PURCHASE OF YOUR NEW
PHILIPS VIDEORECORDER
TO CONTINUE PRESS OK
gThen follow the instructions shown under ’Tuning in your
video recorder for the first time’.
3

Automatic tuning (autoinstall)
Your video recorder will search for all TV channels. It stores
the TV channels it finds in the following order: BBC 1, BBC 2,
ITV, Channel 4, Channel 5, Sky, others.
Tuning in your video recorder for the first
time
aIf you have plugged the aerial into the video recorder,
pressthe OK button on the remote control. Then follow
the instructions below from step e.
Tuning in your video recorder at other times
aSwitch on the TV set and select the programme number
for the video recorder.
bPressthe MENU button. The main menu will appear.
cSelect the line ’INSTALLATION’with the menu buttons
P=or P;and confirm with the Pbutton.
dSelect the line ’AUTOINSTALL’ withthe menu buttons
P=or P;and confirm with the Pbutton.
eAutomatic tuning will start. This can take several minutes.
INSTALLATION
AUTOINSTALL
SEARCHING FOR TV CHANNELS
03 CHANNELS FOUND
________________________
fWhen automatic tuning is complete, ’AUTOINSTALL
COMPLETE’ will appear on the TV screen.
gTo end, press the MENU button.
Automatic TV channel store
(FOLLOW TV)
With this function, the video recorder stores the channels in
the same order as on the TV set. It only works if the video
recorder(socket AV1 EXT1 ) and the TV set are connected with
a scart cable. You must switch off any equipment connected
to socket AV2 EXT2 .
DIf you are following the instructions on page 2 under
’Connecting with a scart cable and Easy Link or
NexTView’, this function will start the transfer of
information between the TV and the video recorder.
aSwitch on the TV set and select the programme number
for the video recorder.
bPressthe MENU button. The main menu will appear.
cSelect the line ’INSTALLATION’with the menu buttons
P=or P;and confirm with the Pbutton.
dSelect the line ’FOLLOW TV’ with the menu buttons
P=or P;and confirm with the Pbutton.
Check the message on the TV screen.
ePressthe OK button.
EIf the video recorder recognises that the TV set has been
connected with a scart cable, ’TV 01’ will appear on the
video recorder display.
EIf ’NOTV’ (no signal from the TV set) appears on the video
recorder display, this means that the TV channels cannot
be tuned in automatically. In this case, please see
’Sorting and clearing TV channels manually’.
fSelect channel ’1’ on the TV set.
gConfirm with the OK button on the video recorder
remote control. The video recorder will compare the
channel on the TV set and the video recorder.
If the video recorder has found the same channel as the
TV set, it will store it as ’P01’.
hWait until, for example, ’TV 02’ appears.
iSelect the next programme number on the TV set.
jConfirm with the OK button on the video recorder
remote control.
4

DIf you have selected the wrong TV channel, you can go
back a step with the menu button Q.
kRepeat steps hto juntil all TV channels have been
stored on the video recorder.
lTo end, press the MENU button.
Connecting a decoder or other equipment
You can also connect other equipment to the AV2EXT2 socket,
for example a decoder, satellite receiver or camera recorder.
And you can connect a hifi set to the sockets AUX OUT L R and
AUX IN L R .
Tuning in a decoder
With this function, your decoder willautomatically tune in to
the TV programme you want.
DIf you are following the instructions on page 2 under
’Connecting with a scart cable and Easy Link or
NexTView’, the decoder must be tuned in to the TV set.
aSwitch on the TV set and select the programme number
for the video recorder.
bOn the video recorder, select the TV channel you want to
tune in to the decoder, using the P;or P=button or
the buttons 0-9 .
cPressthe MENU button. The main menu will appear.
dSelect the line ’INSTALLATION’with the menu buttons
P=or P;and confirm with the Pbutton.
eSelect the line ’MANUAL SEARCH’ with the menu buttons
P=or P;and confirm with the Pbutton.
fSelect the line ’DECODER’ with the menu buttons P=
or P;.
gSelect ’ON’ with the menu buttons Qor P.
When you select ’OFF’, the function will be switched off.
hConfirm with the OK button.
DWhen the function is switched on, ’DEC’ will appear in the
video recorder display.
iTo end, press the MENU button.
Manual TV channel search
In some cases ’Automatic tuning’ may not be able to find all of
the TV channels (for example, coded TV channels). If this
happens, you can use this manual method to tune in the rest of
the channels.
DIf you are following the instructions on page 2 under
’Connecting with a scart cable and Easy Link or
NexTView’, your video recorder will automatically load
the TV channels from the TV set. So thisinformation may
not be relevant.
aSwitch on the TV set and select the programme number
for the video recorder.
bPressthe MENU button. The main menu will appear.
cSelect the line ’INSTALLATION’with the menu buttons
P=or P;and confirm with the Pbutton.
dSelect the line ’MANUAL SEARCH’ with the menu buttons
P=or P;and confirm with the Pbutton.
INSTALLATION
MANUAL SEARCH
CHANNEL/FREQ. CH
ENTRY/SEARCH 34
PROGRAMME NUMBER |02
TV CHANNEL NAME MTV
DECODER OFF
TV SYSTEM PAL
NICAM ON
FINE TUNING +1
________________________________
TO EXIT
PRESS MENU
eIn the line ’CHANNEL/FREQ.’, selectthe display for:
* ’FREQ.’:frequency;
* ’CH’: channel; or
* ’S-CH’: special channel.
5

fIf you know the frequency or number of the TV channel
you want to tune in, you can enter this information in line
’ENTRY/SEARCH’ with the digit buttons 0-9 .
EIf you don’t know the frequency or number, press the
Pbutton to start the channel search.
gIn the line ’PROGRAMME NUMBER’ select the
programme number you want to store it under, using the
menu buttons Qor P.
hIf you want to change the TV channel name, press the
Pbutton in line ’TV CHANNEL NAME’.
ESelect the letter or number you want to change with the
Qor Pbutton. Change it with the P=or P;but-
ton. Change the next letter or number in the same way.
EKeep pressing the menu button Puntil the cursor
disappears.
iIn the line ’NICAM’, select function ’ON’or ’OFF’ with the
Por Qbutton.
jIf you want to change an automaticTV channel setting,
select the line ’FINE TUNING’ and use the Qor P
button. Important: Fine tuning is only necessary in special
cases, for example when there are stripes on the picture
with cable TV systems.
kPressthe OK button to store the TV channel.
DIf you want to search for other TV channels, start again
from step f.
lTo end, press the MENU button.
Monitor function
You can switch backwards and forwardsbetween your
TV picture and video recorder picture with the
MONITOR button. But this only works when you use a scart
cable to connect the video recorder to your
TV set and your TV set responds to this switchover.
Sorting and clearing TV channels manually
DIf you are following the instructions on page 2 under
’Connecting with a scart cable and Easy Link or
NexTView’ your video recorder will automatically load
the TV channels from the TV set. So you cannot select
thisfunction.
aSwitch on the TV set and select the programme number
for the video recorder.
bPressthe MENU button. The main menu will appear.
cSelect the line ’INSTALLATION’with the menu buttons
P=or P;and confirm with the Pbutton.
dSelect the line ’TV CHANNEL ALLOCATION’with the
menu buttons P=or P;and confirm with the
Pbutton.
INSTALLATION
TV CHANNEL ALLOCATION
...
P01 BBC1
P02 BBC2
P03 ITV
P04 CH4
P05 CH5
P06 SKY
...
________________________________
TO SORT TO EXIT
PRESS PRESS MENU
eWith the menu buttons P=or P;, select the
TV channel you want to give a programme number to,
(starting with ’P01’) and press the Pbutton.
DIf you want to delete a TV channel, press the CLEAR(CL)
button when the cursor is next to that programme
number.
fWith the menu buttons P=or P;, shift the TV
channel to the number you want to give to that channel
and press the Qbutton. The TV channel will be added
to the list.
gRepeat steps eand funtil you have given a number
to all TV channels.
hTo store, press the OK button.
iTo end, press the MENU button.
6

Setting the time and date
If the time shown on the video recorder display is not correct
or ’--:--’ appears on the display,please follow these
instructions.
aSwitch on the TV set and select the programme number
for the video recorder.
bPressthe MENU button. The main menu will appear.
cSelect the line ’INSTALLATION’with the menu buttons
P=or P;and confirm with the Pbutton.
dSelect the line ’TIME/DATE’ with the menu buttons
P=or P;and confirm with the Pbutton.
INSTALLATION
TIME/DATE
TIME 20:00
YEAR |1998
MONTH 02
DATE 06
________________________________
TO EXIT
PRESS MENU
eAdjust ’TIME’, ’YEAR’, ’MONTH’ and ’DATE’ using the
buttons 0-9 . Switch between each one with the menu
buttons P=or P;.
fConfirm each entry with the OK button.
gTo end, press the MENU button.
DIf a TV channel which transmits TXT/PDC is stored under
programme number ’P01’, the time and date will
automatically be taken from the TXT/PDC information.
On-screen display (OSD)
With on-screen display the functionsappear on the TV screen
as a menu. The most important buttons are shown at the
bottom of the screen.
ECall up the menu: with the MENU button.
ESelect a line: with the P=or P;button.
ESelect within a line: with the menu buttons Qor P.
EEnter or change: with the Qor Por with the 0-9
buttons.
EStore: with the OK button.
EConfirm: with the Pbutton.
EExit menu: with the MENU button.
For more details of OSD, please see ’On-screen display’
in chapter 5.
Emergency interrupt
You can use the mSTANDBY button on the video recorder or
remote control to interrupt any function.
So if you are having operating problems, you can just interrupt
the function and start again. And you can practise operating
your video recorder without any worries. No matter which
buttons you press, you cannot damage it.
Important notes
EYou can switch on with the STOPhbutton, the
0-9 buttons or by putting in a cassette.
EKeep your video recorder connected to the mains at all
times so that it can make programmed recordings and the
television works normally. Your video recorder uses less
than 4 Watts in energy-saving mode.
EWhen the video recorder is not plugged into the mains, it
will usually store TV channels for a year, and date and
timer information for seven hours.
Saving energy
There are two ways to switch to standby.
Normal method : Switch to standby using the
mSTANDBY button. The clock time will still be displayed.
If you have not set the clock, ’--:--’ will appear.
To save energy : Press the mSTANDBY button twice. The clock
time will disappear from the display.
7

Playing a cassette
aPut a cassette in the cassette slot.
bPressthe PLAY Gbutton.
cTo stop, press the STOPhbutton.
dTo eject the cassette, press the STOP/EJECT?button
on the machine.
DSome hired cassettes may have a poor picture or poor
sound quality. This is not a fault in your machine. Please
read the section ’Selecting the picture setting(SMART
PICTURE)’, or ’Picture interference’in this chapter.
DSome functions switch off automatically after a while (for
example, pause, still picture, picture search). This helps
to protect the cassette and avoids wastingpower.
Playing NTSC casettes
With this machine you can play cassettes that have been
recorded on another video recorder in the NTSC standard.
NTSC is the TV system used in, for example, America and
Japan. PAL is the TV system used in, for example, Europe. But
this only works for PAL-televisionsets which are suitable for a
picture frequency of 60 Hz.
When you play an NTSC cassette, ’60HZ’ will appear on the
video recorder display.
DSome special features (for example,still picture) are not
possible while you are playing an NTSC cassette.
Tape position indicator
aPressthe COUNTER button while the cassette is playing.
bSelect one of the following options.
’TIME USED’ to show the time used on the tape.
’TIME LEFT’ to show the time left on the tape.
’COUNTER’ to show the present position on the tape.
DBy pressing the OK button, you can show the present
tape position on the TV screen.
Searching for a tape position with the
picture (picture search)
aWhile a cassette is playing, press the H(rewind) or
I(wind)button.
bTo stop at a certain picture,press the PLAYGbutton.
DDuring picture search, the picture quality may not be so
good and there will be no sound.
JOG and SHUTTLE
You will find a large knob oon the video recorder and the
remote control.
aSwitch the function on by pressing the STILL Rbutton.
You will see a still picture.
bUse the inner JOG disc on the remote control to select
the next or previous still picture.
cBy turning the inner disc continuously to the rightor to
the left you can switch to slow motion, forwards or
backwards.
dThe outer SHUTTLE ring of the knob allows you to select
different tape speeds for the forwardand reverse picture
search.
Searching for a tape position without the
picture (wind and rewind)
aStop the tape with the STOP hbutton.
bPressthe H(rewind) or I(wind) button or, on the
video recorder, turn the outer ring of the knob oto
the left or to the right.
cTo stop at a certain position,press the STOPhbutton.
2. Playback functions
8

Instant view
With this function you can switch to picture search during
wind or rewind.
aIf you hold the H(rewind) or I(wind) button
during wind or rewind, you will switch to picture search.
bIf you release the button, the video recorder will
automatically switch back to rewindor wind.
Automatic search for a tape position
(index search)
At the start of each recording, the video recorder willmark the
tape with an index code mark.
aPressthe INDEX Ebutton. Then press the Ibutton to
select the next code mark or the Hbutton for the
previous code mark.
bWhen the video recorder finds the code mark or a blank
space it will automatically switch to play.
DYou can only search for a blank space with recordings
made on a video recorder that does not have this index
code mark function.
Selecting the picture setting
(SMART PICTURE)
You can change the colour, contrast and sharpnessof the
picture while a cassette is playing.
aPressthe SMART button. This will show the current
picture setting.
bPressthe SMART button again to select the picture
setting you want.
cConfirm the new setting with the OK button.
This picture setting will not change until you eject the
cassette.
Picture interference
If the picture quality is poor when you play a cassette, please
follow these instructions.
Tracking while a cassette is playing
aPressthe MENU button.
bSelect the line ’PLAY FUNCTIONS’ withthe menu buttons
P=or P;and confirm with the Pbutton.
cSelect the line ’MANUAL TRACKING’ withthe menu
buttons P=or P;.
dHold the menu buttons Qor Puntil the picture
quality is at its best.
eConfirm with the OK button.
fTo end, press the MENU button. This setting will not
change until you eject the cassette.
Tracking with a still picture
If the still picture vibrates vertically, you can improve it as
follows.
aPressthe MENU button.
bSelect the line ’PLAY FUNCTIONS’ withthe menu buttons
P=or P;and confirm with the Pbutton.
cSelect the line ’VERTICAL STABILITY’ withthe menu
buttons P=or P;.
dHold the menu buttons Qor Puntil the picture
quality is at its best.
eConfirm with the OK button.
fTo end, press the MENU button.
Cleaning the video heads
aWhile a cassette is playing, press the MENU button.
bSelect the line ’PLAY FUNCTIONS’ withthe menu buttons
P=or P;and confirm with the Pbutton.
cSelect the line ’HEAD CLEANING’ with the menu buttons
P=or P;.
dPressthe OK button. ’HEAD CLEANING IN PROGRESS’
will appear on the screen.
eWait a few seconds until the message disappears. Then
pressthe MENU button to end.
9

Recording without automatic switch-off
aPut a cassette into the machine.
bUse the P;or P=button to select the programme
number you want to record from.
DIf you are using ’Direct record’, select the programme
number on the TV set. Then, with the video recorder
switched on, press the nRECORD/OTR button.
DIf a TV channel transmits a channel name, it will show on
the video recorder display.
DProgramme numbers ’E1’ and ’E2’ are for recording from
other sources (through scart sockets AV1EXT1 and
AV2EXT2 ). Programme number ’E3’ is for recording from
the front sockets VIDEO and L-AUDIO-R .
DProgramme numbers ’AUX’ and ’MIC’ are for audio
recordings(through sockets AUX IN L R ) and the
microphone socket ’ MIC. ’.
cPressthe nRECORD/OTR button.
dStop recording with the STOP hbutton.
Recording with automatic switch-off
(OTR one-touch recording)
aPut a cassette into the machine.
bUse the P;or P=button to select the programme
number you want to record.
cPressthe nRECORD/OTR button.
dPressthe nRECORD/OTR button again and again until the
display on the video recorder shows the end time or
length of the recording you want.
DTo cancel this programme, press the CLEAR(CL) button.
Protecting your recordings
So that you don’t accidentally delete an important recording,
remove the special tab on the narrow side of the cassettewith
a screwdriver or slide the special tab to the left.Later, if you
no longer want to protect the recording, you can seal the gap
again with sticky tape or slide the specialtab to the right.
Auto-assembling
You can use this function to join individual recordings without
any major picture disturbance between them.
aWhile the cassette is playing, search for the correct
position on the tape.
bStop the cassette by pressing the STOPhbutton.
’PAUSE’ will appear on the TV screen.
cNow start recording as usual by pressing the
nRECORD/OTR button.
Choosing the recording speed (SP or LP)
You can reduce the recording speed by half. This makes it
possible to record, for example, eight-hours instead of
four-hours on an ’E240’(four-hour) cassette.
aSwitch on the TV set and select the programme number
for the video recorder.
bPressthe MENU button. The main menu will appear.
cSelect the line ’RECORD FUNCTIONS’ with the menu
buttons P=or P;, and confirm with the
Pbutton.
dSelect the line ’RECORD SETTINGS’ with the menu
buttons P=or P;, and confirm with the
Pbutton.
eSelect the line ’RECORD SPEED’ with the menu buttons
P=or P;.
fSelect the recording speed you want with the menu
buttons Qor P.
D’LP’(long play) gives half the normal recording speed
(double the recording time).
’SP’(standard play) gives the normal recording speed.
DThe picture quality may suffer when you record at half
speed (LP).
DWhen you play back your recording, the machine will
automatically select the correctspeed.
gConfirm with the OK button.
3. Manual recording
10

hTo end, press the MENU button.
Automatic recording from a satellite
receiver (SAT RECORDING)
You can only use this function when you have a satellite
receiver which can control other equipment by a
’programming’function.
aSwitch on the TV set and select the programme number
for the video recorder.
bPressthe MENU button. The main menu will appear.
cSelect the line ’RECORD FUNCTIONS’ with the menu
buttons P=or P;, and confirm with the
Pbutton.
dSelect the line ’RECORD SETTINGS’ with the menu
buttons P=or P;, and confirm with the
Pbutton.
eSelect the line ’SAT RECORD’ with the menu buttons
P=or P;.
fSelect the scart socket you want to use with the menu
buttons Qor P.
If you want to switch off the function, select ’OFF’ with
the menu buttons Por Q.
gConfirm with the OK button.
hUse a scart cable to connect the scart socket you have
selected on the video recorder to the scart socketon the
satellitereceiver.
iPut a cassette into the machine.
jTo end, press the mSTANDBY button. The video recorder
is now ready to record.
DWhen this function is switched on, ’x’ appears on the
video recorder display.
Direct record
When this function is switched on and the video recorder is
switched to standby, the video recorderwill automatically
record the programme number selected on the television.
DIf you are following the instructions on page 2 under
’Connecting with a scart cable and Easy Link or
NexTView’, the video recorder will also take the
programme number from the TV set automatically when
the video recorder is switched on.
aSwitch on the TV set and select the programme number
for the video recorder.
bPressthe MENU button. The main menu will appear.
cSelect the line ’RECORD FUNCTIONS’ with the menu
buttons P=or P;, and confirm with the
Pbutton.
dSelect the line ’RECORD SETTINGS’ with the menu
buttons P=or P;, and confirm with the
Pbutton.
eSelect the line ’DIRECT RECORD’ with the menu buttons
P=or P;.
fSelect the function ’ON’ with the menu buttons Qor
P.
gConfirm with the OK button.
hTo end, press the MENU button.
iSwitch off the video recorder with the
mSTANDBY button.
jOn the TV set, select the programme number you want to
record from.
kPressthe nRECORD/OTR button with the video recorder
switchedoff.
DDon’t select another programme number on your TV set
until the ’search symbol’ on your video recorder display
disappears. This can takeup to one minute.
DIf ’NOTV’ appears on the video recorder display, this
means the video recorder cannot find that channel. The
video recorder will then switch off automatically.
11

To make a programmed recording, your video recorder needs
to know:
•the date you want to make the recording;
•the programme numberof the TV channel you want to record;
•the start and stop time of the recording;
•whether you want to use VPS or PDC (see below); and
•the recording speed (SP or LP).
The video recorder storesall this informationin a TIMER block.
You can programme up to sixTIMER blocks a month inadvance.
VPS (video programming system) and PDC
(programme delivery control)
With VPS and PDC, the TV station controls the starttime and
length of the recording. This means that the video recorder
switches itselfon and off at the right time,even if a TV
programme you want to record begins earlier or finishes later
than expected.
Usually the start time isthe same as the VPS/PDC time. But if
your TV guide gives a VPS or PDC time which is different to the
programme’s start time (for example, 20.15and VPS 20.14), you
must enter ’20.14’ as the start time.
If you want to programme a time that is different from the VPS
and PDC time, you must switch off VPS and PDC.
DWith most TV stations the VPS and PDC time are always
the same as the start time.
Programming with VIDEO Plus+
All the information your video recorder needs is contained in
the PlusCode programming number.
aSwitch on the TV set and select the programme number
for the video recorder.
bPressthe TIMER sbutton on the remote control.
cSelect the line ’VIDEOPLUS PROGRAMMING’ with the
menu buttons P=or P;and confirm with the
OK button.
dUse the number buttons on the remote control to enter
the PlusCode number printed in your TV guide.
If you make a mistake, you can clear your instructions
with the CLEAR (CL) button.
TIMER
VIDEOPLUS PROGRAMMING
12345678
________________________________
MO-FR/WEEKLY TO STORE
PRESS SELECT PRESS OK
eUse the SELECT button to select daily or weekly
programming.
’MO-FR’ record every day from Monday to Friday.
’WEEKLY’ record every week on the same day of the
week.
fConfirm with the OK button. Your programming details
will then appear on the TV screen.
DIf VIDEO Plus+ does not recognize the TV channel,
’PLEASE ENTER PROGRAMME NUMBER’ willappear on
the TV screen. You can select the programme number
with the P;or P=button.
Then confirm with the OK button.
DIf ’PLUSCODE NUMBER WRONG’ appears on the TV
screen, this means you have entered an incorrect
PlusCode number or the incorrect date. Correct your
instructions or end with the TIMER sbutton.
DIf ’WEEKEND PROGRAMMING - NOT POSSIBLE’appears
on the TV screen, this means you have entered an
incorrect date. You can only use dailyprogramming for
recordings from Monday to Friday.
DUnder ’START’, use the SELECT button to switch VPS and
PDC on or off.
DUnder ’END’, use the SELECT button to select the
recording speed SP or LP.
gConfirm with the OK button.
DThe programming informationhas been stored in a TIMER
block.
hTo end, press the TIMER sbutton.
iMake sure that the cassette you have put in can be
recorded on.
jSwitch off the video recorder with the
mSTANDBY button.
4. Programmed recording
12

DIf any of the TIMER blocks are in use, ’k’ will light up on
the video recorder display.
DIf you reach the end of the cassette during a recording,
the video recorder will automaticallyeject the cassette.
DIf you forget to load a cassette, ’NO CASSETTE’ will
appear on the TV screen and ’k’ will flash on the video
recorderdisplay.
DIf you have put in a cassette which cannot be used for
recording, the video recorder will eject it.
DProgramme numbers ’E1’ and ’E2’ are not for recordings
from your TV.
DProgramme numbers ’AUX’ and ’MIC’ are for audio
recordings, not recordings from your TV.
Manual programming without VIDEO Plus+
aSwitch on the TV set and select the programme number
for the video recorder.
bPressthe TIMER sbutton on the remote control.
cSelect the line ’TIMER PROGRAMMING’with the menu
buttons P=or P;and confirm with the Pbutton.
TIMER
TIMER PROGRAMMING
VPS
DATE PROG. START PDC END LP
01 01 20:00 21:30
________________________________
TO STORE
PRESS OK
dSelect the type of information you want to programme
with the menu buttons Qor P.
eEnter your information with the menu buttons P=or
P;or with buttons 0-9 .
DUnder ’DATE’, use the SELECT button to select daily or
weeklyprogramming.
’MO-FR’ record from Monday to Friday.
’MO’ record every week on the same day.
DUnder ’START’, use the SELECT button to switch VPS and
PDC on or off.
DUnder ’END’, use the SELECT button to select the
recording speed SP or LP.
fConfirm with the OK button.
DThe programming informationhas been stored in a TIMER
block.
gTo end, press the TIMER sbutton.
hMake sure that the cassette you have put in can be
recorded on. Switch off the video recorder with the
mSTANDBY button.
DIf any of the TIMER blocks are in use, ’k’ will light up on
the video recorder display.
DIf you reach the end of the cassette during a recording,
the video recorder will automaticallyeject the cassette.
The TV set will then switchoff after a few minutes.
DIf you forget to load a cassette, ’NO CASSETTE’ will
appear on the TV screen and ’k’ will flash on the video
recorderdisplay.
DIf you have put in a cassette which cannot be used for
recording, the video recorder will eject it.
DProgramme numbers ’E1’ and ’E2’ are not for recordings
from your TV.
DProgramme numbers ’AUX’ and ’MIC’ are for audio
recordings, not recordings from your TV.
How to check or change a TIMER
aSwitch on the TV set and select the programme number
for the video recorder.
bPressthe TIMER sbutton on the remote control.
cSelect the line ’TIMER LIST’ with the menu buttons
P=or P;and confirm with the Pbutton.
dSelect the TIMER you want to check or change with the
menu buttons P=or P;.
ePress the menu button P.
fSelect what you want to check or change with the menu
buttons Qor P.
gChange any information with the menu buttons P=or
P;or with the buttons 0-9 .
hConfirm with the OK button.
iTo end, press the TIMER sbutton.
jMake sure that the cassette you have put in can be
recorded on. Switch off the video recorder with the
mSTANDBY button.
13

How to clear a TIMER
aSwitch on the TV set and select the programme number
for the video recorder.
bPressthe TIMER sbutton on the remote control.
cSelect the line ’TIMER LIST’ with the menu buttons
P=or P;and confirm with the Pbutton.
dSelect the TIMER you want to clear with the menu
buttons P=or P;.
ePressthe CLEAR (CL) button.
fConfirm with the OK button.
gSwitch off with the TIMER sbutton.
NexTView Link
This video recorder has NexTView Link. If your television also
has NexTView, you can select programmes on the TV for
recording. These programmes will automatically be
transmitted to a TIMER block on your video recorder. If you
cancel the TV programme you have selected on the TV, the
TIMER block on the video recorder will also be cancelled.
For more information, please read the instructionmanual for
your TV set.
14

Changing the TV system
If you play recordings made on another video recorder, it may
lead to problems with the colour of your picture.
aSwitch on the TV set and select the programme number
for the video recorder.
bPressthe MENU button. The main menu will appear.
cSelect the line ’SPECIAL SETTINGS’ with the menu
buttons P=or P;and confirm with the Pbutton.
dIn the line ’TV SYSTEM’, select the TV system you want
with the menu buttons Qor P.
eConfirm with the OK button.
fTo end, press the MENU button.
DIf you still have problems withthe colour of the picture,
you can switch to B/W (blackand white) on the ’TV
SYSTEM’ line.
Child lock
aSwitch on the TV set and select the programme number
for the video recorder.
bPressthe MENU button. The main menu will appear.
cSelect the line ’SPECIAL SETTINGS’ with the menu
buttons P=or P;and confirm with the Pbutton.
dIn the line ’CHILD LOCK’, select ’ON’with the menu
buttons Qor P.
eConfirm with the OK button.
fTo end, press the MENU button.
’{’ will appear in the video recorder display.
Keep the remote control in a safe place.
gIf you want to switch off the child lock, select ’OFF’ in the
line ’CHILD LOCK’. ’{’ will disappear from the video
recorderdisplay.
DIf you press a button when the child lock is on, ’{’ will
flash on the video recorder display for a few seconds.
DYou can make programmed recordings while the child
lock is on.
You can also switch on the child lockwith the remote control.
Pressthe mSTANDBY button on the remote control for a few
seconds until ’{’ appears on the video recorder display.
Switch the child lock off in the same way.
Setting the on-screen display (OSD)
aSwitch on the TV set and select the programme number
for the video recorder.
bPressthe MENU button. The main menu will appear.
cSelect the line ’SPECIAL SETTINGS’ with the menu
buttons P=or P;and confirm with the Pbutton.
MAIN MENU
SPECIAL SETTINGS
TV SYSTEM |PAL
CHILD LOCK OFF
OSD MODE AUTO.
16:9 WIDE SCREEN OFF
VCR 1 OR 2 VCR 1
REPEAT PLAY OFF
AUTO STANDBY ON
DEMO OFF
________________________________
TO EXIT
PRESS MENU
dSelect the line ’OSD MODE’ with the menu buttons
P=or P;.
eSelect one of the options shown with the menu buttons
Por Q.
’AUTO.’ Shows the OSD for a few seconds only.
’OFF’ Switches off the OSD.
’ON’ Switches on the OSD.
fConfirm with the OK button.
gTo end, press the MENU button.
DYou can use the OK button to show the current
operating mode on your TV screen.
5. Other functions
15

Switching to 16:9 wide screen picture
When you play a cassette that has been recorded in 16:9 wide
screen format, you can switchthis function ’ON’. The TV set
will now automatically switch to wide screen. This only works
if you have connected the TV set and the video recorder with a
scart cable and if your TV set is suitable for wide screen.
aSwitch on the TV set and select the programme number
for the video recorder.
bPressthe MENU button. The main menu will appear.
cSelect the line ’SPECIAL SETTINGS’ with the menu
buttons P=or P;and confirm with the Pbutton.
dIf you have a wide-screen TV set, select ’ON’ in line
’16:9 WIDE SCREEN’. If not, select ’OFF’ with the menu
buttons Por Q.
eConfirm with the OK button.
fTo end, press the MENU button.
Switching the remote control command
If you have two video recorders with the same remote control,
you can change the commands of the remote control for one
of the video recorders to avoid sending the message to the
wrong recorder.
aSwitch on the TV set and select the programme number
for the video recorder.
bPressthe MENU button. The main menu will appear.
cSelect the line ’SPECIAL SETTINGS’ with the menu
buttons P=or P;and confirm with the Pbutton.
dSelect the line ’VCR 1 OR 2’ with the menu buttons
P=or P;.
eSelect ’VCR 1’ or ’VCR 2’ with the menu buttons Qor
P.
fConfirm with the OK button.
gOn the remote control, press the SELECT button and but-
ton 2at the same time to switch the remote control to
’VCR 2’.
DIf you want to switch back to ’VCR 1’, press the SELECT
button and button 1at the same time.
hConfirm with the OK button.
DIf the menu does not disappear, this means the video
recorder didn’t recognize the remote control command.
Repeat step g.
DIf you change the batteries in the remote control, it will
switch back to ’VCR 1’.
DIf you have entered the wrong remote control command
and you press a button fora few seconds, a message will
appear on the TV screen or ’VCR 1’ will appear on the
video recorder display.
Continuous play
aSwitch on the TV set and select the programme number
for the video recorder.
bPressthe MENU button. The main menu will appear.
cSelect the line ’SPECIAL SETTINGS’ with the menu
buttons P=or P;. Confirm with the Pbutton.
dSelect the line ’REPEAT PLAY’ with the menu buttons
P=or P;.
eSelect ’ON’ with the menu buttons Qor P.
fConfirm with the OK button.
gPressthe MENU button.
hPut in a cassette and press PLAY G.
When the video recorder reaches the end of the tape or
the end of the recording, it will rewind and start again.
16

Automatic switch-off
If you do not use the video recorder for a few minutes it will
switch to standby automatically.You can cancel this function
to use the video recorder as a television receiver.
aSwitch on the TV set and select the programme number
for the video recorder.
bPressthe MENU button. The main menu will appear.
cSelect the line ’SPECIAL SETTINGS’ with the menu
buttons P=or P;and confirm with the Pbutton.
dSelect the line ’AUTO STANDBY’ with the menu buttons
P=or P;.
eSelect ’OFF’ with the menu buttons Qor P.
fConfirm with the OK button.
gTo end, press the MENU button.
DA TIMER recording will only function when the video
recorder is switched to standby.
The ’DEMO’ function
When the DEMO function is switched on and the video
recorder is switched to standby, several menus will be shown
on the TV screen. This does not prevent you from operating
the video recorder as usual.
aSwitch on the TV set and select the programme number
for the video recorder.
bPressthe MENU button. The main menu will appear.
cSelect the line ’SPECIAL SETTINGS’ with the menu
buttons P=or P;and confirm with the Pbutton.
dIn the line ’DEMO’, select ’ON’ with the menu buttons
Por Q.
eConfirm with the OK button.
fTo end, press the MENU button.
DThe DEMO function is not possible during a TIMER
recording and during an automatic recording from a
satellitereceiver.
17

Reducing picture disturbance
(’optimizing the modulator’)
You may experience picture disturbance if you have not used
a scart cable to connect your video recorder and TV. This is
because another TV station in your reception area may
already be using UHF-channel CH35 or 583MHz.
aSwitch on the TV set and select the programme number
for the video recorder.
bMake sure that there is no cassette in the video recorder.
On the video recorder, press the STOP/EJECT?and
the PLAYGbuttons at the same time for a few seconds
until a channel frequency appears on the display. The
video recorder will then transmit a test picture on this
channel.
INSTALLATION
OPTIMIZE MODULATOR
OPTIMIZE |CH35
MODULATOR ON
CHANNEL/FREQ. CH
________________________________
TO EXIT
PRESS MENU
cIn the line ’CHANNEL/FREQ.’, select’CH’ or ’FREQ.’ using
the menu buttons Por Q.
dSelect the line ’OPTIMIZE’ with the menu buttons P;or
P=. Press the menu button P.
eWhen the video recorder finds a ’free’ TV channel, it will
show the channel or frequency on the small
video recorder display.
DYou can also enter the channel or frequency using
buttons 0-9 .
fTune in the TV set to this channel or frequency.
gConfirm the channel or frequency with the OK button.
hTo end, press the MENU button.
Switching off the modulator
If you cannot clear picture or sound interference, you can
switch off the built-in modulator. You should only do this if you
have connected the video recorder to the TV set with a scart
cable.
DIf you have Easy Link or NexTView, the modulator will be
switched off automatically.
aSwitch on the TV set and select the programme number
for the video recorder.
bMake sure that there is no cassette in the video recorder.
Pressthe STOP/EJECT?and the PLAY Gbuttons at
the same time for a few seconds until a channel
frequency appears on the video recorder display.
cSelect the line ’MODULATOR’ on the TV screen or ’M ON’
on the video recorder display with the menu buttons
P;or P=.
dWith the menu buttons Qor P, select ’OFF’ on the
TV screen or ’MOFF’ (modulator off)on the display.
eConfirm with the OK button.
fTo end, press the MENU button.
Using your video recorder remote control
with your TV set
Your video recorder remote control can transmit several
commands to TV sets of different makes.
By using the TV buttons on the panel in the middle of the
control, you can:
Sp increase or reduce the TV volume;
TV yswitch off the sound;
TV mswitch off the TV set; and
Ppchange the channel
aPoint the remote control at the TV set.
18

bPressthe TV mbutton and the relevant number button
at the same time.
Number button TV make
0 Philips, Radiola (F), Schneider (F)
1 Grundig
2 Panasonic
3 Panasonic
4 Sony
DIf the number shown above does not work with your TV
set, or if the make of your TV is not in the list, you can try
out the numbers one after the other.
Audio record only
You can use your video recorder asan audio tape recorder.
You can record the sound from a hifiunit or a second video
recorder.
aUse an audio cable to connect your hifi to the
AUX IN L R socket at the back of the video recorder.
bSelect the programme number from which you want to
make the ’audio only’ recording, using the P;or
P=button (for example, ’AUX’ for the
AUX IN L R socket).
cPressthe MENU button. The main menu will appear.
dSelect the line ’RECORD FUNCTIONS’ with the menu
buttons P=or P;and confirm with the Pbutton.
eSelect the line ’AUDIO ONLY’ with the menu buttons
P=or P;and confirm with the Pbutton.
fTo start sound recording, press the nRECORD/OTR button.
gTo stop recording, press the STOP hbutton.
hTo end, press the MENU button.
Manual audio control
Withthe MANUAL button you can switch to manual audio
control.
aPressthe MANUAL button on the video recorder. The
current selection will appear in the video recorder
display.
bKeep pressing the MANUAL button until ’MAN’ (manual
audio control) appears on the display.
cWiththe PROGRAMME;and PROGRAMME=buttonson
the video recorder, adjust the recording level so that the
’0 dB’ mark lights up during the loudest partsof the
recording.
DAt step byou can switch back to ’AUTO.’ (automatic
audio control) with the Pbutton.
Audio dubbing
This function allows you to replace (dub) the soundtrackof an
existing recording withanother soundtrack. To do this,
connect your audio equipment (for examle, a CD player) to the
L-AUDIO-R socket. You can also connect a microphoneto the
socket MIC. .
aSwitch on the TV set and select the programme number
for the video recorder.
bPressthe MENU button. The main menu will appear.
cSelect the line ’RECORD FUNCTIONS’ with the menu
buttons P=or P;and confirm with the Pbutton.
dSelect the line ’AUDIO DUBBING’ with the menu buttons
P=or P;and confirm with the Pbutton.
eSelect the programme number for the audio equipment
(for example, ’E3’).Then switch on the audio equipment.
fFind the position on the tape where you want the audio
dubbing to end.
gPressthe STILL/JOG ON Rbutton. ’STILL’ will appear on
the TV screen.
hPressthe CLEAR (CL) button. ’0:00:00’ will appear on the
TV screen.
iFind the position on the tape where you want the audio
dubbing to start.
jPressthe STILL/JOG ON Rbutton. ’STILL’ will appear on
the TV screen.
19

kPressthe STOP hbutton.
lPressthe nRECORD/OTR button. The video recorder will
start to record the sound from the audio equipment. The
normal soundtrack will be re-recorded,but the stereo
sound will remain.
The audio recording will stop automatically when the
counter reaches ’0:00:00’.
mTo end audio dubbing,press the MENU button.
DTo play back the audio dubbing, read ’Selecting the
soundtrack’ in this chapter.
Headphone volume
aPress PLAYG, then press the MENU button. The main
menu will appear.
bSelect the line ’PLAY FUNCTIONS’ withthe menu buttons
P=or P;and confirm with the Pbutton.
cSelect the line ’HEADPHONE VOLUME’ with the menu
buttons P=or P;and confirm with the Pbutton.
dAdjust the volume with the menu buttons Qor P.
eConfirm with the OK buton.
fTo end, press the MENU button.
Selecting the soundtrack
You can select the soundtrack you want to record. This is
especially useful if the programme is multilingual.
aPressthe SELECT button. The current setting will appear
on the TV screen.
bBy pressing the SELECT button several times you can
select from the four possibilities displayed (’STEREO’,
’RIGHT’,’LEFT’, ’MONO’).
DWhile a tape is playing,you can select a fifth possibility:
the ’MIXED’ mode. In this mode you can play the mono
sound of the normal audio track together with the sound
of the stereo audio track.
DIf there is no stereo sound recorded on the cassette, the
video recorder automatically switches to mono sound.
’Synchro edit’
You can copy between this video recorderand a suitable
camera recorder. Start both machines at the same timeand
use the adjustable start delay (preroll time).
Adjusting the video recorder to the camera
recorder.
aConnect the two machines with a synchro-edit cable
(socket SYNCHROEDIT on the front left of the video
recorder).
Connect the video or audio source to the input sockets
L-AUDIO-R and VIDEO of the video recorder.
DPlease also read the instruction manual for the camera
recorder.
bSwitch on the TV set and select the programme number
for the video recorder.
cPressthe MENU button. The main menu will appear.
dSelect the line ’RECORD FUNCTIONS’ with the menu
buttons P=or P;and confirm with the Pbutton.
eSelect the line ’CAMERA LINK’ with the menu buttons
P=or P;.
fSwitch the camera recorder to ’still picture’.
gConfirm with the Pbutton. The video recorder now
checks the camera recorder type.
hWhen the check is complete, one of the following
messages will appear on the TV screen:
’VCR CONTROL DETECTED’ if the video recorder controls
the camera recorder; or ’CAMERA CONTROL DETECTED’
if the camera recorder controls the video recorder.
20
Table of contents
Other Philips VCR System manuals

Philips
Philips VR 256 User manual

Philips
Philips VR220/75 User manual

Philips
Philips VR788/50 User manual

Philips
Philips VR570 User manual

Philips
Philips VR437/05 User manual

Philips
Philips VR488/50 User manual

Philips
Philips VR969/05 User manual

Philips
Philips VR 948/13M User manual

Philips
Philips VR870CC/L/P/07 User manual

Philips
Philips VR806 User manual

Philips
Philips VR150/07 User manual

Philips
Philips VR 337 User manual

Philips
Philips VRA611AT User manual

Philips
Philips VR813/05 User manual

Philips
Philips VR624CAT User manual

Philips
Philips VS99005G User manual

Philips
Philips VR602B User manual

Philips
Philips VR605/58 User manual

Philips
Philips VR255/50 User manual

Philips
Philips VRA431AT User manual