Contents
1
Important Safety Instructions............................................................................................................3
Parts Checklist .................................................................................................................................5
Handset Controls .............................................................................................................................6
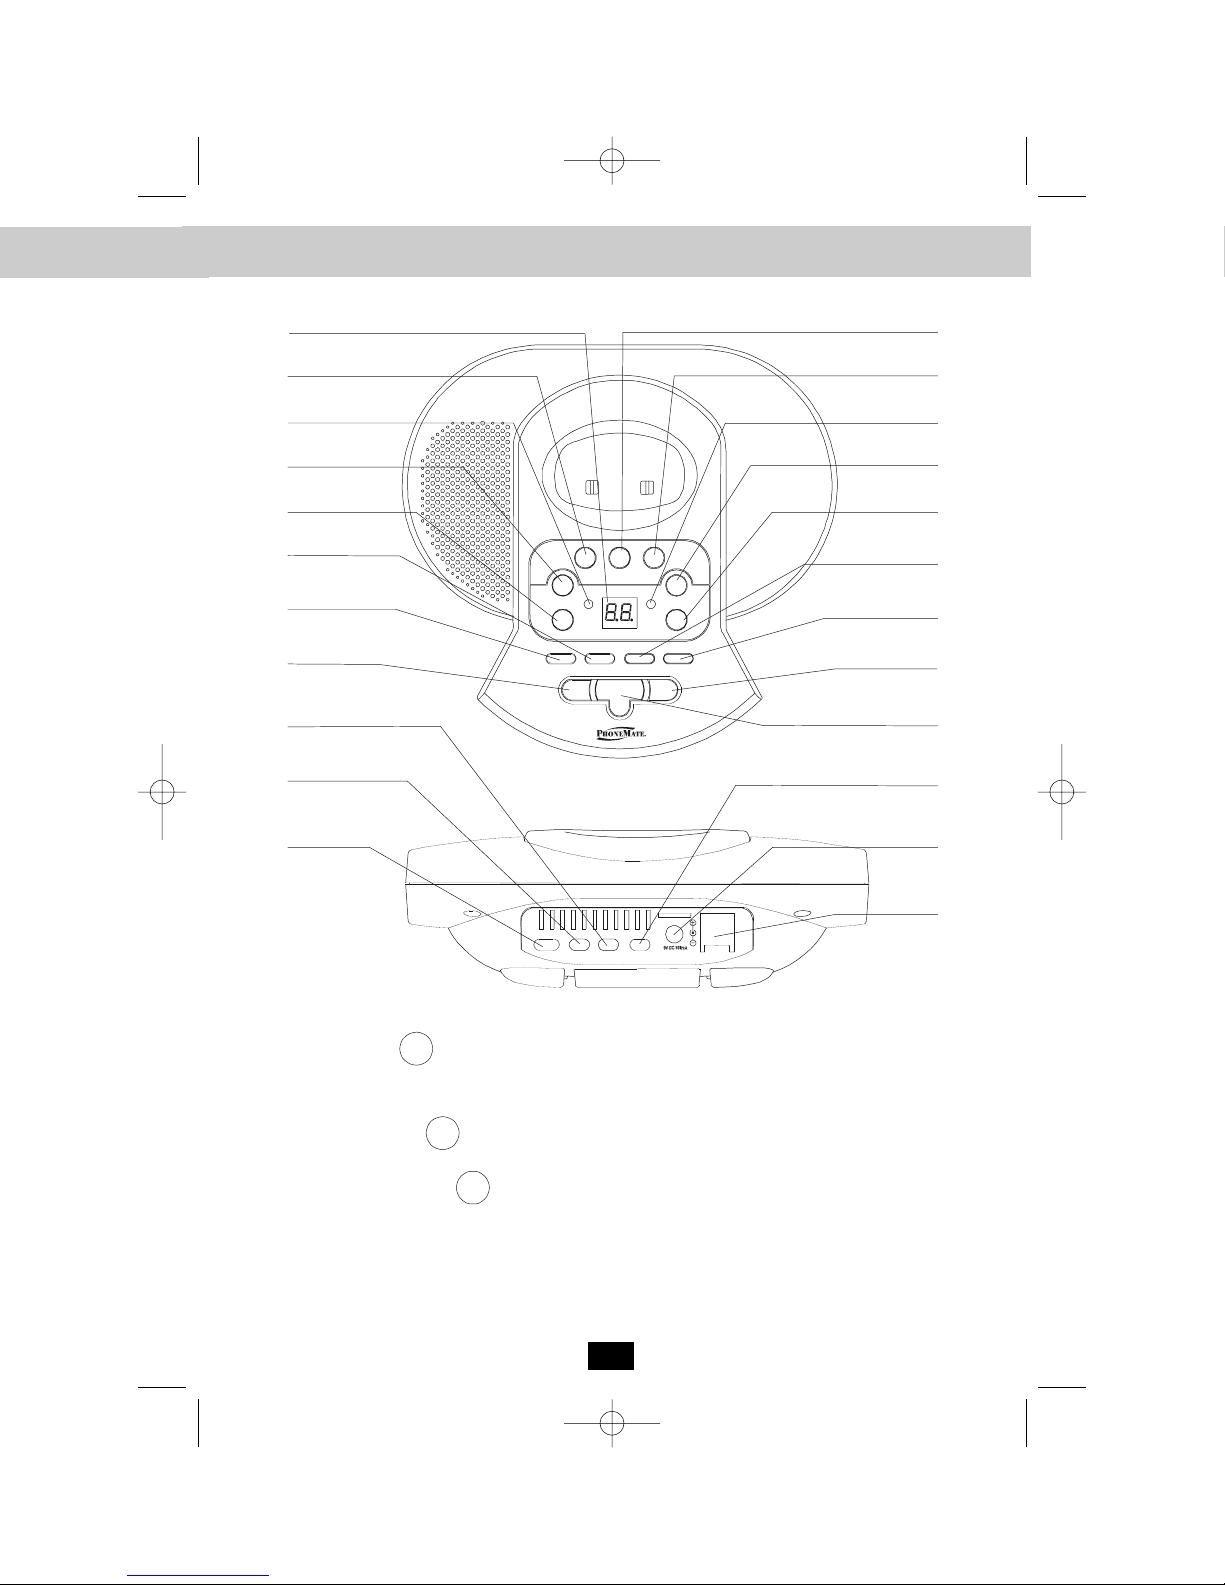
Base Unit .........................................................................................................................................8
Telephone Setup ............................................................................................................................10
Connecting the Phone ............................................................................................................10
Tone/Pulse Select Switch........................................................................................................10
Desk Mounting ........................................................................................................................11
Wall Mounting Instructions ......................................................................................................11
Battery Installation ..................................................................................................................12
Belt Clip Installation ................................................................................................................12
Using the Headset Feature .....................................................................................................12
Basic Operation ........................................................................................................................13-14
Preparing for use ....................................................................................................................13
Making Calls ...........................................................................................................................13
Handset Volume Control .........................................................................................................13
Redial Feature ........................................................................................................................14
Receiving Calls .......................................................................................................................14
Extension In Use Indicator ......................................................................................................14
Handset Setting .........................................................................................................................15-20
Keypad Functions ...................................................................................................................15
Setting the Ringer Level .........................................................................................................16
Setting the Ring Melody .........................................................................................................16
Turning the first Ring On or Off ..............................................................................................16
Setting the Time and Date ......................................................................................................17
Adjusting the Contrast ............................................................................................................17
Setting the PBX Number ........................................................................................................18
Changing the Language .........................................................................................................18
Changing the User Name .......................................................................................................18
Deleting Message Waiting Indication .....................................................................................19
Setting the Area Code ............................................................................................................19
Registering the Handset(s) .....................................................................................................20
Setting the Alarm Clock ..........................................................................................................20
Speed Dialing ........................................................................................................................... 21-24
Storing Phone numbers ..........................................................................................................21
Telephone Keypad Characters ...............................................................................................22
Viewing the Phone book ........................................................................................................22
Making Calls from the Phone book ........................................................................................23
Editing a stored Number in the Phone book ..........................................................................23
Deleting a stored Record in the Phone book .........................................................................24
Preferred Calls ........................................................................................................................24
Blocked Calls ..........................................................................................................................24