Phonic Ear Detect Door User manual
wireless doorbell
other resources online at www.phonicear.dk
© 2004 Phonic Ear A/S 921-03-010-00/Rev. A 0105
Your local representative:
international: +45 3917 7101
u.s.: 800.227.0735, then press 7 • canada: 800.263.8700
website: www.phonicear.dk
GB user guide


DETECT DOOR function . . . . . . . . . . . . . . . . . . . . . . . . . . 1
DETECT DOOR features. . . . . . . . . . . . . . . . . . . . . . . . . . . 2
DETECT DOOR instructions. . . . . . . . . . . . . . . . . . . . . . . . 7
Troubleshooting . . . . . . . . . . . . . . . . . . . . . . . . . . . . . . 18
Test and approval . . . . . . . . . . . . . . . . . . . . . . . . . . . . . 19
Safety precautions . . . . . . . . . . . . . . . . . . . . . . . . . . . . 20
Warranty . . . . . . . . . . . . . . . . . . . . . . . . . . . . . . . . . . . 21
table of contents

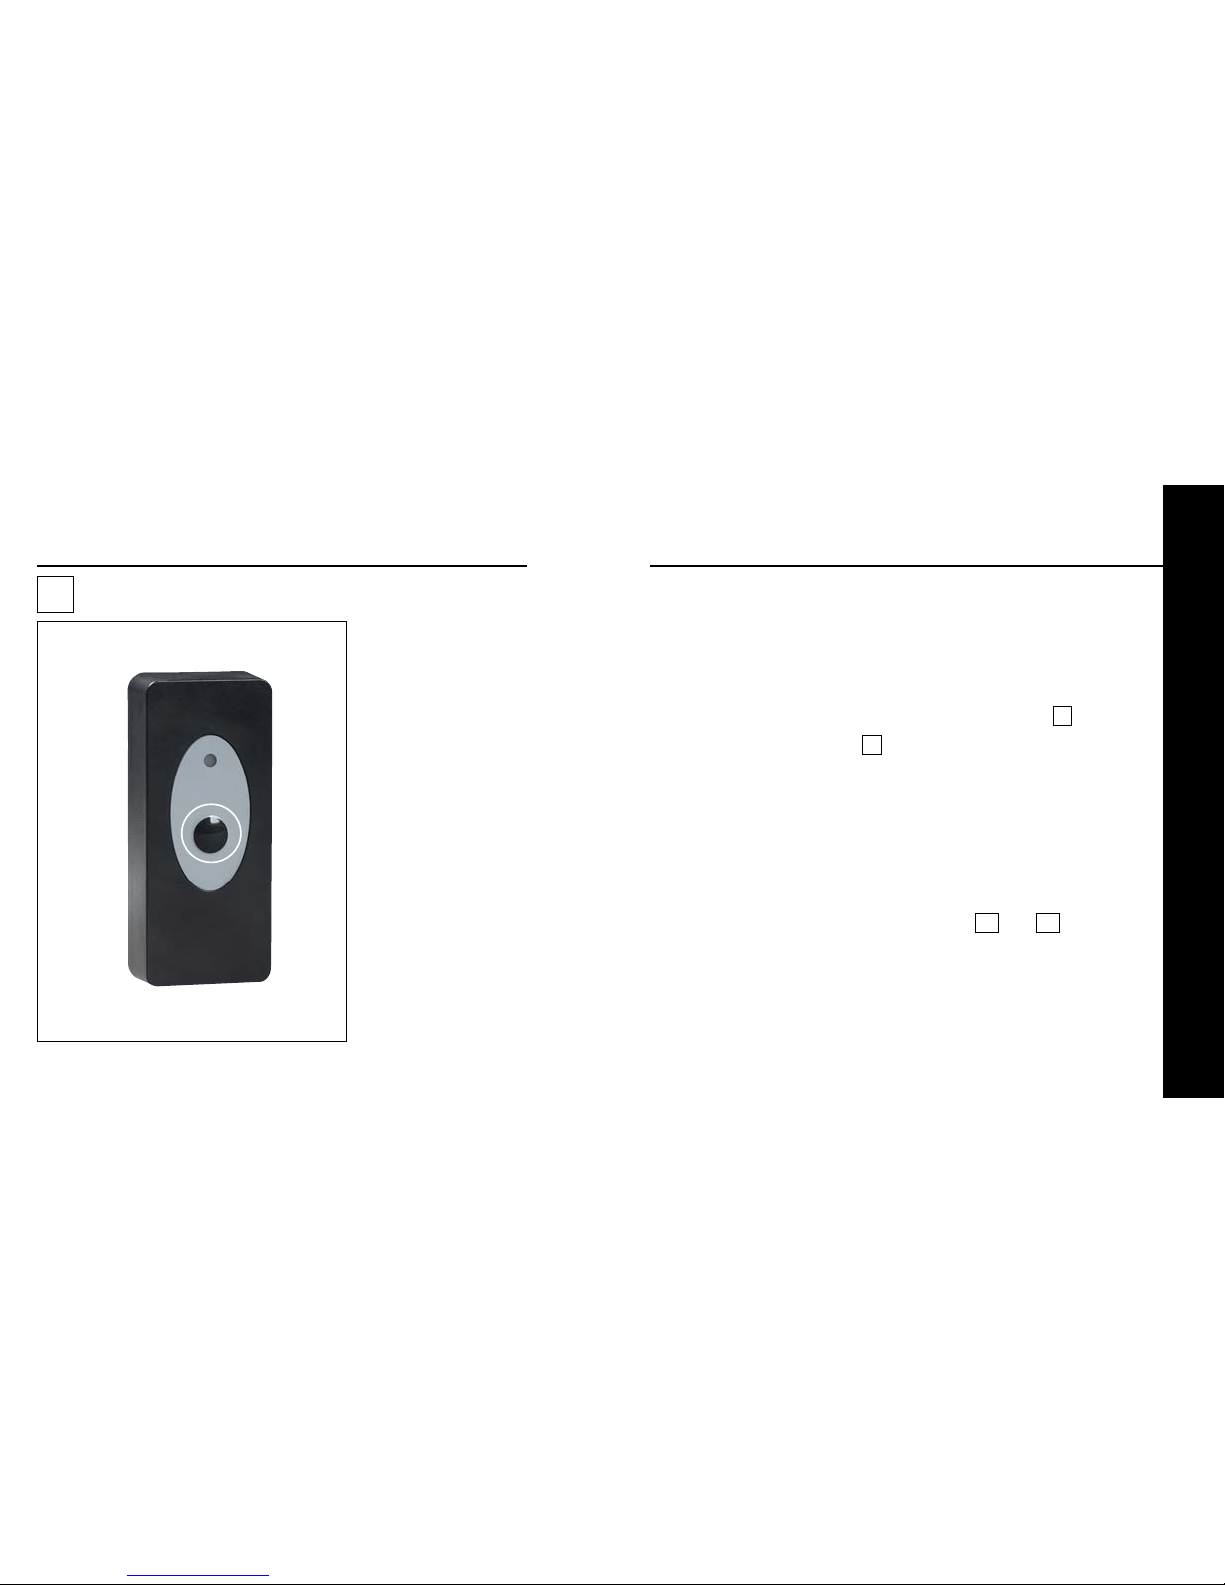
2
1push button
To activate the unit
5input connector
To interface to existing
doorbell installation
2status light
To indicate that unit is
transmitting
DETECT DOOR features
English
3alarm selector
To select alarm pattern
1
DETECT DOOR function
DETECT DOOR is one of the PUZZLE system’s alerting transmitters.
It functions as a wireless doorbell that connects to the existing
doorbell installation and replaces the standard push button
outside the door.
When a visitor pushes the DETECT DOOR button, a wireless
alarm signal is sent to the PUZZLE system's receiver. DETECT
DOOR works with the following receivers in the PUZZLE system:
CALL, FLASH, WAKE, POCKETVIB, LOOP, BEAM, and LINK.
6fail indicator
Indicates if the wire to
the existing doorbell is
not correctly installed
7battery
compartment
8 battery
Lithium type ½ AA,
3.6V
4 channel selector
To select personal code 9 mounting holes

English
DETECT DOOR features DETECT DOOR features
34
1
front
11 disassembly nub
12 gasket
To keep it water
resistant
2
13
10 wire hole
For wire to existing
doorbell installation
13 screwdriver

English
DETECT DOOR features DETECT DOOR features
9
6
10
7
5
11
9
8
front from the inside back from the inside
56
34
12

English
7
DETECT DOOR instructions
preparation
Screw the back of
DETECT DOOR into
desired position using
the two mounting
holes.
1b
DETECT DOOR instructions
preparation
Disassemble your DETECT
DOOR by lifting the bot-
tom end of the front part
while pushing the
release nub with the
screwdriver.
If DETECT DOOR connects
to an existing doorbell
installation remove exist-
ing doorbell plate. Then
push out the material in
the wire hole of DETECT
DOOR using the screw-
driver. Run the wires
through the hole. Other-
wise leave the material in
the wire hole in place.
1a
8

10
English
DETECT DOOR instructions
install battery
Install the battery
into the battery
compartment,
being sure to orient
the battery accord-
ing to the symbols.
2
9
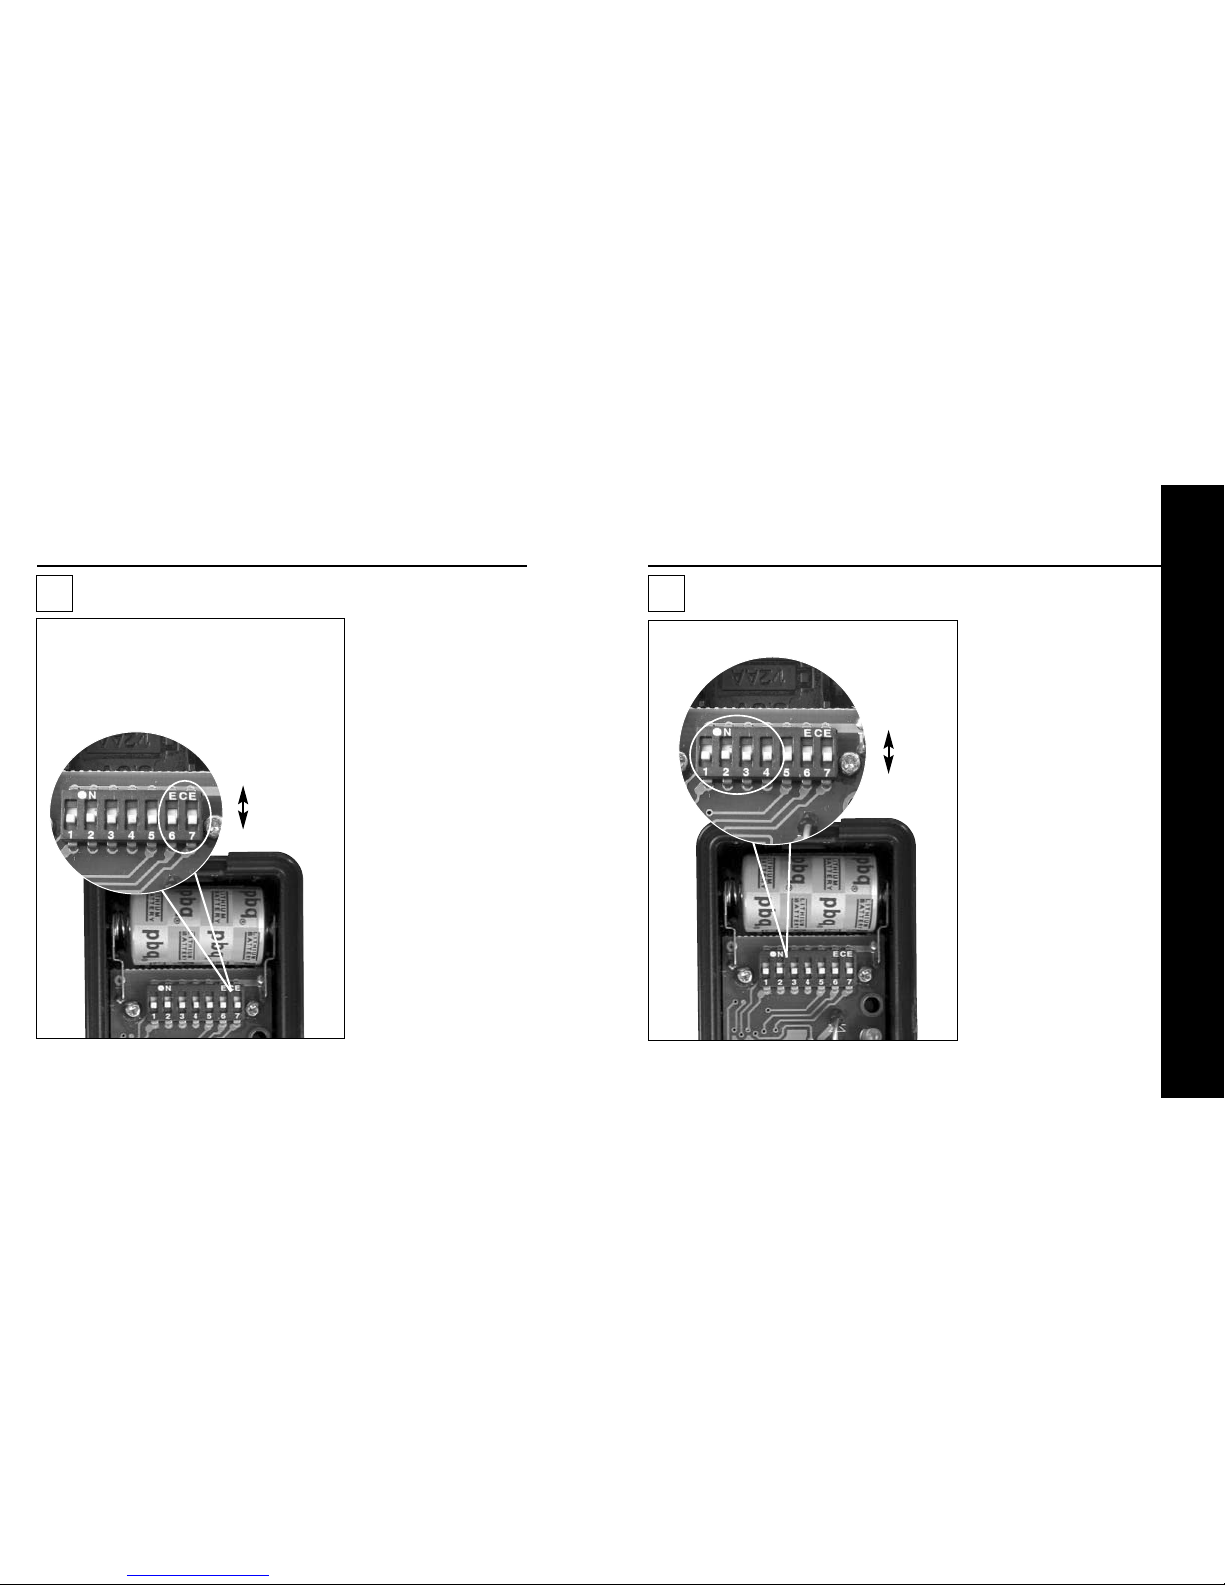
DETECT DOOR instructions
select alarm pattern
3a
Alarm patterns that
DETECT DOOR sends
to the PUZZLE sys-
tem's receivers are
selected with pin 6
and 7 (see table).
Setting a distinctive
pattern for your
DETECT DOOR will
help you distinguish
the arrival of a visi-
tor from other alerts
you may have set up
PUZZLE transmitters
to detect.
on
off
Pattern Pin 6 Pin 7
2
3
6
7
on
on
off
off
on
off
on
off
on
off
English
DETECT DOOR instructions
select alarm pattern
3b
If you select e.g. alarm
pattern 2 for the
DETECT DOOR at the
front door then you
should select alarm
pattern 3 for the
DETECT DOOR at the
back door, and so on.
As each DETECT DOOR
has its own alarm pat-
tern you can become
familiar with the dif-
ferent patterns.
NOTE: Use the screwdriver included
with DETECT DOOR to change the
position of the pins.
DETECT DOOR instructions
12
11
select personal code
Personal code is
selected by the pins
1, 2, 3, 4 according
to the table on page
13.
4a
NOTE: The PUZZLE
system's different
receivers should be set
to the same personal
code.
NOTE: Use the
screwdriver included
with DETECT DOOR
to change the position
of the pins.
on
off
NOTE: Patterns 1, 4,
and 5 are available
with other PUZZLE
transmitters.

English
14
DETECT DOOR instructions
13
DETECT DOOR instructions
select personal code
4b
Code Pin 1 Pin 2 Pin 3 Pin 4
0
1
2
3
4
5
6
7
8
9
A
B
C
D
E
F
Off
Off
Off
Off
Off
Off
Off
Off
On
On
On
On
On
On
On
On
Off
Off
Off
Off
On
On
On
On
Off
Off
Off
Off
On
On
On
On
Off
Off
On
On
Off
Off
On
On
Off
Off
On
On
Off
Off
On
On
Off
On
Off
On
Off
On
Off
On
Off
On
Off
On
Off
On
Off
On
connect existing doorbell
Cut the wire from
the existing doorbell
installation to
approximately 5cm
length and remove
3mm of insulation
from each of the
two wires. Insert
one of the two wires
into one of the
input connector
holes. Firmly tight-
en the screw to
secure the wire.
5a

English
16
15
DETECT DOOR instructions DETECT DOOR instructions
connect existing doorbell
Insert the other wire
into the other input
connector hole and
tighten the screw to
secure this wire. If the
fail indicator lights
up reverse the connec-
tion.
5b
NOTE: Extra wire can
be fitted into the com-
partment if necessary.
complete installation
Click the front of
DETECT DOOR firmly
into place on the back
plate starting with the
upper end.
6
NOTE: Ensure that the
gasket is fully in place
before assembly.
18
English
complete installation
Depress the area of
the push button.
The DETECT DOOR
transmits the signal
to any PUZZLE
receiver while the
status light lights
up.
7
17
DETECT DOOR instructions
NOTE: If DETECT
DOOR is connected to
an existing doorbell
installation pushing
the push button
enables the existing
doorbell while the
button is activated.
troubleshooting
Should your DETECT DOOR wireless doorbell not function satisfac-
torily, please check the list below:
The status light does not light up when pushing the
activation button
• Check that the battery is installed correctly. See 2 .
• Replace the battery. See 2 .
NOTE: The status light lights up only for a short period of time
following each activation.
The status light does light up, but only some or none of
the PUZZLE system's receivers emit an alarm
• Check that DETECT DOOR and the PUZZLE system's receivers
are using the same personal code. See 4a and 4b .
If the PUZZLE system emits alarm without apparent
reason
• Change the personal code of the entire system to another

20
English
test and approval
19
troubleshooting
setting, because the faulty alarms may relate to interference
from neighbouring PUZZLE system installations. See 4a
and 4b .
If you still have trouble after trying the ideas above please
contact your local authorized Phonic Ear representative/
installer.
DETECT DOOR is approved and CE marked in accordance with
the R&TTE directive. Hereby, Phonic Ear, declares that this
DETECT DOOR doorbell is in compliance with the essential
requirements and other relevant provisions of Directive
1999/5/EC.
safety precautions
Warning
Lithium battery inside. Fire, explosion and severe burn haz-
ard if the battery is incorrectly replaced. Do not recharge,
disassemble, heat above 100°C/212°F, incinerate, or expose
to water or direct sunlight.
To avoid damaging electronic circuitry, which may impair
safety features do not dissemble, modify, or put pressure on
this product.
Important note
Lithium batteries should not be opened or burned.
Exposure to the ingredients contained within or combusted
products may be harmful.
!
Waste from electronic
equipment must be
handled according to
local regulations.

22
21
English
warranty
A one-year limited warranty is issued to the original consumer of this product(s) by
Phonic Ear (two years inside the EU).
time period of warranty
This warranty will go into effect upon the date of original purchase of this equipment, and
will remain in effect for one calendar year (two years inside the EU) from that date as long
as the instrument remains the property of the original consumer.
what is covered by this warranty
Any electronic component which, because of workmanship, manufacturing, or design
defects, fails to function properly under normal use during the life of this warranty
will be replaced or repaired at no charge for parts or labor when returned to the factory
service center. Transportation in is paid by the customer. If it is determined that repair
is not feasible, the entire unit may be replaced with an equivalent unit upon mutual
agreement of the manufacturer and customer.
what is not covered by this warranty
1Malfunctions resulting from abuse, neglect, or accident.
2Peripheral accessories as itemized within the product brochure, when such items are
returned after 90 days from the original purchase.
3Alkaline batteries (if applicable).
4Instruments connected, installed, used, or adjusted in a manner contrary to instruc-
tions provided by the manufacturer.
warranty (cont’d)
5Consequential damages and damages resulting from delay or loss of this instru-
ment. The exclusive remedy under this warranty is strictly limited to repair or
replacement as herein provided.
6Products damaged in transit unless investigated by the shipper and returned to the
warrantor with the investigation report.
Phonic Ear reserves the right to make changes in the design or construction of any of
its instruments at any time without incurring any obligation to make any changes
whatsoever on units previously purchased. This warranty is in lieu of all other
expressed warranties. All expressed and implied warranties will terminate upon the
expiration of this written warranty. No representative or person is authorized to repre-
sent or assume for us any liability in connection with the sale or use of our products
other than as set forth above.
The above warranty does not affect any legal rights that you might have under appli-
cable national legislation governing sale of consumer goods. Your distributor may have
issued a warranty that goes beyond the clauses of this limited warranty. Please consult
your distributor for further information.
what to do if you need service
If you require service under the terms of this warranty, carefully package the instru-
ment to prevent damage and return it to your distributor (see information on back
cover). Please provide your receipt, a detailed description of the problem, your full name,
billing address, and telephone number.
Table of contents
Popular Accessories manuals by other brands


Cornelius
Cornelius Duette 3 Operator's manual

TOPPOINT
TOPPOINT LT91130 user manual

Davis Instruments
Davis Instruments Rain Collector Shelf instruction manual

BW SENSING
BW SENSING BW-AH125 Series Technical manual

Hydac
Hydac MCS1510-5-0 Operation and installation manua

EMX Industries
EMX Industries IRB-MON instruction manual