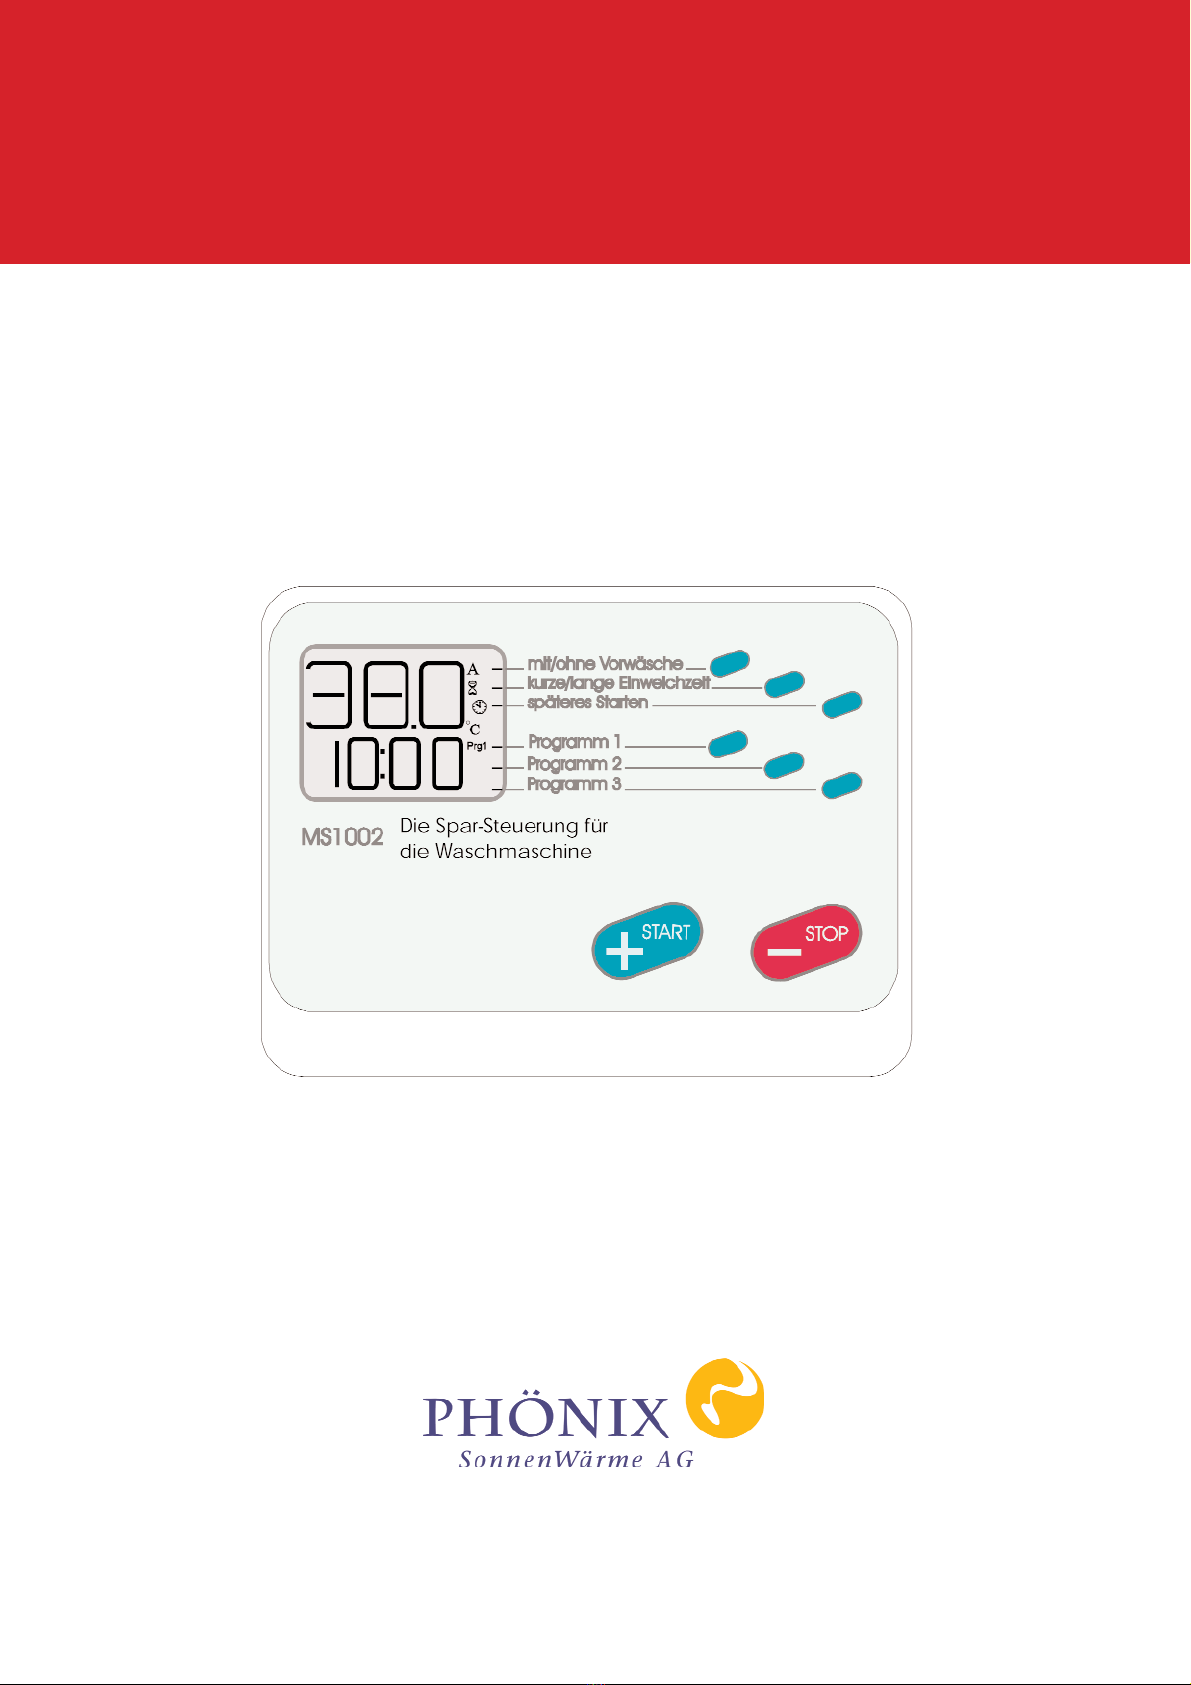
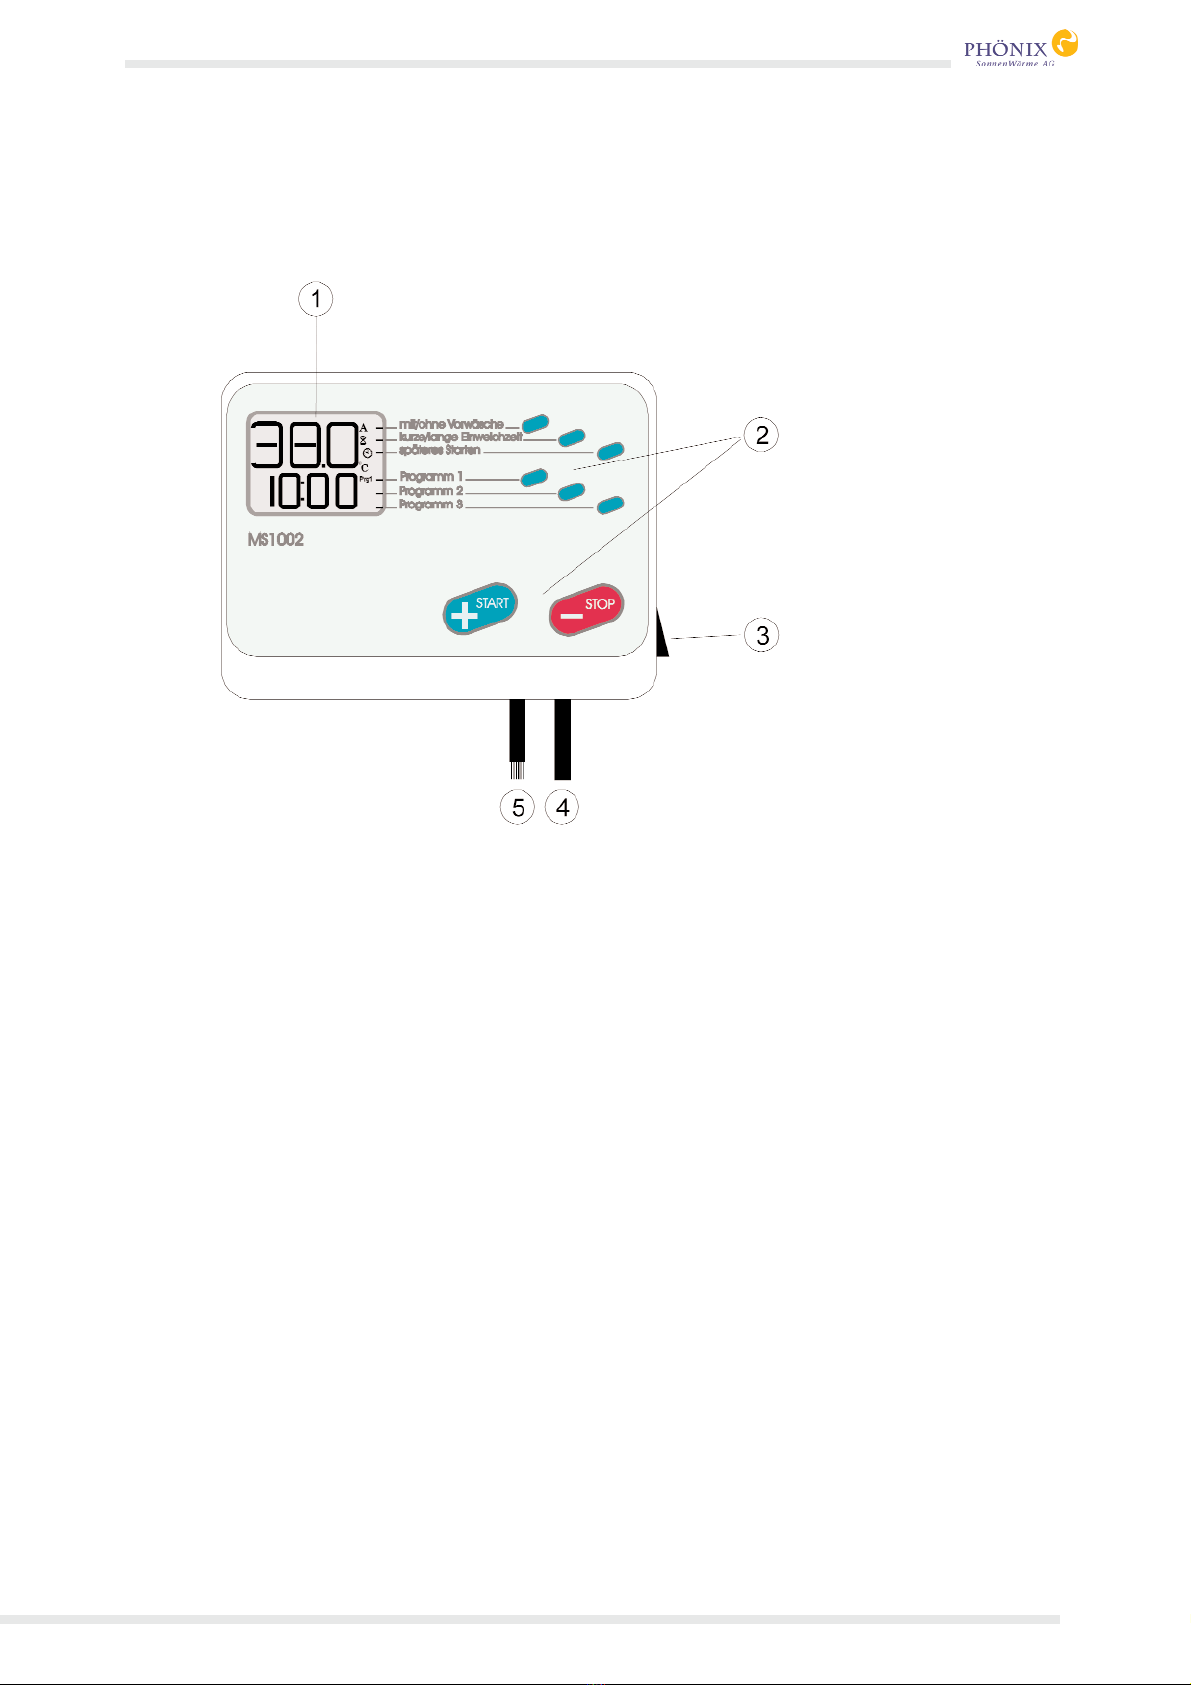
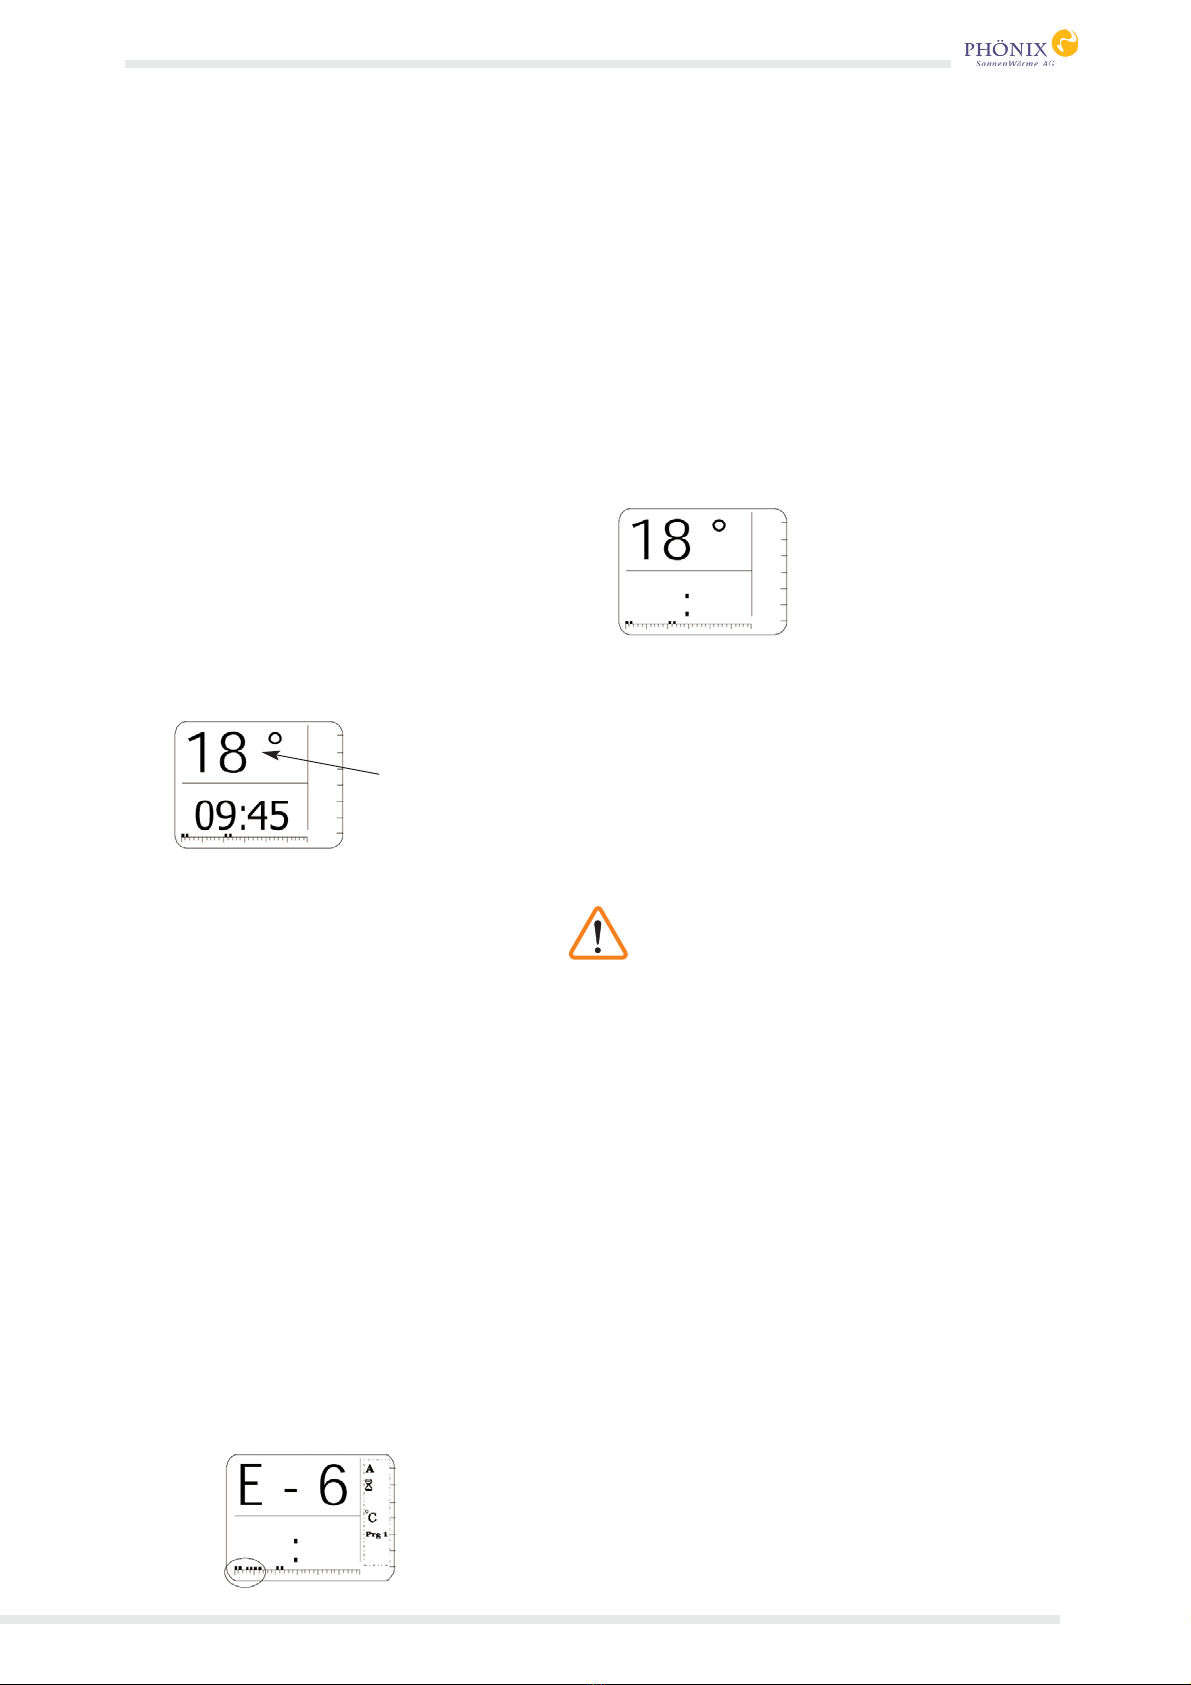
PHONIX MS 1002 User manual

MS 1002
Washing machine
control gear
User Manual

Washing machine control gear MS 1002
1. Important notes 4
2. Assembly and connection 4
3. Explanations 5
4. Display 6
5. Shipment MS1002 7
6. Assembly MS 1002 7
7. Initiation MS1002 8
8. Urgent notes for programming MS1002 8
9. Technical data 10
Drilling Jig 11
Contents
MS 1002 - 3

4-MS1002
MS 1002
1. Important notes
Before starting use your MS1002 please read
this instruction manual exactly. That will help you
to operate the device safe and without any
errors.
The MS1002 matches the relevant safety norms.
Only experts in electric are allowed to repair
electric-devices. By improper repair or use the
device not according to its original purpose
there can occure serious harms for your safety
and the safety of the persons around you. If the
cable for the power supply (230 V) is damaged
let it restore immediatly! If you notice any dama-
ge at the casing or at the plug of the MS1002,
send the device for an inspection to the manu-
facturer, to avoid damage to come.
The MS1002 is only to be used with a washing
machine for home use. Do not use the MS1002
for anything else! Never put the MS1002 in
water or similar liquids. You can clean the device
with a moist cloth. Please pull the plug (230 V)
before each cleaning. When a power failure hap-
pens the MS1002 will switch to its "emergency-
program" to guaranty that the washing machine
can finish its program. By pressing the "Stop"
button the device switches back into the normal
program.
If there is no hot water tap but a sink
with a hot water connection near to
the washing machine you can use
the hot water connection by a "Eck-
fix" piece. You can purchuase the "Eckfix"
piece by us.
2. Assembly and connection
1. Pull the plug of your washing machine.
2. Unscrew the water hose of the washing
machine at the water tap and even at the was-
hing machine.
3. Remove the sieve, even if you use "Aqua-
Stop", or it could happen that the valve at the
return flow inhibitor can not open properly and
the inflow of cold water is handicapped.
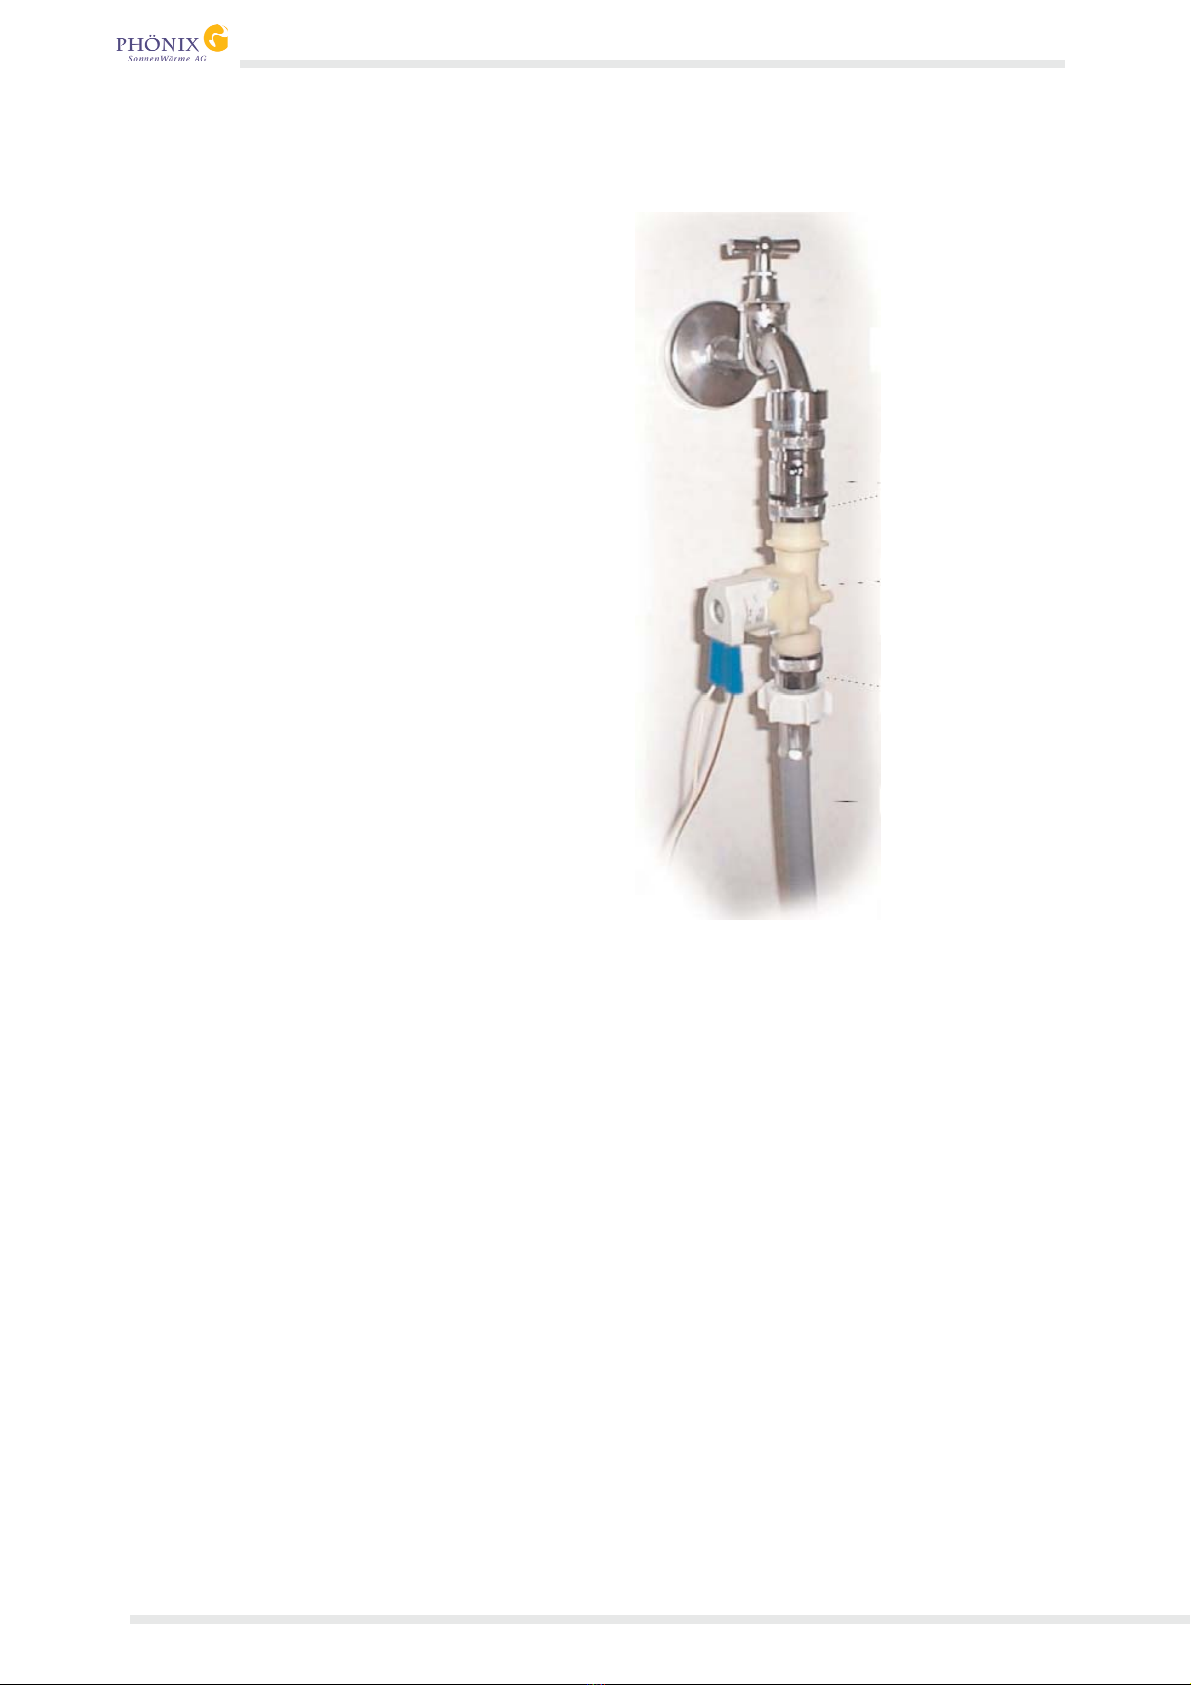
4. Now you can screw the mixing chamber
together with the square hose and the Y-Piece
to your washing machine.
When using "Aqua Stop" remove the
square hose and put your Ypiece
together with the "Aqua Stop" piece
by using a hoseconnector (2 x ¾"
external screw thread). If you are using a
washing machine with "Aqua-Stop" you need
an additional hose.
5. The magnetic valve and the mixing chamber
have to be assembled, that the hose is faced
downwards. (If not it could happen that the
inflow is handicapped).
6. Screw the cold water hose and the hot water
hose each with the Ypiece of the mixing cham-
ber (see drawing Drilling Jig, on page 11).
7. Screw the existing washing machine hose to
the return flow inhibitor.
8. Mount the magnetic valve via the metallic
coupler and the return flow inhibitor (which is
pre-assembled) at the cold water tap. You can
disassemble the adaptor at the water tap (see
drawing on page 10 and 11).
9. Proceed alike with the hot water tap. You
must use the delivered hose.
Service note:
Calcareous or polluted water makes casual clea-
ning of the sieve in the magnetic valves neces-
sary.
The Water inflow temperature must not
exceed 60° C!

MS 1002 - 5
MS 1002
3. Explanations
Display
Enter keys
On/off switch
Power cord 230 V
Connection cold water valve (blue)
Connection hot water valve (red)
Connection feeler gauge at the mixing chamber
Connection humidity sensor
1
2
3
4
5

6-MS1002
MS 1002
4. Display
Display for temperature and amount of breaks
Prewash on
Prewash off (only main washing program)
Short time for soaking
Long time for soaking
Starting later
°C
Programm1 active
Programm2 active
Programm3 active
Display for hot water magnetic valve
Display for cold water magnetic valve
Display for duration of soaking, starting later, setting parameter an remaining time
1
2
3
4
5
6
7
8
9
10
11
12
13

MS 1002 - 7
MS 1002
5. Shipment MS1002
1 piece MS1002 (operating unit) with adapter
plug
1 piece hot water hose 1,5 m length, ¾",
60 °C
1 piece mixing chamber, consisting of
connection bracket, Y-piece and brass sleeve
with temperature sensor.
2 pieces magnetic valve 24 V with return flow
inhibitor and connection for water tap ¾"
1 piece humidity sensor with fixing by a
vacuum cup
2 pieces dowels 6 mm and bolts
5 pieces gaskets (rubber)
6. Assembly MS 1002
1. Mark the position of the holes on the wall by
using the drilling jig (horizontal).
2. Drill a hole for the dowels by using a 6 mm
stone drill and put the dowels succinct in it.
(Dowels are suitable with brickwork, finery, and
concrete). When assembling at cavity walls, for
example plasterboard, please use special
dowels for cavity walls.
3. Turn the bolts in until a gap of 3-4 mm bet-
ween wall and bolt headinside is reached.
4. Hook MS1002 in.
5. Establish the electric connection between the
magnetic valves an the MS1002 (Attach plug fix
on the connection clip).
6. Put the humidity sensor via the vacuum cup at
the washing machine in the way that the plastic
housing contact the floor (pins faced down-
wards to the floor).
7. Plug in the power plug (adapter plug) of the
control gear in the power socket.
8. Put the washing-machine plug in the adapter
plug of the control gear.
9. At first starting, check all compression cou-
plings for leak tightness and if necessary retigh-
ten.
10. If your washing machine uses "Aqua-Stop",
it´s necessary to order an extra hose connector
and an extra hose.

8-MS1002
MS 1002
7. Initiation MS1002
1. Turn on MS1002 by using the on/off
switch Now program 1 without prewash is
chosen
2. Press button "mit/ohne Vorwäsche" to switch
pre-wash on or off (A = on, B = off)
.. choose the washing program (Programm 1,
Programm 2, Programm 3)
3. Fill your washing machine like you are used
to do (Put laundry in, fill washing agent in, adjust
your washing machine and switch it on)
4. Press the start button on the MS1002. The
washing machine starts now. The MS 1002 con-
trols now with the standard settings .
After about 26 min. delay at the main washing
programm (without breaks) the hot water valve
close itself and the cold water valve will be ope-
ned at least for 2 hours. Soonest now a 2 hour
remaining time will be showen at the display.
After that the display will show "Aus", what
means that the MS1002 is finished but the
power is still on. The programm for your washing
machine will end earlier so you can at that time
take your clothes out of the washing machine.
Now you can press the "Stop" button and
switch the device out or press the "Stop" button
and continue washing clothes. If you forget to
press "Stop" after the washing machine has
ended its programm before switching the
MS1002 off, at the next start the error code E-6
will appear but you can delete this error by pres-
sing the "Stop" button.
8. Urgent notes for programming MS1002
1. If the display is flashing, you´re at the pro-
gramming mode.
2. Programmed values will only be saved if at
least one stage of the washing program has
been finished before the device is switched
off.
3. The soaking time arise from setted time of bre-
aks multiplied with the sum of breaks.
Example: 10 min x 4 breaks = 40 min soaking-
time.
Please program not more than 4 breaks.
Positioning of pre-wash temperature
At factory setting a temperature of 5 °C is set in
"Programm 1" and a temperature of 30 °C is set
in "Programm 2" and "Programm 3"
If you want to change the temperature please do
the following:
1. Press and hold button
"mit/ohne Vorwäsche".
2. Press and hold button "Programm 1".
3. Change value by pressing buttons +/-.
4. Release buttons and press "Stop".
The programmed value is the same for "Pro-
gramm 1", "Programm 2 and "Programm 3".
Positioning of main-wash temperature
At factory setting a temerature of 30°C is set in
"Programm 1" a temperature of 40°C is set in
"Programm 2" and a temperature of 60°C is set
in "Programm 3"
If you want to change the temperature please do
the following:
1. Press and hold button "Programm 1".
2. Change value by pressing buttons +/-.
3. Release buttons and press "Stop".
flashing
flashing
temperature

MS 1002 - 9
MS 1002
If you want to change settings in "Programm 2"
and "Programm 3" then repeat the Steps 1 to 3
by pressing the corresponding button. The tem-
perature setting is changed in 1°C steps.
Positioning "späteres Startens" (=”starting
later”)
At factory setting the time for starting later (spä-
teres Starten) is 0 minutes The delay you want
the machine starting later is expressed in hours
and minutes For example 9:45 means that 9
hours and 45 minutes will pass before the was-
hing machine will start.
If you want to change the time please do the fol-
lowing:
1. Press and hold button "späteres Starten".
2. Change value by pressing buttons +/- in
steps of 5 minutes.
3. Release buttons and press "Stop".
The programmed value is the same for "Pro-
gramm 1", "Programm 2 and "Programm 3".
If “starting later” is active you can see a clock in
the display. If you want to activate starting later
press the button "späters Starten". If you want
to start the machine immediatly after you´ve first
time pressed the button press button a second
time. (There will be no more clock showed in the
display).
Turning into the emergency program (device
switches into the emergency program after a
blackout itself)
If there is a error or defect part at any time, you
can turn the Ms1002 into a emergency program,
so you can use your washing machine, like the
MS1002 weren´t installed. In this program the
cold water valve is open and the power is
always on.
To activate the emergency program, just press
the buttons "Programm 1", "Programm 2" and
"Programm3" at the same time.
Reset
With that, all parameter will be restored
to the default settings.
1. Switch of MS1002
2. Press button "Start" and "Stop" at the
same time and hold both
3. Switch MS1002 back on again and wait
until the display will appear again
4. Release the buttons
Errorcodes
E-1 = Short-circuit
E-2 = The connection to the temperature sensor
has been cut, for example the plug
isn´t installed properly.
E-3 = Humidity sensor has triggered
E-6 = Emergency program or after a blackout
E-7 = Short-circuit in the magnetic valve(s)
Remedy the error and press the "Start"
button before restarting, to delete the
error-message.
If the water is colder than 5°C the temperature
sensor has to be deactivated, or the error code
“E" will appear. For that switch off the MS1002,
press and hold the "Programm 2" key, and
switch the MS1002 back on. Release the button
not until the temperature is shown in the display.
After 60 seconds the setting is saved. Press,
while a programmis running, the button "Pro-
gramm2" to switch the temperature sensor off.
An "A" will appear in the lower half of the
display, which means that the temperature sen-
sor is switched off. The temperature sensor can
even be activated by doing that steps again.
Only the cold
water valve is opened
Complete display
is flashing
Complete display
is flashing
flashing

10 - MS 1002
MS 1002
9. Technical data
MS1002:
VDE-certified Nr. 119634
Voltage 230 V, 50 Hz
Wattage 0,6-13 W, casing IP44
Breaking capacity 16 A
Measures:
180 mm x 140 mm x 58 mm, weight 1,8 kg
Magnetic valve:
24 V AC, 5 W, ¾ ´´ thread
Technical claim:
There must exist an automatic circuit
breaker 16 A.
All changes, serve the technical advance,
reserved.
Water tap
Fast coupler
Magnetic valve (in directory
to be installed)
Return flow inhibitor
Water hose

MS 1002 - 11
MS 1002
Drilling jig

MS 1002
PHÖNIX SonnenWärme AG
Ostendstraße 1
12459Berlin
Fax.: 030 - 53 000 717
www.sonnenwaermeag.de Last update: Oct. 2007
Table of contents