Practice on stationary and slow moving targets close and far to get used to shooting with the PGD
Tracker. Keep both eyes open! You can see more and it is easier to follow moving targets.
This completes the Quick Setup. Please continue reading the original more detailed instructions that
follow. The descriptions of the parallel and fixed point setups are alternatives that may be useful to you.
The quick set up above is a blend of these two approaches and is the method we personally use to set
up our Trackers.
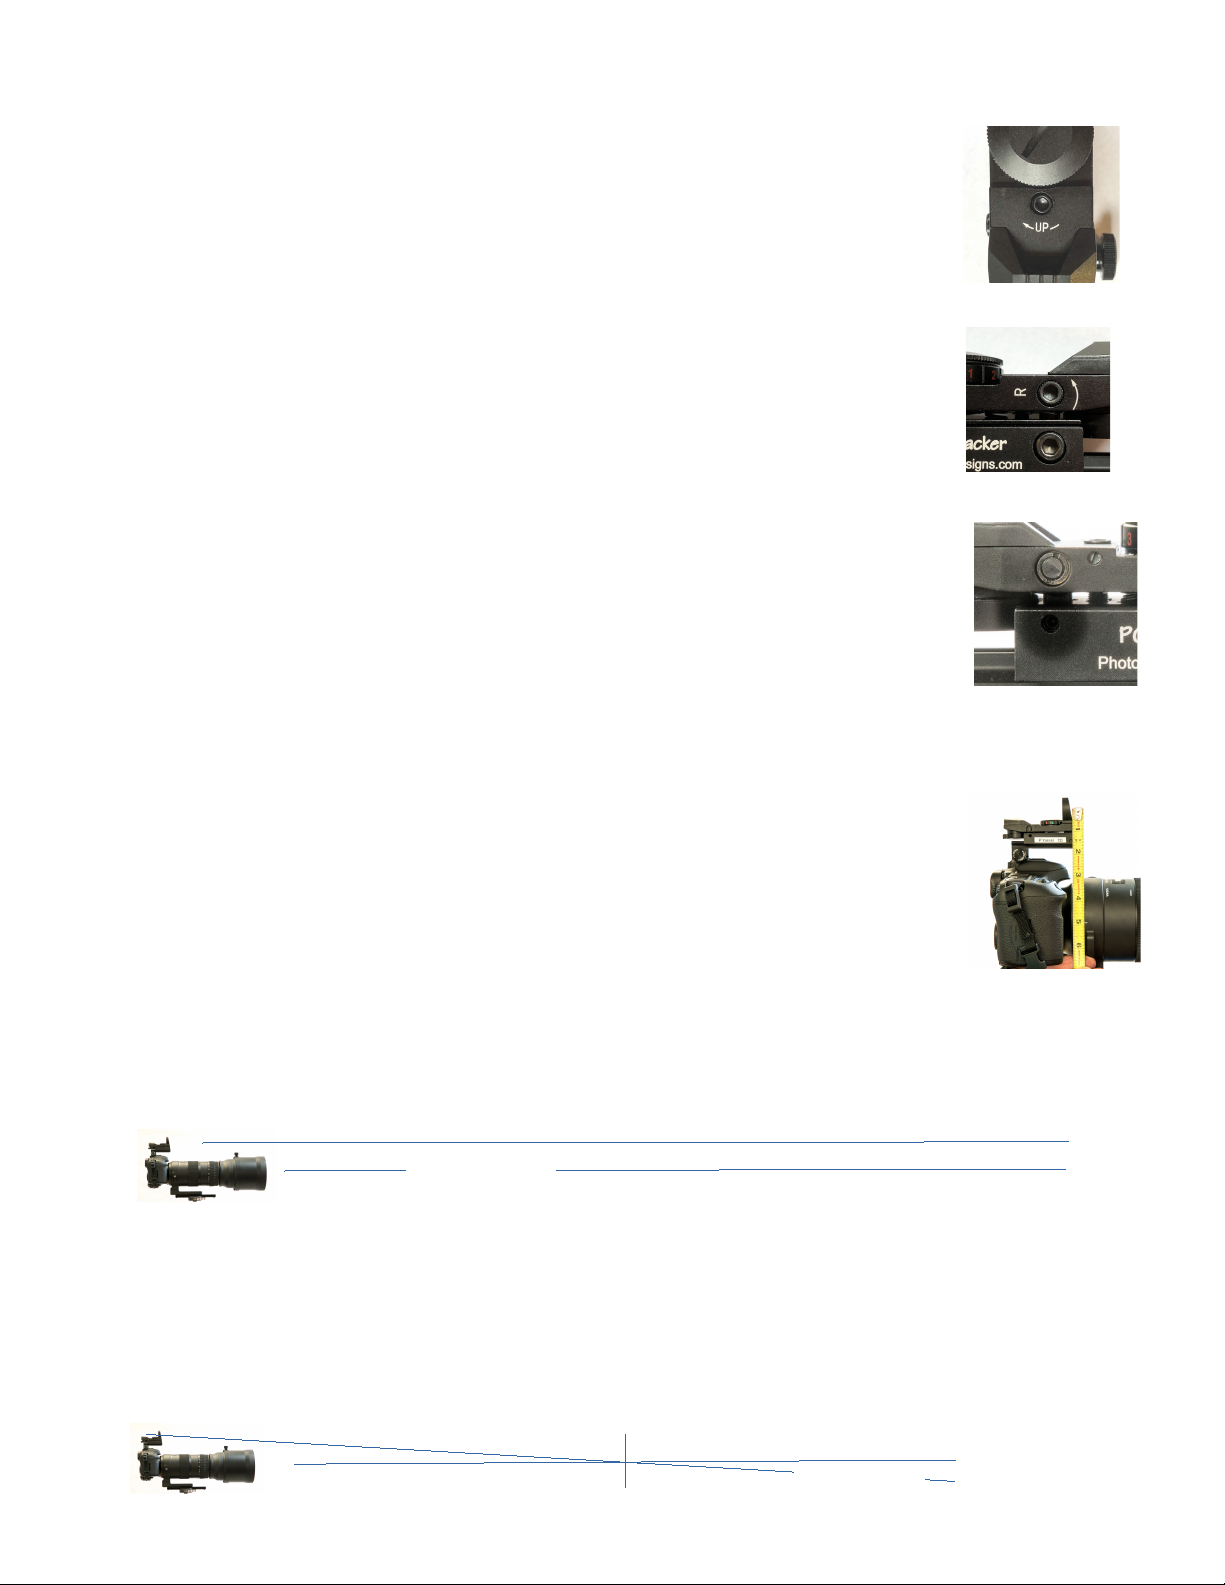
Step 1: Turn on the Tracker.
1. Turn the dial to either the Green 5 or Red 5. 5 is the brightest
setting for the reticle. You may choose any brightness or color
based on personal preferences later.
2. At the back of the sight just above the ESM-1 rail is a toggle
switch showing four reticle options. Again the choice is a matter of
personal preference but for the calibration process described later
in these instructions we suggest using either the “cross hair: +”
reticle (the second choice from the left) or the “single dot” (on the
far right).
3. Hold the Tracker out in front of you approximately 4” from your
nose and look over the back of the sight and through the lens. You
should not be able to see the battery cover. Gently move the sight
up or down with slight changes to the attitude of the sight until you can
see the reticle on the lens. Try the other reticle styles and the
intensities 1-5 in both colors. We suggest doing this in a softly lit
location. The lower brightness values may be hard to see in bright
light. Contact us if any of the reticle styles or colors are not functioning.
4. Always turn the Tracker off when you are not using it. Rotate the
Intensity dial to align with the R or G over the small white dot on the
side of the tracker. These are the “off” positions. The battery can
provide 60-80 hours of service.
Step 2: Mount the ESM-1 with the Tracker on our camera hot shoe.
Remove the rubber lens cover. Back the ESM-1 clamp screw out a few turns before sliding the ESM –
Tracker assembly into your camera hot shoe. It should not require more than very modest force at most
for the ESM to slide fully forward into the hot shoe. It may slide easily. There are variations in hot shoe
geometries across brands and models. While gently holding the ESM forward against the front of the hot
shoe turn the clamp screw until it is firmly seated. Use no tools! The clamp screw is tight enough when
any perceived looseness of the Tracker in the hot shoe disappears and the Tracker cannot slide out of
the hot shoe due to its own weight if pointed upward.
Step 3: Calibrate the PGD Tracker to our camera.
The PGD Tracker must be calibrated to your camera before use. Calibration is best done with your
preferred telephoto lens and a sturdy tripod. This method describes a simplified “parallel offset”
calibration and is based on the fact that on the typical DSLR the Tracker is positioned above the lens
center line by a little less than 5” the same height as a 12 oz soda can. If you have a smaller or a
mirrorless camera the offset is less and you need an object matching your offset or just use a ruler.