Photo Jinn Camera Adapter User manual

The setting and maintanance guide of Photo Jinn automat.
THE HARDWARE PREPARATION
Into the motorized head MP101 insert batteries or
connect an external power source. Then switch the
switches on the back side of head to a position needed
for adapter working. The switch on the left side, gi e to
"0" position and the second switch on the right side set
to "M" (manual mode). Then insert Photo-Jinn control
adapter into a circular connector that is designed to
connect the original remote control .
For shooting panoramas ha e to be used head MP101,
which can be rotated horizontally by a full 360 ° angle.
(Original heads ha e a displacement range only to 180°,
but can be adjusted to 360 °).
Controls and connectors.
Connecting ca les.
Cable for connection to a computer insert into the jack conector, which is located on the left side of
the adapter on the top (square symbol) and the other end insert into a computer serial port. If your
computer has not a serial port, used reduction - serial port RS232/USB (supply doesn't includ). For
more informations, see our website www.photo-jinn.com - Customer support section .
Cable for PC connection PC cable connected to the adapter

Connect digital camera to the jack connector located on the left side of the adapter box, quite down
(circle symbol). A supply Includes a cable to connect the adapter with digital cameras, which allow
to connect remote control of the type RS-60E3. For other brands of digital cameras can be the
cable ordered in our e-shop.
Cable for camera connection Camera cable connected to the adapter
1. CAMERA PARAMETER SETTINGS
After the hardware connecting, run the Photo-Jinn setup program on your computer, and start
with adjusting the panorama parameters adjusting and head calibration. It's needed, that the cable
between PC and adapter was connected when calibrating and recording.
For panorama calculating, the focal length of
used lens (and FML -focal length multiplier) is a
determinig parameter , because the FOV size
depends on it.
FOV – shot angle , from which the angles and
times of head mo ements are calculated.
Other entered alues in this section relate only
with a camera control and do not affect the
panorama calculation. These parameters are
Focus, Shuter, Record, and DelayH, DelayV.
Focus – The setting of the time in seconds, during which the camera focussing will be acti ated.
(f.e. 2-3 s). Shutter – The setting of the time in seconds, during which the camera shuter button
wil be down. (f.e. 0.5 s). Record – The setting of the time period, during which the camera can sa e
taken picture to the memory card. Delay H, Delay V – The setting of pause duration in seconds,
which the head will make after the mo ement . This setting is usefull especially by taking pictures
with big telephoto lens
2. PANORAMA SIZE SETTINGS
In this section of the program , set the number of
panorama images in horizontal and ertical
direction, o erlap of images (>25%) and image
orientation. With these settings, the program will
calculate the total angle of panorama and also basic
angle on how the head will mo e in e ery step.

Photo-Jinn adapter controls the head MP101 by making of mo ements (left ,right, down and up)
according to a recorded program , therefore the angels calculated from panorama mo ements must
be con erted to the times of head work starting.For this transfer, the constants got from calibration
are used.
Summary of calculated panorama alues
includes the total number of images and time
how long the head with camera will shoot
panorama.
3. THE CALIBRATION
To achie e better results when shooting panoramas with head MP101 and Photo-Jinn control
adapter , the calibration must be done before shooting panoramas . It's also necessary to repeat
calibration e ery time you change the power source of the head.
The cali ration of horizontal motion
Panorama, which has not been calibrated yet, has the times of head mo ements calculated from
default alues and is marked with red note - PANORAMA NOT CALIBRATED.
When calibration process is done, the note will change to blue note - PANORAMA CALIBRATED.
Marking of panorama before calibration Marking of panorama after calibration
Before calibration, connect the computer with running program to Photo-Jinn adapter inserted in
the head MP101 and set the name of the serial port (COM1, 2 ..) in the program. If the computer
has no serial port, use the reduction USB / serial port RS232. For more information about using the
con ertor USB/RS232 with Photo-Jinn adapter see our website www.photo-jinn.com - Customer
support section. If you ha e a computer connected to the adapter and set the port number in the
program, you can proceed to own calibration.
In the program window, click on the button "Calibrate ...", which will open another window, which is
used for entering angles reading during calibration of the head.
Set the head to the default 0 degrees position - on the protractor. If you need to mo e the head,
you can use the buttons on the adapter box for left and right mo ment. It is a group of four buttons
located on the right side of Photo-jinn adapter box.

Now, press the “Start calibration” button and the program will send measurement string to
photorobot and will start. At the beginning of the test, the head will be a few seconds in sleep mode
and then start. The head will mo e to the right according to panorama settings and then stop for a
little longer, so we can read the angle (angle End R) and consequently return back by mo ing to the
left. During the left and right mo ements, the head makes pauses according to set number of
pictures of adjusted in panorama.
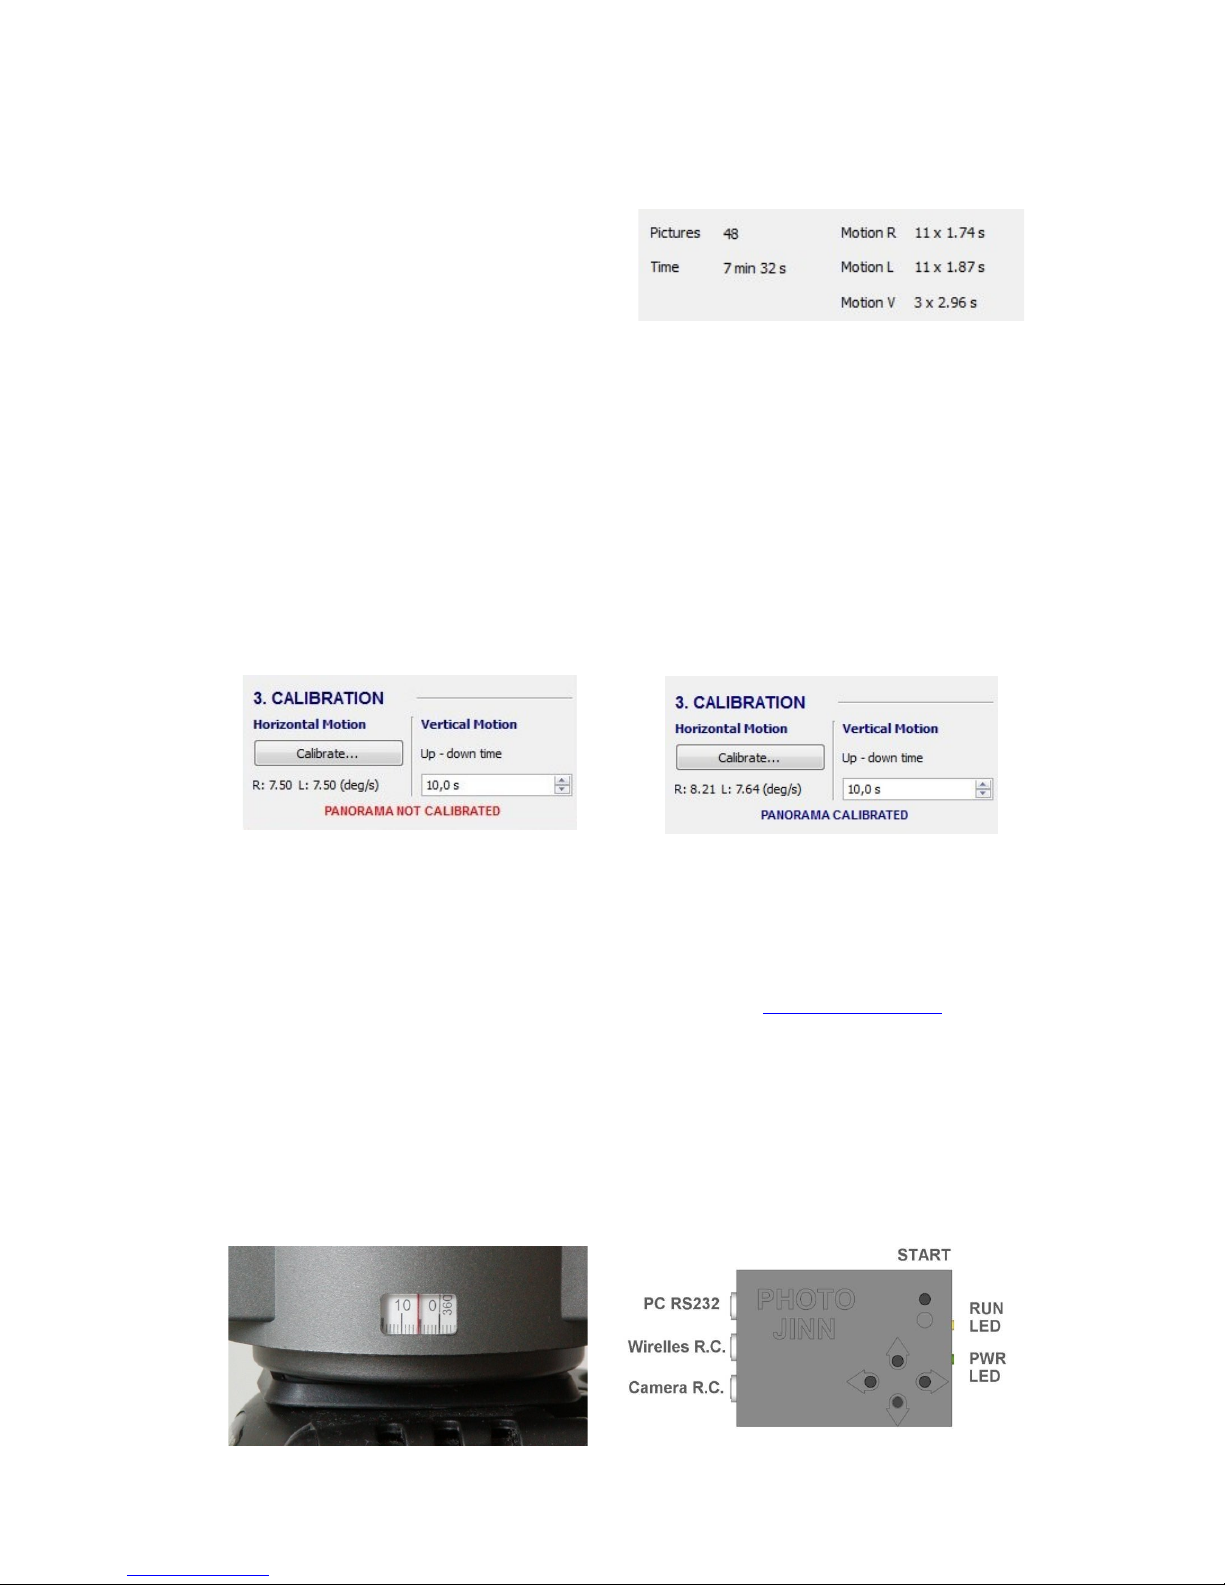
The angles, reading on the head protractor will be entered to the fields in the program. First, the
angle where the head is stopped when mo ing to the right - End R angle and then the angle at which
the head stoped after the left motion - End L angle. If the head will pass 360 degrees angel, type
this alue into the program field (f.e. 15°) and check “ o er 360” box. The same we do, if the head
mo es in re erse motion through the 0 ° mark and stop f.e. at 355 °. In the program, type angle
355 ° and check "below 360" box.
If your head MP101 has not enought accurate protractor to read the angles of mo ements, you
can isit our website www.photo-jinn.com - Customer support section, where you can find
instructions , how to easily replace the original protractor by more accurate one.
Entering of the start angel Entering of the EndR and EndL angles
Finally, click on the "Finish calibration" button and the program returns to the main window. From
entered angles when calibrating, the program will calculate new - corrected panorama data and the
notice of the panorama state will change from red note "PANORAMA NOT CALIBRATED" to the
blue note "PANORAMA CALIBRATED.
The cali ration of vertical motion
As head MP101 has not any protractor scale for the ertical motion, we will calibrate the motion in
ertical direction by measuring of time we need for the head motion from one extreme position to
another. According to the de ice maker, this angle is 30 degrees.
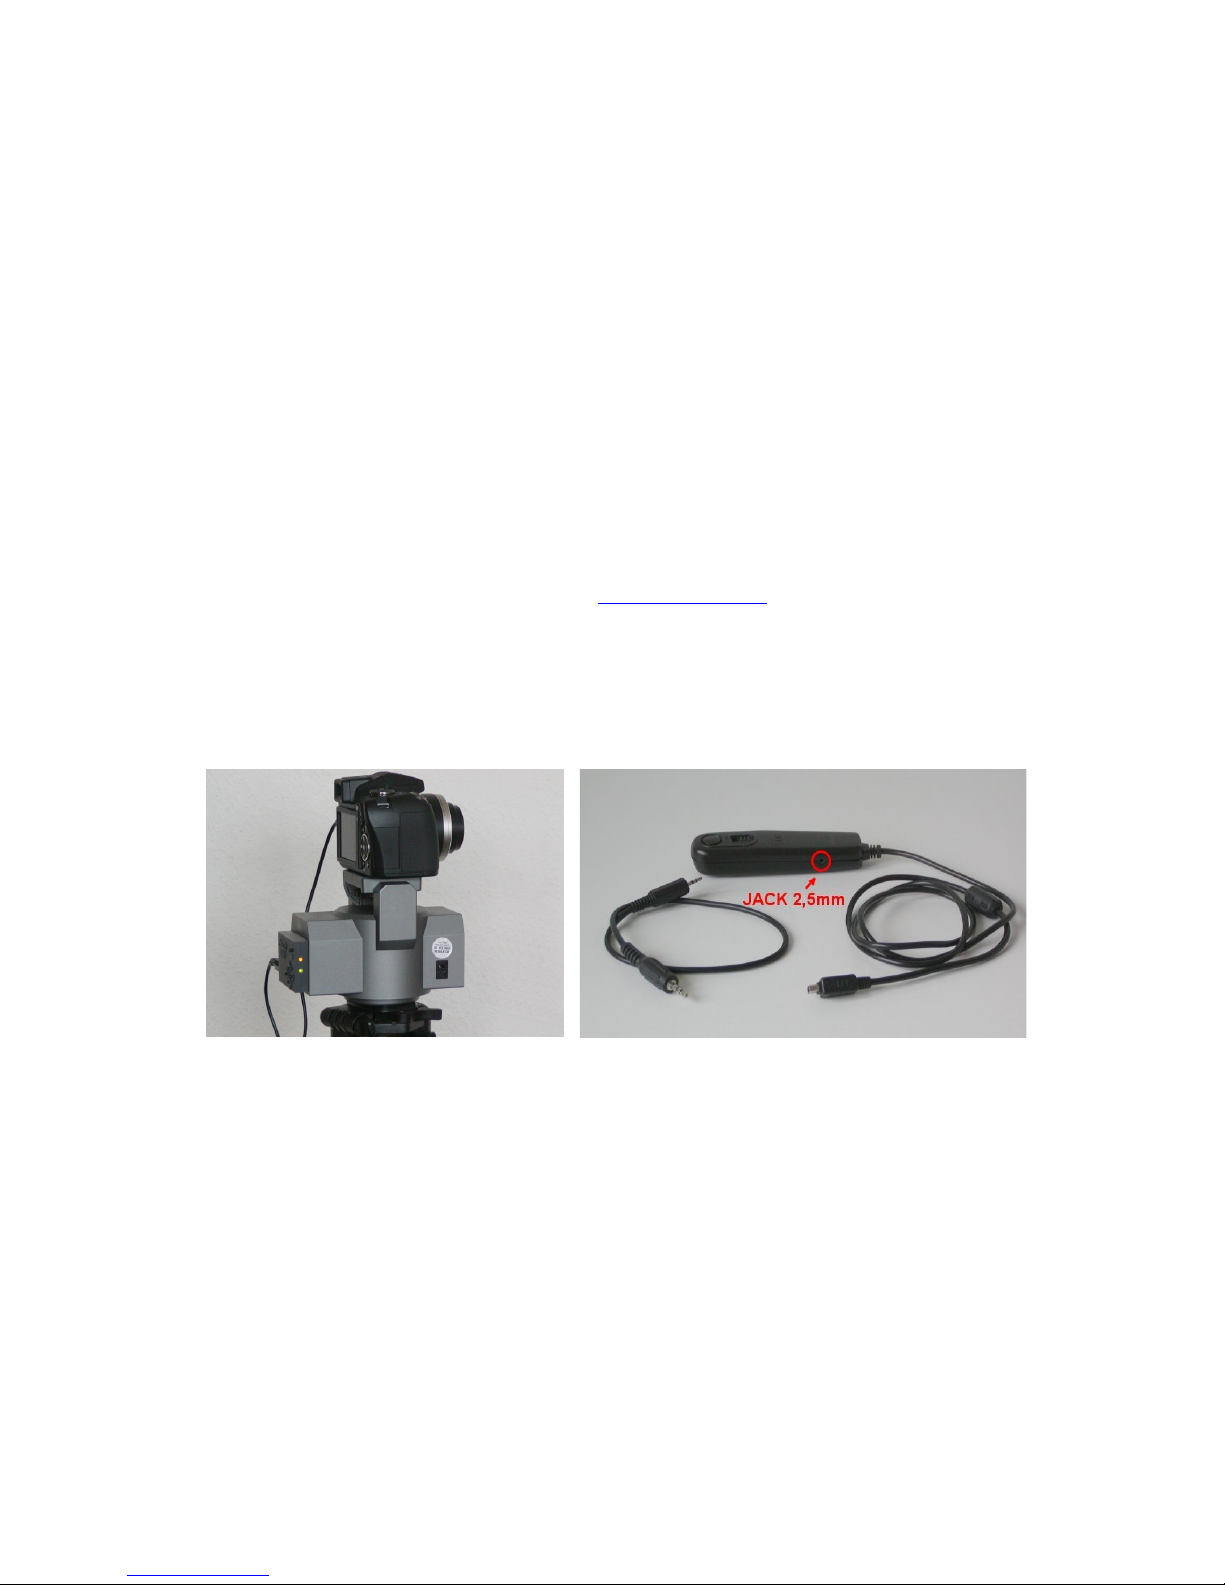
The calibration process is following : the head will be tilt to the extreme position by pushing the (up/
down) button on the adapter. (if we hold the button little bit longer the head will be stopped in
extreme position)
Take the stopwatch and measure the time taken by the head mo es from one extreme position to
another. This alue is then inserted into the Photo-Jinn program in PC - into the "Up - down time“
field. (Informati e alue of this time is about 10s for 6V power source and about 15s for power supply
from NiMH batteries.)
By this, the head is calibrated (for horizontal and ertical motion) and with the adjusted calibration
alues, the program will calculate all panorama details.Now you can sa e the calibrated panorama
into your computer (SAVE button), but mainly it must be loaded into the Photo-Jinn adapter (SEND
button), otherwise the head will still perform only the calibration program - which we sent to it last
and which is sa ed in adapter memory.

After uploading of calibrated panorama into the adapter, we can disconnect the cable, which
connects the adapter with the PC, it is no longer necessary. Just press the Start button on the box
and shooting panorama will start.
4. SHOOTING PANORAMA
Upload the control program from PC to the adapter. The adapter will sa e this program into own
memory and will use it untill it is o erwritten by another new program.
Before shooting, connect the adapter with digital camera . For this purpose there is Jack 3.5mm
connector on the left side of adapter box – quite down (circle symbol). Insert one end of connecting
cable into this connector and other end into the 2,5mm Jack connector on the digital camera (into
connector for camera remote control). Thus, we can connect digital camera brands Canon, Pentax
and Samsung, which use 2,5mm Jack connector for remote control connection and remote control
RS-60E3.
Digital cameras of other brands that do not use remote control RS-60E3 is also possible to
connect to our adapter,but it is necessary to buy a cable for a particular brand of camera in our
e-shop.Second option is to use a remote control for this specific camera, which includes extra 2,5
mm jack connector for RS-60E3, connected in parallel to the main connector. More informations
about this solution can be found on our website www.photo-jinn.com - Customer Support section.
The following pictures show the Photo-Jinn adapter connected to the Olympus digital camera,
which has not 2,5 mm jack connector (for remote control RS-60E3). For this connection the remote
control for this camera with inbuilt 2,5 mm jack connector was used . Supplied cable was connected
to this connector.
Connection of camera and adapter Remote control with Jack 2,5mm connector
Before shooting panoramas is recommended to set the protractor angle to zero. It will be easier to
control the head mo ements during the shooting. Press Start button on the back of the Photo-Jinn
adapter to start shooting. The button is located on the right side of the adapter box (circle symbol).
Shooting panoramas can be stoped by disconnecting of the power supply. If you use external
power source, just pull off the feed cable or switch the power source off. If you use the internal
battery, the shooting panoramas can be stoped by pulling off the adapter, or inserting of stop pin
into an external power supply connector.
Control adapter will be reseted by switching off and repeated switching on of power supply and
after new start will shoot panorama again.

5. WIRELESS CONTROL
Photo-Jinn Adapter can also run remotely. This solution find the main use, if we use head MP101
with Photo-Jinn adapter placed on telephoto mast when shooting panoramas from the heights.
First, upload control program for shooting panoramas to the adapter (best, if it's a 360-degree
panorama, it captures the whole ambient).Then connect a digital camera - to the connector on the
box quite down and to the middle jack connector connect wireless control module. Wireless modules
suitable for connection to the adapter Photo-Jinn, must ha e a conector 2,5 mm Jack and has to be
compatible with RS-60E3 remote control. These wireless modules can be purchased from arious
sellers, or also in our e-shop.
With remote control that is supplied with the wireless module, then we can start shooting
panoramas – fully press. As the camera captures panorama completely around (in se eral series), it
is not necessary to ha e a cable connection for a ideo monitor to set the camera to a frame. The
best picture will be definitely find in taken series of images and also we ha e a ailable 360 °
panorama.
The wireless module connected to the The wireless module attached to the
adapter and remote control head MP101
Connection of wirrelles module Complet with wirelles module
This solution can be usefull for photographing complete 360 ° panoramas from the mast - ery
simply, without the need of long cables for head control and connected ideo monitor.

6. SYNCHRONIZED CONTROL OF TWO CAMERAS
With Photo-Jinn adapter we can synchronously control two or more cameras. We just need a
reduction (di erging) Jack 3,5mm/2xJack 3,5mm. A reduction pin will be inserted into the lower
connector on the Photo-Jinn adapter and into two new connectors can be connected two digital
cameras. Because of the connectors on the Photo-Jinn adapter and the cables for connection of
the cameras are Jack 2,5 mm, it is necessary to use a reduction from 2,5 mm to 3,5 mm and then
also from 3,5 mm to 2,5 mm.
Both cameras should be attached to the head MP101. This solution can be used when shooting
panoramas with 3D effects, or if cameras are mutually shifted by a certain angle, it can
simultaneously capture the panorama in two rows, which can reduce the time shooting by half.
Two cameras synchronously controled by one Photo-Jinn adapter
Accessories:
Adapter plug 3.5mm - socket 2.5mm Adapter plug 3.5mm - socket 2x 3.5mm

More informations about Photo-Jinn adapter you can find on www.photo-jinn.com and
www.xahax.com .
Table of contents