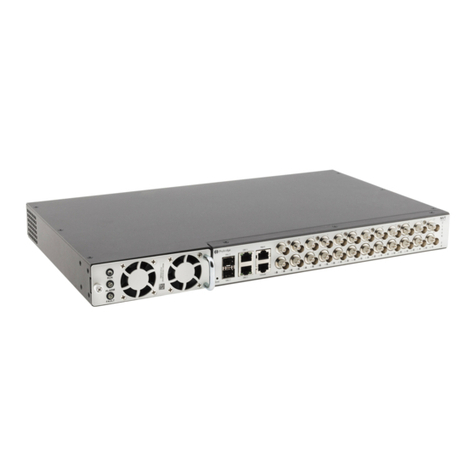
Phybridge CLEER24 User manual

________________________________________________________________________
CLEER Switch – Quick Install Guide 1
Quick Install Guide
CLEER Managed Switches
Beyond PoE: Delivering Power over Long Reach Ethernet
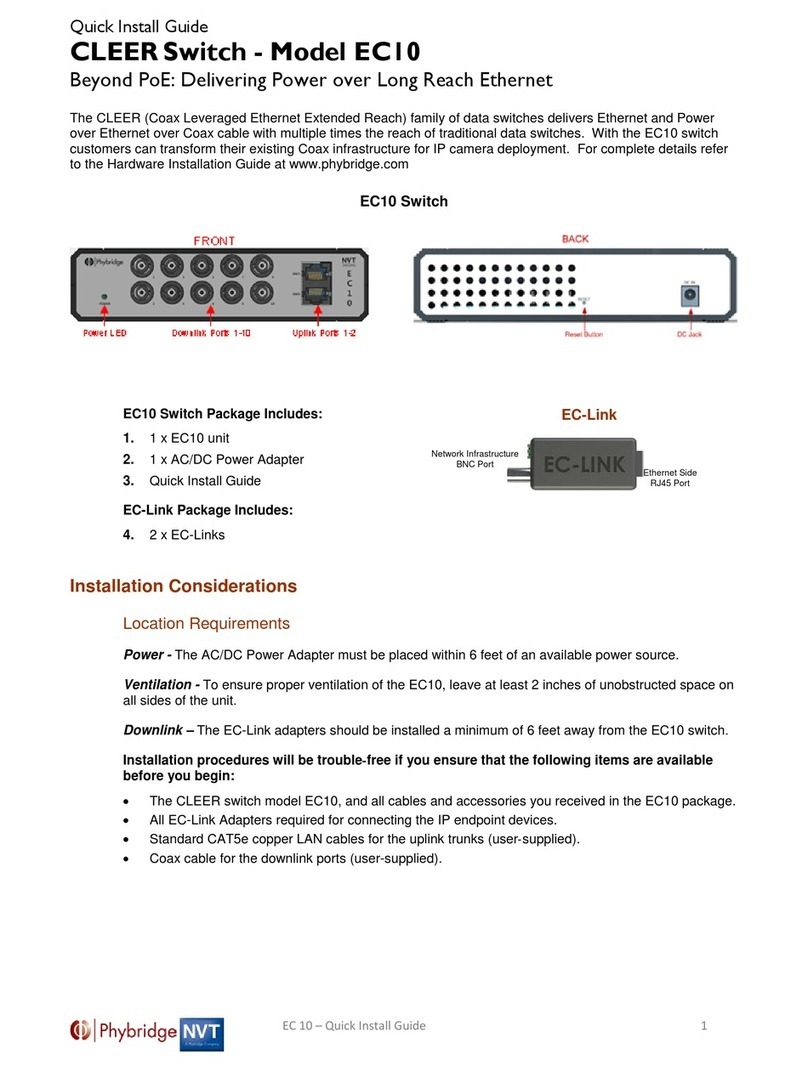
The CLEER (Coax Leveraged Ethernet Extended Reach) family of data switches delivers Ethernet and
Power over Ethernet over Coax cable with multiple times the reach of traditional data switches. With the
CLEER24 switch customers can transform their existing Coax infrastructure for IP camera deployment. For
complete details refer to the Hardware Installation Guide at www.phybridge.com
CLEER24 Switch
CLEER Package Includes:
1. 1 x CLEER24 Unit
2. 1 x rackmount bracket kit
3. 1 x console cable
4. 1 x power cable
5. Quick Install Guide
EC-Link Package Includes:
1. 2 x EC-Links
Installation Considerations
The ground symbol within a circle identifies the terminal to be connected to an external
protective conductor. Connect this terminal to earth ground before you make any other
connections to the equipment.
Location and Regional Specifications
The CLEER24 can be installed in any indoor location in all countries except in Finland, Norway and
Sweden, where, in these 3 Nordic countries, it must be installed in a restricted access location.
CLEER24 kan installeras på valfri plats inomhus i samtliga länder utom Finland, Norge och
Sverige; i dessa nordiska länder måste den installeras på en plats med begränsad åtkomst.
CLEER24 kan installeres overalt indendørs undtagen i Finland, Norge og Sverige, hvor i disse tre
nordiske lande den skal installeres på et sted med begrænset adgang.
CLEER24 kan installeres innendørs i alle land unntatt Finland, Norge og Sverge. I disse tre
nordiske landene må den installeres på et sted med begrenset tilgang.
Network Infrastructure
BNC Port
Ethernet Side
RJ45 Port
EC
-
Link

________________________________________________________________________
CLEER Switch – Quick Install Guide 2
Space Requirements
1. Select a standard 19" equipment rack or, for a standalone installation, a flat, stable surface
capable of supporting the size and weight of the CLEER24, its installable components and
cabling.
2. Ensure that you have enough rack space for all equipment. Shelves and rear
supporting brackets are not mandatory.
Location Requirements
Power - The CLEER24 switch must be placed within 6 feet of an available power source. Do not
use an extension cord to connect the equipment to a power outlet.
Ventilation - To ensure proper ventilation of the CLEER24, leave at least 2 inches of unobstructed
space on all sides of the unit. If the fans are blocked, the unit could overheat.
Downlink – The EC-Link adapters should be installed a minimum of 6 feet away from the
CLEER24 switch.
Installation procedures will be trouble‐free if you ensure that the following items are
available before you begin:
•The CLEER24 switch, and all cables and accessories you received in the CLEER package.
•All EC-Links required for connecting the IP endpoint devices, provided with the product
package according to the quantity ordered.
•SFP transceiver modules for the Gbic uplink trunks available if connecting over fiber.
•Fiber optic LAN cables for the Gbic uplink trunks (user-supplied) if connecting over fiber.
•Standard CAT5e copper LAN cables for the GbE uplink trunks (user‐supplied).
•Coax cable for the downlink ports (user-supplied).
•Serial console cable for the CONSOLE port, provided with the product package.
•Coax cable for the MGMT port. Optional, only if out-of band management is required
(user‐supplied).
•Protective Ground cable (user‐supplied).
Hardware Topology and Installation Overview
EC LINK
EC LINK 100 Mbps o E
CAT 5
100 Mbps o E
CAT 5
EC LINK
EC LINK
Computer
I Telephone
100 Mbps o E
CAT 5
100 Mbps o E
CAT 5
Wireless
A
EC LINK
Coax Up to 600M
Optional Local
ower
Optional Local
ower
Optional Local
ower
Optional Local
ower
Optional Local
ower
NVR
CAT5
100MB With OE
CLEER24
I Camera
I Camera
100 Mbps o E
CAT 5

________________________________________________________________________
CLEER Switch – Quick Install Guide 3
1. Remove the CLEER24 switch and all accompanying accessories.
2. Install the rackmount brackets for rack mounting. Unit fits in standard 19” racks
3. Install the protective grounding conductor (please refer to the System Grounding section of this
guide).
4. Remove all legacy cameras from the Coax cable.
Note: It is extremely important that non-IP, non-PoE cameras are not connected when you
power on the CLEER24.
5. Connect an EC-Link to the Network jack on the IP endpoint and connect the BNC Jack on the
EC-Link to the Coax cable.
6. Connect the Coax cable to BNC connectors on the CLEER24 switch.
7. Connect the uplink cable from a Gigabit port to the IP PBX or network switch.
Note: This connection also permits inband management over Ethernet.
8. For power share, daisy chain CLEER24 switches using DC cables (see below).
9. Power up the CLEER24.
10. For troubleshooting, please refer to the Hardware Installation Guide located at
www.phybridge.com.
11. To revert back to factory defaults, hold the reset button for at least 10 seconds.
Power Capabilities and Considerations
CLEER24 switches come standard with hot swappable PowerWise power supply, for power/load
sharing. The switch will support either AC or DC power source.
The switches are amongst the lowest power consuming switches in the industry.
For a redundant power configuration, daisy-chain multiple CLEER24 switches:
You can connect up to a max. of 4 units for power/load sharing.
•Mount all CLEER24 switches in the same equipment rack, with no
more than 1U space between any two units.
Note: You can daisy-chain the units together while they are up and
running or power them up afterward.
•Facing the rear of the units, install the DC cables (available through
Phybridge) as follows:
Note: To fit properly, the DC cable must be inserted into the DC
input/output connector with its hairpin clip on top.
•For the top unit, insert the first cable into the DC input connector on
the left until it clicks into place. Bring the other end of the cable down
to the next unit, and connect to the DC output connector on the right.
•Continue in the same way for each pair of units, connecting the DC
input (left) connector on the upper unit to the DC output (right)
connector on the lower unit.
Important: For the bottom unit, the last cable from the DC input (left)
connector goes up to the DC output (right) connector on the top unit.
This is required to create a fully redundant ring.

________________________________________________________________________
CLEER Switch – Quick Install Guide 4
Note: If you need to move a cable to a different DC connector on the CLEER24, press the hairpin
clip at the top of the DC cable and pull the cable out.
Configuring the CLEER24 (2 methods)
Connecting to the Admin GUI
Accessibility:
In band management via the
gigabit uplink ports
Default IP address:
GBE1 &GBE2 = 192.168.100.1
Default User Name & Password:
User Name: admin
Password: admin
Connecting to CLEER24:
1. Change the IP address of your PC or Laptop
to 192.168.100.2
2. Connect your Ethernet port on the PC or
Laptop to the GBE1 port on the CLEER24.
3. Open a web browser (Chrome only) and type
in/go to http://192.168.100.1
4. Login is “admin” password is “admin” (without
quotes)
5. You are now in the Admin GUI.
NOTE: Change IP addresses to avoid conflict.
(Ethernet/Uplink Ports)
Steps to Change the IP Address:
1. Click on Ethernet menu option on the top
bar.
2. Once Ethernet page is displayed select
UPLINK PORTS.
3. Type in new IP address in the IP Address
section for in-band IP configuration.
4. Type in new Net Mask in the Net Mask
section (e.g. 255.255.255.0).
5. Type in new IP address of the system
default gateway in the Default Gateway
section.
6. Click Save Changes button to apply the
modifications.
7. Refer to admin guide for more software
details.
Connecting to the Command Line Interface (CLI)
Accessibility:
Console cable connected
directly to the console port
Console Port Serial Settings:
115200/8/N/1
Default User Name &
Password:
User Name: admin
Password: admin
Connect to the console port:
1. Connect the RJ45 end of the serial cable
to the console port of the CLEER24.
Connect the serial end of the serial cable
to the serial port of your PC.
2. Configure your serial port to 115200/8/N/1
3. Login is “admin”, password is ”admin”
(without quotes)
4. You are now connected to the CLI via the
console port.
Steps to Change the IP Address:
1. Type in “pal-set-sys-ip GbE 192.168.9.1
255.255.255.0 192.168.9.255” Substitute the
provided example IP information for your own.
a. The usage is: pal-set-sys-ip GbE
<IPADDRESS> <NETMASK>
<BROADCAST>
2. You will be prompted to confirm this information
3.
Refer to the CLI section of the administration
guide for more information.
Changing Management port default IP address
The Mgmt IP default address of 192.168.1.1 may conflict with other CL R24. To avoid this from happening, you must change the IP address of the Mgmt Port to
an IP which will never be used on the network. For example, if your network belongs to “192.168.X.X” subnet, change the Mgmt Port IP to “10.10.1.1”.
Steps to Change the Management Port IP Address:
1. Log into the unit via the serial console port (115200,8,N,1,None).
2. Type in “pal-set-sys-ip mgmt 10.10.1.1 255.255.255.0 10.10.1.255”
Substitute the provided example IP information for your own.
a. The usage is: pal-set-sys-ip mgmt <IPADDRESS> <NETMASK> <BROADCAST>
3. You will be prompted to confirm this information.
4. Refer to the CLI section of the administration guide for more information.

________________________________________________________________________
CLEER Switch – Quick Install Guide 5
Note the following:
All of the above instructions provide basic installation information, necessary for the proper and safe
functioning of this equipment. Persons installing or maintaining this product must read all of the safety
instructions and the parts of system grounding which are applicable to the system being maintained.
Only trained, qualified service personnel shall install or maintain this product.
WARNING: FAILURE TO FOLLOW ALL INSTRUCTIONS MAY RESULT IN IMPROPER
EQUIPMENT OPERATION AND/OR RISK OF ELECTRICAL SHOCK.
ANY CONNECTION TO AN OUTSIDE PLANT LEAD, AN OFF-PREMISE APPLICATION,
OR ANY OTHER EXPOSED PLANT APPLICATION MAY RESULT IN A FIRE OR SHOCK
HAZARD, AND/OR DEFECTIVE OPERATION, AND/OR EQUIPMENT DAMAGE.
•Keep these instructions with the equipment.
•Do not attempt to install or service this equipment unless you are skilled in the installation and
maintenance of electronic telecommunications equipment and have successfully completed specific
training for this equipment.
Safety Warnings and Precautions
Access to the interior of this unit
shall be made only by a qualified
technician.
Der Zugang ins Innere des
Gerätes ist nur einem fachlich
qualifizierten Techniker gestattet.
Seul un spécialiste doit avoir
accès l'appareil.
l servicio de antenimiento y
reparación de esta unitad solo
puede ser realizado por técnicos
autorizados por el fabricante.
This unit may have more than one
power input. To reduce the risk of
energy or shock hazard,
disconnect all power inputs before
servicing the unit.
Dieses Gerät kann mehr als eine
Leistungsaufnahme. Um das
Risiko von nergie oder Gefahr
eines elektrischen Schlags zu
reduzieren, trennen Sie alle Macht
ingaben, bevor
Wartungsarbeiten an der inheit.
Cette unité peut avoir plus d'une
entrée d'alimentation. Pour réduire
le risque de danger de l'énergie
ou de choc, débranchez toutes les
entrées d'alimentation avant de
réparer l'unité.
sta unidad puede tener más de
una entrada de energía. Para
reducir el riesgo de peligro de
descargas eléctricas o descargas
eléctricas, desconecte todas las
entradas de alimentación antes de
reparar la unidad.
To ensure adequate cooling of the
equipment, a 2‐inch unobstructed
space must be provided around all
sides of the unit.
Um die Kühlung des Gerätes nicht
zu beeinträchtigen, ist es
notwendig, an allen Seiten des
Gerätes ca 5 cm Raum zu lassen.
Afin de ne pas nuire au processus
de refroidissement, il est
nécessaire de laisser un espace
d'environ 5 cm de chaque côté de
l'appareil.
No bloquee las ranuras de
ventilación del equipo, ya que los
componentes podrian
sobrecalentarse y sufrir daños.
The Power Socket shall be
installed near the equipment and
shall be easily accessible.
Stellen Sie das Gerät in der Nähe
eines geerdeten
Schutzkontaktsteckers so
auf,dass der Stecker leicht
erreichbar und zugänglich ist.
Placez l'appareil près d’une prise
de courant facilement accessible.
Para evitar el riesgo de choque
electrico o de incendio, reemplace
el fusible com otro del mismo tipo
y capacidad nominal.
To prevent the risk of shock or fire
hazard, replace fuse with same
type and rating.
Zur Vermeidung der
Stromschlag‐und Feuergefahr
beim Auswechseln Sicherungen
des gleichen Typs und der
gleichen Nennleistung einsetzen.
Afin d’éviter tout risque d’incendie
ou d’électrocution, remplacez les
fusibles par des fusibles de même
type et de même ampérage.
Para su propia protección,
cerciórese de que todas las
conexiones eléctricas de los
servicios públicos, incluyendo la
puesta a tierra, las líneas
telefónicas y el sistema de
tuberías de agua metálicas
internas, si las hubiera, estén
conectadas entre sí.
CAUTION: The ground lug is a
main earth terminal that must be
permanently connected to earth.
VORSICHT: Die rdungsöse ist
einer der wichtigsten
rdungsklemme, die dauerhaft auf
die rde angeschlossen werden
muss.
ATTENTION: La cosse de terre
est une borne de terre principale
qui doit être connectée en
permanence à la terre.
PRECAUCIÓN: l terminal de
tierra es un terminal de tierra
principal que debe estar
permanentemente conectada a la
tierra.

________________________________________________________________________
CLEER Switch – Quick Install Guide 6
System Grounding (Earthing)
General Grounding
WARNING: GROUND ALL
SYSTEMS ACCORDING TO
THESE INSTRUCTIONS B
EFORE YOU
CONNECT POWER LEADS. FOLLOW GROUNDING INSTRUCTIONS EXPLICITLY TO ENSURE
THE SAFETY OF PERSONNEL.
Cabinets always require redundant and independent equipment grounding conductors between the
cabinet and the wiring system ground: an insulated grounding conductor and a supplementary
(protective) ground.
Grounding Conductor
The grounding conductor is provided as part of the three-wire, 15-Amp, AC-power cord set included with
the equipment. If the power cord must be replaced, use a power cord of the same gauge that has the
same insulation, number of conductors, and usage ratings.
Protective Grounding Conductor
Install the protective grounding conductor to the system.
The ground symbol within a circle identifies the terminal to be connected to an external
protective conductor. Connect this terminal to earth ground before you make any other
connections to the equipment.
The protective grounding conductor must be:
•
An Insulated wire, #5 (13mm2) to #14 (2mm2) AWG, with green and yellow stripes
•
Connected to the grounding stud on the back of the cabinet.
Compliance and Environmental information
All the compliance and environmental information is available on our website www.phybridge.com
Technical Support
The Phybridge Technical Support Group is available to assist you with product installation,
configuration, monitoring and troubleshooting procedures. Should you experience trouble with this
equipment or for repair or warranty information, please contact Phybridge Inc. at +1 905.901.3633 or
Technical Specifications
CLEER24
Dimensions 19 inches x 1U Without rack ears: 4.45cm x 43.5cm x 25.2cm (HxWxD),1.75” x 17.13” x
9.92” (HxWxD)
Weight 3.6 kg (7.94 lb.)
Mounting Standalone or rack or shelf-mountable
2 brackets included for installation
Processor Broadcom BCM56018 switch processor, 266MHz
Memory 32MB FLASH, 64MB DDR SDRAM

________________________________________________________________________
CLEER Switch – Quick Install Guide 7
Interface:
Ethernet uplink
(Trunk IP)
Maximum 2 uplinks, each 1Gb/s (full duplex), either:
2 mini-GBIC ports: 1000 Base-TX/SX/LX/EX/ZX/LHX (determined by SFP, transceiver
module installed), Ethernet IEEE 802.3z, fiber optic cable, or
2 RJ45 ports: 10/100/1000 Base-T autosensing, independent speed selection, Ethernet
IEEE 802.3, CAT5e copper cable
Interface:
Downlink (PoE
and IP to
adapter)
24 x BNC Jacks
Speed: 100Mb/s (full duplex)
PoE power: 30 Watts Maximum (see Appendix)
Maximum distance:
1500' (457M) over RG59 COAX Cable
1600’ (487M) over RG6 COAX Cable
2000’ (609M) over RG11 COAX Cable
24 x Status LEDs:
Configuration options: Link Activity / Link / Off
Management 1 LAN port (MGMT): RJ45, 10/100 Base-T autosensing, IEEE 802.3
1 UART console port: RJ45 (RJ45 to DB9 cable included)
Power supply Hot-Swappable Power Supply Unit
Autosensing 100-240VAC, 50/60 Hz
Power output: 500W max at 100VAC, 1000W max at 240VAC
Power
consumption 16.5W
Power injection
(PoE) DC voltage: 48VDC to 56VDC
Endpoint devices must be compliant with IEEE 802.3af/at
PowerWISE
®
power sharing 2 male connectors (rear), DC IN and DC OUT: 48VDV to 56VDC
Operating
temperature -10° C to 50° C
Humidity 10% to 95% (non-condensing) at 35° C
EC-Link
Dimensions 2.1cm x 3.2cm x 8.8cm (HxWxD); 0.83” x 1.23” x 3.46” (HxWxD)
Weight 42 g (1.48 oz.)
Mounting Inline between the CAT5 cable (to IP endpoint) and the COAX cable (to CLEER/EC
Switch)
Inline between the CAT5 cable (to IP endpoint) and the COAX cable (to a second EC-Link
when used as an Extender)
COAX Interface 1 BNC port: COAX cable – RG59, RG11, RG6.
Ethernet
Interface 1 RJ45 port: 100 Base-T, IEEE 802.3af/at
Power injection
(PoE) DC voltage on RJ45 port:
37V – 56V
Endpoint devices must be compliant with IEEE 802.3af/at
DC IN (Screw
Terminal) Optional
48V – 56VDC via an external AC/DC Power Adapter (IEC Class II isolated only)
Power
consumption 0.9W
Operating
temperature -50° C to +70° C
Humidity 10% to 95% (non-condensing) at 35° C

_____________________________________________________________________________________________________________________
CLEER Switch – Quick Install Guide 8
Appendix A: Power vs. Reach
P/N: 8009-02-01 Rev. C
Printed in Canada
Table of contents
Other Phybridge Switch manuals