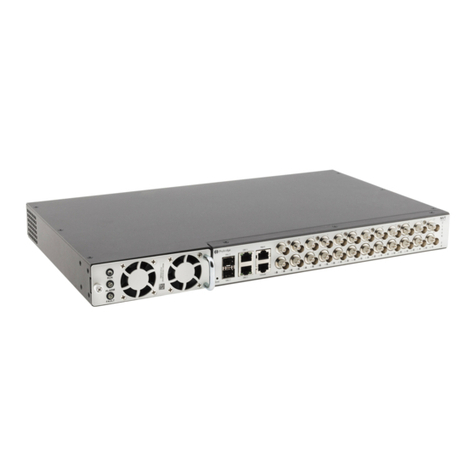
Phybridge PoLRE User manual

PoLRE®Switch Hardware Installation Guide
Release 1.2

Proprietary Notice
Copyright © 2013 Phybridge Inc. All rights reserved.
All information contained in this document is confidential and proprietary to Phybridge Inc. Any disclosure,
duplication, reproduction or transmission of this document or the information it contains is prohibited without the
prior written authorization of Phybridge Inc.
Phybridge believes that at the time of publication, this document accurately reflects PoLRE switch and Phylink
adapter features, requirements and specifications. However, this document may contain errors or omissions, and
Phybridge makes no warranties regarding the content of this document.
Phybridge is not responsible for any loss or damages arising from the use or misuse of this document.
The information contained in this document as well as all product specifications are subject to change without
notice.
Trademarks
Phybridge, PoLRE, and Phylink are trademarks of Phybridge Inc.
All other trademarks, registered trademarks and service marks are the property of their respective owners.
Corporate Contact Information
Phybridge Inc.
2115 South Service Road West
Oakville, ON L6L 5W2
Canada
Tel.: +1 888.901.3633
Fax:
+1 866.252.9148
Web:
www.phybridge.com
Phybridge PoLRE Switch Hardware Installation Guide
Release 1.2 – October 2014
®,™ Trademark of Phybridge Inc.
© Copyright 2013, Phybridge Inc.
All rights reserved.

PoLRE Switch Hardware Installation Guide
i
Warranty Information
All statements in this document concerning the Phybridge PoLRE switch are for informational purposes
only. No part of this document constitutes a warranty, either express or implied, regarding the PoLRE
switch. Our standard limited warranty is provided with the sales contract and/or product package.
Service and Support
Phybridge is dedicated to customer satisfaction and the high quality of its products. Our technical support
team is prepared to assist you in maximizing the efficiency and dependability of your PoLRE switch
environment and will provide you with an immediate solution should a problem with your product arise.
Contact us to discuss a plan of action and be prepared to provide us with:
North America
Please have your Technical Support ID Code ready when calling.
Europe, Middle East, Africa, Asia Pacific
Please have your Channel Support Agreement/Contract Number and password ready when calling.
Returning a PoLRE Switch
If you must return a PoLRE switch, Phylink adapter or accessory component to Phybridge Inc., ensure that
all items are adequately protected with insulating material and packaged in the original carton before
shipping. Failure to do so may void the equipment warranty. Consult the warranty statements included
with the sales contract and/or product package. Contact us for specific RMA requirements before you
ship.
Audience
This document is intended for the use of service technicians, system administrators, information
technology experts and other personnel who are qualified to install, configure and maintain the PoLRE
switch in the telephone network environment. The tasks and procedures described in this guide require a
basic understanding of IP communications, Ethernet LAN networks, PBX telephone systems and the
strategies and solutions currently practiced in your network environment. This document assumes that
you are familiar with the architecture, specifications and functionality of your network. Phybridge
Communications Director (MCD) certification training is required.

ii
PoLRE Switch Hardware Installation Guide
Document Conventions
In this document, some instructions are given particular emphasis to denote cautions, warnings and
notes.
Cautions
A caution contains an instruction that the reader must follow in order to prevent damage to equipment,
network failure or loss of data.
Example:
CAUTION: Do not expose the PoLRE switch or any of its components to a magnetic field or
electrostatic charge. Damage to system components could result.
Warnings
A warning contains an instruction that the reader must follow in order to prevent electrical shock, death
or serious injury to personnel.
Example:
WARNING: Ensure that the PoLRE switch is independently grounded with a wire securely
attached to the ground lug at the rear of the switch.
Notes or Tips
A note or tip provides helpful information related to the topic of discussion.
Examples:
Note: The power supply unit is a field-replaceable part.
Tip: Use the handle on the right side to pull the power supply unit out.

PoLRE Switch Hardware Installation Guide
iii
Contents
1. PRODUCT DESCRIPTION ..................................................................................................................................... 1
Quick Links .................................................................................................................................................................1
Introduction...............................................................................................................................................................2
PoLRE Switch Hardware Description .........................................................................................................................3
PoLRE Switch Front View (Models 24-Port and 48-Port).......................................................................................3
PoLRE Switch Rear View (Models 24-Port and 48-Port) ........................................................................................4
PoLRE Switch Product Numbers ............................................................................................................................4
PoLRE Switch Dimensions......................................................................................................................................4
Operating/Storage Environment ...........................................................................................................................5
Internal Components.............................................................................................................................................5
Power Supply Unit .................................................................................................................................................5
Front View .........................................................................................................................................................5
Rear View...........................................................................................................................................................6
Uplink Ports ...........................................................................................................................................................6
GbE Port Pinout .................................................................................................................................................7
Downlink Ports ......................................................................................................................................................7
Downlink Port Pinout.........................................................................................................................................7
Ports 1 to 24: .....................................................................................................................................................8
Ports 25 to 48: ...................................................................................................................................................8
Out-of-band Management Port.............................................................................................................................8
Out-of-band Management Port Pinout .............................................................................................................9
Console Port ..........................................................................................................................................................9
Reset Button ........................................................................................................................................................10
Status Indicators ..................................................................................................................................................11
Phylink Adapter Hardware Description ...................................................................................................................11
Phylink Product Number......................................................................................................................................11
Product Nameplate Location...........................................................................................................................11
Phylink Dimensions..........................................................................................................................................12
Network Infrastructure Connector......................................................................................................................12
Ethernet Connector .............................................................................................................................................12
2. UNPACKING ..................................................................................................................................................... 13
PoLRE Switch Product Package................................................................................................................................13
Returning a PoLRE Switch ....................................................................................................................................13
Before You Install.....................................................................................................................................................14
Size Requirements ...............................................................................................................................................14
Physical Location Requirements..........................................................................................................................14
Power...............................................................................................................................................................14
Ventilation .......................................................................................................................................................14
Downlink..........................................................................................................................................................14
What You Will Need ............................................................................................................................................15

iv
PoLRE Switch Hardware Installation Guide
3. INSTALLATION.................................................................................................................................................. 17
Quick Links ...............................................................................................................................................................17
Requirements ..........................................................................................................................................................18
Safety Precautions ...................................................................................................................................................18
ESD Procedure .....................................................................................................................................................18
Safety Warnings and Precautions............................................................................................................................19
Care of the PoLRE Switch.....................................................................................................................................20
Care of Replaceable Components .......................................................................................................................20
Overview of Installation...........................................................................................................................................21
Installing the Switch in a Rack .................................................................................................................................21
Rackmount Safety Instructions............................................................................................................................23
Replacing Legacy Devices with IP Endpoint Devices................................................................................................23
Connecting a PC Behind the IP Phone .....................................................................................................................24
Connecting to the 2-wire Network Infrastructure...................................................................................................24
Connecting to the Console ......................................................................................................................................26
Connecting to the IP PBX .........................................................................................................................................26
GbE Port Connection ...........................................................................................................................................27
Gbic Port Connection...........................................................................................................................................27
Installing the SFP Transceiver Modules ...........................................................................................................28
Installing the Fiber Optic Cable........................................................................................................................30
Connecting to Power ...............................................................................................................................................31
AC Connection .....................................................................................................................................................31
Multiple Switch Configurations ...............................................................................................................................32
Daisy-chaining PoLRE Switches for Powershare ..................................................................................................32
Replacing the Power Supply Unit ............................................................................................................................34
4. TECHNICAL SPECIFICATIONS............................................................................................................................. 36
5. COMPLIANCE AND ENVIRONMENTAL INFORMATION...................................................................................... 38
6. ACRONYMS...................................................................................................................................................... 39
INDEX .................................................................................................................................................................. 41

1. PRODUCT
DESCRIPTION
Quick Links
1
1. Product Description
Quick Links
•PoLRE Switch Front View (Models 24-Port and 48-Port), page 3
•PoLRE Switch Rear View (Models 24-Port and 48-Port), page 4
•Power Supply Unit, page 5
•Uplink Ports, page 6
•Downlink Ports, page 7
•Out-of-band Management Port, page 8
•Console Port, page 9
•Reset Button, page 10
•Status Indicators, page 11
•Phylink Adapter Hardware Description, page 11

2
1. PRODUCT
DESCRIPTION
Introduction
Introduction
The PoLRE switch is a Power over Long Reach Ethernet switch. Unlike traditional Ethernet switches, the
PoLRE switch has a reach of up to 1200 feet (365 meters) and is capable of delivering power and signaling
over a single pair CAT3 cable. A Phylink adapter is installed at each IP endpoint, carrying the power and
signaling to the connected IEEE 802.3af compliant end devices.
The default PoLRE configuration supports IP phones and provides a plug and play solution for replacing a
legacy voice network using the existing network cabling plan. Up to 48 IP phones can be powered from a
single PoLRE switch.
The PoLRE switch is a 1U, 19", rackmount 24/48-port Power over Ethernet (PoE) switch. Its upstream
ports connect to the IP PBX, router or data switch over a GbE copper connection. Unlike the typical PoE
switch, however, its downstream ports connect to either one or two 25-pair RJ21 connectors and run over
voice-grade CAT3 cable extending up to 1200 feet (365 meters).
This permits the use of a legacy 2-wire telephony infrastructure to carry voice, data and signals between
the upstream switch or IP PBX to all IP endpoints in the network. Phylink adapters at the IP endpoints are
like media converters that switch from the single CAT3 pair to a standard RJ45 Ethernet PoE connection
for connectivity and power to the attached IP device.
Important: Devices attached at the IP endpoints must be IEEE 802.3af compliant.
IP telephony (IPT) systems deploying the PoLRE switch provide both the robustness of traditional
telephony systems and the easy mobility of IP devices. Multiple PoLRE switches can also be daisy-chained
together to operate in Powershare mode if one switch’s power supply should fail.

1.
PRODUCT DESCRIPTION
PoLRE Switch Hardware Description
3
PoLRE Switch Hardware Description
PoLRE Switch Front View (Models 24-Port and 48-Port)
Model 48-Port
Model 24-Port

4
1. PRODUCT
DESCRIPTION
PoLRE Switch Hardware Description
PoLRE Switch Rear View (Models 24-Port and 48-Port)
PoLRE Switch Product Numbers
The nameplate affixed to the bottom of the PoLRE switch indicates the generic model number (24-Ports
or 48-Ports). The product serial number as well as the switch-specific model number are on a label affixed
to the left side of the rear panel. You may be asked to provide these numbers if you contact Phybridge
Technical Support for assistance.
PoLRE Switch Dimensions
•19”, 1U
•Height: 4.45cm (1.75”)
•Width: 43.5cm (17.13”)
•Depth: 25.2 cm (9.92”)
•Weight: 3.61 kg (7.96 lb.)

1.
PRODUCT DESCRIPTION
PoLRE Switch Hardware Description
5
Operating/Storage Environment
•Operating temperature: -10°C to 50°C (14°F to 122°F)
•Storage temperature: -25°C to 70°C (-4°F to 158°F)
•Relative humidity: 10% to 95% (non-condensing) at 35°C (95°F)
Internal Components
•Processor: Broadcom BCM56018 switch processor, 266 MHz
•Memory: 32MB FLASH, 64MB DDR SDRAM
Power Supply Unit
•Field-replaceable AC power supply unit (PSU)
•1 male AC connector at the rear: Autosensing 100-240VAC, 50/60 Hz
•2 male DC connectors (In/Out) at the rear of the unit for Powershare: -54VDC (nominal),
-42VDC to -58VDC tolerance
•Power output: 500W max at 100VAC; 1000W max at 240VAC
•Power injection (PoE): -54VDC; endpoint devices must be compliant with IEEE 802.3af
•2 fans for cooling, front to rear
•3 LEDs at the front: RUN (green), ALARM (amber) and FAULT (red). Refer to Status Indicators, page
11.
Front View
CAUTION: Do not lift the PoLRE switch using the handle at the front of the power supply unit.
This handle is intended for removing and replacing the PSU only. Refer to Replacing the Power
Supply Unit, page 34.

6
1. PRODUCT
DESCRIPTION
PoLRE Switch Hardware Description
Rear View
Uplink Ports
•Provide Ethernet uplink connections (trunk) to the IP PBX, router or data switch
•Permit inband management from a computer connected to the LAN, including all system OAM&P
functions: software updates, configuration upload/download, status monitoring and management
system interactions
•Speed: 1 GbE, full duplex
•Number of ports: Total of 2
•Cable required: copper, CAT-5e or better
CAUTION: Do not connect both ports to the network unless STP/RSTP is enabled. For more
information, see the PoLRE Switch User Guide as well as the 3300/MCD Resiliency Guidelines.
Port label Port type Cable required
GbE 1, GbE 2 RJ45, Ethernet IEEE 802.3
10/100/1000 Base-T autosensing, independent speed selection
Auto-MDIX
CAT-5e copper cable

1.
PRODUCT DESCRIPTION
PoLRE Switch Hardware Description
7
GbE Port Pinout
Pin Function
1, 2 T/Rx+, T/Rx–
3, 6 T/Rx+, T/Rx–
4, 5 T/Rx+, T/Rx–
7, 8 T/Rx+, T/Rx–
Downlink Ports
•Provide downlink connections (Ethernet with PoE)
•Speed: 10 Mb/s, full duplex
•Number of ports:
- Model 24-Port: 1 RJ21 male telco connector (standard), 24 pairs used
- Model 48-Port: 2 RJ21 male telco connectors (standard), 48 pairs used
•Cable required: CAT3 UTP, 24 AWG
•Maximum cable length: 1200' (365 m)
•PoE power: 10 Watts
Downlink Port Pinout

8
1. PRODUCT
DESCRIPTION
PoLRE Switch Hardware Description
Ports 1 to 24:
PIN
Number 1 2 3 4 5 6 7 8 18 19 20 21 22 23 24 25
Port
Number
TR
+ –
1
TR
+ –
2
TR
+ –
3
TR
+ –
4
TR
+ –
5
TR
+ –6
TR
+ –
7
TR
+ –
8
TR
+ –
18
TR
+ –
19
TR
+ –
20
TR
+ –
21
TR
+ –
22
TR
+ –
23
TR
+ –
24
X
PIN
Number 26 27 28 29 30 31 32 33 43 44 45 46 47 48 49 50
Port
Number
TR
+ –
1
TR
+ –
2
TR
+ –
3
TR
+ –
4
TR
+ –
5
TR
+ –
6
TR
+ –
7
TR
+ –
8
TR
+ –
18
TR
+ –
19
TR
+ –20
TR
+ –21
TR
+ –
22
TR
+ –
23
TR
+ –24
X
Ports 25 to 48:
PIN
Number 1 2 3 4 5 6 7 8 18 19 20 21 22 23 24 25
Port
Number
TR
+ –
25
TR
+ –
26
TR
+ –
27
TR
+ –
28
TR
+ –
29
TR
+ –
30
TR
+ –
31
TR
+ –
32
TR
+ –
42
TR
+ –
43
TR
+ –
44
TR
+ –
45
TR
+ –
46
TR
+ –
47
TR
+ –
48
X
PIN
Number 26 27 28 29 30 31 32 33 43 44 45 46 47 48 49 50
Port
Number
TR
+ –
25
TR
+ –
26
TR
+ –
27
TR
+ –
28
TR
+ –
29
TR
+ –
30
TR
+ –
31
TR
+ –32
TR
+ –
42
TR
+ –
43
TR
+ –
44
TR
+ –
45
TR
+ –
46
TR
+ –
47
TR
+ –
48
X
Out-of-band Management Port
•1 IEEE 802.3 Ethernet LAN port labeled MGMT
•Dedicated port for out-of-band management of the PoLRE switch, including all system OAM&P
functions
•Speed: 10/100 Base-T autosensing Auto-MDIX
•Cable required: standard RJ45 LAN cable, CAT-5 or better

1.
PRODUCT DESCRIPTION
PoLRE Switch Hardware Description
9
Out-of-band Management Port Pinout
Pin Function
1 TX +
2 TX –
3 RX +
4, 5 Bob Smith Termination
6 Rx –
7, 8 Bob Smith Termination
Console Port
•1 RJ45 UART port labeled Console
•Dedicated port for management of the PoLRE switch via a console terminal or PC
•Speed: 115200 Baud
•8 data bits, no parity, 1 stop bit
•Cable required: RS232 RJ45 to DB9 connector

10
1. PRODUCT
DESCRIPTION
PoLRE Switch Hardware Description
Console
Port
RTS DTR TxD GND GND RxD DSR CTS
RJ45 Pin 1 2 3 4 5 6 7 8
DB-9 Pin 8 6 2 5 5 3 4 7
Console
Device
CTS DSR RxD GND GND TxD DTR RTS
Reset Button
•Recessed button labeled Reset, for manually restarting the PoLRE switch
•Located on the front panel of the PoLRE switch immediately to the right of the power supply unit
•Use a paper clip or something similar to press the Reset button in
CAUTION: Do NOT use a pencil tip to press the Reset button.
Note: If you press and hold for 10 seconds, the PoLRE switch will revert to its factory
configuration. If you press and hold for under 10 seconds, the PoLRE switch will reboot.

1.
PRODUCT DESCRIPTION
Phylink Adapter Hardware Description
11
Status Indicators
3 LEDs on the front panel of the power supply unit indicate the operating status of the PSU and the PoLRE
switch:
•RUN (green): Flashes during startup. Lights solid when the PoLRE switch is up and running.
•ALARM (amber): Flashes once during startup, then turns off. Lights solid to indicate a problem with
the PSU.
•FAULT (red): Flashes once during startup, then turns off. Lights solid to indicate a PoLRE switch
software or hardware failure. Contact Phybridge Technical Support for assistance.
Phylink Adapter Hardware Description
Phylink Product Number
The nameplate affixed to the top of the Phylink adapter enclosure indicates the product model number.
You may be asked to provide this number if you contact Phybridge Technical Support for assistance.
Product Nameplate Location

12
1. PRODUCT
DESCRIPTION
Phylink Adapter Hardware Description
Phylink Dimensions
•Height: 1.8cm (0.71”)
•Width: 2.8cm (1.1”)
•Depth: 6.5cm (2.56”)
•Weight: 22 g (0.78 oz.)
Network Infrastructure Connector
•RJ11 port
•Connects to the single CAT3 pair on the legacy infrastructure side
Ethernet Connector
•RJ45 port
•Provides connectivity and power to the IP end device.
•DC voltage -54V max; -37V when 365m (1200’) away from the PoLRE switch
•Speed: Fixed 10 Mb/s Full Duplex Auto-MDIX
•Cable: CAT-5 or better

2. UNPACKING
PoLRE Switch Product Package
13
2. Unpacking
PoLRE Switch Product Package
When you first take the PoLRE switch out of its carton, lay out the switch and all of its accessories in your
work area and verify that you have received all of the items you ordered. Each component is labeled with
its part number. The basic PoLRE switch product package includes:
•1 PoLRE switch, model 24-Port or model 48-Port
•1 rackmount bracket kit
•1 console cable
•1 power cord
•Other PoLRE components are packaged separately for installation in the field. Verify that you have
received all of the items you ordered.
•Phylink adapters. The number of adapters shipped is determined from your order.
•(Optional) Replacement power supply unit. Note that the PoLRE switch comes standard with a factory
installed power supply unit.
Returning a PoLRE Switch
Contact Phybridge immediately if any parts are missing or have been damaged during shipment. Retain
the shipping order and invoice for confirmation.
North America
Please have your Technical Support ID Code ready when calling for North America customers.

14
2. UNPACKING
Before You Install
Europe, Middle East, Africa, Asia Pacific
Please have your Channel Support Agreement/Contract Number and password ready when calling.
Before You Install
WARNING: The PoLRE switch can be installed in any indoor location in all countries except in
Finland, Norway and Sweden, where, in these three Nordic countries, it must be installed in a
restricted access location.
The location has to meet the following size, distance and environmental criteria.
Size Requirements
Select a standard 19" equipment rack or, for a standalone PoLRE switch, a flat, stable surface capable of
supporting the size and weight of the PoLRE switch, its installable components and cabling. Refer to PoLRE
Switch Dimensions, page 4.
Ensure that you have enough rack space for all equipment. Shelves and rear supporting brackets are not
mandatory. See Installing the Switch in a Rack, page 21.
Physical Location Requirements
Power
The PoLRE switch must be placed within 6 feet of an available AC power source. Do not use an extension
cord to connect the equipment to a power outlet.
Ventilation
To ensure proper ventilation of the PoLRE switch, leave at least 2 inches of unobstructed space on all
sides of the switch. If the fans are blocked, the unit could overheat. Refer also to Operating/Storage
Environment, page 5.
Downlink
The Phylink adapters can be installed up to 1200' (365m) away from the PoLRE switch.
Table of contents
Other Phybridge Switch manuals