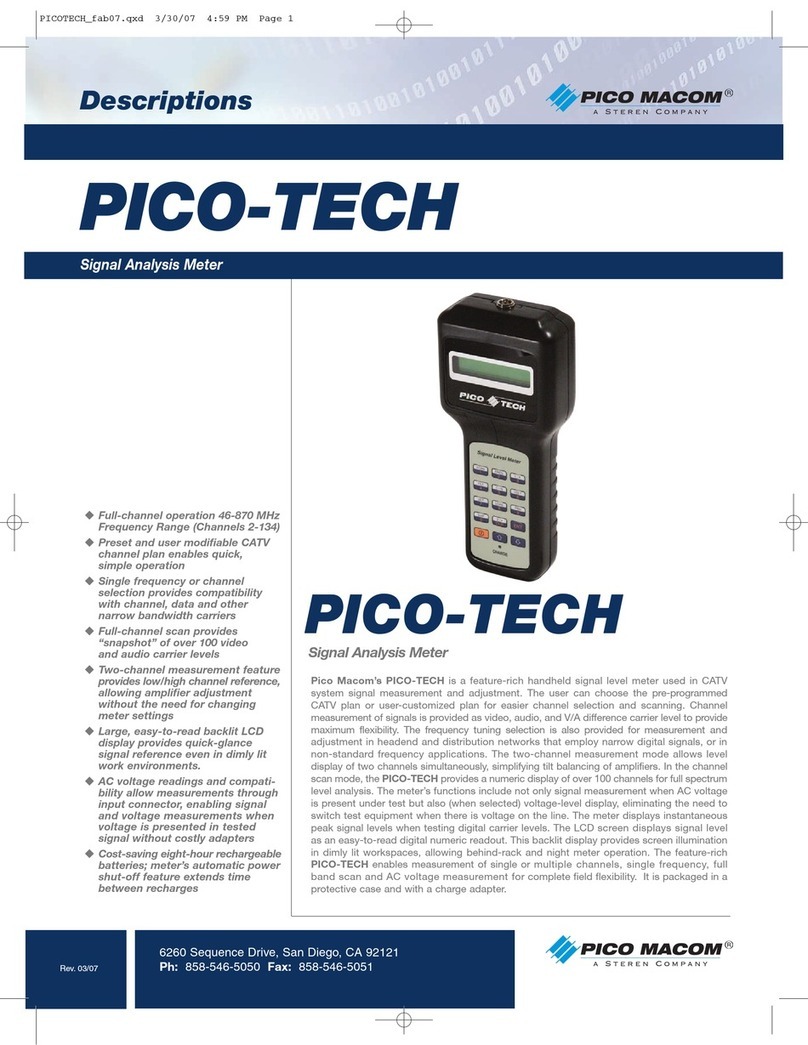
Pico Macom PICO-PRO User manual

PICO-PRO
Signal Analysis Meter
Manual
Rev.03/06
Pico Macom, Inc.
355 Parkside Drive, San Fernando, CA 91340 USA
Ph: 818-493-4300 www.picomacom.com Fax: 818-493-4433
User Manual
Pico Pro Manual 06.qxd 4/10/06 3:20 PM Page 1

PICO-PRO
Rev. 03/06
Ph: 800-421-6511
www.picomacom.com
Pico-Pro User Manual
Foreword...........................................................1
1. ABOUT THE INSTRUMENT ............................................2
2. LIMITED WARRANTY ................................................2
3. OPERATION .......................................................3
3.1 KEYS ........................................................3
3.2 HOW TO SET..................................................4
3.2.1 Auto Off Time. . . . . . . . . . . . . . . . . . . . . . . . . . . . . . . . . . . . . . . . . . . . . . 4
3.2.2 Level Unit Select . . . . . . . . . . . . . . . . . . . . . . . . . . . . . . . . . . . . . . . . . . . 4
3.2.3 Frequency Step In . . . . . . . . . . . . . . . . . . . . . . . . . . . . . . . . . . . . . . . . . . 4
3.2.4 Tilt Channel Set . . . . . . . . . . . . . . . . . . . . . . . . . . . . . . . . . . . . . . . . . . . . 4
3.2.5 Channel Amend Set. . . . . . . . . . . . . . . . . . . . . . . . . . . . . . . . . . . . . . . . . 5
3.2.6 Clear Channel Amend Value . . . . . . . . . . . . . . . . . . . . . . . . . . . . . . . . . . 5
3.2.7 Scan Audio Carrier. . . . . . . . . . . . . . . . . . . . . . . . . . . . . . . . . . . . . . . . . . 5
3.2.8 Communication Port Set . . . . . . . . . . . . . . . . . . . . . . . . . . . . . . . . . . . . . 5
3.2.9 Channel Plan Set ...........................................5
3.2.10 Channel Sort . . . . . . . . . . . . . . . . . . . . . . . . . . . . . . . . . . . . . . . . . . . . . 6
3.2.11 Channel Edit .............................................6
3.2.12 Operator and Unit Name . . . . . . . . . . . . . . . . . . . . . . . . . . . . . . . . . . . . 6
3.3 SYSTEM......................................................7
3.3.1 Single Channel Test . . . . . . . . . . . . . . . . . . . . . . . . . . . . . . . . . . . . . . . . . 7
3.3.2 Scan Channels.............................................7
3.3.3 Spectrum Test . . . . . . . . . . . . . . . . . . . . . . . . . . . . . . . . . . . . . . . . . . . . . 7
3.3.4 Voltage Test ...............................................8
3.3.5 C/N Test . . . . . . . . . . . . . . . . . . . . . . . . . . . . . . . . . . . . . . . . . . . . . . . . . . 8
3.3.6 Tilt Test...................................................8
3.3.7 Hum Test . . . . . . . . . . . . . . . . . . . . . . . . . . . . . . . . . . . . . . . . . . . . . . . . . 8
4. SPECIFICATIONS....................................................9
4.1 LEVEL........................................................9
4.2 AUTO SCAN TESTING ..........................................9
4.3 VOLTAGE .....................................................9
4.4 C/N ..........................................................9
4.5 OTHERS......................................................9
4.6 POWER ......................................................9
4.7 ACCESSORIES ................................................9
APPENDIX: Channel Lists ..............................................10
Table of Contents
Pico Pro Manual 06.qxd 4/10/06 3:20 PM Page 2

1
Rev.03/06
Ph: 800-421-6511
www.picomacom.com
Pico-Pro User Manual
PICO-PRO
Foreword
Thank you for selecting Pico Macom’s Pico-Pro Signal Analysis Meter. Please read this
manual carefully before initial operation. Inspect the shipping container for damage. If
the shipping container or cushioning material is damaged, keep it until you have verified
that the contents are complete and you have tested the instrument mechanically and
electrically. If the contents are incomplete and/or if the instrument doesn’t work properly,
notify your dealer. If this instrument is delivered to you directly, notify the carrier. If the
shipping container is damaged or the cushioning material shows indication of stress, also
notify the carrier.Only the recipient is elegible for any kind of claim to transportation
damages because the dealer has paid for the transportaiton insurance at the time of
shipment. The recipient should inspect the container at the time of arrival. If the shipping
material is in good condiditon please retain for future use.
Pico Pro Manual 06.qxd 4/10/06 3:20 PM Page 1

PICO-PRO
2
Rev.03/06
Ph: 800-421-6511
www.picomacom.com
Pico-Pro User Manual
1. ABOUT THE INSTRUMENT
The PICO-PRO Signal Analysis Meter is specially designed and manufactured for CATV system
installation and testing. It’s a portable instrument, easy to carry with many functions. This instrument
can test CATV signal level both at channel and frequency mode. At SCAN mode, it can scan all
channels and store signal levels. At spectrum mode, it can carry out spectrum display and test
for a certain frequency range. It can also measure CATV Tilt, C/N, trunk cable voltage, etc. The big
LCD screen clearly displays all testing results. It is especially suited for CATV headend use as a
professional measurement instrument.
2. LIMITED WARRANTY
This product is warrented against defects in material and workmanship for a period of 90 days from
the date of shipment. During the warranty period the manufacturer or the dealer will be responsible
for necessary calibration and repair. We ensure that the software and hardware designed for use will
operate the product’s programming.
Pico Pro Manual 06.qxd 4/10/06 3:20 PM Page 2

3. OPERATION
3.1 KEYS
Function Setting Key
This key will show setting interface to
set and change testing specifications.
Channel Scan Key
Press the key to enter Channel Scan
mode.
Frequency Spectrum Key
Press the key to enter spectrum
display mode.
Channel/Frequency Key
Press the key to enter Channel/
Frequency (Video, Audio, V/A)
testing mode.
Step up key, Step down Key
Press the key to increase or decrease
the channel number and frequency
value. At setting mode press the key to
move up/down the menu.
Power On/Off Key.
Enter Key confirms the input channel
number/Frequency or new setting or
enter sub-menu.
Clear Key
Clear new input number or clear
unconfirmed setting or escape from
sub-menu.
Numeric Keys provide precise
frequency selection. Built in 2ndF
function key provides additional
selections listed below.
At SETUP mode, use numeric keys to
input English letter, space, etc.
Press these keys to enter the channel
number and frequency value. To input
frequency use decimal points to the
nearest thousands. To input additional
channel number, press key “S/.x” then
enter the number.At the end of this
operation instrument will confirm
automatically, or else press “ENT” to
confirm or press “CLR” to clear the
operation.
2ndF Second Function Key
Use the key to begin the second
function operation.
NOTE: Operation described in this section
is under second function!
Press “2ndF” then “6” to check built-in
battery voltage and trunk cable
voltage testing.
Press “2ndF” then “5” to test CATV
carrier to noise ratio.
Press “2ndF” then “4” to begin
testing TILT.
PRINT Value added Opt.(l).
At SCAN or SPECTRUM mode
press key to print the data stored in
memory.
Press “2ndF” then “8” during SCAN or
SPECTRUM mode, to save
current data.
Press “2ndF” then “9” at SCAN or
SPECTRUM mode, to load
saved data.
Press “2ndF” then “S/.CLR” Delete
key. At SCAN or SPECTRUM mode,
press the key to delete data in
memory.
Press “2ndF” then press these keys to
change the LCD contrast.
3
Rev.03/06
Ph: 800-421-6511
www.picomacom.com
Pico-Pro User Manual
PICO-PRO
SCAN
SET
SPECT
F/CH
ê
ê
ENT
CLR
0-9
S/.
2ndF
6
5
4
PRN/ENT
8
9
CLR
st
Pico Pro Manual 06.qxd 4/10/06 3:20 PM Page 3

PICO-PRO
4
Rev.03/06
Ph: 800-421-6511
www.picomacom.com
Pico-Pro User Manual
3.2 HOW TO SET
Press “2ndF” then “7”.
LCD display as follows:
Press key sor tto select menu (in three
screens) then press key “ENT” to enter
selected SET mode. Press Key “CLR” to
escape to testing mode.
At any time during this menu press sor t
to select desired choice, and then press “ENT”
to confirm and escape to previous menu.
Or press key “CLR” to cancel the current
operation and return to previous menu.
3.2.1 Auto Off Time
When the mark is pointed to “AUTO OFF
TIME”, press “ENT”, the LCD will display:
3.2.2 Level Unit Select
When the mark (arrow head) is pointed to
LEVEL UNIT, press “ENT” to confirm; LCD
displays:
Select the desired output power level “dBuV”
or “dBmV”.
3.2.3 Frequency Step In
When mark (arrow head) is pointed to
“FREQUENCY STEP”, press “ENT” to
confirm; LCD Displays:
Select the desired frequency step:
“50kHz”,”100kHz” or “1MHz”
3.2.4 Tilt Channel Set
This function helps you check the tilt in your
multi-channel headend system. You can
choose 7 different channels in ascending
order (you can choose the channel number by
using up and down arrow). Using F1 or F4 you
can go to the next level of channel to be
selected. 1 being the lowest channel and 7
being the highest channel in your system,
it will show you the difference between the
lowest and highest signal level. Accordingly
the user will know if equalizer is needed or
not. Once all channels have been selected
press <ENT> to confirm and press <2nd>and
<TILT> to check your selected channel levels.
2ndF
7
Pico Pro Manual 06.qxd 4/10/06 3:20 PM Page 4

5
Rev.03/06
Ph: 800-421-6511
www.picomacom.com
Pico-Pro User Manual
PICO-PRO
3.2.5 Channel Amend Set
This key lets you modify and correct the level
using a known reference level. When
“CHAN AMEND” is highlighted, press “ENT”
to confirm; the LCD will display:
Press key sor tto change the channel to
be amended. Press key “F1” or “F2” to change
the Video or Audio mode. Press “F3” or “F4”
to correct data (the range is ±5 dB). Press
“ENT” to confirm and save the data to build in
memory. Press “CLR” to cancel the current
operation and escape to the previous menu.
3.2.6 Clear Channel Amend Value
Press key sor t,when “CLR AMEND
VALUE” is highlighted, press key “ENT”; the
LCD will display:
Press “F2” or “F3” then press “ENT” or “CLR”
to confirm or cancel the operation.
3.2.7 Scan Audio Carrier
Press key sor tto select, when the “SCAN
AUDIO” is highlighted, press “ENT”; the LCD
will display:
Pressing “F2” will scan Audio and Video
carrier simultaneously at Channel Scan mode.
Pressing “F3” will only scan Video carrier at
Channel Scan mode.
3.2.8 Communication Port Set (Opt.)
Press key sor t,when “INTERFACE SET”
is highlighted, press “ENT”; the LCD will
display:
a. The COM port is RS232C serial type.
Default Baud Rate of the current Version
is 9600bps.
b. Serial printing port is required for the
printer.(EPSON LX-300)
c. Print Scale is valid for screen printing.
It means printing at rate of 1:1 or 1:2 by
comparing the screen matrix. The default
printing rate is 1:1.
3.2.9 Channel Plan Select
Press key sor tto select. When mark
(arrow head) is pointed to “CHANNEL PLAN”,
press “ENT” to confirm; LCD will display:
Select the desired “CHANNEL PLAN” using
sor t.
Pico Pro Manual 06.qxd 4/10/06 3:20 PM Page 5

PICO-PRO
6
Rev.03/06
Ph: 800-421-6511
www.picomacom.com
Pico-Pro User Manual
3.2.10 Channel Sort
The default “CHANNEL SORT” is sorted by
frequency. Press key sor tto select. When
arrow head points to “CHANNEL SORT”,
press key “ENT” to confirm; LCD will display:
Select the desired option by pressing
sor t.
3.2.11 Channel Edit
Press sor tto select. When arrow head is
pointed to “CHANNEL EDIT”, press “ENT” to
confirm; LCD will display:
Press key sor tto select “Manual edit” or
“Auto edit”. Then press key “ENT” to start,
sub-menu (press “CLR” to cancel the
operation). The menu is as follows:
a. Manual Edit
Using Manual Edit mode, selecting NO on any
channel will deselect the channel from your
regular operational testing. For example, if you
only have a 7 channel headend system,
(CH. 2, 3, 4, 5, 6, 7, 8) then you can manually
deselect all channels above channel 8. Once
confirmed, you will only see channels 2 thru 8
in your meter.
In manual edit mode, press sor tto select
channel, press F1 or F4 to enable or disable
the selected channel number. When selected,
press “ENT” to confirm the current operation
and save the data to built-in memory. Press
key “CLR” to cancel current operation and
reload data in memory, then escape to
previous menu.
b. Auto Edit
In Auto Edit mode, the user is allowed to
adjust the Auto edit limit level, and then
press key “ENT”; the instrument will scan all
channels in the Channel List and select all
channels greater than the limit level. Finally,
press key “ENT” to confirm. Press key “CLR”
to cancel the auto edit and escape to
previous menu.
Notice: if the total number of selected
channels is less than 3, then the meter will
select channels 2, 3 and 4 automatically.
3.2.12 Operator and Unit Name
Press key sor tto select. When arrow
head points to”OPERATOR”, press key “ENT”
to confirm; the LCD displays:
Press “F1” or “F4” to select “NAME” or
“UNIT”. Press “F2” or “F3” to change input
letter position (also used for space). Press
key “1/ABC”–“9/YZ” to input 26 letters. Then
press “ENT” to confirm. Press “CLR” to clear
the current operation and escape to
previous menu.
Pico Pro Manual 06.qxd 4/10/06 3:20 PM Page 6

7
Rev.03/06
Ph: 800-421-6511
www.picomacom.com
Pico-Pro User Manual
PICO-PRO
3.3 SYSTEM
3.3.1 Single Channel Test
Press key “2ndF” and “F/CH” will enter the
following testing mode. The LCD displays:
Press “F l”, “F2”, “F3” or “F4” to switch
between the above 4 test modes.
Press sor tto change frequency and
channels. Press key pad to easily input
channel number and/or frequency to the
nearest thousands.
3.3.2 Scan Channels
Press “SCAN” to enter Channel SCAN mode.
The LCD displays:
Press key sor tto change reference level
display at 10dB/Division. Press key “F1” to
change display scale. The value is 10dB or 20
dB/ division. Press key “F4” to change the
scan channel numbers (i.e., the display is
enlarged). Zoom in 1X, 2X, or 4X. Press “F2”
or “F3” to move the marker right or left.
At Channel SCAN mode, press key “2ndF”
plus other second function key to save (“8”)
the tested data, or reload (“9”), or print or
delete saved data.
3.3.3 Spectrum Test
Press key “2ndF” and “SPECT” to enter
SPECTRUM testing mode. The LCD displays:
Press sor tto change display reference
level at 10 dB/ division.
Press “F1” to change display scale to 10dB or
20dB/division. Press “F2” or “F3” to input cen-
tral frequency (CENT) or scan width (SPAN).
Press “F4” to change 4 keys operation and
enter frequency marker operation. At this
instance press “F1” to automatically move the
frequency marker to the frequency point of the
highest level (Peak). Press key “F2” or “F3” to
move marker right or left.
In spectrum test mode press “2ndF” plus other
second function key to save tested data, load,
print or delete saved data.
Pico Pro Manual 06.qxd 4/10/06 3:20 PM Page 7

PICO-PRO
8
Rev.03/06
Ph: 800-421-6511
www.picomacom.com
Pico-Pro User Manual
3.3.4 Voltage Test
Press “2ndF” then “VOLT/6” and the instru-
ment will enter voltage testing mode. It will
test the built-in battery voltage and the trunk
voltage. The LCD displays:
3.3.5 C/N Test (The result is only for
reference, not accuracy.)
Press “2ndF” then “C/N 5” and the instrument
will enter C/N testing mode. The instrument
will measure the selected channel’svideo
carrier level (the value should be greater than
80dBuV,or it will not be accurate) and display
the value. Then the noise level of the system
will be measured. Follow the instruction from
the instrument and get the C/N value and
display on LCD as follows:
Press sor tto change the channel number.
to be tested. One can also directly input the
Channel by keypad and “ENT”. The special
case of testing C/N shows:
1. The C/N testing is limited to test the CATV
transmitting system.
2. When the LCD display <25dB, it means the
tested C/N value is less then 25 dBuV or the
value is negative.
3. When the LCD display >65dB, it means the
tested C/N value is greater than 65dBuV.
4. When the LCD displays “Error”, it means
the resultant C/N is too low and out of range.
3.3.6 Tilt Test
Press “2ndF” then press “TILT/4”and the
instrument enters TILT testing mode. The LCD
displays:
Press sor tto change the display reference
level at 10dB. Press “F1” to change display
scale. The value is 10dB or 20dB per division.
The other keys don’t work in this version.
3.3.7 Hum Test (Opt.)
Press key “2ndF” then press key “6/HUM” to
enter HUM testing mode. Function is not
included in this version.
Pico Pro Manual 06.qxd 4/10/06 3:20 PM Page 8

9
Rev.03/06
Ph: 800-421-6511
www.picomacom.com
Pico-Pro User Manual
PICO-PRO
4. SPECIFICATIONS
4.1 LEVEL
Frequency Range: 5-870MHz
Resolution Bandwidth: 280kHz ± 50kHz
Channels: NTSC CATV & PAL B/G & SUB-Band
Level Range: 30dBµV – 115dBµV (61-870MHz)
33dBµV – 115dBµV (5-60MHz)
Accuracy: ±1.5dBµV (under room temperature 27° C)
Input impedance: 75Ω(BNC or F connector)
Wave detection: Peak value
4.2 AUTO SCAN TESTING
Max Channel Scan: 100 Channels
Scan Range: All Channels within 46—870MHz
Scan Speed: 30 Channels/Min
Memory Groups: 23 Groups (00-22) Each group stores Max 100 Channels
4.3 VOLTAGE
Voltage Range: 0 – 100VAC
Accuracy: ±1.5V
Resolution: 0.1V
4.4 C/N (The measured result is only for reference)
Level Range: 80dBuV – 105dBuV
4.5 OTHERS
Dimension: 214mm x 94mm X 47mm
Weight: 1.4 kg
Working Temperature: -l5° C – +40° C
Display LCD: 128x64 Matrix Super big LCD with back light
4.6 POWER
DC Supply: DC 7.2V/1.6Ah rechargeable battery
AC Supply: AC 220V/50Hz±10%
Battery working hours: longer than 4.5 hours at continuous working mode
Recharging hours: 12 – 14 hours.
4.7 ACCESSORIES
Battery Charger: charger 1pc
RF Input Port: F type 2pcs
User Manual 1 copy
Pico Pro Manual 06.qxd 4/10/06 3:20 PM Page 9

PICO-PRO
10
Rev.03/06
Ph: 800-421-6511
www.picomacom.com
Pico-Pro User Manual
APPENDIX: Channel Lists
PAL B/G (CCIR) Channel List
CH. NO. DISPLAY VIDEO AUDIO CH. NO. DISPLAY VIDEO AUDIO
CH. NO. CARRIER CARRIER CH. NO. CARRIER CARRIER
E2 CH02 48.25 53.75 S7 ZCH 7 147.25 152.75
E3 CH03 55.25 60.75 S8 ZCH 8 154.25 159.75
E4 CH04 62.25 67.75 S9 ZCH 9 161.25 166.75
X ZCH01 69.25 74.75 S10 ZCH10 168.25 173.75
Y ZCH02 76.25 81.75 E5 CH05 175.25 180.75
Z ZCH03 83.25 88.75 E6 CH06 182.28 187.75
Z+1 ZCH04 90.25 95.75 E7 CH07 189.25 194.75
Z+2 ZCH05 97.25 102.75 E8 CH08 196.25 201.75
S1 ZCH 1 105.25 110.75 E9 CH09 203.25 208.75
S2 ZCH 2 112.25 117.75 E10 CH10 210.25 215.75
S3 ZCH 3 119.25 124.75 E11 CH11 217.25 222.75
S4 ZCH 4 126.25 131.75 E12 CH12 224.25 229.75
S5 ZCH 5 133.25 138.75 S11 ZCH11 231.25 236.75
S6 ZCH 6 140.25 145.75 S12 ZCH12 238.25 243.75
S13 ZCH13 245.25 250.75 S36 ZCH36 423.25 428.75
S14 ZCH14 252.25 257.75 S37 ZCH37 431.25 436.75
S15 ZCH15 259.25 264.75 S38 ZCH38 439.25 444.75
S16 ZCH16 266.25 271.75 S39 ZCH39 447.25 452.75
S17 ZCH17 273.25 278.75 S40 ZCH40 455.25 460.75
S18 ZCH18 280.25 285.75 S41 ZCH41 463.25 468.75
S19 ZCH19 287.25 292.75 CH21 CH21 471.25 476.75
S20 ZCH20 294.25 299.75 CH22 CH22 479.25 484.75
S21 ZCH21 303.25 308.75 CH23 CH23 487.25 492.75
S22 ZCH22 311.25 316.75 CH24 CH24 495.25 500.75
S23 ZCH23 319.25 324.75 CH25 CH25 503.25 508.75
S24 ZCH24 327.25 332.75 CH26 CH26 511.25 516.75
S25 ZCH25 335.25 340.75 CH27 CH27 519.25 524.75
S26 ZCH26 343.25 348.75 CH28 CH28 527.25 532.75
S27 ZCH27 351.25 356.75 CH29 CH29 535.25 540.75
S28 ZCH28 359.25 364.75 CH30 CH30 543.25 548.75
S29 ZCH29 367.25 372.75 CH31 CH31 551.25 556.75
S30 ZCH30 375.25 380.75 CH32 CH32 559.25 564.75
S31 ZCH31 383.25 388.75 CH33 CH33 567.25 572.75
S32 ZCH32 391.25 396.75 CH34 CH34 575.25 580.75
S33 ZCH33 399.25 404.75 CH35 CH35 583.25 588.75
S34 ZCH34 407.25 412.75 CH36 CH36 591.25 596.75
S35 ZCH35 415.25 420.75 CH37 CH37 599.25 604.75
CH38 CH38 607.25 612.75 55 CH55 743.25 748.75
CH39 CH39 615.25 620.75 56 CH56 751.25 756.75
CH40 CH40 623.25 628.75 57 CH57 759.25 764.75
CH41 CH41 631.25 636.75 58 CH58 767.25 772.75
42 CH42 639.25 644.75 59 CH59 775.25 780.75
43 CH43 647.25 652.75 60 CH60 783.25 788.75
44 CH44 655.25 660.75 61 CH61 791.25 796.75
45 CH45 663.25 668.75 62 CH62 799.25 804.75
Pico Pro Manual 06.qxd 4/10/06 3:20 PM Page 10

11
Rev.03/06
Ph: 800-421-6511
www.picomacom.com
Pico-Pro User Manual
PICO-PRO
46 CH46 671.25 676.75 63 CH63 807.25 812.75
47 CH47 679.25 684.75 64 CH64 815.25 820.75
48 CH48 687.25 692.75 65 CH65 823.25 828.75
49 CH49 695.25 700.75 66 CH66 831.25 836.75
50 CH50 703.25 708.75 67 CH67 839.25 844.75
51 CH51 711.25 716.75 68 CH68 847.25 852.75
52 CH52 719.25 724.75 69 CH69 855.25 860.75
53 CH53 727.25 732.75
54 CH54 735.25 740.75
NTSC CATV Channel List
CH. NO. DISPLAY VIDEO AUDIO CH. NO. DISPLAY VIDEO AUDIO
CH. NO. CARRIER CARRIER CH. NO. CARRIER CARRIER
2 CH002 55.25 59.75 F CH019 151.25 155.75
3 CH003 61.25 65.75 G CH020 157.25 161.75
4 CH004 67.25 71.75 H CH021 163.25 167.75
5 CH005 77.25 81.75 I CH022 169.25 173.75
6 CH006 83.25 87.75 7 CH007 175.25 179.75
A5 CH095 91.25 95.75 8 CH008 181.25 185.75
A4 CH096 97.25 101.75 9 CH009 187.25 191.75
A3 CH097 103.25 107.75 10 CH010 193.25 197.75
A2 CH098 109.25 113.75 11 CH011 199.25 203.75
A1 CH099 115.25 119.75 12 CH012 205.25 209.75
A CH014 121.25 125.75 13 CH013 211.25 215.75
B CH015 127.25 131.75 J CH023 217.25 221.75
C CH016 133.25 137.75 K CH024 223.25 227.75
D CH017 139.25 143.75 L CH025 229.25 233.75
E CH018 145.25 149.75 M CH026 235.25 239.75
N CH027 241.25 245.75 II CH045 349. 25 353.75
OCH028 247.25 251.75 JJ CH046 355. 25 359.75
P CH029 253.25 257.75 KK CH047 361. 25 365.75
Q CH030 259. 25 263.75 LL CH048 367. 25 371.75
R CH031 265. 25 269.75 MM CH049 373. 25 377.75
S CH032 271. 25 275.75 NN CH050 379. 25 383.75
TCH033 277.25 281.75 OO CH051 385. 25 389.75
U CH034 283. 25 287.75 PP CH052 391. 25 395.75
V CH035 289. 25 293.75 QQ CH053 397. 25 401.75
W CH036 295. 25 299.75 RR CH054 403.25 407.75
AA CH037 301. 25 305.75 SS CH055 409.25 413.75
BB CH038 307. 25 311.75 TT CH056 415.25 419.75
CC CH039 313. 25 317.75 UU CH057 421.25 425.75
DD CH040 319. 25 323.75 W CH058 427.25 431.75
EE CH041 325. 25 329.75 WW CH059 433.25 437.75
FF CH042 331.25 335.75 XX CH060 439.25 443.75
GG CH043 337. 25 341.75 YY CH061 445.25 449.75
HH CH044 343. 25 347.75 ZZ CH062 451.25 455.75
AAA CH063 457.25 461.75 --- CH084 583.25 587.75
CH. NO. DISPLAY VIDEO AUDIO CH. NO. DISPLAY VIDEO AUDIO
CH. NO. CARRIER CARRIER CH. NO. CARRIER CARRIER
Pico Pro Manual 06.qxd 4/10/06 3:20 PM Page 11

PICO-PRO
12
Rev.03/06
Ph: 800-421-6511
www.picomacom.com
Pico-Pro User Manual
BBB CH064 463.25 467.75 --- CH085 589.25 593.75
CCC CH065 469.25 473.75 --- CH086 595.25 599.75
DDD CH066 475.25 479.75 --- CH087 601.25 605.75
EEE CH067 481.25 485.75 --- CH088 607.25 611.75
FFF CH068 487.25 491.75 --- CH089 613.25 617.75
GGG CH069 493.25 497.75 --- CH090 619.25 623.75
HHH CH070 499.25 503.75 --- CH091 625.25 629.75
III CH071 505.25 509.75 --- CH092 631.25 635.75
JJJ CH072 511.25 515.75 --- CH093 637.25 641.75
KKK CH073 517.25 521.75 --- CH094 643.25 647.75
LLL CH074 523.25 527.75 --- CH100 649.25 653.75
MMM CH075 529.25 533.75 --- CH101 655.25 659.75
NNN CH076 535.25 539.75 --- CH102 661.25 665.75
OOO CH077 541.25 545.75 --- CH103 667.25 671.75
PPP CH078 547.25 551.75 --- CH104 673.25 677.75
--- CH079 553.25 557.75 --- CH105 679.25 683.75
--- CH080 559.25 563.75 --- CH106 685.25 689.75
--- CH081 565.25 569.75 --- CH107 691.25 695.75
--- CH082 571.25 575.75 --- CH108 697.25 701.75
--- CH083 577.25 581.75 --- CH109 703.25 707.75
--- CH110 709.25 713.75 --- CH128 817.25 821.75
--- CH111 715.25 719.75 --- CH129 823.25 827.75
--- CH112 721.25 725.75 --- CH130 829.25 833.75
--- CH113 727.25 731.75 --- CH131 835.25 839.75
--- CH114 733.25 737.75 --- CH132 841.25 845.75
--- CH115 739.25 743.75 --- CH133 847.25 851.75
--- CH116 745.25 749.75 --- CH134 853.25 857.75
--- CH117 751.25 755.75 --- CH135 859.25 863.75
--- CH118 757.25 761.75 --- CH136 865.25 869.75
--- CH119 763.25 767.75
--- CH120 769.25 773.75
--- CH121 775.25 779.75
--- CH122 781.25 785.75
--- CH123 787.25 791.75
--- CH124 793.25 797.75
--- CH125 799.25 803.75
--- CH126 805.25 809.75
--- CH127 811.25 815.75
NTSC Sub-Band Channel List
CH. NO. DISPLAY VIDEO AUDIO CH NO. DISPLAY VIDEO AUDIO
CH. NO. CARRIER CARRIER CH. NO. CARRIER CARRIER
--- T-7 7.00 11.50 --- T-11 31.00 35.50
--- T-8 13.00 17.50 --- T-12 37.00 41.50
--- T-9 19.00 23.50 --- T-13 43.00 47.50
--- T-10 25.00 29.50 ---
NTSC CATV Channel List Continued
CH. NO. DISPLAY VIDEO AUDIO CH NO. DISPLAY VIDEO AUDIO
CH. NO. CARRIER CARRIER CH. NO. CARRIER CARRIER
Pico Pro Manual 06.qxd 4/10/06 3:21 PM Page 12

Manual
Rev.03/06
Ph: 800-421-6511
www.picomacom.com
Pico-Pro User Manual
PICO-PRO
Notes
____________________________________________________________________
____________________________________________________________________
____________________________________________________________________
____________________________________________________________________
____________________________________________________________________
____________________________________________________________________
____________________________________________________________________
____________________________________________________________________
____________________________________________________________________
____________________________________________________________________
____________________________________________________________________
____________________________________________________________________
____________________________________________________________________
____________________________________________________________________
____________________________________________________________________
____________________________________________________________________
____________________________________________________________________
____________________________________________________________________
____________________________________________________________________
____________________________________________________________________
____________________________________________________________________
____________________________________________________________________
____________________________________________________________________
Pico Pro Manual 06.qxd 4/10/06 3:21 PM Page 13

PICO MACOM, INC.
355 Parkside Drive
San Fernando, CA 91340 USA
Ph: 800-421-6511
www.picomacom.com
Pico Pro Manual 06.qxd 4/10/06 3:21 PM Page 14
Other manuals for PICO-PRO
1
Table of contents
Other Pico Macom Measuring Instrument manuals