manuals.online logo
Brands
  1. Home
  2. •
  3. Brands
  4. •
  5. Control Company
  6. •
  7. Measuring Instrument
  8. •
  9. Control Company TRACEABLE 4080 User manual

Control Company TRACEABLE 4080 User manual

Traceable
®
is a registered trademark of Control Company ©2008 Control Company. 92-4080-20 Rev. 2 0 2308
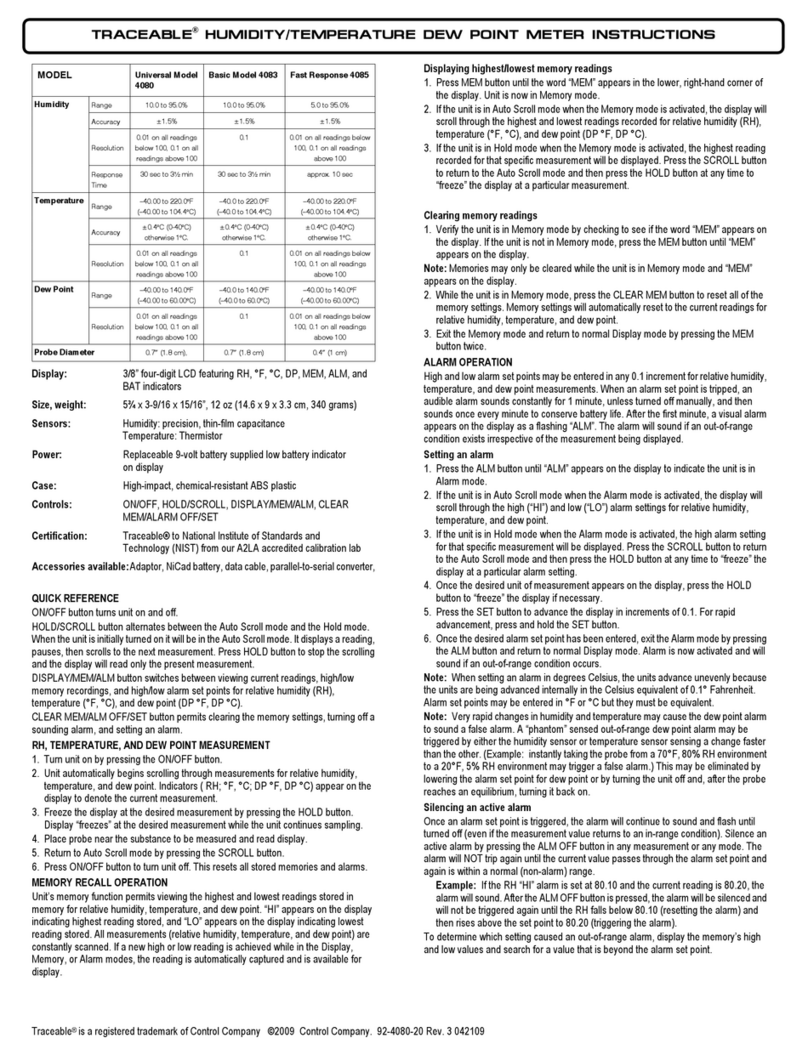
MODEL
Universal Model
4080
Basic Model 4083
Fast Response 4085
Range 10.0 to 95.0% 10.0 to 95.0% 5.0 to 95.0%
Accuracy ±1.5% ±1.5% ±1.5%
Resolution
0.01 on all readings
below 100, 0.1 on all
readings above 100
0.1 0.01 on all readings below
100, 0.1 on all readings
above 100
Humidit
Response
Time
0 sec to ½ min 0 sec to ½ min approx. 10 sec
Range –40.00 to 220.0°F
(–40.00 to 104.4°C)
–40.0 to 220.0°F
(–40.0 to 104.4°C)
–40.00 to 220.0°F
(–40.00 to 104.4°C)
Accuracy ±0.4°C (0-40°C)
otherwise 1°C.
±0.4°C (0-40°C)
otherwise 1°C.
±0.4°C (0-40°C)
otherwise 1°C.
Temperature
Resolution
0.01 on all readings
below 100, 0.1 on all
readings above 100
0.1 0.01 on all readings below
100, 0.1 on all readings
above 100
Range –40.00 to 140.0°F
(–40.00 to 60.00°C)
–40.0 to 140.0°F
(–40.0 to 60.0°C)
–40.00 to 140.0°F
(–40.00 to 60.00°C)
Dew Point
Resolution
0.01 on all readings
below 100, 0.1 on all
readings above 100
0.1 0.01 on all readings below
100, 0.1 on all readings
above 100
Probe Diameter
0.7² (1.8 cm), 0.7² (1.8 cm) 0.4² (1 cm)
Display: 3/8” four-digit LCD featuring RH, °F, °C, DP, MEM, ALM, and
BAT indicators
Size, weight: ¾ x 3-9/16 x 1 /16”, 12 oz (14.6 x 9 x 3.3 cm, 340 grams)
Sensors: Humidity: precision, thin-film capacitance
Temperature: Thermistor
Power: Replaceable 9-volt battery supplied low battery indicator
on display
Case: High-impact, chemical-resistant ABS plastic
Controls: ON/OFF, HOLD/SCROLL, DISPLAY/MEM/ALM, CLEAR
MEM/ALARM OFF/SET
Certification: Traceable® to National Institute of Standards and
Technology (NIST) from our A2LA accredited calibration lab
Accessories available: Adaptor, NiCad battery, data cable, parallel-to-serial converter,
QUIC REFERENCE
ON/OFF button turns unit on and off.
HOLD/SCROLL button alternates between the Auto Scroll mode and the Hold mode.
When the unit is initially turned on it will be in the Auto Scroll mode. It displays a reading,
pauses, then scrolls to the next measurement. Press HOLD button to stop the scrolling
and the display will read only the present measurement.
DISPLAY/MEM/ALM button switches between viewing current readings, high/low
memory recordings, and high/low alarm set points for relative humidity (RH),
temperature (°F, °C), and dew point (DP °F, DP °C).
CLEAR MEM/ALM OFF/SET button permits clearing the memory settings, turning off a
sounding alarm, and setting an alarm.
RH, TEMPERATURE, AND DEW POINT MEASUREMENT
1. Turn unit on by pressing the ON/OFF button.
2. Unit automatically begins scrolling through measurements for relative humidity,
temperature, and dew point. Indicators ( RH; °F, °C; DP °F, DP °C) appear on the
display to denote the current measurement.
3. Freeze the display at the desired measurement by pressing the HOLD button.
Display “freezes” at the desired measurement while the unit continues sampling.
4. Place probe near the substance to be measured and read display.
. Return to Auto Scroll mode by pressing the SCROLL button.
6. Press ON/OFF button to turn unit off. This resets all stored memories and alarms.
MEMORY RECALL OPERATION
Unit’s memory function permits viewing the highest and lowest readings stored in
memory for relative humidity, temperature, and dew point. “HI” appears on the display
indicating highest reading stored, and “LO” appears on the display indicating lowest
reading stored. All measurements (relative humidity, temperature, and dew point) are
constantly scanned. If a new high or low reading is achieved while in the Display,
Memory, or Alarm modes, the reading is automatically captured and is available for
display.
Displaying highest/lowest memory readings
1. Press MEM button until the word “MEM” appears in the lower, right-hand corner of
the display. Unit is now in Memory mode.
2. If the unit is in Auto Scroll mode when the Memory mode is activated, the display will
scroll through the highest and lowest readings recorded for relative humidity (RH),
temperature (°F, °C), and dew point (DP °F, DP °C).
3. If the unit is in Hold mode when the Memory mode is activated, the highest reading
recorded for that specific measurement will be displayed. Press the SCROLL button
to return to the Auto Scroll mode and then press the HOLD button at any time to
“freeze” the display at a particular measurement.
Clearing memory readings
1. Verify the unit is in Memory mode by checking to see if the word “MEM” appears on
the display. If the unit is not in Memory mode, press the MEM button until “MEM”
appears on the display.
Note: Memories may only be cleared while the unit is in Memory mode and “MEM”
appears on the display.
2. While the unit is in Memory mode, press the CLEAR MEM button to reset all of the
memory settings. Memory settings will automatically reset to the current readings for
relative humidity, temperature, and dew point.
3. Exit the Memory mode and return to normal Display mode by pressing the MEM
button twice.
ALARM OPERATION
High and low alarm set points may be entered in any 0.1 increment for relative humidity,
temperature, and dew point measurements. When an alarm set point is tripped, an
audible alarm sounds constantly for 1 minute, unless turned off manually, and then
sounds once every minute to conserve battery life. After the first minute, a visual alarm
appears on the display as a flashing “ALM”. The alarm will sound if an out-of-range
condition exists irrespective of the measurement being displayed.
Setting an alarm
1. Press the ALM button until “ALM” appears on the display to indicate the unit is in
Alarm mode.
2. If the unit is in Auto Scroll mode when the Alarm mode is activated, the display will
scroll through the high (“HI”) and low (“LO”) alarm settings for relative humidity,
temperature, and dew point.
3. If the unit is in Hold mode when the Alarm mode is activated, the high alarm setting
for that specific measurement will be displayed. Press the SCROLL button to return
to the Auto Scroll mode and then press the HOLD button at any time to “freeze” the
display at a particular alarm setting.
4. Once the desired unit of measurement appears on the display, press the HOLD
button to “freeze” the display if necessary.
. Press the SET button to advance the display in increments of 0.1. For rapid
advancement, press and hold the SET button.
6. Once the desired alarm set point has been entered, exit the Alarm mode by pressing
the ALM button and return to normal Display mode. Alarm is now activated and will
sound if an out-of-range condition occurs.
Note: When setting an alarm in degrees Celsius, the units advance unevenly because
the units are being advanced internally in the Celsius equivalent of 0.1° Fahrenheit.
Alarm set points may be entered in °F or °C but they must be equivalent.
Note: Very rapid changes in humidity and temperature may cause the dew point alarm
to sound a false alarm. A “phantom” sensed out-of-range dew point alarm may be
triggered by either the humidity sensor or temperature sensor sensing a change faster
than the other. (Example: instantly taking the probe from a 70°F, 80% RH environment
to a 20°F, % RH environment may trigger a false alarm.) This may be eliminated by
lowering the alarm set point for dew point or by turning the unit off and, after the probe
reaches an equilibrium, turning it back on.
Silencing an active alarm
Once an alarm set point is triggered, the alarm will continue to sound and flash until
turned off (even if the measurement value returns to an in-range condition). Silence an
active alarm by pressing the ALM OFF button in any measurement or any mode. The
alarm will NOT trip again until the current value passes through the alarm set point and
again is within a normal (non-alarm) range.
Example: If the RH “HI” alarm is set at 80.10 and the current reading is 80.20, the
alarm will sound. After the ALM OFF button is pressed, the alarm will be silenced and
will not be triggered again until the RH falls below 80.10 (resetting the alarm) and
then rises above the set point to 80.20 (triggering the alarm).
To determine which setting caused an out-of-range alarm, display the memory’s high
and low values and search for a value that is beyond the alarm set point.
TRACEABLE
®
HUMIDITY/TEMPERATURE DEW POINT METER INSTRUCTIONS
Traceable
®
is a registered trademark of Control Company ©2008 Control Company. 92-4080-20 Rev. 2 0 2308
Default alarm settings
When the unit is turned on, the alarms automatically default to out-of-range set points so
that the alarms will not trigger. The default settings are:
Relative Humidity HI 101.00 LO –01.00
Temperature °F HI 221.00 LO 0.00
Temperature °C HI 10 .00 LO –17.77
Dew Point °F HI 141.00 LO 0.00
Dew Point °C HI 60. 6 LO –17.77
To prevent any alarm from tripping, simply set the alarm set point out of the unit’s range.
As an example, in relative humidity any alarm set point above 100 or less than zero will
never trip the alarm. To quickly reset all alarm values to the default out-of-range
condition, simply turn the unit off, wait 2 seconds, and then turn it on again.
Default alarm sounds
Three distinctive alarm sounds distinguish each measurement. The alarm sounds are:
Dew Point 1 beep per second
Temperature 2 beeps per second
Relative Humidity 3 beeps per second
Note: If two or more alarms are sounding simultaneously the sound will be heard in the
following sequence: dew point, temperature, and relative humidity.
GENERAL INFORMATION
Display
For ease of use the display is optimized at a 20-degree angle. It is best viewed by the
user when sitting or standing with the unit flat on a lab bench or desk. When viewed
straight-on the display will appear to have less contrast.
ey sound
An audible confirmation beep will be heard each time a button is pressed.
Freezing points
Dew points below freezing should be converted to frost points by using frost point
tables.
USER CALIBRATION
WARNING: User calibration adjustment will void the factory-supplied National Institute
of Standards and Technology (NIST) Traceable
®
Certificate. The unit has been
calibrated against NIST traceable instrumentation.
For users wishing to check factory calibration, we suggest using a calibration laboratory
with capabilities to generate a known humidity and utilize sophisticated chilled mirror
test equipment.
Salt as a calibration standard
We do NOT recommend or use the saturated salt calibration method. NIST does NOT
use the salt method. The proper technique involved in the salt method is far more
difficult and far more time consuming than most literature suggests. Liquid volume, air
volume, sensor placement, temperature, air movement, vapor pressure, equilibration
time, and a host of other factors can all contribute to gross errors. On occasion these
errors are reproducible.
For information on the saturated salt method we suggest studying American Society of
Testing Materials Method ASTM E104 and obtaining a paper from the National Institute
of Standards and Technology JOURNAL OF RESEARCH, Vol. 81A, No. 1, pages 89–
96.
Dial hygrometers as a calibration standard
Absolutely do NOT calibrate against hair dial hygrometers. Inaccuracies in dial units
caused by age of hair and other factors can greatly affect readings. Dial units are not
sensitive to rapid changes and readings generally lag actual humidity changes by hours.
Users of some dial units have encountered errors of over 0% relative humidity.
Sling hygrometer calibration
Absolutely do NOT calibrate against sling units. Sling units are limited to the accuracy
and resolution of their thermometers. Temperature errors of as little as 0.0 ° can cause
significant humidity errors. Unfortunately temperature, time, air volume, and technique
can cause reproducible, but large errors. In low humidities, in small spaces, the addition
of a wet wick may change the actual humidity. If too much swing time is taken, a
partially dry wick produces errors. If too little swing time is taken, sufficient evaporation
may not have taken place to cool the thermometer. Sling units generally measure crude
averages of a large volume of air. Users of some sling units have encountered errors of
over 0% relative humidity.
ACCESSORIES AVAILABLE
Cat. No. 1023 AC Adaptor for continuous use
An accessory adaptor is available for continuous AC operation. When using the
adaptor, the non-rechargeable lithium or alkaline battery must be removed. Never
use the adaptor with a non-rechargeable battery. A battery is NOT required to use
the adaptor. A rechargeable NiCad battery may be used with the adaptor. The
adaptor will simultaneously power the unit and recharge a NiCad battery.
Cat. No. 4020 Rechargeable NiCad Battery
Requires use of Cat. No. 1023 AC Adaptor for continuous use.
Cat. No. 409 Data Cable
Data Cable plugs into internal board and the cable exits through the battery
compartment. It is supplied with data-out documentation. The signal output is
parallel/TTL/ASCII. For serial data capture also purchase the parallel to serial
converter. This converts the signal to a standard serial output.
Cat. No. 4098 Parallel-to-Serial Converter
Requires use of Cat. No. 4097 Data Cable. Converter enables the user to connect
the unit to any serial computer port in order to capture data. All hardware is provided
including the male serial connector to plug into a computer. Also, all data-out is
documented. No software program is provided. The user may wish to consider
commercially available data capture programs.
ALL OPERATIONAL DIFFICULTIES
If this meter does not function properly for any reason, please replace the battery with a
new high quality battery (see “Battery Replacement” section). Low battery power can
occasionally cause any number of “apparent” operational difficulties. Replacing the
battery with a new fresh battery will solve most difficulties.
Frozen display
Turning the unit on and off rapidly may lock (freeze) the display. Wait 2 seconds before
switching the unit from off to on. If a “frozen display” occurs, remove the battery, wait 1
minute, insert the battery, and resume operation.
BATTERY REPLACEMENT
A faint display or no display are indicators that the battery must be replaced. A BAT
indicator appears on the display when the battery is low. Remove the battery cover on
back of the unit. Remove the exhausted battery and replace it with a new 9-volt alkaline
or lithium battery. Replace the battery cover. Do NOT use a heavy-duty or regular
battery since they do not have sufficient power. If BAT indicator appears on the display
when using a NiCad battery, recharge the battery.
Cat. No. 4080 Traceable® Humidity/Temperature/Dew Point Meter (Universal)
Cat. No. 4083 Traceable® Humidity/Temperature/Dew Point Meter (Basic)
Cat. No. 4085 Traceable® Humidity/Temperature/Dew Point Meter (Fast-Response)
WARRANTY, SERVICE, OR RECALIBRATION
For warranty, service, or recalibration, contact:
CONTROL COMPANY
4455 Rex Road
Friendswood, Texas 77546 USA
Ph. 281-482-1714 Fax 281-482-9448
E- ail sales@control3.co
www.control3.co
Control Co pany is ISO 9001 Quality-
Certified by DNV and ISO 17025 accredited
as a Calibration Laboratory by A2LA.

This manual suits for next models

2

Other Control Company Measuring Instrument manuals

Control Company TRACEABLE 3253 User manual

Control Company

Control Company TRACEABLE 3253 User manual

Control Company Traceable 4080 User manual

Control Company

Control Company Traceable 4080 User manual

Control Company TRACEABLE 3253 User manual

Control Company

Control Company TRACEABLE 3253 User manual

Control Company TRACEABLE 3251 User manual

Control Company

Control Company TRACEABLE 3251 User manual

Control Company TRACEABLE 3247 User manual

Control Company

Control Company TRACEABLE 3247 User manual

Popular Measuring Instrument manuals by other brands

PCB Piezotronics IMI SENSORS EX603C01/ICS-29 Installation and operating manual

PCB Piezotronics

PCB Piezotronics IMI SENSORS EX603C01/ICS-29 Installation and operating manual

Fiso Nortech EasyGrid LT user guide

Fiso

Fiso Nortech EasyGrid LT user guide

golmar TEKNA-S PLUS user manual

golmar

golmar TEKNA-S PLUS user manual

Blancett QuikSert B131-038 user manual

Blancett

Blancett QuikSert B131-038 user manual

Endress+Hauser Waterpilot FMX21 Brief operating instructions

Endress+Hauser

Endress+Hauser Waterpilot FMX21 Brief operating instructions

Pepperl+Fuchs AS-i manual

Pepperl+Fuchs

Pepperl+Fuchs AS-i manual

LB Altimeters ARES II quick start guide

LB Altimeters

LB Altimeters ARES II quick start guide

GW Instek PCS-1000I user manual

GW Instek

GW Instek PCS-1000I user manual

Tenmars TM-201L user manual

Tenmars

Tenmars TM-201L user manual

EDTM GC3000 manual

EDTM

EDTM GC3000 manual

GE DB-16 installation guide

GE

GE DB-16 installation guide

Control Products VD-5101-TM quick start guide

Control Products

Control Products VD-5101-TM quick start guide

Emerson Rosemount X-Stream Series Instruction manual addendum

Emerson

Emerson Rosemount X-Stream Series Instruction manual addendum

Neptune R450 user manual

Neptune

Neptune R450 user manual

Neoss NeoTell & SmartPegs Instructions for use

Neoss

Neoss NeoTell & SmartPegs Instructions for use

Shodex Asahipak NH2P-50 2D Operation manual

Shodex

Shodex Asahipak NH2P-50 2D Operation manual

Vutlan VT960i manual

Vutlan

Vutlan VT960i manual

Abbott m-PIMA user guide

Abbott

Abbott m-PIMA user guide

manuals.online logo
manuals.online logoBrands
  • About & Mission
  • Contact us
  • Privacy Policy
  • Terms and Conditions

Copyright 2025 Manuals.Online. All Rights Reserved.