manuals.online logo
Brands
  1. Home
  2. •
  3. Brands
  4. •
  5. Vernier
  6. •
  7. Measuring Instrument
  8. •
  9. Vernier Go Direct GDX-WRP User manual

Vernier Go Direct GDX-WRP User manual

1
update LabQuest App.
2. Charge your sensor for at least
2hours before first use.
3. Turn on your sensor by pressing the
power button once. The Bluetooth®
LED will blink red.
4. Launch Graphical Analysis or turn
on LabQuest.
5. If using Graphical Analysis, click or
tap Sensor Data Collection. If using
LabQuest, choose Wireless Device
Setup > Go Direct from the Sensors
menu.
6. Select your Go Direct sensor from
the list of Discovered Wireless
Devices. Your sensor's ID is located
near the barcode on the sensor. The
Bluetooth LED will blink green
when it is successfully connected.
7. Click or tap Done to enter data-
collection mode.
2. Connect the sensor to the USB port.
3. Launch Graphical Analysis or turn
on LabQuest. You are now ready to
collect data.
Note: This sensor does not work with
the original LabQuest. It works with
LabQuest 2 or LabQuest 3.
Charging the Sensor
Connect Go Direct Wide-Range Pressure to the included Micro USB Cable and
any USB device for two hours.
You can also charge up to eight Go Direct Wide-Range Pressures using our
GoDirect Charge Station, sold separately (order code: GDX-CRG). An LED on
each Go Direct Wide-Range Pressure indicates charging status.
Charging Orange LED next to the battery icon is solid while
the sensor is charging.
Fully charged Green LED next to the battery icon is solid when
the sensor is fully charged.
Go Direct®Wide-Range
Pressure
(Order Code GDX-WRP)
Go Direct Wide-Range Pressure measures absolute gas
pressure. It can be used to monitor pressure changes in
gas-law experiments in chemistry and physics. Vapor pressure of various liquids
can be monitored using this sensor. Its metal fittings provide for versatile, airtight
connections. The following is a partial list of activities and experiments that can
be performed using this sensor:
lInvestigate the relationship between pressure and volume, Boyle’s law.
lMeasure vapor pressure of liquids.
lStudy the effect of temperature on gas pressure, Gay-Lussac’s law.
lStudy the effect of temperature and concentration on the rate of decomposition
of H2O2.
Note: Vernier products are designed for educational use. Our products are not
designed nor are they recommended for any industrial, medical, or commercial
process such as life support, patient diagnosis, control of a manufacturing
process, or industrial testing of any kind.
What's Included
lGo Direct Wide-Range Pressure with Chrome-plated Brass Quick Disconnect
Tube Fitting with 1/8” NPT thread insert attached
lMicro USB Cable
lChrome-plated Brass Quick Disconnect Tube Fitting with 1/8” hose barb insert
lPlastic tubing (2-foot section)
lPlumber’s tape (to ensure a tight seal)
Compatible Software
See www.vernier.com/manuals/gdx-wrp for a list of software compatible with
GoDirect Wide-Range Pressure.
Getting Started
Please see the following link for platform-specific connection information:
www.vernier.com/start/gdx-wrp
Bluetooth Connection USB Connection
1. Install Vernier Graphical Analysis™
on your computer, Chromebook™,
or mobile device. If using
LabQuest®, make sure LabQuest
App is up to date. See
www.vernier.com/ga for Graphical
Analysis availability or
www.vernier.com/downloads to
1. Install Graphical Analysis on your
computer or Chromebook. If using
LabQuest, make sure LabQuest App
is up to date. See
www.vernier.com/ga for software
availability or
www.vernier.com/downloads to
update LabQuest App.
2
removed, snap the replacement attachment into the adapter until you hear a click
sound.
If you wish to purchase different quick disconnect inserts or replacements, many
are available and compatible with the sensor. For several options, visit
www.vernier.com/til/13798
Calibration
You do not have to perform a new calibration when using the Go Direct Wide-
Range Pressure. The sensor is calibrated prior to shipping. If you would like to
perform your own calibration, follow the steps described here. A one-point
calibration at atmosphere is adequate for most applications.
To perform a one-point calibration,
1. Connect Go Direct Wide-Range Pressure to a device and launch the software.
2. Initiate the calibration procedure.
3. Enter the actual pressure as the known value.
4. When the relative stability reading stabilizes, click Keep.
5. Click Apply to complete the calibration process. This calibration is
automatically saved to the sensor. To restore the default calibration, click
Reset to Defaults.
Go Direct Wide-Range Pressure has been calibrated to read station pressure.
Station pressure is the true atmospheric pressure at your location, or station. If you
prefer it to read sea level pressure for conducting weather studies, you can perform
a one-point calibration to correct for elevation, using the sea-level corrected
pressure value for your location obtained from a reputable source (NOAA,
Weather Underground, etc.). Sea level pressure is the pressure after the station
pressure has been adjusted to its equivalent pressure at sea level. This is
commonly done to normalize pressures at various altitudes for weather forecasts.
Pressure in Liquids: Depth Measurements
If you measure the pressure at the end of a long plastic tube forced underwater,
you can indirectly measure depth. Connect the tubing to the stem of Go Direct
Wide-Range Pressure and then put the end of the tube under water. The pressure
reading will increase 8.105 kPa (0.0800 atm or 60.79 mmHg) for every meter
below the surface of the water. Note: If you measure depth in this way, the depth
you are measuring is to the top of the water in the tubing.
Specifications
Pressure range 0 to 690 kPa (0 to 100 psi, 0 to 6.8
atm, 0 to 5171 mmHg)
Maximum pressure that the sensor can
tolerate without permanent damage
900 kPa
Compatibility Dry gases only
Powering the Sensor
Turning on the sensor Press button once. Red LED indicator flashes
when unit is on.
Putting the sensor in sleep
mode
Press and hold button for more than three seconds
to put into sleep mode. Red LEDs stop flashing
when sleeping.
Connecting the Sensor
See the following link for up-to-date connection information:
www.vernier.com/start/gdx-wrp
Connecting via Bluetooth
Ready to connect Red LED next to the Bluetooth icon flashes when
sensor is awake and ready to connect.
Connected Green LED next to the Bluetooth icon flashes
when sensor is connected via Bluetooth.
Connecting via USB
Connected and charging Orange LED next to the battery icon is solid when
the sensor is connected to Graphical Analysis via
USB and the unit is charging. LED next to
Bluetooth icon is off.
Connected, fully charged Green LED next to the battery icon is solid when
the sensor is connected to Graphical Analysis via
USB and fully charged. LED next to Bluetooth
icon is off.
Charging via USB,
connected via Bluetooth
Orange LED next to the battery icon is solid when
the sensor is charging. Green LED next to the
Bluetooth icon flashes.
Identifying the Sensor
When two or more sensors are connected, the sensors can be identified by tapping
or clicking Identify in Sensor Information.
Using the Product
Connect the sensor following the steps in the Getting Started section of this user
manual.
To switch quick disconnect fittings, simultaneously press the metal tab on the
quick fitting adapter that is on the pressure sensor side of the connection while
pulling the attachment away from the adapter. Once the desired attachment is
3
lChrome-plated Brass Quick Disconnect Tube Fitting with 1/8” NPT thread
insert
lChrome-plated Brass Quick Disconnect Tube Fitting with 1/8” hose barb insert
lTwo-foot section of plastic tubing: This soft tubing is designed to fit over the
hose barb connector. Its standard size allows you to connect to a variety of
third-party instrumentation or adapters.
lPlumber's tape: This 1/2" sealing tape should be wrapped around the threading
on the pressure sensor. Wrap only once and to the right, as the threading runs.
This will help ensure an airtight seal.
Troubleshooting
For troubleshooting tips and FAQs, see www.vernier.com/til/13798
Repair Information
If you have followed the troubleshooting steps and are still having trouble with
your Go Direct Wide-Range Pressure, contact Vernier Technical Support at
[email protected] or call 888-837-6437. Support specialists will work with
you to determine if the unit needs to be sent in for repair. At that time, a Return
Merchandise Authorization (RMA) number will be issued and instructions will be
communicated on how to return the unit for repair.
Accessories/Replacements
Item Order Code
Micro USB Cable CB-USB-MICRO
USB-C to Micro USB cable CB-USB-C-MICRO
Go Direct 300 mAh Replacement Battery GDX-BAT-300
Warranty
Warranty information for this product can be found on the Support tab at
www.vernier.com/gdx-wrp
General warranty information can be found at www.vernier.com/warranty
Disposal
When disposing of this electronic product, do not treat it as household waste. Its
disposal is subject to regulations that vary by country and region. This item should
be given to an applicable collection point for the recycling of electrical and
electronic equipment. By ensuring that this product is disposed of correctly, you
help prevent potential negative consequences on human health or on the
environment. The recycling of materials will help to conserve natural resources.
For more detailed information about recycling this product, contact your local city
office or your disposal service.
Battery recycling information is available at www.call2recycle.org
Do not puncture or expose the battery to excessive heat or flame.
Accuracy using factory calibration ±2 kPa
Accuracy using one-point custom
calibration at atmosphere
±1 kPa
Internal volume of sensor with 1/8” NPT
thread insert attached
0.786 mL
Internal volume of sensor with 1/8” hose
barb insert attached
0.623 mL
Care and Maintenance
Clean sensor with a soft, damp cloth.
Battery
Go Direct Wide-Range Pressure contains a small lithium-ion battery. The sensor is
designed to consume very little power and not put heavy demands on the battery.
Although the battery is warranted for one year, the expected battery life should be
several years. Replacement batteries are available from Vernier (order code GDX-
BAT-300).
Storage
To store Go Direct Wide-Range Pressure for extended periods of time, put the
device in sleep mode by holding the button down for at least three seconds. The
red LED will stop flashing to show that the unit is in sleep mode. Over several
months, the battery will discharge but will not be damaged. After such storage,
charge the device for a few hours, and the unit will be ready to go.
Exposing the battery to temperatures over 35°C (95°F) will reduce its lifespan. If
possible, store the device in an area that is not exposed to temperature extremes.
Water Resistance
Go Direct Wide-Range Pressure is not water resistant and should never be
immersed in water.
If water gets into the device, immediately power the unit down (press and hold the
power button for more than three seconds). Disconnect the sensor and charging
cable, and remove the battery. Allow the device to dry thoroughly before
attempting to use the device again. Do not attempt to dry using an external heat
source.
How the Sensor Works
The active sensor in this unit is a pressure transducer that has a membrane that
flexes as pressure changes. This sensor is arranged to measure absolute pressure.
One side of the membrane is a vacuum, while the other side is open to the
atmosphere. The sensor produces an output voltage that varies in a linear way with
absolute pressure. It includes special circuitry to minimize errors caused by
changes in temperature.
Included with the sensor are accessories to allow you to connect it to a reaction
container or instrument. Check to be sure that each of these items is included:
4
Vernier Software & Technology
13979 SW Millikan Way • Beaverton, OR 97005-2886
Toll Free (888) 837-6437 • (503) 277-2299 • Fax (503) 277-2440
[email protected] • www.vernier.com
Rev. 1/4/2022
Go Direct, Graphical Analysis, LabQuest, and other marks shown are our trademarks or registered trademarks in the
United States. All other marks not owned by us that appear herein are the property of their respective owners, who
may or may not be affiliated with, connected to, or sponsored by us.
The Bluetooth®word mark and logos are registered trademarks owned by the Bluetooth SIG, Inc. and any use of such
marks by Vernier Software & Technology is under license. Other trademarks and trade names are those of their
respective owners.
The symbol, shown here, indicates that this product must not be disposed of in
a standard waste container.
Federal Communication Commission Interference Statement
This equipment has been tested and found to comply with the limits for a Class B digital device, pursuant to Part 15 of the FCC rules. These
limits are designed to provide reasonable protection against harmful interference in a residential installation. This equipment generates,
uses and can radiate radio frequency energy and, if not installed and used in accordance with the instructions, may cause harmful
interference to radio communications. However, there is no guarantee that interference will not occur in a particular installation. If this
equipment does cause harmful interference to radio or television reception, which can be determined by turning the equipment off and on,
the user is encouraged to try to correct the interference by one or more of the following measures:
Reorient or relocate the receiving antenna.
Increase the separation between the equipment and receiver.
Connect the equipment into an outlet on a circuit different from that to which the receiver is connected.
Consult the dealer or an experienced radio/TV technician for help.
FCC Caution
This device complies with Part 15 of the FCC Rules. Operation is subject to the following two conditions:
(1) this device may not cause harmful interference and
(2) this device must accept any interference received, including interference that may cause undesired operation
RF Exposure Warning
The equipment complies with RF exposure limits set forth for an uncontrolled environment. The antenna(s) used for this transmitter must not
be co-located or operating in conjunction with any other antenna or transmitter. You are cautioned that changes or modifications not
expressly approved by the party responsible for compliance could void your authority to operate the equipment.
IC Statement
This device complies with Industry Canada license-exempt RSS standard(s). Operation is subject to the following two conditions:
(1) this device may not cause interference, and
(2) this device must accept any interference, including interference that may cause undesired operation of the device.
Industry Canada - Class B This digital apparatus does not exceed the Class B limits for radio noise emissions from digital apparatus as set
out in the interference-causing equipment standard entitled “Digital Apparatus,” ICES-003 of Industry Canada. Operation is subject to the
following two conditions: (1) this device may not cause interference, and
(2) this device must accept any interference, including interference that may cause undesired operation of the device.
To reduce potential radio interference to other users, the antenna type and its gain should be so chosen that the equivalent isotropically
radiated power (e.i.r.p.) is not more than that permitted for successful communication.
RF exposure warning: The equipment complies with RF exposure limits set forth for an uncontrolled environment. The antenna(s) used for
this transmitter must not be co-located or operating in conjunction with any other antenna or transmitter.
Le présent appareil est conforme aux CNR d’Industrie Canada applicables aux appareils radio exempts de licence. L’exploitation est
autorisée aux deux conditions suivantes :
(1) l’appareil ne doit pas produire de brouillage, et
(2) l’appareil doit accepter tout interférence radioélectrique, même si cela résulte à un brouillage susceptible d’en compromettre le
fonctionnement.
Cet appareil numérique respecte les limites de bruits radioélectriques applicables aux appareils numériques de Classe B prescrites dans la
norme sur le matériel interférant-brouilleur: “Appareils Numériques,” NMB-003 édictée par industrie Canada. L’utilisation est soumise aux
deux conditions suivantes:
(1) cet appareil ne peut causer d’interférences, et
(2) cet appareil doit accepter toutes interférences, y comprises celles susceptibles de provoquer un disfonctionnement du dispositif.
Afin de réduire les interférences radio potentielles pour les autres utilisateurs, le type d’antenne et son gain doivent être choisie de telle
façon que l’équivalent de puissance isotrope émis (e.i.r.p) n’est pas plus grand que celui permis pour une communication établie.
Avertissement d’exposition RF: L’équipement est conforme aux limites d’exposition aux RF établies pour un environnement non
supervisé. L’antenne (s) utilisée pour ce transmetteur ne doit pas être jumelés ou fonctionner en conjonction avec toute autre antenne ou
transmetteur.
Note: This product is a sensitive measurement device. For best results, use the cables that were provided. Keep the device away from
electromagnetic noise sources, such as microwaves, monitors, electric motors, and appliances.
Other Vernier Measuring Instrument manuals

Vernier NO3-BTA User manual

Vernier

Vernier NO3-BTA User manual

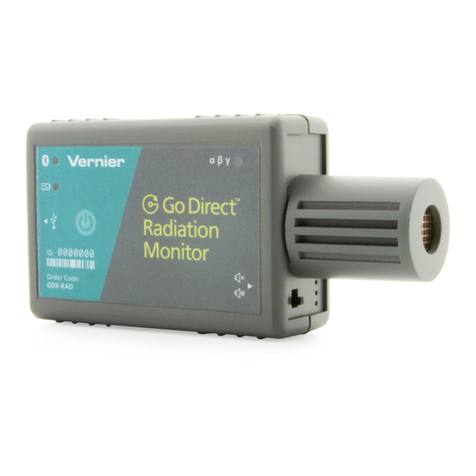
Vernier Go Direct GDX-RAD User manual

Vernier

Vernier Go Direct GDX-RAD User manual

Vernier Go Direct GDX-RMS User manual

Vernier

Vernier Go Direct GDX-RMS User manual

Vernier Go!Motion User manual

Vernier

Vernier Go!Motion User manual

Vernier Go Direct ORP User manual

Vernier

Vernier Go Direct ORP User manual

Vernier ACC-BTA User manual

Vernier

Vernier ACC-BTA User manual

Vernier Go Direct Sound User manual

Vernier

Vernier Go Direct Sound User manual

Vernier DRM-BTD User manual

Vernier

Vernier DRM-BTD User manual

Vernier Go Direct Sound User manual

Vernier

Vernier Go Direct Sound User manual

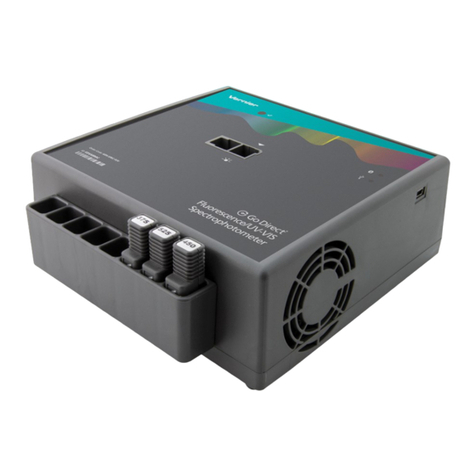
Vernier Go Direct GDX-SPEC-FUV User manual

Vernier

Vernier Go Direct GDX-SPEC-FUV User manual

Vernier EasyLink EZ-LINK User manual

Vernier

Vernier EasyLink EZ-LINK User manual

Vernier Conductivity Probe User manual

Vernier

Vernier Conductivity Probe User manual

Vernier K-BTA User manual

Vernier

Vernier K-BTA User manual

Vernier 3D-BTA User manual

Vernier

Vernier 3D-BTA User manual

Vernier VRM-BTD User manual

Vernier

Vernier VRM-BTD User manual

Vernier Go Direct GDX-CA User manual

Vernier

Vernier Go Direct GDX-CA User manual

Vernier DRM-BTD User manual

Vernier

Vernier DRM-BTD User manual

Vernier 3D-BTA User manual

Vernier

Vernier 3D-BTA User manual

Vernier Go Direct Mini GC User manual

Vernier

Vernier Go Direct Mini GC User manual

Vernier Go Direct Visible Spectrophotometer User manual

Vernier

Vernier Go Direct Visible Spectrophotometer User manual

Vernier VSP-FP User manual

Vernier

Vernier VSP-FP User manual

Vernier Go Direct GDX-NH4 User manual

Vernier

Vernier Go Direct GDX-NH4 User manual

Vernier SLM-BTA User manual

Vernier

Vernier SLM-BTA User manual

Vernier SLM-BTA User manual

Vernier

Vernier SLM-BTA User manual

Popular Measuring Instrument manuals by other brands

Ludlum Measurements 3007 manual

Ludlum Measurements

Ludlum Measurements 3007 manual

Aquila T Series user guide

Aquila

Aquila T Series user guide

KeLi XK3118K9-R user manual

KeLi

KeLi XK3118K9-R user manual

Tattile F01750 Reference manual

Tattile

Tattile F01750 Reference manual

Keysight N9010AK-MTU Installation note

Keysight

Keysight N9010AK-MTU Installation note

Bender ISOMETER isoUG425 quick start guide

Bender

Bender ISOMETER isoUG425 quick start guide

Scaime GM 80 TG Operating	 instruction

Scaime

Scaime GM 80 TG Operating instruction

BART LAB-DMM operating manual

BART

BART LAB-DMM operating manual

Durham 9840 Setting up

Durham

Durham 9840 Setting up

NU-METRICS NITESTAR Installation & operation  reference guide

NU-METRICS

NU-METRICS NITESTAR Installation & operation reference guide

ShotTrack III VoD manual

ShotTrack

ShotTrack III VoD manual

ABB Relion RES670 Operator's manual

ABB

ABB Relion RES670 Operator's manual

Flex ADM 30 manual

Flex

Flex ADM 30 manual

KMC Controls BAC-19 FlexStat Series installation guide

KMC Controls

KMC Controls BAC-19 FlexStat Series installation guide

Endress+Hauser Deltabar FMD72 operating instructions

Endress+Hauser

Endress+Hauser Deltabar FMD72 operating instructions

TOUGHBUILT TB-H2-LM-165-BT Operating/safety instructions

TOUGHBUILT

TOUGHBUILT TB-H2-LM-165-BT Operating/safety instructions

X2E XORAYA uT-Z7 Quick manual

X2E

X2E XORAYA uT-Z7 Quick manual

Geometrics Memory-Mag G-857 Operation manual

Geometrics

Geometrics Memory-Mag G-857 Operation manual

manuals.online logo
manuals.online logoBrands
  • About & Mission
  • Contact us
  • Privacy Policy
  • Terms and Conditions

Copyright 2025 Manuals.Online. All Rights Reserved.