ABOUT HAIREGEN
Hairegen is a scalp stimulation personal device. Scalp stimulation
has been shown to contribute to better looking hair: thicker,
lustrous, with increased volume. When used according to
instructions, Hairegen delivers to the scalp multiple forms of
stimulations: optical, physical and electrical.
HAIREGEN KIT CONTAINS
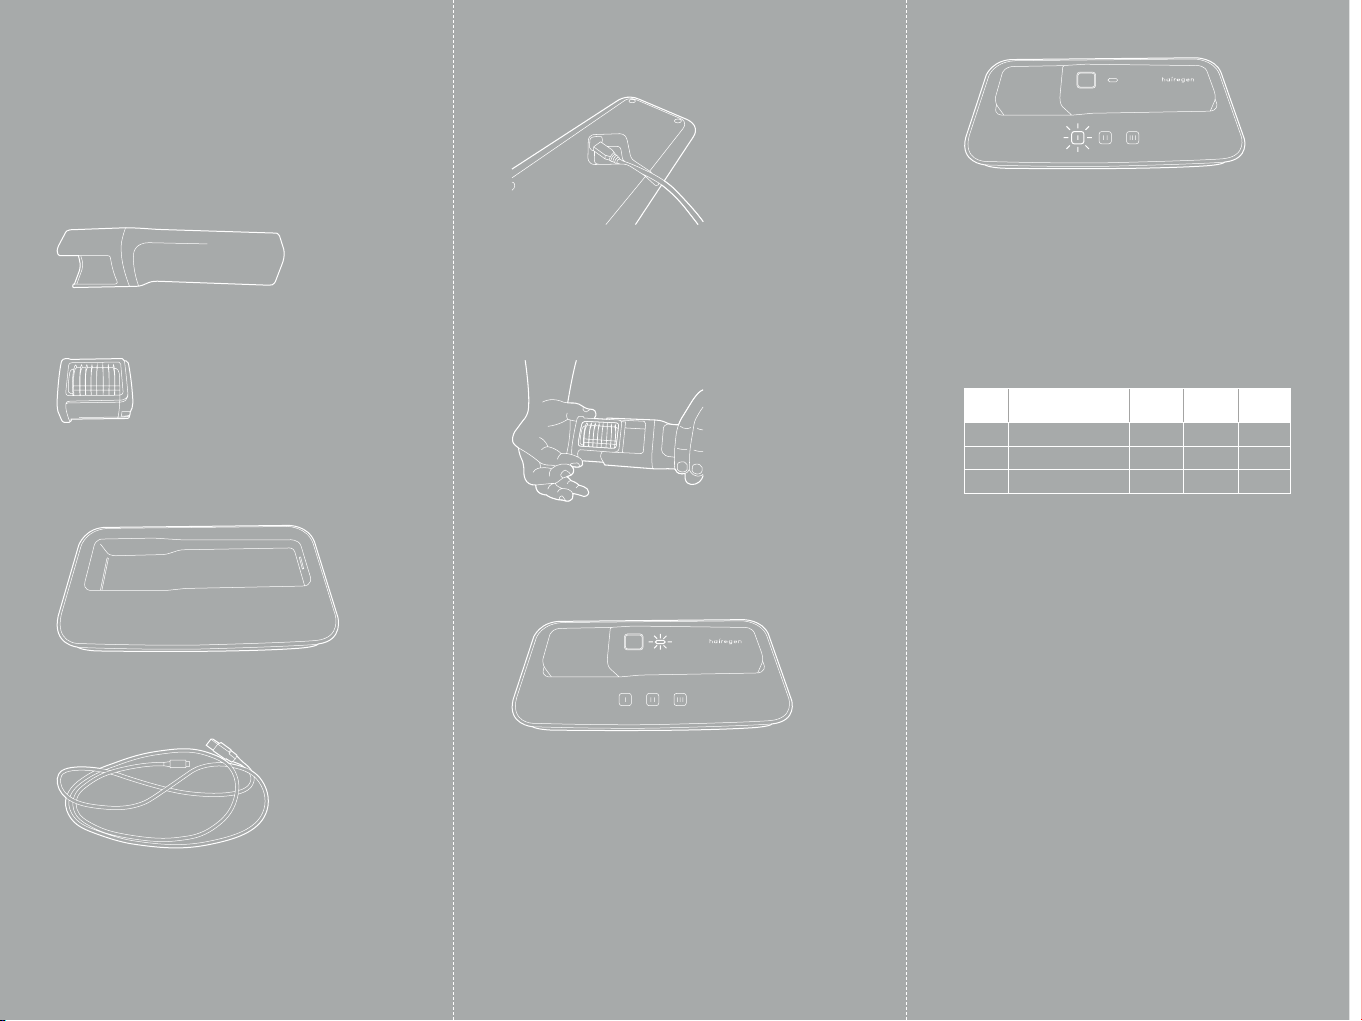
2. Replaceable Cartridge
The Cartridge is the component that touches the scalp and delivers
the stimulations. It is for personal use. The cartridge can be
replaced by the user.
3. Base
The Base is a docking and charging station for the Applicator. The
basealso controls theApplicator’s stimulation profile.
4. USB cable
A standard micro-USB provides power to the Base and data
connectivity to an optional PC control software. The cable connects
to a standard wall adapter or a powered USB port.
PREPARING FOR USE
Attachingthe Cartridge to the Applicator
• Remove the Cartridge from its packaging.
• Check that the disks roll freely by spinning them a couple of
times. Also verify the disks are unbended.
• Push the Cartridge into the Applicator until it is firmly clicked.
Connectingthe USB cable to the Base
• Connect the USB cable to the port at the bottom of the Base.
• Connect the other end of the USB cable to the provided power
supply, or the a powered USB port.
• Place the Base on a stable flat surface, with the cable at the
bottom and the Applicator’s cradle at the top.
Chargingthe Applicator
• When cradles in the Base, the Applicator’s light should turn
on, and one of the Base’s configuration buttons should turn on
after a few seconds.
• The Base should be connected to a USB power source via the
cable.
• The Applicator should be fully inserted into the Base. If unsure,
remove and replace.
• If the battery needs charging, the Applicator will light in yellow
while in the Base during the charging. After charging completes,
the light will turn green.
• When no charging is needed, the Applicator will light in green.
• It is recommended to keep the Applicator in the Base and have
the Base powered at all time.
Selectinga stimulationprofile
• When the Base is powered and the Applicator is properly
cradled, the 3 touchbuttons I- II- III are lit.
• Each button corresponds to a specific stimulation profile.
The intensely lit button represents the chosen profile of the
Applicator.
• Touch a dimly lit button to select its corresponding stimulation
profile. When applied to the Applicator, this button will light
more intensely thanthe others.
STIMULATION PROFILES
Profile Most suitable for Duration Required
Pressure
Sessions
perday
I
Beginners
3 min.Light 1-2
II
Advanced users
5 min.Medium1-2
III
Long or dense hair users
8 min.Light 1-2
USING HAIREGEN
• Remove the Applicator from the Base.
• Press shortly the Applicator’s button. Within a few seconds,
after self-test period, the Applicator will sound a startup tune
and start vibrating.
• To modify the vibration intensity, press shortly the Applicator’s
again to cycle through 3 vibration intensity levels.
• To turn o the Applicator, press the button continuously for 2
seconds, or place the Applicator in the powered Base. After
a few seconds, the Applicator will sound a shutdown tune
and turn itself o.
• The Applicator will shut itself down in any of the following
events:
1. Applicator is cradled in a powered Base.
2. Stimulation profile time limit is reached.
3. Stimulation profile electrical stimulation limit is reached.
4. Low level battery
5. A malfunction
• For eective treatment, roll the Applicator back and forth over
the scalp area requiring treatment.
• Some discomfort from intense use and some tingling from
the micro-currents may be felt. This actually indicates the
treatment is vigorous andeective. If the discomfort is high,
reduce the pressure of the disks onthe scalp.
1. Applicator
The battery operated Applicator powers the Cartridge.


