www.pilotagetoys.com
www.pilotagetoys.com 3
Caution
1. This product is not suitable for children under 14 years of age. Adult supervision of children under this age is highly recommended.
2. This kit contains a number of small parts which are fragile and may act as choking hazards. Please store and assemble this model well
out of the reach of small children.
3. Only use batteries of the same or equivalent type.
4. The supply terminals are not to be short-circuited.
5. Do not use new and old batteries together. Do not mix dierent brands or kinds of batteries.
6. Make sure to insert batteries with correct (+) and (-) polarity.
7. Do not short-circuit this model, which is potentially dangerous.
8. If the model gets wet, dry it, and stop playing to avoid short-circuiting that may cause hazards.
9. Do not disassemble and resolder this model.
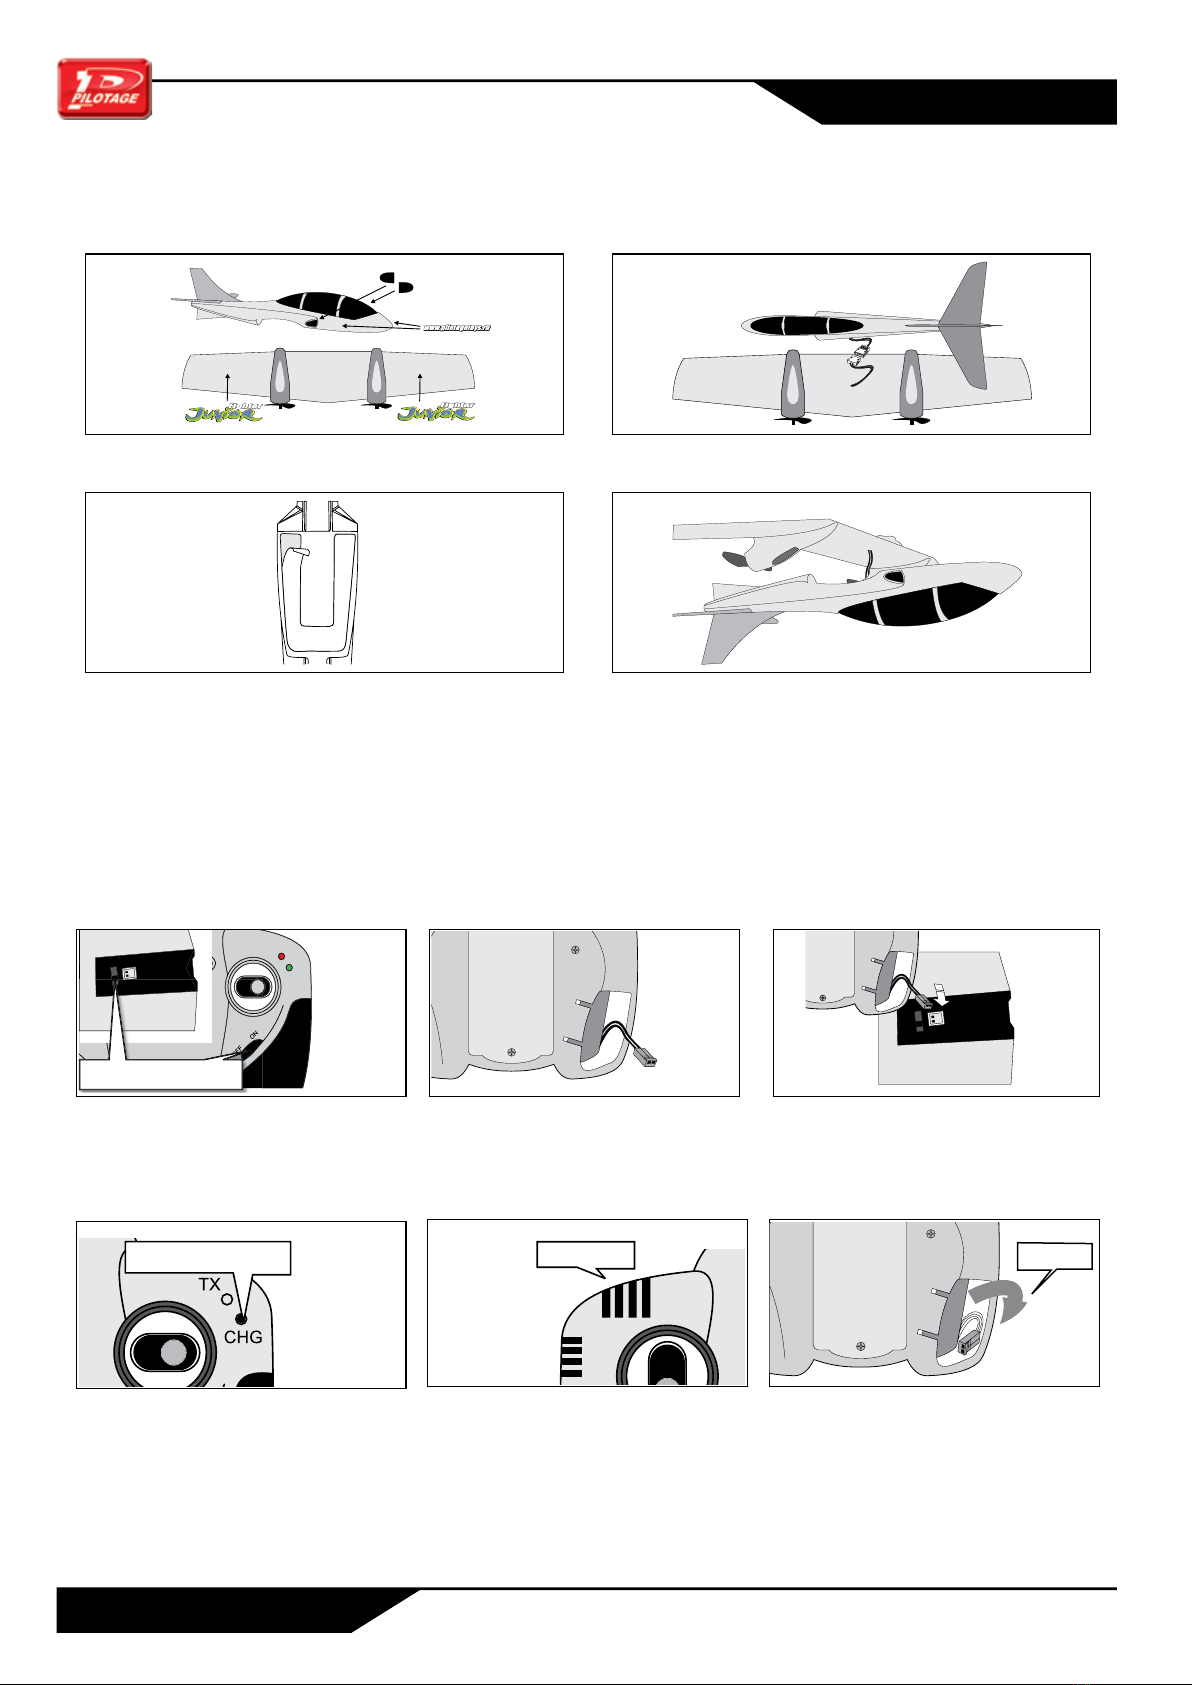
Battery and Charging Safety
This model contains a non-removable, non-replaceable 3.7V lithium-polymer (Li-Pol) battery. Damage to your Li-Pol battery can cause the
cell to catch re or explode. Please carefully review and adhere to the following safety guidelines:
1. Only use the included transmitter/charger to charge up the Li-Pol cell in this model.
2. Never reverse the polarity while plugging in the charger connector.
3. Never leave your model unattended while charging.
4. Never leave or store your model with the charger connected to the model.
5. Never use the model if the battery becomes hot, emits an odor or leaks a uid.
6. If battery uid touches your skin ush it well with water.
7. Never attempt to burn or incinerate this model.
8. When disposing of this model tape the leads to prevent short circuiting, and take it to a recycling center that is qualied to dispose of
electronic waste and batteries.
9. Do not charge/discharge (use) or store this model at temperatures below freezing or above 45degrees C (113 degrees F).
10. Charge the model in a re proof location, well away from potentially ammable items.
11. Never short-circuit the model.
13. Protect the model from bumps, jolts, and concussions from other hard objects as this could damage the model.
14. Keep the model clean of dust, mud and dirt.
15. Never place foreign objects on top of the model.
16. Use the model ONLY in wide open spaces that are free of people, or at your local RC ight club.
17. NEVER use the model near populated pedestrian areas. This could lead to damage of property or injury to bystanders.
18. Prior to takeo, always check that transmitter and receiver batteries are fully charged and are fresh. As battery power decreases the
quality of the radio signal diminishes and control over the model could fail.
19. Please dispose of used batteries and electronic components in accordance with your municipal and federal regulations relating to these
types of products.
20. Keep in mind that those in your vicinity may also use radio control models. Please check prior to takeo that you are using a unique
frequency to all those around you. Not doing so may cause you and others to lose control over your models.
21. If the model does not properly respond to signals, land immediately and do not attempt to use the model until the cause has been
determined and xed.
22. After ying, switch o the power on the vehicle and the transmitter.