Pinnacle PCTV DUAL DVBT PRO PCI User manual

PCTV DVB-T Pro USB
Hardware

PCTV DVB-T Pro USB Hardware (260e)
User’s Guide
GB 04/2006
© Pinnacle Systems GmbH 2006
All rights reserved.
No part of this manual may be reproduced or transferred to other media without
explicit written permission from Pinnacle Systems GmbH, Braunschweig,
Germany.
All brand or product names are trademarks or registered trademarks of their
respective holders.
Pinnacle Systems GmbH has written this manual to the best of its knowledge,
but does not guarantee that the programs/systems will fulfill the users’ intended
applications.
No warranty is made as to the specifications of features.
Pinnacle Systems GmbH retains the right to make alterations to the content of
the manual without obligation to inform third parties.
All quotes, sales, supply and manufacturing contracts from Pinnacle Systems
GmbH, including consulting, installation and other contractual services are
subject exclusively to the General Sales and Delivery Terms of Pinnacle
Systems GmbH.
Pinnacle Systems hereby declares that this TV reception equipment complies
with the fundamental requirements and other relevant terms and conditions of
EC directive number 89/336/EEC.
The EC and FCC declarations of conformity and identical construction can be
downloaded from http://www.pinnaclesys.com/compliance.

Disposal and Recycling
Do not dispose of electric components in the garbage. Either return defective or
unwanted devices to the retailer or take them to an appropriate recycling station!


Introduction
Congratulations! You are now the proud owner of a PCTV DVB-T Pro USB!
PCTV DVB-T Pro USB makes it possible to receive digital terrestrial television
in accordance with the DVB-T standard (Digital Video Broadcasting -
Terrestrial) and with excellent picture quality on your laptop and desktop PC.
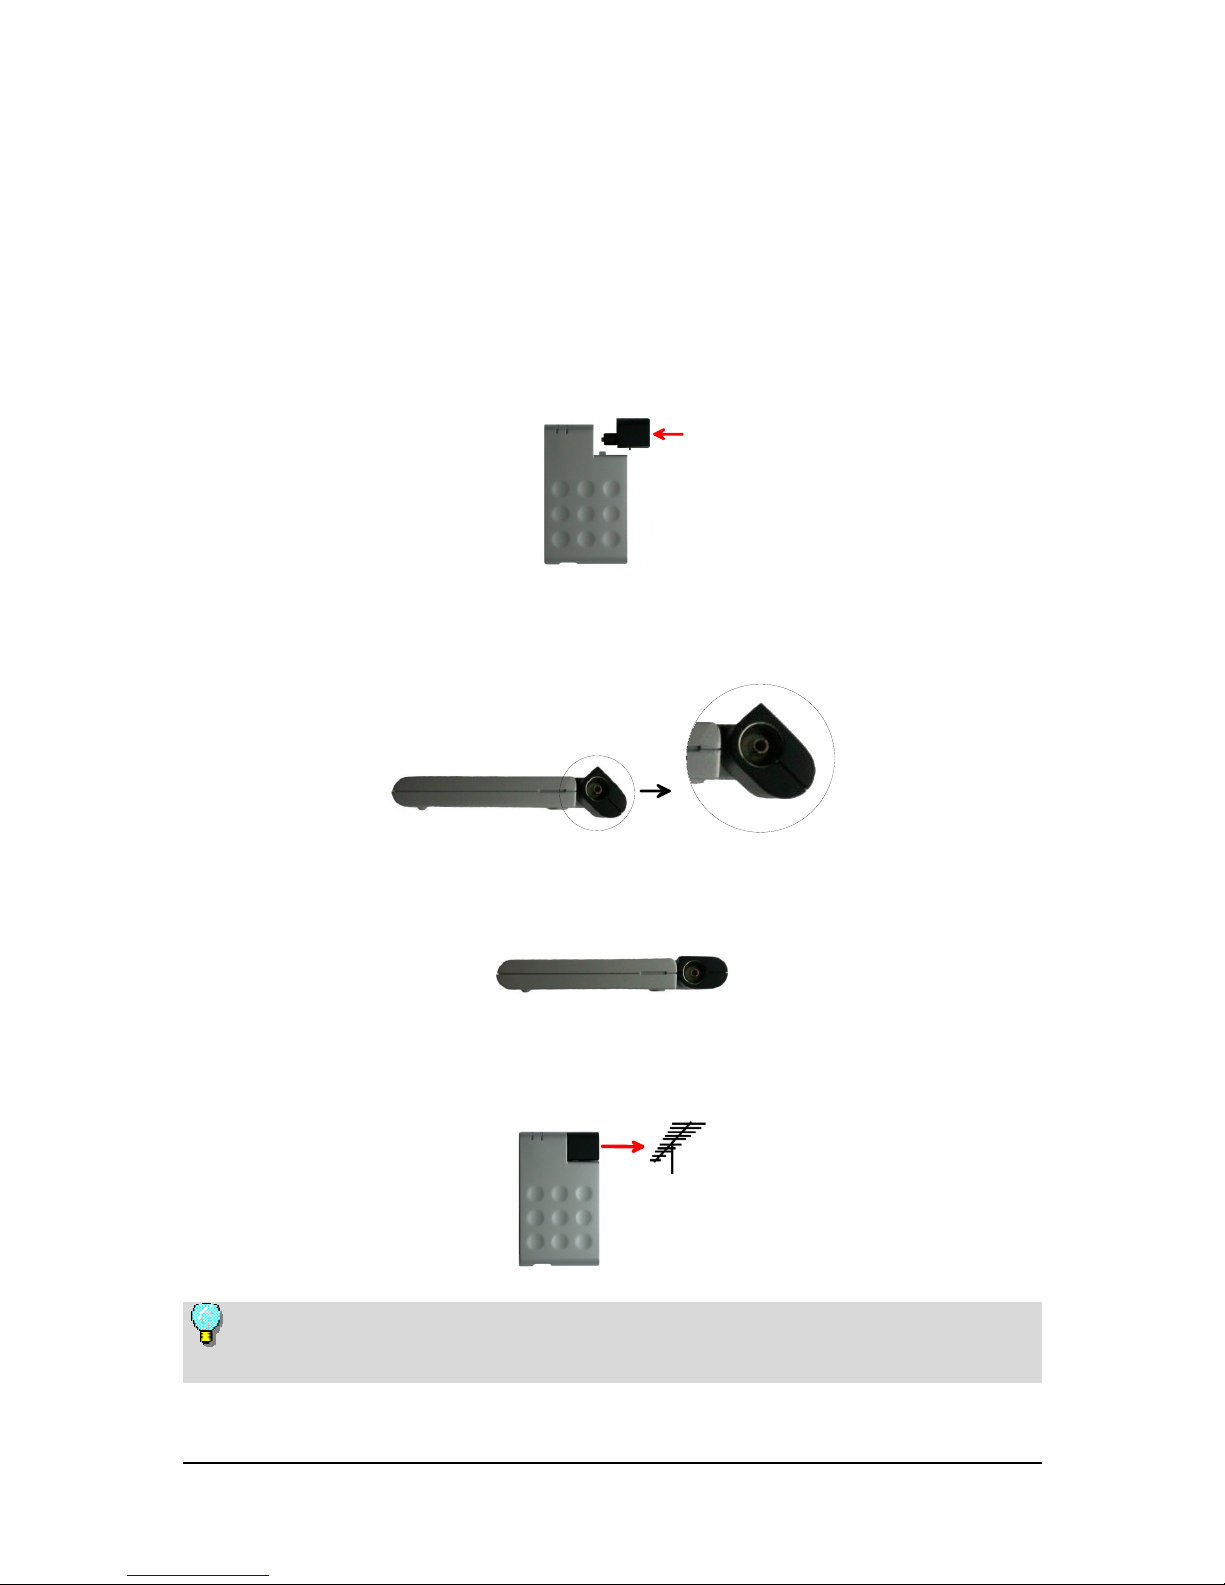
The PCTV DVB-T Pro USB offers you a unique combination of a DVB-T
receiver for USB and an active planar antenna from Hirschmann™ Multimedia.
The PCTV DVB-T Pro USB has optimized reception and functions
independently of the power supply. This makes it the ideal mobile solution for
digital television reception on your laptop computer.
In addition to Live-TV, PCTV DVB-T Pro USB also makes time delay
television (Timeshift) available, as well as giving you the ability to record shows
on your hard disk and on writable DVDs - without any compromise in sound or
image quality.
You also get access to the free information services, videotext and the electronic
program guide (EPG), which let you program the shows you want to record
simply and easily.
Additional services planned for the future include digital radio, interactive
television, and IP data reception. Some of these services are already available in
selected areas.
And now have fun with your PCTV DVB-T Pro USB!
More information about DVB-T can be found on the Internet at
www.dvb.org.
1

2
System Requirements
In order for the PCTV DVB-T Pro USB to function smoothly, your system must
meet the following requirements:
Computer Hardware
Processor
Minimum: Pentium III 1.0 GHz
or equivalent AMD Athlon XP processor (SD only)
Recommended: Pentium IV 2.0 GHz, Pentium M 1.3 GHz
or equivalent AMD Athlon 64 processor (SD and HD)
Working memory
Minimum: 256 MB RAM
Recommended: 512 MB RAM
Hard disk
Minimum: IDE hard disk with master mode drivers and 5 GB free disk space
Recommended: U-DMA hard disk with 20 GB free disk space
Graphics controller
Minimum: DirectX 8 compatible graphics card
Recommended: DirectX 9 (or higher) compatible graphics controller
Sound controller
Minimum: DirectX 9 compatible sound controller
USB port
USB (full-speed or high-speed) port
CD-ROM / DVD-ROM drive or recorder
Minimum: CD-ROM or DVD-ROM drive
Recommended: CD or DVD recorder
Computer Software
Windows XP (Home Edition, Professional Edition or Media Center Edition
2005) with the latest Service Pack

Connecting the Antenna
You can use different types of antennas with the PCTV DVB-T Pro USB:
Active Planar Antenna
To mount the active planar antenna, insert it into the antenna input socket on
the side of the PCTV DVB-T Pro USB.
In order to insert the antenna into the PCTV DVB-T Pro USB casing, the
marking stamped on the side of the antenna must be lined up with the seam
of the PCTV DVB-T Pro USB casing.
When using the active planar antenna (optional) or another active antenna
without its own power supply, make sure that the antenna power supply is
activated in the "Settings" menu in the Pinnacle MediaCenter application.
If the antenna power supply is active, a red LED on the PCTV DVB-T Pro USB
casing will light up.
3

Or: Other Antennas
If your PCTV DVB-T Pro USB does not include an antenna or you live in an
area that is not suited for receiving signals with indoor antennas, connect the
PCTV DVB-T Pro USB to another antenna (e.g., your building antenna) using
the antenna adapter:
Insert the antenna adapter into the antenna input socket of the PCTV DVB-T
Pro USB from the side.
When doing this, make sure that the plastic knob on the
PCTV DVB-T Pro USB casing fits into the round groove of the adapter.
Now turn the adapter until it snaps into the PCTV DVB-T Pro USB casing
and both line up properly.
Finally, connect the antenna adapter to your building antenna or to an indoor
antenna.
To connect an antenna, you need the corresponding cable. Note that the
quality of the cable has a great influence on the quality of the reception.
4

Connecting to the Computer
Connect your PCTV DVB-T Pro USB with your computer via the USB port.
Use only the USB cable included in the box.
5

Positioning your PCTV DVB-T Pro USB
If you are using the active planar antenna (optional), fold it up when you
move it or take it anywhere.
Whenever the PCTV DVB-T Pro USB is running, always unfold the antenna
and make sure that it is positioned upright.
You can place your PCTV DVB-T Pro USB in various positions:
Sitting on a Flat Surface
You can place your PCTV DVB-T Pro USB on a flat surface.
If you are using the active planar antenna, make sure that it is unfolded into a
right angle and is sitting upright.
or
Attached to a Laptop Computer
You can also attach your PCTV DVB-T Pro USB directly to your laptop. This
makes your PCTV DVB-T Pro USB a convenient and mobile accessory. To do
this, mount the retaining clip onto the PCTV DVB-T Pro USB casing:
Press the retaining clip onto the PCTV DVB-T Pro USB casing so that the
plastic knobs on both sides of the clip click audibly into the round grooves on
the casing.
6

With the retaining clip in place, attach the PCTV DVB-T Pro USB casing
onto the outer side of the cover of your laptop computer.
If you are using the active planar antenna, make sure that it is completely
open and is positioned upright.
or
Using the Adhesive Pads
If you use the retaining clip to fasten the PCTV DVB-T Pro USB casing to your
notebook display, make note of the following instructions:
If you have a display with a very flat frame, you can increase stability by
attaching the adhesive pads included in the box to the retaining clip according to
the illustration below.
7

Positioning Tips for the Active Planar Antenna
If you would like to use the active planar antenna (optional) included in your
box to get television reception, note following instructions (these instructions do
not apply to other antennas):
Position the PCTV DVB-T Pro USB so that the reception surface of the
antenna is pointed towards the closest television transmitter.
If possible, place the PCTV DVB-T Pro USB near a window.
In addition, place the PCTV DVB-T Pro USB as high as possible.
The PCTV DVB-T Pro USB should not be placed near a cathode ray tube
monitor or a television or similar equipment.
Note that you will possibly not get the best DVB-T reception inside
buildings. In this case, place your PCTV DVB-T Pro USB as high and as near to
a window as possible or attach the adapter (included in the box) to your roof
antenne.
8

Using the Remote Control
If your PCTV DVB-T Pro USB box includes a remote control, when you use it,
make sure that it is aimed directly at the reception area of the PCTV DVB-T Pro
USB casing.
LED Display
The LED display on the PCTV DVB-T Pro USB indicates the operational status
of the device:
The yellow LED indicates that the station is set correctly.
The red LED indicates that the power supply of the active planar antenna is
switched on.
In order to operate the active planar antenna (optional), the power supply to
the antenna needs to be switched on.
Station is set
A
ntenna power is on
yellow red
9

Technical Data
Bus System
USB (full-speed or high-speed)
TV Tuner
Microtune MT2060
The frequency range is 45.75 to 863.25 MHz (VHF and UHF).
DVB-T Demodulator
Zarlink MT352
16.64 QAM, QPSK
6,7,8 MHz bandwidth
UHF, VHF
Antenna Input (Optional)
75 Ohm via IEC adapter
Note the following when using the Pinnacle Studio QuickStart: If you want
to edit DVB-T shows, first record them to your hard disk using the Pinnacle
MediaCenter. After this, you can edit the saved video files with Studio
QuickStart.
10
Other manuals for PCTV DUAL DVBT PRO PCI
1
Table of contents
Other Pinnacle TV Receiver manuals