Pioneer AVH-X5800BHS User manual

Owner’s Manual
Manuel du propriétaire
Manual de Instrucciones
AVH-X5800BHS
AVH-X4800BS
AVH-X3800BHS
AVH-X2800BS
AVH-X1800S
DVD RDS AV RECEIVER
RÉCEPTEUR A/V RDS DVD
RADIO AV RDS CON DVD
English
1< CRD4924-B >
Important (Serial number)
The serial number is located on the bottom of this unit. For your own security and
convenience, be sure to record this number on the enclosed warranty card
.
Important (numéro de série)
Le numéro de série se trouve sous cet appareil. Pour votre sécurité et votre
commodité, pensez à inscrire ce numéro sur la carte de garantie fournie.
Importante (Número de serie)
El número de serie está ubicado en la parte inferior de esta unidad. Para su
seguridad y comodidad, asegúrese de registrar este número en la tarjeta de
garantía incluida.
English Français Español

2
Displaying the rmware version .....................43
Displaying the open source licenses..............43
Updating rmware..........................................43
■Audio adjustments ..........44
Displaying the “Audio” setting screen .............44
Using fader/balance adjustment.....................44
Switching sound muting/attenuation ..............44
Adjusting source levels ..................................44
Using the auto level control ............................44
Adjusting loudness.........................................44
Setting the subwoofer output..........................44
Adjusting the cutoff frequency value ..............44
Switching the rear speaker output..................45
Using BASS Boost.........................................45
Selecting the listening position.......................45
Adjusting the speaker output levels nely.......45
Adjusting the time alignment..........................45
Switching the time alignment preset...............45
Using the equalizer ........................................46
Adjusting the equalizer curve automatically
(Auto EQ)..................................................46
Saving the sound settings..............................47
Loading the sound settings ............................47
■Theme menu ....................47
Selecting the background display...................47
Setting the illumination color ..........................47
Selecting the theme color...............................48
Selecting the clock image ..............................48
■Setting up the video
player................................48
Setting the top-priority languages ..................48
Setting the angle icon display.........................48
Setting the aspect ratio ..................................49
Setting parental lock ......................................49
Displaying your DivX VOD registration
code..........................................................49
Displaying your DivX VOD deregistration
code..........................................................49
Automatic playback of DVDs ..........................50
Setting the video signal for the rear view
camera......................................................50
■Favorite menu..................50
Creating a shortcut ........................................50
Selecting a shortcut .......................................50
Removing a shortcut......................................50
Thank you for buying this Pioneer product.
Please read through these instructions so you
will know how to operate your model properly.
After you have finished reading the instruc-
tions, keep this document in a safe place for
future reference.
Important
The screens shown in the examples may
differ from actual screens, which may be
changed without notice for performance and
function improvements.
■Precaution..........................4
Information to User ..........................................4
Important safety information ............................5
Parking brake interlock.....................................5
When using a display connected to V OUT ......5
To avoid battery exhaustion..............................5
Rear view camera............................................5
Handling the USB connector............................6
Failure to operate.............................................6
Visit our website...............................................6
Protecting the LCD panel and screen...............6
Notes on internal memory................................6
About this manual ............................................6
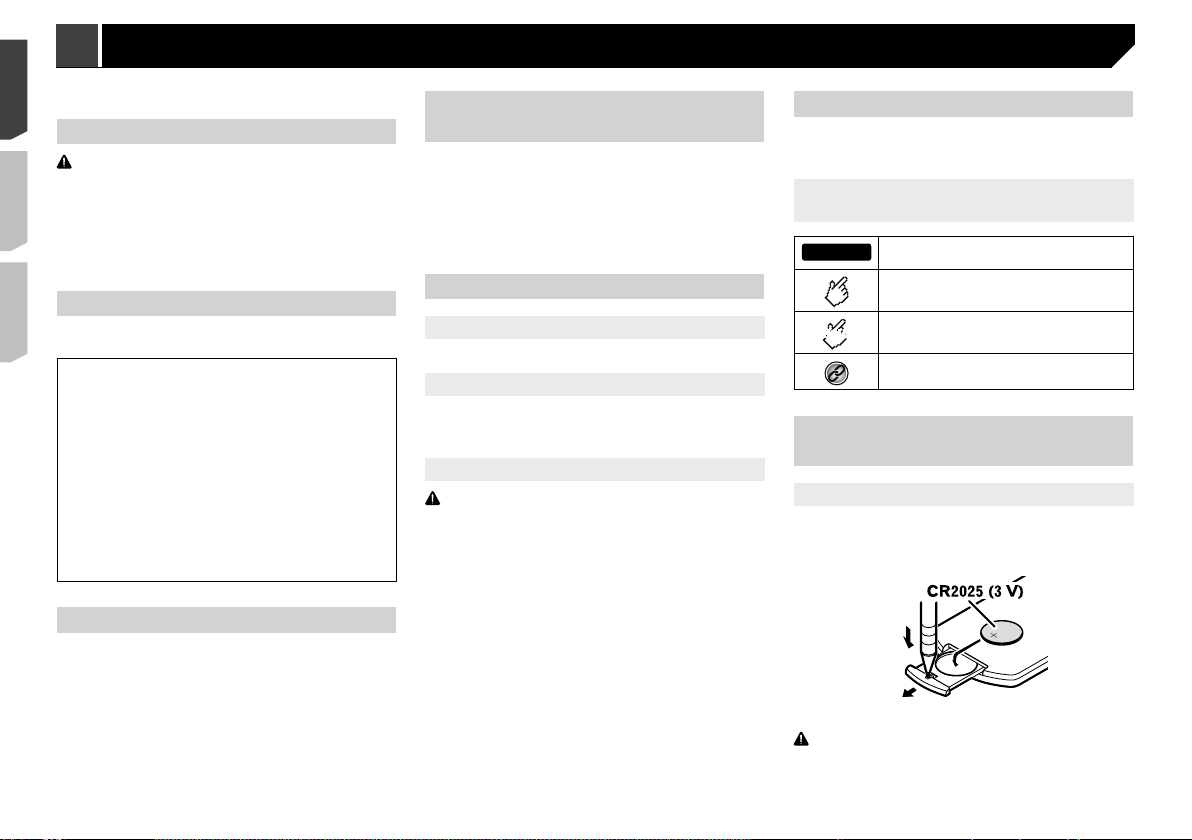
Use and care of the remote control..................6
■Basic operation..................7
Checking part names and functions.................7
Remote control ................................................7
Notes on using the LCD panel .........................8
Adjusting the LCD panel angle.........................8
Inserting/ejecting/connecting media.................8
On rst-time startup .........................................8
How to use the screens..................................10
Supported AV source.....................................11
Displaying the AV operation screen................11
Selecting a source .........................................11
Changing the display order of sources...........11
Using the touch panel ....................................11
■Registration and
connection of Bluetooth®
device ...............................12
Displaying the “Bluetooth” screen...................12
Registering your Bluetooth devices................12
Connecting a registered Bluetooth device
manually ...................................................12
Switching visibility..........................................13
Entering the PIN code for Bluetooth wireless
connection ................................................13
Displaying the device information...................13
Clearing the Bluetooth memory......................13
Updating Bluetooth software..........................13
Displaying the Bluetooth software version......13
Switching the connected Bluetooth device.....13
■Hands-free phoning.........14
Displaying the Phone menu screen................14
Making a phone call.......................................14
Receiving a phone call...................................15
Minimizing the dial conrmation screen .........15
Changing the phone settings .........................15
Using the voice recognition function (for
iPhone) .....................................................15
Setting phone book auto synchronization ......15
Notes for hands-free phoning.........................15
■Setup for iPod / iPhone or
smartphone......................16
The basic ow of iPod / iPhone or smartphone
setup.........................................................16
Setting the device connection method............16
iPod compatibility...........................................16
Android™ device compatibility.........................16
Information on the connections and functions
for each device..........................................17
■Radio ................................19
Starting procedure .........................................19
Storing the strongest broadcast
frequencies ...............................................19
Tuning into strong frequencies .......................19
■HD Radio™........................20
HD Radio stations..........................................20
Starting procedure .........................................21
Storing the strongest broadcast
frequencies ...............................................21
Display the Radio settings screen..................21
■Disc...................................21
Starting procedure .........................................23
Selecting les from the le name list..............23
Switching the media le type..........................23
Searching for the part you want to play ..........23
Operating the DVD menu ...............................23
Switching the subtitle/audio language............23
Operating the DVD menu using touch panel
keys ..........................................................23
■Compressedles.............24
Starting procedure (for Disc)..........................26
Starting procedure (for USB)..........................26
Operations common to all le types ...............26
Audio le operations.......................................26
Still image le operations...............................26
■iPod ..................................27
Connecting your iPod.....................................28
Starting procedure .........................................28
Selecting song or video sources from the
playlist screen ...........................................28
Using this product’s iPod function from your
iPod...........................................................28
Selecting a song from the list related to the
song currently playing (link search)...........28
■AppRadioOne ..................29
Using AppRadioOne ......................................29
Using the audio mix function ..........................29
■Pandora®..........................30
Pandora operations........................................31
Starting procedure .........................................31
Selecting a Pandora station from the list........31
Adding a station .............................................31
Storing the preset stations .............................31
■Spotify®.............................32
Using Spotify with your Pioneer car audio/
video.........................................................33
Starting procedure .........................................33
Selecting a track or station from the list..........33
■Bluetooth audio player....34
Starting procedure .........................................34
Selecting les from the le name list..............34
■SiriusXM®Satellite
Radio ................................35
SiriusXM tuner operations..............................35
Starting procedure .........................................36
Selecting a channel from a list of all
channels ...................................................36
Selecting a channel from the category list......36
Switching the displayed list ............................36
Setting TuneStart™.........................................36
Using TuneScan™...........................................36
Using category scan ......................................36
Using TuneMix™.............................................36
About SmartFavorites ....................................36
Using iTunes Tagging .....................................36
Activating the Trafc & Weather Now..............37
Displaying the “SiriusXM settings” screen......37
Using SportsFlash™list..................................37
Using Featured Favorites Band......................37
Restoring the “SiriusXM Settings” to the
default.......................................................38
■AUX source ......................38
Starting procedure .........................................38
Setting the video signal..................................39
■AV input............................39
Starting procedure (for AV source).................39
Starting procedure (for camera).....................39
Setting the video signal..................................39
■MIXTRAX ..........................40
MIXTRAX operation.......................................40
MIXTRAX EZ operation..................................40
Displaying the “MIXTRAX Settings” screen ....40
Setting the ash pattern.................................40
■System settings...............41
Displaying the “System” setting screen ..........41
Setting Bluetooth audio source activation ......41
Setting Spotify source activation ....................41
Setting the ever scroll.....................................41
Setting the beep tone.....................................41
Setting the auto audio mix function ................41
Setting AppRadioOne Sound.........................41
Setting the rear view camera..........................41
Setting the demo mode..................................42
Selecting the system language ......................42
Setting the keyboard language with the
application for iPhone................................42
Adjusting the response positions of the touch
panel (touch panel calibration)..................42
Setting the dimmer.........................................42
Adjusting the picture ......................................43
2< CRD4924-B >< CRD4924-B >
Contents

3
Displaying the rmware version .....................43
Displaying the open source licenses..............43
Updating rmware..........................................43
■Audio adjustments ..........44
Displaying the “Audio” setting screen .............44
Using fader/balance adjustment.....................44
Switching sound muting/attenuation ..............44
Adjusting source levels ..................................44
Using the auto level control ............................44
Adjusting loudness.........................................44
Setting the subwoofer output..........................44
Adjusting the cutoff frequency value ..............44
Switching the rear speaker output..................45
Using BASS Boost.........................................45
Selecting the listening position.......................45
Adjusting the speaker output levels nely.......45
Adjusting the time alignment..........................45
Switching the time alignment preset...............45
Using the equalizer ........................................46
Adjusting the equalizer curve automatically
(Auto EQ)..................................................46
Saving the sound settings..............................47
Loading the sound settings ............................47
■Theme menu ....................47
Selecting the background display...................47
Setting the illumination color ..........................47
Selecting the theme color...............................48
Selecting the clock image ..............................48
■Setting up the video
player................................48
Setting the top-priority languages ..................48
Setting the angle icon display.........................48
Setting the aspect ratio ..................................49
Setting parental lock ......................................49
Displaying your DivX VOD registration
code..........................................................49
Displaying your DivX VOD deregistration
code..........................................................49
Automatic playback of DVDs ..........................50
Setting the video signal for the rear view
camera......................................................50
■Favorite menu..................50
Creating a shortcut ........................................50
Selecting a shortcut .......................................50
Removing a shortcut......................................50
■Common operations........51
Setting the time and date ...............................51
Storing song information to an iPod (iTunes
Tagging)....................................................51
Setting the “Sound Retriever” function............51
Changing the wide screen mode....................51
■Other functions................52
Restoring this product to the default
settings .....................................................52
■Connection.......................52
Precautions....................................................52
Precautions before connecting the system.....52
Before installing this product..........................53
To prevent damage ........................................53
Notice for the blue/white lead .........................53
This product...................................................53
Power cord.....................................................54
Speaker leads................................................54
Power amp (sold separately)..........................54
iPhone and smartphone.................................55
iPhone with Lightning connector ....................55
iPhone with 30-pin connector.........................55
Android device ...............................................56
Camera..........................................................56
External video component and the display.....56
■Installation .......................57
Precautions before installation.......................57
Before installing .............................................57
Installation notes............................................57
Installation using the screw holes on the side of
this product ...............................................57
Installing the microphone...............................58
Mounting on the sun visor ..............................58
Installation on the steering column.................58
Adjusting the microphone angle.....................58
■Appendix ..........................59
Troubleshooting .............................................59
Error messages .............................................60
Handling and care of discs.............................62
Playable discs ................................................62
Detailed information for playable media .........63
Bluetooth .......................................................65
SiriusXM® satellite radio.................................66
HD Radio™ Technology ..................................66
WMA..............................................................66
FLAC..............................................................66
DivX...............................................................66
AAC ...............................................................66
Android™........................................................66
Detailed information regarding connected iPod
devices......................................................66
Using app-based connected content..............67
Pandora®........................................................67
Spotify®..........................................................67
Notice regarding video viewing ......................67
Notice regarding DVD-Video viewing .............67
Notice regarding MP3 le usage ....................67
Using the LCD screen correctly......................67
Specications.................................................68
Starting procedure .........................................36
Selecting a channel from a list of all
channels ...................................................36
Selecting a channel from the category list......36
Switching the displayed list ............................36
Setting TuneStart™.........................................36
Using TuneScan™...........................................36
Using category scan ......................................36
Using TuneMix™.............................................36
About SmartFavorites ....................................36
Using iTunes Tagging .....................................36
Activating the Trafc & Weather Now..............37
Displaying the “SiriusXM settings” screen......37
Using SportsFlash™list..................................37
Using Featured Favorites Band......................37
Restoring the “SiriusXM Settings” to the
default.......................................................38
■AUX source ......................38
Starting procedure .........................................38
Setting the video signal..................................39
■AV input............................39
Starting procedure (for AV source).................39
Starting procedure (for camera).....................39
Setting the video signal..................................39
■MIXTRAX ..........................40
MIXTRAX operation.......................................40
MIXTRAX EZ operation..................................40
Displaying the “MIXTRAX Settings” screen ....40
Setting the ash pattern.................................40
■System settings...............41
Displaying the “System” setting screen ..........41
Setting Bluetooth audio source activation ......41
Setting Spotify source activation ....................41
Setting the ever scroll.....................................41
Setting the beep tone.....................................41
Setting the auto audio mix function ................41
Setting AppRadioOne Sound.........................41
Setting the rear view camera..........................41
Setting the demo mode..................................42
Selecting the system language ......................42
Setting the keyboard language with the
application for iPhone................................42
Adjusting the response positions of the touch
panel (touch panel calibration)..................42
Setting the dimmer.........................................42
Adjusting the picture ......................................43
3
< CRD4924-B >
Contents

4
BE SURE TO OBSERVE THE FOLLOWING
GUIDELINES:
Do not turn up the volume so high that you can’t hear what’s
around you.
Use caution or temporarily discontinue use in potentially
hazardous situations.
Do not use headphones while operating a motorized vehicle;
the use of headphones may create a traffic hazard and is
illegal in many areas.
Important safety information
WARNING
Do not attempt to install or service this product by yourself.
Installation or servicing of this product by persons without
training and experience in electronic equipment and
automotive accessories may be dangerous and could
expose you to the risk of electric shock, injury or other
hazards.
Do not allow this product to come into contact with liquids.
Electrical shock could result. Also, damage to the product,
smoke, and overheating could result from contact with
liquids.
If liquid or foreign matter should get inside this product,
park your vehicle in a safe place, turn the ignition switch
off (ACC OFF) immediately and consult your dealer or the
nearest authorized Pioneer Service Station. Do not use this
product in this condition because doing so may result in a
fire, electric shock, or other failure.
If you notice smoke, a strange noise or odor from this
product, or any other abnormal signs on the LCD screen,
turn off the power immediately and consult your dealer or
the nearest authorized Pioneer Service Station. Using this
product in this condition may result in permanent damage
to the system.
Do not disassemble or modify this product, as there
are high-voltage components inside which may cause
an electric shock. Be sure to consult your dealer or the
nearest authorized Pioneer Service Station for internal
inspection, adjustments or repairs.
Before using this product, be sure to read and fully understand
the following safety information:
Do not operate this product, any applications, or the rear
view camera option (if purchased) if doing so will divert your
attention in any way from the safe operation of your vehicle.
Always observe safe driving rules and follow all existing
traffic regulations. If you experience difficulty in operating
Information to User
MODEL NO. : AVH-X5800BHS, AVH-X4800BS, AVH-
X3800BHS, AVH-X2800BS
Contains FCC ID : AJDK071
Contains/Contient IC : 775E-K071
This device complies with Part 15 of FCC Rules and
Industry Canada licence-exempt RSS standard(s).
Operation is subject to the following two conditions:
(1) this device may not cause interference, and (2)
this device must accept any interference, including
interference that may cause undesired operation of this
device.
The Bluetooth antenna cannot be removed (or replaced)
by user.
This equipment complies with FCC/IC radiation exposure
limits set forth for an uncontrolled environment and
meets the FCC radio frequency (RF) Exposure Guidelines
and RSS-102 of the IC radio frequency (RF) Exposure
rules. This equipment has very low levels of RF energy
that it deemed to comply without maximum permissive
exposure evaluation (MPE). But it is desirable that it
should be installed and operated keeping the radiator at
least 20 cm or more away from person’s body (excluding
extremities: hands, wrists, feet and ankles).
MODEL NO.: AVH-X1800S
This device complies with Part 15 of the FCC Rules.
Operation is subject to the following two conditions:
(1) this device may not cause harmful interference, and (2)
this device must accept any interference received, including
interference that may cause undesired operation.
This transmitter must not be co-located or operated in
conjunction with any other antenna or transmitter.
Alteration or modifications carried out without
appropriate authorization may invalidate the user’s right
to operate the equipment.
NOTE: This equipment has been tested and found to
comply with the limits for a Class B digital device,
pursuant to Part 15 of the FCC Rules. These limits are
designed to provide reasonable protection against
harmful interference in a residential installation. This
equipment generates, uses and can radiate radio
frequency energy and, if not installed and used in
accordance with the instructions, may cause harmful
interference to radio communications. However, there
is no guarantee that interference will not occur in a
particular installation. If this equipment does cause
harmful interference to radio or television reception,
which can be determined by turning the equipment
off and on, the user is encouraged to try to correct the
interference by one or more of the following measures:
Reorient or relocate the receiving antenna.
Increase the separation between the equipment and
receiver.
Connect the equipment into an outlet on a circuit differ-
ent from that to which the receiver is connected.
Consult the dealer or an experienced radio/TV techni-
cian for help.
CAUTION:
USE OF CONTROL OR ADJUSTMENT OR PERFORMANCE
OF PROCEDURES OTHER THAN THOSE SPECIFIED HEREIN
MAY RESULT IN HAZARDOUS RADIATION EXPOSURE.
CAUTION:
THE USE OF OPTICAL INSTRUMENTS WITH THIS PRODUCT
WILL INCREASE EYE HAZARD.
CAUTION
This product is a Class 1 laser product classified under the
Safety of laser products, IEC 60825-1:2007, and contains a
class 1M laser module. To ensure continued safety, do not
remove any covers or attempt to gain access to the inside of
the product. Refer all servicing to qualified personnel.
CAUTION—CLASS 1M VISIBLE AND INVISIBLE
LASER RADIATION WHEN OPEN, DO NOT VIEW
DIRECTLY WITH OPTICAL INSTRUMENTS.
WARNING
This product contains chemicals known to the State of
California and other governmental entities to cause cancer
and birth defects or other reproductive harm. Wash hands
after handling.
The Safety of Your Ears is in Your
Hands
Get the most out of your equipment by playing it at a safe level—
a level that lets the sound come through clearly without annoy-
ing blaring or distortion and, most importantly, without affecting
your sensitive hearing. Sound can be deceiving. Over time, your
hearing “comfort level” adapts to higher volumes of sound, so
what sounds “normal” can actually be loud and harmful to your
hearing. Guard against this by setting your equipment at a safe
level BEFORE your hearing adapts.
ESTABLISH A SAFE LEVEL:
Set your volume control at a low setting.
Slowly increase the sound until you can hear it comfortably
and clearly, without distortion.
Once you have established a comfortable sound level, set
the dial and leave it there.
Precaution
4< CRD4924-B >< CRD4924-B >
Precaution Precaution

5
BE SURE TO OBSERVE THE FOLLOWING
GUIDELINES:
Do not turn up the volume so high that you can’t hear what’s
around you.
Use caution or temporarily discontinue use in potentially
hazardous situations.
Do not use headphones while operating a motorized vehicle;
the use of headphones may create a traffic hazard and is
illegal in many areas.
Important safety information
WARNING
Do not attempt to install or service this product by yourself.
Installation or servicing of this product by persons without
training and experience in electronic equipment and
automotive accessories may be dangerous and could
expose you to the risk of electric shock, injury or other
hazards.
Do not allow this product to come into contact with liquids.
Electrical shock could result. Also, damage to the product,
smoke, and overheating could result from contact with
liquids.
If liquid or foreign matter should get inside this product,
park your vehicle in a safe place, turn the ignition switch
off (ACC OFF) immediately and consult your dealer or the
nearest authorized Pioneer Service Station. Do not use this
product in this condition because doing so may result in a
fire, electric shock, or other failure.
If you notice smoke, a strange noise or odor from this
product, or any other abnormal signs on the LCD screen,
turn off the power immediately and consult your dealer or
the nearest authorized Pioneer Service Station. Using this
product in this condition may result in permanent damage
to the system.
Do not disassemble or modify this product, as there
are high-voltage components inside which may cause
an electric shock. Be sure to consult your dealer or the
nearest authorized Pioneer Service Station for internal
inspection, adjustments or repairs.
Before using this product, be sure to read and fully understand
the following safety information:
Do not operate this product, any applications, or the rear
view camera option (if purchased) if doing so will divert your
attention in any way from the safe operation of your vehicle.
Always observe safe driving rules and follow all existing
traffic regulations. If you experience difficulty in operating
this product or reading the display, park your vehicle in a
safe location and apply the parking brake before making the
necessary adjustments.
Never set the volume of this product so high that you cannot
hear outside traffic and emergency vehicles.
To promote safety, certain functions are disabled unless the
vehicle is stopped and/or the parking brake is applied.
Keep this manual handy as a reference for operating proce-
dures and safety information.
Do not install this product where it may (i) obstruct the
driver’s vision, (ii) impair the performance of any of the
vehicle’s operating systems or safety features, including air
bags or hazard lamp buttons or (iii) impair the driver’s ability
to safely operate the vehicle.
Please remember to fasten your seat belt at all times while
operating your vehicle. If you are ever in an accident, your
injuries can be considerably more severe if your seat belt is
not properly buckled.
Never use headphones while driving.
Parking brake interlock
Certain functions (such as viewing of video image and certain
touch panel key operations) offered by this product could be
dangerous (possibly resulting in serious injury or death) and/
or unlawful if used while driving. To prevent such functions from
being used while the vehicle is in motion, there is an interlock
system that senses when the parking brake is set and when the
vehicle is moving. If you attempt to use the functions described
above while driving, they will become disabled until you stop
the vehicle in a safe place, and (1) apply the parking brake, (2)
release the parking brake, and then (3) apply the parking brake
again. Please keep the brake pedal pushed down before releas-
ing the parking brake.
To ensure safe driving
WARNING
LIGHT GREEN LEAD AT POWER CONNECTOR
IS DESIGNED TO DETECT PARKED STATUS
AND MUST BE CONNECTED TO THE POWER
SUPPLY SIDE OF THE PARKING BRAKE SWITCH.
IMPROPER CONNECTION OR USE OF THIS LEAD
MAY VIOLATE APPLICABLE LAW AND MAY RESULT
IN SERIOUS INJURY OR DAMAGE.
Do not take any steps to tamper with or disable the
parking brake interlock system which is in place for
your protection. Tampering with or disabling the
parking brake interlock system could result in serious
injury or death.
To avoid the risk of damage and injury and the
potential violation of applicable laws, this product is
not for use with a video image that is visible to the
driver.
In some countries the viewing of video image on a display
inside a vehicle even by persons other than the driver may
be illegal. Where such regulations apply, they must be
obeyed.
If you attempt to watch video image while driving, the warning
“Viewing of front seat video source while driving is strictly
prohibited.” will appear on the screen. To watch video image
on this display, stop the vehicle in a safe place and apply the
parking brake. Please keep the brake pedal pushed down before
releasing the parking brake.
When using a display con-
nected to V OUT
The video output terminal (V OUT) is for connection of a display
to enable passengers in the rear seats to watch video images.
WARNING
NEVER install the rear display in a location that enables the
driver to watch video images while driving.
To avoid battery exhaustion
Be sure to run the vehicle engine while using this product. Using
this product without running the engine can drain the battery.
WARNING
Do not install this product in a vehicle that does not have an
ACC wire or circuitry available.
Rear view camera
With an optional rear view camera, you are able to use this
product as an aid to keep an eye on trailers, or backing into a
tight parking spot.
WARNING
SCREEN IMAGE MAY APPEAR REVERSED.
USE INPUT ONLY FOR REVERSE OR MIRROR IMAGE
REAR VIEW CAMERA. OTHER USE MAY RESULT IN
INJURY OR DAMAGE.
CAUTION
The rear view mode is to use this product as an aid to keep
an eye on the trailers, or while backing up. Do not use this
CAUTION
This product is a Class 1 laser product classified under the
Safety of laser products, IEC 60825-1:2007, and contains a
class 1M laser module. To ensure continued safety, do not
remove any covers or attempt to gain access to the inside of
the product. Refer all servicing to qualified personnel.
CAUTION—CLASS 1M VISIBLE AND INVISIBLE
LASER RADIATION WHEN OPEN, DO NOT VIEW
DIRECTLY WITH OPTICAL INSTRUMENTS.
WARNING
This product contains chemicals known to the State of
California and other governmental entities to cause cancer
and birth defects or other reproductive harm. Wash hands
after handling.
The Safety of Your Ears is in Your
Hands
Get the most out of your equipment by playing it at a safe level—
a level that lets the sound come through clearly without annoy-
ing blaring or distortion and, most importantly, without affecting
your sensitive hearing. Sound can be deceiving. Over time, your
hearing “comfort level” adapts to higher volumes of sound, so
what sounds “normal” can actually be loud and harmful to your
hearing. Guard against this by setting your equipment at a safe
level BEFORE your hearing adapts.
ESTABLISH A SAFE LEVEL:
Set your volume control at a low setting.
Slowly increase the sound until you can hear it comfortably
and clearly, without distortion.
Once you have established a comfortable sound level, set
the dial and leave it there.
5
< CRD4924-B >
Precaution Precaution
Other manuals for AVH-X5800BHS
1
This manual suits for next models
4
Table of contents
Other Pioneer Car Multimedia System manuals