Clarion VX506AU User manual

DVD MULTIMEDIA STATION WITH 6.0’’ TOUCH PANEL CONTROL
Owner’s manual
VX506AU

1
VX506AU
English
English Owner’s Manual
Contents
1. FEATURES...........................................................................................................3
Expanding Systems ..............................................................................................3
2. PRECAUTIONS....................................................................................................4
3. CAUTIONS ON HANDLING.................................................................................7
Operation Panel ....................................................................................................7
USB Port...............................................................................................................7
Cleaning................................................................................................................7
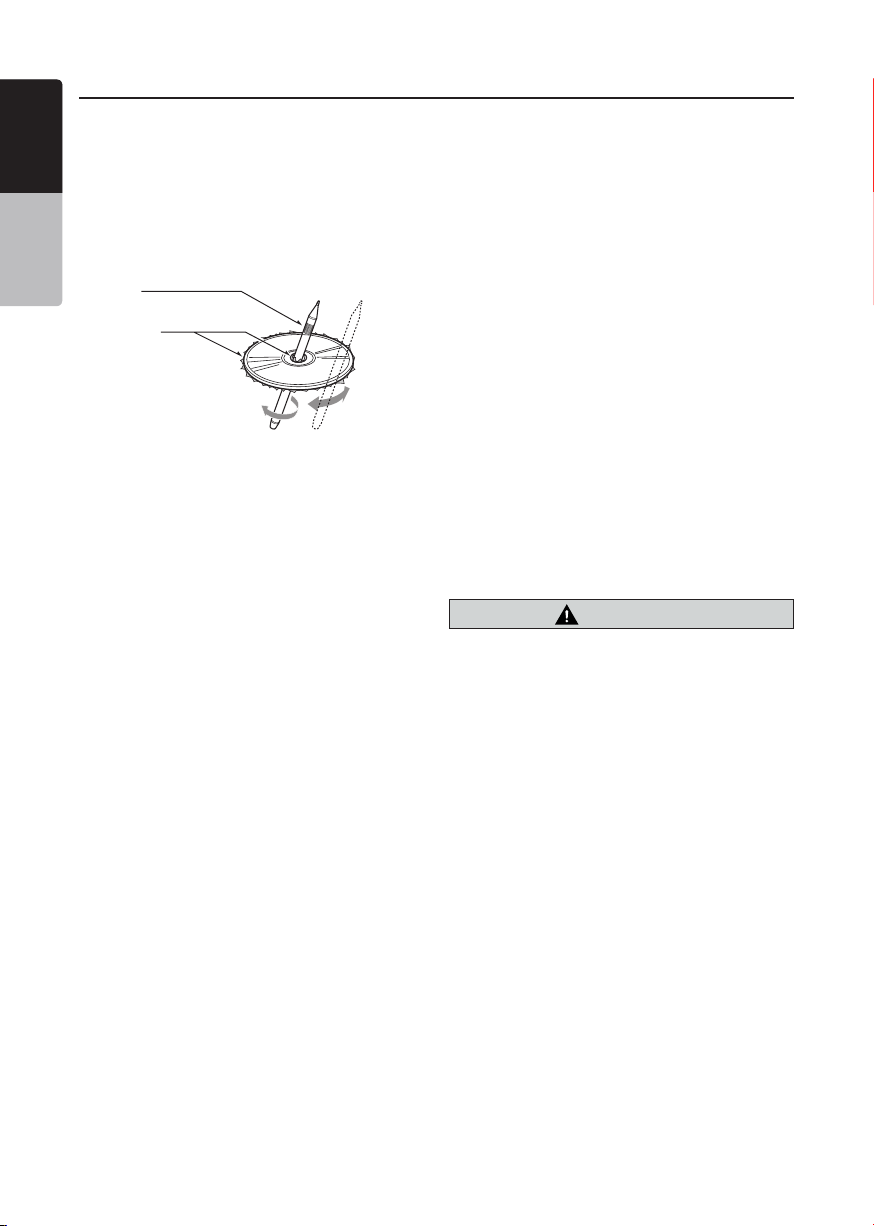
Handling Discs......................................................................................................8
4. OPERATION PANEL..........................................................................................10
Functions of Buttons...........................................................................................10
5. REMOTE CONTROL..........................................................................................11
Remote Control Functions..................................................................................12
6. MAIN MENU.......................................................................................................14
7. DVD VIDEO PLAYER OPERATIONS ...............................................................15
Discs ...................................................................................................................15
Change DVD System Settings ............................................................................16
Watching to a Disc..............................................................................................16
Showing DVD Player Mode Screen ....................................................................17
Operate the DVD Player Menu............................................................................17
Showing Video Files Player Mode Screen..........................................................18
Operate the Video Files Player Menu .................................................................19
Playable Video Disc Formats..............................................................................19
8. CD PLAYER OPERATIONS ..............................................................................21
Listening to a Disc/Ejecting a Disc .....................................................................21
Showing CD Player Mode Screen ......................................................................21
Operate the CD Player Menu..............................................................................21
Listening to Compressed Audio .........................................................................22
Tag Display Function ..........................................................................................22
Playback MP3/WMA/AAC menu ........................................................................23
9. USB AUDIO OPERATIONS ..............................................................................24
Notes on Using USB Memories..........................................................................24
Select USB Audio Mode .....................................................................................24
Playing Audio Files in USB Memory ...................................................................25
10. USB VIDEO OPERATIONS..............................................................................26
Notes on Using USB Memories..........................................................................26
Select USB Video Mode .....................................................................................26
Playing Video Files in USB Memory ...................................................................26
Playable Video Format........................................................................................26
11. iPod OPERATIONS..........................................................................................28
Notes on Using iPod/iPhone...............................................................................28
iPod Audio Menu Operations..............................................................................28
iPod Audio ID3 Mode Screen .............................................................................28
iPod Audio Playlist Mode Screen .......................................................................29
iPod Audio List Mode Screen .............................................................................29
iPod Audio Simple Control Mode Screen...........................................................30
iPod Video Menu Operations..............................................................................30
iPod Video ID3 Mode Screen..............................................................................30
iPod Video List Mode Screen .............................................................................31
iPod Video Simple Control Mode Screen ...........................................................31
iPod Video Play Mode Screen ............................................................................31
iPod Audio Bluetooth Mode................................................................................32

2VX506AU
English
English Owner’s Manual
12. Pandora®OPERATIONS ................................................................................33
Selecting the Pandora Mode ..............................................................................33
Pandora Bluetooth Mode....................................................................................34
13. Bluetooth
AUDIO PLAYER OPERATIONS....................................................35
Selecting the Bluetooth Audio Mode..................................................................35
Bluetooth Audio Player Settings.........................................................................35
Registering Your Bluetooth Audio Player (Pairing) .............................................35
Selecting the Bluetooth Audio Player .................................................................36
Controlling the Bluetooth Audio Player...............................................................36
14. Bluetooth
TELEPHONE OPERATIONS ............................................................37
Select the BT Phone Mode.................................................................................37
Bluetooth Telephone Settings ............................................................................37
Registering Your Cellular Phone (Pairing)...........................................................38
Select the Cellular Phone....................................................................................38
Get the Phone Book Data...................................................................................38
Telephone Operations ........................................................................................38
Using Siri Eyes Free Function.............................................................................40
15. TUNER OPERATIONS.....................................................................................41
16. HDMI MODE ....................................................................................................42
Wire Connection of HDMI Mode.........................................................................42
Select HDMI Source ..........................................................................................43
17. AUX .................................................................................................................44
18. CAMERA INPUT OPERATIONS .....................................................................44
19. REAR SOURCE OPERATIONS.......................................................................45
DVD Video in Rear ..............................................................................................45
DVD Video Rear Source Control Info Mode. ......................................................45
DVD Video Rear Source Control Direct Mode. ..................................................45
iPod Video Rear Source Control Play Mode.......................................................46
iPod Video Rear Source ID3 Mode.....................................................................46
20. SETTING OPERATIONS..................................................................................47
General Setup Menu...........................................................................................47
Video Setup Menu ..............................................................................................47
Audio Setup Menu ..............................................................................................48
Navigation Setup Menu ......................................................................................48
Others Setup Menu.............................................................................................48
Set the Anti-Theft Code ......................................................................................49
21. TROUBLESHOOTING .....................................................................................50
General................................................................................................................50
DVD Player..........................................................................................................50
USB Device.........................................................................................................51
Bluetooth ............................................................................................................51
TFT Screen..........................................................................................................52
22. ERROR DISPLAY.............................................................................................53
DVD Player..........................................................................................................53
23. SPECIFICATIONS............................................................................................54
24. WIRE CONNECTION GUIDE...........................................................................56

3
VX506AU
English
English Owner’s Manual
1. FEATURES
Expanding Systems
NOTE:
•
The items listed outside of the frames are the commercial products generally sold.
FLAC(Free Lossless Audio Codec) Compatible with ID3-TAG Display
Built-in Bluetooth
®
Handsfree (HFP) and Audio Streaming (A2DP &
AVRCP)
Front-Panel Auxiliary Input and 6ch RCA Output with Subwoofer Control
iPod
®
Expanding Visual Features
Rear Monitor Rear Vision Camera
Expanding Audio Features
External Power
Amplier
iPhone
®
USB
Memory
Bluetooth
Telephone
iPhone/Smartphone via HDMI

4VX506AU
English
English Owner’s Manual
2. PRECAUTIONS
• Foryoursafety,thedrivershouldnotwatchanyvideosourcesand/oroperatethecontrolswhiledriving.
Please note that watching and operating any video sources while driving are prohibited by law in some
countries.Also,whiledriving,keepthevolumetoalevelatwhichexternalsoundscanbeheard.
•Donotdisassembleormodifythisunit.Itmaycauseanaccident,re,orelectricshock.
•Donotusethisunitwhenatroubleexists,suchasnoscreencontentappearsornosoundis
audible.Itmaycauseanaccident,re,orelectricshock.Forthatcase,consultyourauthorized
dealer or a nearest Clarion service center.
•Incaseofaproblem,suchasanymaterialhasbeenenteredintheunit,theunitgetswet,or
smokeorstrangesmellscomeoutoftheunit,etc.,stopusingthisunitimmediately,andconsult
yourauthorizeddealeroranearestClarionservicecenter.
Usingitinthatconditionmaycauseanaccident,re,orelectricshock.
•Useafusewiththesamespecicationonlywhenreplacingthefuse.
Usingafusewithadifferentspecicationmaycausesare.
•Fortheinstallationofthisunitorachangeintheinstallation,askyourauthorizeddealerora
nearest Clarion service center for safety. Professional skills and experiences are required to do
so.
•Thisnavigationsystemshouldnotbeusedtoreplaceyourownjudgment.Noitinerarysuggested
bythisnavigationsystemshouldeveroverrideanyhighwayregulations,yourownjudgment,ora
knowledge of safe driving practices. Do not follow the navigation system’s suggested itinerary if it
wouldcauseyoutoperformadangerousorillegalact,placeyouinadangeroussituation,ortake
you into an area you consider unsafe.
•Theadviceprovidedbythenavigationsystemistoberegardedasasuggestiononly.Theremay
betimeswhenthenavigationsystemdisplaysthevehicle’slocationincorrectly,failstosuggest
theshortestroute,orfailstodirectyoutoyourdesireddestination.Insuchinstances,relyonyour
owndrivingjudgment,takingintoaccountthedrivingconditionsatthetime.
•Donotusethenavigationsystemtolocateemergencyservices.Thedatabasedoesnotcontain
acompletelistingofemergencyservicessuchaspolicestations,rehalls,hospitalsandwalk-in
clinics. Please show discretion and ask for directions in such instances.
•Asthedriver,youaloneareresponsibleforyourdrivingsafety.
•Inordertoavoidatrafcaccident,donotoperatethesystemwhiledriving.
•Inordertoavoidatrafcaccident,operatethesystemonlywhenthevehicleisstoppedatasafe
place and the parking brake is on.
•Inordertoavoidatrafcaccidentortrafcoffense,rememberthatactualroadconditionsand
trafcregulationstakeprecedenceovertheinformationcontainedonthenavigationsystem.
•Thesoftwaremaycontaininaccurateorincompleteinformationduetothepassageoftime,
changingcircumstances,andthesourcesofinformationused.Pleaserespectcurrenttrafc
conditions and regulations at all times while driving.
•Whereactualroadconditionsandhighwayregulationsdifferfromtheinformationcontainedon
thenavigationsystem,abidebythehighwayregulations.
•Keeptheamountoftimespentviewingthescreenwhiledrivingtoastrictminimum.
•Thenavigationsystemdoesnotprovide,norrepresentinanywayinformationon:trafcand
highwayregulations;technicalaspectsofthevehicleincludingweight,height,width,loadand
WARNING

5
VX506AU
English
English Owner’s Manual
speedlimits;roadconditionsincludinggrade,percentageofinclineandsurfaceconditions;
obstacles such as the height and width of bridges and tunnels; and other current driving or road
conditions.Alwaysrelyonyourownjudgmentwhendrivingacar,takingintoaccountcurrent
driving conditions.
•Changesormodicationsnotexpresslyapprovedbythepartyresponsibleforcompliancecould
void the user’s authority to operate the equipment.
ThisequipmenthasbeentestedandfoundtocomplywiththelimitsforaClassBdigitaldevice,
pursuant to Part 15 of the FCC Rules. These limits are designed to provide reasonable protection
againstharmfulinterferenceinaresidentialinstallation.Thisequipmentgenerates,usesandcan
radiateradiofrequencyenergyand,ifnotinstalledandusedinaccordancewiththeinstructions,
maycauseharmfulinterferencetoradiocommunications.However,thereisnoguaranteethat
interference will not occur in a particular installation.
Ifthisequipmentdoescauseharmfulinterferencetoradioortelevisionreception,whichcanbe
determinedbyturningtheequipmentoffandon,theuserisencouragedtotrytocorrectthe
interferencebyoneormoreofthefollowingmeasures:
-- Reorient or relocate the receiving antenna.
-- Increase the separation between the equipment and receiver.
-- Connect the equipment into an outlet on a circuit different from that to which the receiver is
connected.
-- Consult the dealer or an experienced radio/TV technician for help.

6VX506AU
English
English Owner’s Manual
1.When the inside of the car is very cold and
the player is used soon after switching on the
heater, moisture may form on the disc (DVD/
CD) or the optical parts of the player and
proper playback may not be possible. If
moisture forms on the disc (DVD/CD), wipe it
o with a soft cloth. If moisture forms on the
optical parts of the player, do not use the
player for about one hour. The condensation
will disappear naturally allowing normal
operation.
2.Driving on extremely bumpy roads which
cause severe vibration may cause the sound
to skip.
3.This unit uses a precision mechanism. Even
in the event that trouble arises, never open
the case, disassemble the unit, or lubricate
the rotating parts.
VX506AU
CNE-8243J-CL
1:1
机身大贴纸
技术说明:
1、大小65x75mm,红色外框线为刀模线。
2、材质,80g铜版纸,过哑胶。
3、内容印刷黑色:PANTONE Black C。
4、要求内容印刷正确、清晰,贴纸表面干净、整洁,不得有脏污、斑点、折痕;
切边务必整齐,不得歪斜。
D025034 TX-1166K-D
邱腾萱
20150821
7-8243-1009-00-01

7
VX506AU
English
English Owner’s Manual
3. CAUTIONS ON HANDLING
Operation Panel
•Theoperationpanelwilloperateproperlyina
temperature range of 0˚ to 60˚ C.
•Donotallowanyliquidsonthesetfrom
drinks,umbrellasetc.Doingsomaydamage
the internal circuitry.
•Donotdisassembleormodifythesetinany
way. Doing so may result in damage.
•Subjectingtheoperationpaneltoshocks
mayresultinbreakage,deformationorother
damage.
•Donotletcigarettesburnthedisplay.
•Ifaproblemshouldoccur,havetheset
inspected at your store of purchase.
•Theremotecontrolunitmaynotworkifthe
remote control sensor is exposed to direct
sunlight.
•Inextremelycoldweather,thedisplay
movement may slow down and the display
maydarken,butthisisnotamalfunction.
The display will work normally when the
temperature increases.
•Smallblackandshinyspotsinsidetheliquid
crystal panel are normal for LCD products.
For a longer service life, be sure to read the following cautions.
Cleaning
• Cleaningthecabinet
Useasoft,dryclothandgentlywipeoff
thedirt.Fortoughdirt,applysomeneutral
detergentdilutedinwatertoasoftcloth,wipe
offthedirtgently,thenwipeagainwithadry
cloth.
Donotusebenzene,thinner,carcleaner,etc.,
as these substances may damage the cabinet
orcausethepainttopeel.Also,leavingrubber
or plastic products in contact with the cabinet
for long periods of time may cause stains.
• Cleaningtheliquidcrystalpanel
Theliquidcrystalpaneltendstocollectdust,
so wipe it off occasionally with a soft cloth.
Thesurfaceiseasilyscratched,sodonotrub
it with hard objects.
USB Port
•TheUSBmemorysticksmustberecognized
as “USB mass storage class” to work
properly. Some models may not operate
correctly.
When the memorized data is lost or
damaged by any chance, Clarion shall not
be liable for any damage.
WhenusinganUSBmemorystick,we
recommend that you backup your data stored
on it before by using a personal computer etc.
•DatalesmaybebrokenwhenusingUSB
memorysticksinthefollowingsituation:
When disconnecting the USB memory stick or
turning the power off during writing or reading
data. When affected by static electricity or
electric noise. Connect/disconnect the USB
memory stick when it is not accessed.
•Connectingwiththecomputerisnot
supported.
•ConnectingwiththeUSBHubisnot
supported.

8VX506AU
English
English Owner’s Manual
Handling Discs
Handling
•Newdiscsmayhavesomeroughness
aroundtheedges.Ifsuchdiscsareused,
the player may not work or the sound
may skip. Use a ball-point pen or the like
to remove any roughness from the edge
of the disc.
Ball-point pen
Roughness
Never stick labels on the surface of the
disc or mark the surface with a pencil or
pen.
•Neverplayadiscwithanycellophane
tape or other glue on it or with peeling off
marks.Ifyoutrytoplaysuchadisc,you
may not be able to get it back out of the
DVD player or it may damage the DVD
player.
•Donotusediscsthathavelarge
scratches,aremisshapen,cracked,
etc. Use of such discs may cause
misoperation or damage.
•Toremoveadiscfromitsstoragecase,
press down on the center of the case
andliftthediscout,holdingitcarefully
by the edges.
•Donotusecommerciallyavailabledisc
protection sheets or discs equipped with
stabilizers,etc.Thesemaydamagethe
disc or cause breakdown of the internal
mechanism.
Storage
•Donotexposediscstodirectsunlightor
any heat source.
•Donotexposediscstoexcesshumidity
or dust.
•Donotexposediscstodirectheatfrom
heaters.
Cleaning
•Toremovengermarksanddust,use
a soft cloth and wipe in a straight
line from the center of the disc to the
circumference.
•Donotuseanysolvents,suchas
commerciallyavailablecleaners,anti-
staticspray,orthinnertocleandiscs.
•Afterusingspecialdisccleaner,letthe
disc dry off well before playing it.
On Discs
•Neverturnoffthepowerandremovethe
unit from the car with a disc loaded.
CAUTION
For your safety, the driver should not
insert or eject a disc while driving.

9
VX506AU
English
English Owner’s Manual
•
This product incorporates copyright protection
technology that is protected by U.S. patents
and other intellectual property rights. Use of this
copyrightprotectiontechnologymustbeauthorized
byRoviCorporation,andisintendedforhomeand
other limited viewing uses only unless otherwise
authorizedbyRoviCorporation.
Reverse engineering or disassembly is prohibited.
•
Manufactured under license from Dolby
Laboratories. “Dolby” and the double-D symbol are
trademarks of Dolby Laboratories.
•
"Made for iPod" and "Made for iPhone" mean that
an electronic accessory has been designed to
connectspecicallytoiPodoriPhone,respectively,
andhasbeencertiedbythedevelopertomeet
Apple performance standards. Apple is not
responsible for the operation of this device or its
compliance with safety and regulatory standards.
Please note that the use of this accessory with iPod
or iPhone may affect wireless performance.
iPhone,iPod,andSiriaretrademarksofAppleInc.,
registered in the U.S. and other countries
Lightning is a trademark of Apple Inc.
• AndroidTM is the trademark of Google Inc.
•
The Bluetooth®word mark and logos are registered
trademarksownedbyBluetoothSIG,Inc.andany
useofsuchmarksbyClarionCo.,Ltd.isunder
license. Other trademarks and trade names are
those of their respective owners.
•
Pandora,thePandoralogo,andthePandoratrade
dress are trademarks or registered trademarks of
PandoraMedia,Inc.usedwithpermission.
Pandora is only available in certain countries.
Pleasevisithttp://www.pandora.com/legalformore
information.
About the registered marks, etc.

10 VX506AU
English
English Owner’s Manual
[Microphone]
[MENU]
[NAVI/AV]
[IR]
[Cover]
[AUX IN]
[RESET]
[microSD slot]
[POWER/VOL]
[Disc slot]
[ ]
4. OPERATION PANEL
Functions of Buttons
[POWER/VOL] Knob
• Press this knob to turn on the power.
• When the power is already on, it moves to the
Navigation mode. If Navigation mode is displayed, it
moves to the Navigation menu.
• Keep pressing this knob more than 2 seconds to turn
off the power.
• Turn this knob to left or right to decrease or increase
the volume of the system.
[NAVI/AV] Button
• Press this button to display NAVI, press again to
return current source.
• Press and hold this button for 2 seconds to display
the Dimmer setting menu.
[] Button
• Press to eject disc from the unit.
[MENU] Button
• Press this button to display main menu; press again
to return current source.
• Press and hold this button for 2 seconds to turn off
the monitor. Press any place of the screen to turn on
the monitor again.
[RESET] Button
• Press this button to hardware reset the unit.
Note: When the [RESET] button is pressed, frequencies
of radio stations, titles, etc. stored in memory are
cleared.
[microSD slot ]
Note: The microSD card is only for navigation. Please
don’t insert microSD card for other purpose. After
insertion of microSD card for MAP, don’t remove it;
otherwise, the navigation function will be disabled.
[AUX IN]
AUX 1 Connector.
[Microphone]
This is used for Bluetooth phone.
[IR] SENSOR
•Receiver for the remote control unit (operating range:
30 degree in all directions).
[VOICE] Button
Press and hold this button until you hear the warning
tone,thenyoucanuseSiri
®
Eyes Free function.
Only navigation map card is available and don’t remove it when unit is power on
[VOICE]

11
VX506AU
English
English Owner’s Manual
5. REMOTE CONTROL
Replacing the batteries
1.Press the retention tab and pull out the
battery tray and remove the old battery.
2. Insert the new CR2025 battery and slide
the battery tray back in the remote control
the same direction that you removed it.
Please ensure the tray is inserted in the
correct direction.
• Keep the battery out of the reach of children.
Should the battery be swallowed, consult a doctor
immediately.
• Batteries (battery pack or batteries installed)
must not be exposed to excessive heat such as
sunshine, re or the like.
Signal transmitter
Operating range : 30°in all directions
[ / ]
[ 0-9 ]
[SRCH]
[BACK]
[ , , , ]
[TITLE]
[ ], [ ]
[ZOOM]
[MUTE]
[AUDIO]
[POWER/SRC]
[VOLUME]
[SET]
[PIC]
[TAG]
[RPT]
[ ], [ ]
[SUB.T]
[OPEN]
[ANGLE]
[NAVI/AV]
[MENU]
[BAND]
[ROOT]
[ENT]
CAUTION
RCX005 Remote Control Included

12 VX506AU
English
English Owner’s Manual
[ / ] Button
• Press this button to play or pause video and audio
media.
• Press this button more than 1 second to stop video
and audio media.
[MUTE] Button
• Mute or Unmute the speaker.
• The symbol on upper right area of the screen
indicates that speaker is muted.
[POWER/SRC] Button
• Press this button to move the focus to next available
source item on main menu.
• Press this button to power on when the unit is power
off.
• Press this button more than 1 second to power off
when the unit is power on.
[0 - 9] Buttons
• Use in the Key Pad screen to select the radio.
• Use to select the track in the track list screen.
• Press to enter DVD video chapters/titles in the Key
Pad screen.
[VOLUME] Buttons
• Increase and decrease volume.
[NAVI/AV] Button
• Press this button to switch between current source
and current position on navigation map.
[SRCH] Button
• Press this button to open chapter or title search
window while playing DVD.
[BAND] Button
• Switch to next band alternately.
[SET] Button
• Press this button to open the Audio setting menu in
any mode.
[BACK] Button
• Press this button to quit main menu if current screen
is main menu.
[ ], [ ], [ ], [ ] Buttons
• Press this button for cursor movement in main menu
or Setting mode.
• From the main menu, you can select your desired
source or change your settings.
[MENU] Button
• Press this button to enter the MAIN MENU or return
current resource.
[PIC] Button
• Press and hold this button to change your monitor
Dimmer.
[ENT] Button
• Press to x the entered data in the Key Pad screen
or enter the item the cursor is on.
[TAG] Button
• No function.
[TITLE] Button
• Press to go to the title menu on the DVD.
[ROOT] Button
• Press to go to the root menu on the DVD.
[RPT] Button
Remote Control Functions
You can use the remote control to operate the VX506AU.
Note:
• The wireless remote control operation may not be optimal in direct sunlight.
CAUTION
• Use one CR2025 (3V) lithium battery.
• Remove the battery if the remote control is not
used for a month or longer.
• There is a danger of explosion if battery is
incorrectly replaced. Replace only with the same or
equivalent type.
• Do not handle the battery with metallic tools.
• Do not store the battery with metallic objects.
• If the battery leaks, wipe the remote control
completely clean and install a new battery.
• When disposing of used batteries, comply with
governmental regulations or environmental public
institutions’ rules that apply in your country/area.
Important
• Do not store the remote control in high
temperatures or direct sunlight.
• The remote control may not function properly in
direct sunlight.
• Do not let the remote control fall onto the oor,
where it may become jammed under the brake or
accelerator pedal.

13
VX506AU
English
English Owner’s Manual
• Press to perform chapter repeat/title repeat/repeat
off while playing DVD mode.
• Press to perform Repeat Track/Repeat All while
playing CD.
• Press to perform Repeat Track/Repeat Folder/Repeat
All while playing MP3/WMA, or video les on disc.
• Press to perform Repeat Track /Repeat Folder/
Repeat All while playing MP3/WMA, or video les in
USB memory.
[ ], [ ] Buttons
• Press to seek the next available lower or higher
station in Tuner mode.
• Press to select the next lower or higher chapter
number in DVD video mode.
• Press to select the next lower or higher track in CD,
USB Video, USB Audio mode.
• Press for movement of background source in
Navigation mode.
[ ], [ ]Buttons
• Press to manually select the next lower or higher
station in Tuner modes.
• Press to perform fast-backward or fast-forward
searching. Press again to change the speed to 2x,
4x, 8x or 16x.
• Press for movement of background source in
Navigation mode.
[ZOOM] Button
• Press to turn on and zoom in while playing DVD. You
can zoom in up to 3x. (No all DVD disc supports this
function).
[AUDIO] Button
• Press to switch the AUDIO channel of the disc while
playing DVD.
[SUB-T] Button
• Press to switch next available subtitle while playing
DVD.
• Press to display Video menu in iPod mode.
[ANGLE] Button
• Press to switch the different ANGLE while playing
DVD. (No all DVD disc supports this function)
• Press to display Audio menu in iPod mode.
[OPEN] Button
• Press to eject disc from the unit.

14 VX506AU
English
English Owner’s Manual
6. MAIN MENU
1 - Tuner---Touch the button to display the Tuner mode.
2 - HDMI---Touch the button to display the HDMI
mode.
3 - Navi---Touch the button to display the Navigation
mode.
4 - TEL--- Touch the button to display the Telephone
mode.
5 - iPod Audio---Touch the button to display the iPod
Audio mode.
6 - USB Audio---Touch the button to display the USB
Audio mode.
7 - Disc Audio---Touch the button to display the Disc
Audio mode.
8 - BT Audio--- Touch the button to display the
Bluetooth Audio mode.
9 - iPod Video---Touch the button to display the iPod
Video mode.
10 - USB Video---Touch the button to display the USB
Video mode.
11 - Disc Video---Touch the button to display the Disc
Video mode.
12 - Pandora
®
---Touch the button to display the Pandora
mode.
13 - Camera---Touch the button to display the Camera
mode.
14 - AUX1 ---Touch the button to display the AUX1
mode.
15 - AUX2 ---Touch the button to display the AUX2
mode.
16 - Setting button---Touch the button to display the
Setting menu.
17 - Monitor off --- Touch the button to turn off the
monitor.
18 - Day/Night --- Touch the button to change the
dimmer.
19 - Audio off---Touch the button to make audio source
voice off.
20 - Rear---Touch the button to display the Rear mode.
Scrolling the menu
Flicking to right or left it will switch to next or previous
page of main menu.
Moving the menu position
1. Touch any quadrate icon on main menu more than 2
seconds,theiconwilloatonmainmenu.
2.Scrollingtheoatingicontoanypositionyouwant.
1 2 3 4
56 7 8
9 10 11 12
13 14 15
16 17 20
18 19

15
VX506AU
English
English Owner’s Manual
7. DVD VIDEO PLAYER OPERATIONS
Playable discs
This DVD video player can play the following
discs.
Playable discs
CD TEXTDVD video discs Audio CD
Playablemediales
MP3/WMA/AAC
About CD Extra disc
A CD Extra disc is a disc in which a total of two
sessions have been recorded. The rst session
is Audio session and the second session is Data
session.
Your personally-created CDs with more than
second data sessions recorded cannot be played
on this DVD video player.
Note:
•
WhenyouplayaCDExtradisc,onlytherst
sessionwillberecognized.
Discs that cannot be played back
This DVD video player cannot play back DVD-
Audio, DVD-RAM, Photo CDs, etc.
Note:
•
I
t may also not be possible to play back CDs
recorded on a CD-R unit and CD-RW unit.
(Cause:disccharacteristics,cracks,dust/dirt,
dust/dirtonplayer’slens,etc.)
•
If a CD-R or CD-RW disc that has not been
nalizedisplayed,itwilltakealongtimeto
startplaying.Also,itmaynotbepossibleto
play depending on its recording conditions.
•
You cannot play SuperAudio CD.
The CD player is not supported even if it is a
hybrid disc.
About MP3/WMA/AAC playback
This unit can play back CD-R/CD-RW, DVD-R/
RW and DVD+R/RW discs on which MP3/WMA/
AAC music data have been recorded.
For a detailed information, see the section
entitled “Listening to compressed audio”.
Note on region numbers
The DVD video system assigns a region number
to DVD video players and DVD discs by sales
area. DVD video players sold in Australia can
play back all DVD discs with the region number
“ALL”, “4” or any combination of numbers that
also incorporate a “4”.
The DVD video region number is marked on the
disc jacket as shown below.
4
ALL
124
Discs
MP4

16 VX506AU
English
English Owner’s Manual
Change DVD System Settings
Note:
If the setup operation is performed in the middle of DVD
video play, the disc will restart from the beginning.
Selecting DVD Setup Menu
1. Touch the [Settings] button on the Main Menu to
access the Video setup menu.
2. Touch [Video] button. The video menu is displayed.
Setting up the Screen Size
Touch the [DVD Wide Screen Mode] button to turn on
or turn off the DVD wide screen mode.
The factory default setting is “off”
Note: Not all DVD disc support this function.
Setting up the password for parental level
control
The factory default pass code is “0000”.
1.In Main Menu Touch [Settings] button. Touch
[Others] button on the display. Touch the [Set
Password] ---- and a numerical key pad will appear.
Input a new password and come again. The password
is set.
Note:
When a disc with view restrictions is inserted, you will
be prompted to input this password. The disc will not be
viewable until the correct password is entered.
Set rating for parental level control
1.Select Others screen while in Setting mode. Touch
[Parental Control] button. Touch the desired rating for
level control. Use this table to set the parental level.
Kid Safe Kid Safe
G General Audiences
PG Parental Guidance Suggested
PG-13 Parents Strongly Cautioned
PG-R Parental Guidance Restricted
R Restricted
NC-17 No One 17 And Under Admitted
Adult Only Adult
• The contents that the parental level restricts vary
with the country code.
Note: The rating can be selected only under the
password unlocked status, and the limits can be set only
under the password locked status.
Watching to a Disc
1. To load a disc:
Insert the disc into the center of the insertion slot the
label side facing up.
CAUTION
For your safety, the driver should not
insert or eject a disc while driving.
Note:
• Never insert foreign objects into the disc insertion slot.
• If the disc is not inserted easily, there may be another
disc in the mechanism or the unit may require service.
• 8cm (single play) discs cannot be used.
2. Disc starts playing automatically.
WARNING
Some videos may be recorded at higher
than desired volume levels. Increase the
volume gradually from the minimal setting
after the video has started.
Ejecting a disc
1. To eject a disc press eject [ ] button. The play
mode then switches to the Tuner mode.
If the disc is left in the ejected position for 10
seconds, the disc is automatically reloaded. In this
case, the play mode will remain in the Tuner mode.
Note:
If you force a disc into before auto reloading, it may
damage a disc.

17
VX506AU
English
English Owner’s Manual
Showing DVD Player Mode Screen
After disc is loaded, the play mode is automatically
engaged.
Touch any place of the screen to display DVD Video
menu touch the screen again to return the playback
screen. The display will return to the playback screen,
if you do not touch the screen for 10 seconds.
1 - Option button
2 - Show Cursor keys button
3 - Previous Chapter/Fast Backward button
4 - Play/Pause button
5 - Next Chapter/Fast Forward button
6 - Elapsed playing time
7 - Seek bar
8 - Total time
9 - Menu List button
10 - System time
11 - Bluetooth status indicator
12 - DVD playback information
13 - Shortcut button
14 - Repeat Switching button
15 - Audio Channel switching button
16 - Subtitle switching button
17 - Angle button
18 - Direct chapter or title searching button
19 - Information button
Operate the DVD Player Menu
You can select the button items displayed in the DVD
menu by directly touching it.
Play/Pause Playback
1. Touch [] button to pause during playback.
2. Touch [ ] button again to resume playback.
Skip (Search) a Chapter
1. Touch [ ] or [ ] button during playback.
Chapters are skipped down or up from current
locations, as many times as the button is touched, and
playback starts.
Skip use seek bar
Touch the triangle [ ] on seek bar and drag it to any
position where you want to start playback.
Fast Forward/Fast Backward
1. Touch [ ] or [ ] button and hold 2 seconds to
start fast backward or fast forward during playback.
The playback speed starts at 2x, then will increase
to 4x, 8x, and 16x. Release the button will continue
playing with normal speed.
Note:
• No audio is reproduced during fast forward and fast
backward operation.
• The fast forward and fast backward speed may differ
depending on the disc.
Search function
You can locate the beginning of a scene using the
chapter numbers or title numbers recorded on the
DVD Video disc.
1. Showing the DVD Video menu, touch [ ] button.
The Key Pad screen appears with the chapter/Title
number input mode.
Touching [] button turns the Key Pad to the
chapter number input mode.
Touching [] button turns the Key Pad to the title
number input mode.
• Title
A large segment to divide the data area of the disc.
• Chapter
A small segment to divide the data area of the disc.
2. Input the number of the title/chapter that you want
to play with the [0] to [9] key.
3. Touch the [ ] button.
14 15 16
19
18
13
101112
1
235 6 89
47
17

18 VX506AU
English
English Owner’s Manual
Playback starts from the scene of the input title
number or chapter number.
NOTE:
*If the input title/chapter number does not exist or
searching with a title/chapter number is not allowed,
the screen image will not change.
4. Touch [ ] button to close the key pad.
Repeat Playback
This operation plays back chapters recorded on the
DVD-Video repeatedly.
1. Showing the DVD Video menu, touch [ ] button.
2. Touch [ ] button once for Repeat Chapter, again
for Repeat Title.
3. Touch [ ] button again to turn off the repeat
playback.
Using the Title Menu
On DVD discs containing two or more titles, you can
select from the title menu for playback.
1. Showing the DVD Video menu, touch [ ] button
during playback.
* Depending on the disc, the title menu may not be
called.
2. Touch the title menu screen. And touch the Show
Cursor keys.
3. Select the items in the title menu screen by
directional buttons.
* Depending on the disc, items may not be selected
with the directional buttons.
4. Touch [ ] button to x on the selected item.
5. Touch [] button.
Switching Audio
On discs in which two or more audios or audio
languages have been recorded, you can switch among
the audio languages during playback.
1. Showing the DVD Video menu, touch [] button
during playback.
• Each time you touch the button, you can switch
among audio languages.
• It may take time to switch among audios.
Depending on the disc, up to 8 kinds of audios may
be recorded. For details, see the mark of the disc:
(Indicates that 8 audios have been recorded).
When the power is turned on and when the disc
is changed to a new one, the language set as the
factory default is selected. If that language has not
been recorded on disc the language is specied on
the disc.
Depending on the disc, switching may be
completely impossible or impossible on some
scenes.
Switching Subtitles
On DVD discs in with two or more subtitle languages
have been recorded, you can switch among the
subtitle languages during playback.
1. Showing the DVD Video menu, touch [ ] button
to select a subtitle during playback. Each time you
touch the button, you can switch among subtitles.
• It may take time to switch among subtitles.
Depending on the disc, up to 32 kinds of subtitles
may be recorded. For details, see the mark of the
disc: ( Indicates that 8 kinds of subtitles have
been recorded).
Depending on the disc, switching may be
completely impossible or impossible on some
scenes.
2. To turn off subtitles, repeat touching [ ] button
until subtitles are turned off.
Displaying the playback status
Touch [ ] button on DVD Player mode screen,
Playback status is displayed on screen.
Play video files
This system can play video les stored on disc.
Showing Video Files Player Mode
Screen
1. After disc with video les is loaded, touch [Disc
Video] button on MAIN MENU to show video les
player mode screen.
2. Touch the screen of the playing video le to display
Video les player menu touch the screen again to
return the playback screen. The display will return to
the playback screen, if you do not touch the screen
for 10 seconds.

19
VX506AU
English
English Owner’s Manual
1 - Option button
2 - Previous Track/Fast Backward button
3 - Play/Pause button
4 - Next Track/Fast Forward button
5 - Elapsed playing time /Seek bar
6 - List Mode button
7 - System time
8 - Bluetooth status indicator
9 - Playback information
10 - Repeat button
11 - Audio button
12 - Subtitle button
Operate the Video Files Player Menu
You can select the button items displayed in the Video
les player menu by directly touching it.
Play/Pause Playback
1. Touch [ ] button to pause during playback.
2. Touch [ ] button again to resume playback.
Switch to Previous/Next File
1. Touch [ ] or [ ] button during playback to play
previous/next le
Skip using seek bar
Touch the ball on seek bar and drag it to any position
where you want to start playback.
Fast Forward/Fast Backward
1. Touch [ ] or [ ] button and hold 2 seconds to
start fast backward or fast forward during playback.
The playback speed starts at 2x, then will increase
to 4x, 8x, and 16x. Release the button will continue
playback with normal speed.
Note:
*No audio is reproduced during fast forward and fast
backward operation.
*The fast forward and fast backward speed may differ
depending on the disc.
Repeat Playback
This operation plays back video les recorded on the
disc repeatedly.
The repeat set as the factory default is Repeat all.
1. Showing the video les player menu, touch [ ]
button.
2. Touch [ ] button once for Repeat Track, again
for Repeat Folder.
3.Touch [] button again for Repeat All.
Switching Audio
Some video les will have two or more audio channels;
you can switch among the audio channels during
playback.
1. Touch [ ] button during playback.
• Each time you touch the button, you can switch
among audio languages.
• It may take time to switch among audios.
Depending on the disc, switching may be impossible.
Switching Subtitles
Some video les will have two or more subtitles have
been recorded; you can switch among these subtitles
during playback.
1. Touch the [ ] button to select a subtitle during
playback.
• Each time you touch the button, you can switch
among subtitles.
• It may take time to switch among subtitles.
Depending on the disc, switching may be impossible.
Video Files List
Showing the Video les player menu; touch the
[] button to display video les list screen.
Video les list operations is almost same as Disc Audio
player mode. Please refer to CD Player Operations.
Playable Video Disc Formats
This system can play video les stored on disc.
*.avi les
• format: MPEG4 Visual Simple @L1
• Picture size: 720 x 480
• Audio format: MP3
• Audio sampling frequency: 32/44.1/48 KHz
10 11 12
1
23456
78
9
Table of contents
Other Clarion Car Multimedia System manuals