manuals.online logo
Brands
  1. Home
  2. •
  3. Brands
  4. •
  5. Pioneer
  6. •
  7. CD Player
  8. •
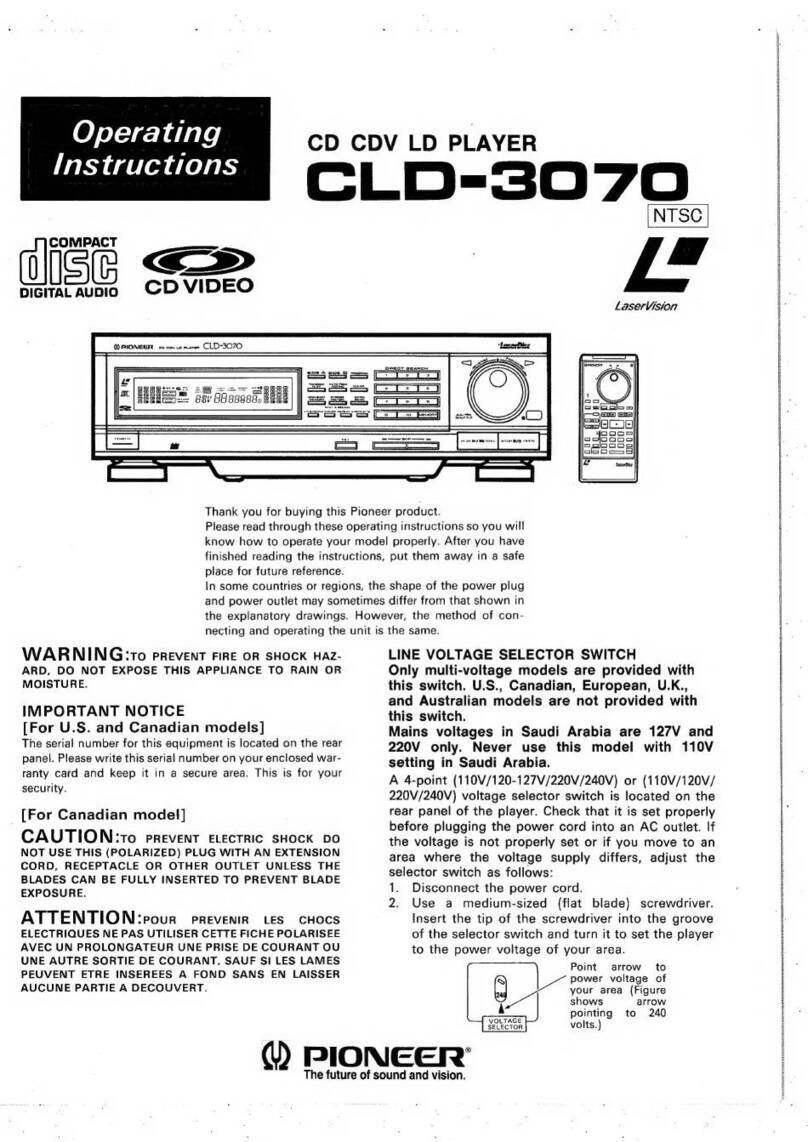
  9. Pioneer LaserDisc CLD-1580K User manual

Pioneer LaserDisc CLD-1580K User manual

Qperating
hastructions
LaserMarache
ser
DIGITAL
AUDIO
cD
vI
DEO
LASER
DISC
@
This
player
does
not
apply
to
business
use,
and
CD~ROM/
CD
graphic
discs
cannot
be
played
with
this
player.
OD
FNORMEEFt
cocovipmaveR
CLD-1590K
CD
CDV
LD
PLAYER
CLD-1580K
SPARE
PARTS
MASTER
NTSC
PSOM
AC
RARE,
im
sz
«
-—-—HO0U0
QUO
SEONR
eee
&
Thank
you
for
buying
this
Pioneer
product.
Please
read
through
these
operating
instructions
so
you
will
know
how
to
operate
your
model
properly.
After
you
have
finished
reading
the
instr
safe
place
for
future
reference.
uctions,
put
them away
in
a
In
some
countries
or
regions,
the
shape
of
the
power
plug
and
power
outlet
may
sometimes
differ
from
that
shown
in
the
explanatory
drawings.
However,
the
method
of
connecting
and
operating
the
unit
is
the
same.
WARNING:
To
PREVENT
FIRE
OR
SHOCK
HAZARD,
DO
NOT
EXPOSE
THIS
APPLIANCE
TO
RAIN
OR
MOISTURE,
IMPORTANT
NOTICE
“or
U.S.
and
Canadian
models]
The
serial
number
for
this
equipment
is
located
on
the
rear
panel,
lease
write
this
serial
number
on
your
enclosed
warranty
card
id
keep
it
in
a
secure
area,
This
is
for
your
security.
For
Canadian
model]
*AUTION:
TO
PREVENT
ELECTRIC
SHOCK
DO
NOT
SE
THIS
(POLARIZED)
PLUG
WITH
AN
EXTENSION
ORD,
RECEPTACLE
OR
OTHER
OUTLET UNLESS
THE
LADES
CAN
BE
FULLY
INSERTED
TO
PREVENT
BLADE
XPOSURE.
\TTENTION:
POUR
PREVENIR
LES
CHOCS
LECTRIQUES
NE
PAS
UTILISER
CETTE
FICHE
POLARISEE
VEC
UN
PROLONGATEUR,
UNE
PRISE
DE
COURANT
U
UNE
AUTRE
SORTIE
DE
COURANT,
SAUF
SI
LES
AMES
PEUVENT
ETRE
INSEREES
A
FOND
SANS
EN
AISSER
AUCUNE
PARTIE
A
DECOUVERT.
LINE
VOLTAGE
SELECTOR
SWITCH
Only
multi-voltage
models
are
provided
with
this
switch.
U.S.,
Canadian,
European,
U.K.,
and
Australian
models
are
not
provided
with
this
switch.
The
line
voltage
selector
switch
is
located
on
the
rear
panel
of
this
player.
Before
your
player
is
shipped
from
the
factory,
the
switch
is
set
to
the
Power
requirements
of
the
player's
destination.
Check
that
it
is
set
properly
before
plugging
the
power
cord
into
the
outlet.
If
the
voltage
is
not
properly
Set
or
if
you
move
to
an
area
where
the
voltage
requirements
differ,
adjust
the
selector
switch
as
follows:
Use
a
medium-sized
(flat
blade)
screwdriver.
Insert
the
tip
of
the
screwdriver
into
the
groove
of
the
selector
switch
and
turn
it
to
set
the
player
to
the
power
voltage
of
your
area,
Set
the
selector
so
that
arrow
points
power
voltage
of
your
area
{Figure
shows
arrow
pointing
to
110
volts.)
Q
PIONEER’
The
future
of
sound
and
vision.
Iacarhice
Cds
ae
ed
1.
ee
IMPORTANT
CAUTION
RISK
OF
ELECTRIC
SHOCK
DO:
NOT
OPEN
The
exciamation
point
within
an
equilateral
triangle
is
intended
to
alert
the
user
of
the
presence
of
important
operating
and
maintenance
(servicing)
instructions
in
the
litereture
accompanying
the
appliance.
CAUTION:
TO
PREVENT
THE
RISK
OF
ELECTRIC
SHOCK,
DO.
NOT
REMOVE
COVER
{OR
BACKI.
NO
USER-
SERVICEABLE
PARTS
INSIDE.
REFER
SERVICING
TO.
The
lightning
flash
with
arrowhead,
within
an
equilateral
trlangie,
is
intended
to
alert
the
user
of
the
presence
of
uninsuleted
“dangerous
voltage’
within
the
product’s
enclosure
thet
may
be
of
sufficient
magnitude
to
constitute
a
risk
of
electric
shock
to
persons.
QUALIFIED
SERVICE
PERSONNEL.
READ
INSTRUCTIONS
~
All
the
safety
and
operating
insiructions
should
be
read
before
the
appliance
is
op.2rated.
RETAIN
INSTRUCTIONS
~
The
safety
and
operating
in:
structions
should
be
retained
for
future
reference
HEED
WARNINGS
~
Ail
warnings
on
the
appliance
and
in
the
operating
instructions
should
be
adhered
to
FOLLOW
INSTRUCTIONS
~
All
operating
and
use
in-
structions
should
be
fallowed.
CLEANING
~
Unplug
this
video
product
from
the
wall
outer
before
cleaning,
Do
notuse
liquid
cleaners
or
aerosol
cleaners,
Use
a
damp
cloth
for
cleaning
ATTACHMENTS
~
Do
not
use
attachments
not
recom:
mended
by
the
video
product
manufacturer
as
they
may
cause
hazards,
WATER
AND
MOISTURE
~
Do
not
use
this
video
pro-
duct
near
water
~
for
example,
near
a
bathiub,
wash
bowl,
kitchen
sink,
or
laundry
tub,
in
a
wet
basement,
of
near
8
swimming
pool,
and
the
like
ACCESSORIES
~
Do
nat
place
this
video
product
on
an
unstable
cart,
stand,
tripod,
bracket,
or
table.
The
video
product
may
fall,
causing
serious
injury
to
a
child
or
adult,
and
serious
damage
to
the
ap-
pliance,
Use
oniy
with
a
cart,
stand,
tripod,
bracket,
or
table
recommended
by
the
manufacturer,
or
sold with
the
video
product.
Any
mounting
of
the
appliance
should
follow
the
manutacturer’s
in
structans,
and
should
use
a
mounting
accessory
recommended
by
the
manufacturer
CART
~
An
appliance
and
cart
combination
should
be
maved
with
care.
Quick
stops,
excessive
force,
and
uneven
surfaces
may
cause
the
appliance
and
cart
carabination
to
overturn
LAr
“VENTILATION
~
Sots
and
apenings
in
the
cabinet
are
POWER
SOURCES
provided
for
ventilation
and
to
ensure
reliable
operation
af
the
video
product
and
to
protect
it
from
overheating.
and
these
openings
must
net
be
blocked
or
covered.
The
openings
should
never
be
blocked
by
placing
the
video
product
on
a
bed,
POLARIZATION
-
This
video
product
is
equipped
with
a
polarized
ahternating
current
line
plug
ta
plug
hav
Ing
one
blade
wider
than
the
other}.
This
plug
will
fit
into
the
power
outlet
only
one
way.
This
is
a
safety
feature.
If
you
are
unable
to
insert
the
plug
fully
into
the
outler,
try
reversing
the
plug.
If
the
plug
should
stiff
fail
to
fit,
contact
your
electrician
to
replace
your
obsolete
outlet.
Do
not
defeat
the
safety
pur
pose
of
the
polarized
plug
LIGHTNING
-
For
added
protection
for
this
video
pro:
duct
receiver
during
a
lightning
storm.
or
when
itis
jeft
unattended
and
unused
for
tong
periods
of
time,
unplug
it
from
the
wail
outlet
and
disconnect
the
antenna
or
cable
system.
This
will
prevent
dam
age
to
the
video
product
due
to
fightring
and
power-line
surges
POWER
LINES
-
An
cutside
antenna
system
should
not
be
focated
in
the
vicinity
of
overhead
power
fines
or
other
electric
light
or
power
circuits,
or
where
ttcan
fall
into
such
power
fines
or
circuits.
When
install
ing
an
outside
antenna
system.
extreme
care
should
be
taken
to
keep
from
touching
such
power
lines
or
circuits
as
contact
with
them
might
be
fatal
OVERLOADING
~
Do
nor
overload
wall
outlets
and
ex
tension
cords
as
this
can
resuit
in
the
Fisk
of
fire
or
electric
shock
OBJECT
AND
LIQUID
ENTRY
~
Never
push
objects
of
any
kind
into
this
video
product
through
openings
as
they
may
touch
dangerous
voltage
points
or
short
out
parts
that
could
result
in
a
fire
or
electric
shock.
Never
spill
liquid
of
any
kind
on
the
video
product
SERVICING
--
Do
not
attempt
to
service
this
video
pro
duct
yourself
a8
opening
or
removing
covers
may
expose
you
to
dangerous
voltage
or
other
hazards.
Refer
all
seevicing
10
qualified
service
personnel
ea
SAFETY
INSTRUCTIONS
—
DAMAGE
REQUIRING
SERVICE
Unplug
this
video
product
from:
the
wall
outlet
and
retor
servicing
to
qualified
service
personnel
under
the
following
condivons
3.
When
the
power
supply
cord
of
plug
is
damn-
aged.
b.
If
liquid
has
been
smiled,
oF
objects
have
fatlen
into
the
video
product.
¢.
If
the
video
product
has
been
exposed
ty
rain
or
water
4. if
the
video
product
does
nat
operate
normally
by
following
the
operating
instructions.
Adjust
only
those
controls
that
are
covered
by
the
operating
in-
structions
as
an
improper
adjustment
of
other
con
trols
may
result
in
damage
and
wall
often
require
extensive
work
by
a
qualified
technician
to
restore
the
video
product
to
its
normal
operanon
€.
if
the
video
product
has
been
dropped
ar
the
cabinet
has
been
damaged.
1,
When
the
video
product
exhibits
a
distinct
change
in
performance
»
this
indicaws
a
need
for
service
REPLACEMENT
PARTS
©
When
replacement
parts
are
required,
be
sure
the
service
technician
has
used
replacement
parts
specified
by
the
manufacturer
or
having
the
same
characteristics
as
the
original
part.
Unauthorized
substitutons
may
result
i
tire,
electric
shock
of
other
hazards.
SAFETY
CHECK
©
Upon
completion
af
any
service
or
repairs
to
this
video
product,
ask
the
service
teehni-
cian
to
perform
safety
checks
to
determine
that
the
wideo
product
1s
in
proper
Operating
condition.
OUTDOOR
ANTENNA
GROUNDING
-
if
an
outside
an
tena
is
connected
to
the
antenna
terminal,
be
sure
the
antenna
system
1s
grounded
so
as
to
provide
some
protection
agaist
voltage
surges
and
built:
up
static
charges.
in
the
U.S.A.
section
810
of
the
National
Electrical
Code,
ANSUNFPA
No.
70-1984,
provides
informa-
Bon
with
respect
to
proper
grounding
of
the
mast
and
supporting
structure,
grounding
of
the
lead-in
wire
to
an
antenna
discharge
unit,
size
of
grounding
conductors,
location
of
antenna:
discharge
unit,
connection
to
grounding
electrodes,
and
require-
ments
for
the
grounding
electrode
See
Fig.
A,
sofa,
rug,
or
other
similar
surface.
This
video
pro-
Matcune
NEC
NATIONAL
ELECTRIC
CODE
duct
should
never
be
placed
near
or
over
a
radiator
le
or
heat
register.
This
video
product
should
not
be
LEAD
placed
in
a
built-in
installation
such
as
a
bookcase
WIRE
or
rack
unless
proper
ventilation
is
provided
or
the
manufacturer's
instructions
have
been
adhered
to
ANTENNA
This
video
product
should
be
operated
only
fram
the
type
of
power
source
indi
cated
on
the
marking
label.
If
you
are
not
sure
of
the
type
of
power
supply
to
your
home,
consult
your
appliance
deater
of
local
power
company.
Far
Video
products
intended
to
operate
from
battery
power.
of
other
sources,
refer
to
the
operating
in
structions,
POWER-CORD
PROTECTION
Powersupply
cords
should
be
routed
so
that
they
are
not
tikely
to
be
walked
on
or
pinched
by
items
placed
upon
or
against
them.
paying
particular
at.
tention
to
cords
at
plugs.
convenience
receptacies,
and
the
point
where
they
exit
from
the
appiiance.
—
DISCHARGE
UNIT
INEC
SECTION
810
—
20)
GROUN!
ING
CONDUCTORS
(NEC
SECTION
810
~
21)
“==
GROUND
CLAMPS
-———
POWER
SERVICE
GROUNDING
FGA
ELECTRODE
SYSTEM
{NEC
ART
250,
PART
H).
)
<VRB1039>
ae
PRACAUTIONS
este
iet
econ
eta
edaseareesbeesyteecsedhderedsbeshese
Features
and
Functions
of
the
CLD-1580K
.
Accessories
Types
of
Discs
that
can
be
played
with
this
Unit
.
Care
of
Discs
...
Connections
....
To
Watch
a
TV
Broadcast
.
Names
and
Functions
of
Front
Panel
Components.....
16
Names
and
Functions
of
remote
Contro!
Unit
Components
....
Remote
Control
Operations
Before
starting
Karaoke
Play
.
Enjoying
Laser/CD
Karaoke
-
Basic
Operation
...
CONTENTS
Additional
Functions
Possible
with
Other
Karaoke
Devices
Display
Switching
To
Play
an
LD,
CDVorCD.
To
Search
for
a
Particular
Passage
{Search
using
fast
foward
or
fast
reverse
-
Manual
Search)
..............
34
To
Search
for
a
Particular
Chapter/Track
{Chapter
(Track)
Search/Chapter
(Track)
Skip)
To
Search
for
a
Particular
Time/Frame
(Time
Number
Search/Track
Time
Search/ABS
Time
Search/
Frame
Number
Search}
..
Extra
Playback
To
Repeatedly
Play
a
Desired
Passage
Convenient
Functions
for
Karaoke
Play
-
(Repeat
Playback)
oo...
cece
enseeseecnecsaeseseseerersentnernes
38
“Mood
up”
Functions
To
Play
Only
the
Desired
Chapters/Tracks
Cenvenient
Functions
for
Karaoke
Play
-
{Program
Playback)
Sesh
ih
suk
oo
cRa
eeSeagaaseoneaageastatetduaseheutth
40
F.Gt
PIACH
GING
ccssenisicsiveinavenee
anngotdnneuasennetau
25
Troubleshooting.
:
Specifications
....
CAUTION
e
Use
of
controls
or
adjustments
or
performance
of
procedures
other
than
those
specified
herein
may
result
in
hazardous
radiation
exposure.
@
The
use
of
optical
instruments
with
this
product
will
increase
eye
hazard.
Lam
(For
Canadian
model]
a
~o.
This
digital
apparatus
does
not
exceed
the
Class
B
limits
for
radio
noise
emissions
from
digital
apparatus
set
outin
the
Ra-
|
dio
Interference
Regulations
of
the
Canadian
Department
of
Communications.
This
player
may
be
used
with
LaserVision
Discs,
Compact
Dics,
and
Compact
Discs
with
Video
bearing
the
following
symbols:
{LASERDISC
SYSTEM}/(LaserVision
Disc)*
LASER
DISC
Laservision
*
LaserVision
players
and
discs
which
bear
this
symbol
and
use
the
same
television
system,
are
mutually
compatible.
This
is
the
unified
symbol}
mark
of
LASERDISC
(LaserVision
videodisc).
(Compact
Disc}
(**CD
VIDEO
SYSTEM)
COMPACT
<—_>
CD
VIDEO
DIGITAL
AUDIO
Ss_—>
vd
CD
VIDEO
(3-inch
Compact
Disc)
<2)
SINGLE
**
A
Digital
Sound
with
Multi
Audio
Discs
(CD
VIDEO
LD)
are
referred
to
as
CD
Video
discs.
CD
Video
discs
are
recorded
with
subcodes,
which
are_the
non-audio
recordings
of
TOC
data
such
as
track
numbers,
index
numbers,
etc.
However,
there
are
some
discs
without
these
marks.
Only
one
disc
can
be
loaded
at
any
one
time.
Loading
|
a
LaserVision
Disc,
a
Compact
Disc,
a
3”
Compact
Disc
or
a
Compact
Dise
with
Video
on
top
of
one
another
may
result
in
breakdown,
or
in
scratching
of
the
discs.
Please
only
load
one
disc
at
a
time.
This
player
is
to
be
used
exclusively
with
the
NTSC
color
system.
Please
use
NTSC
LaserVision
Disc
or
NTSC
Compact
Disc
with
Video
only.
PAL
and
SECAM
system
discs
cannot
be
used
with
this
player.
Note
to
CATV
system
installer
This
reminder
is
provided
to
call
the
CATV
system
installer’s
attention
to
Article
820-22
of
the
NEC
that
provides
guidelines
for
proper
grounding
and,
in
particular,
specifies
that
the
cable
ground
shall
be
connected
to
the
grounding
system
of
the
buliding,
as
close
to
the
point
of
cable
entry
as
practical.
3
<VRB1039>
PRECAUTIONS
If
it
becomes
necessary
to
transport
or
ship
this
unit
in
the
future,
be
sure
to
first
remove
the
disc
lif
present},
retract
the
disc
table
to
its
closed
position,
turn
the
power
off
and
disconnect
the
power
cord.
STALLING
THE
PLAYER
Place
the
player
on
a
stable
platform
next
to
the
television
and
stereo
system
to
be
used
with
the
player.
When
using
the
player
with
a
stereo
system,
your
speakers
should
be
placed
away
from
your
television
(or
TV
monitor).
Do
not
place
heavy
objects
such
as
a
television
or
TV
monitor
on
top
of
the
player.
Do
not
place
the
player
on
top
of
your
TV
set
or
TV
monitor.
Also,
keep
the
player
away
from
devices
such
as
cassette
decks
which
are
sensitive
to
magnetic
fields.
en
FM
or
AM
stations
are
being
received,
signal
noise
y
be
generated
if
the
player
is
turned
on.
Turn
off
the
yer
when
not
in
use.
Also,
if
there
is
signal
noise
when
giving
radio
stations
with
an
indoor
antenna,
adjust
the
ition
or
direction
of
the
antenna.
STALL
THE
PLAYER
IN
A
WELL
VENTILATED
ACE
AWAY
FROM
HEAT
AND
HUMIDITY
not
install
the
player
in
a
location
subject
to
direct
light,
or
hear
a
stove
or
radiator
etc.
This
could
adversely
ct
the
cabinet
and
internal
components.
Also
avoid
alling
the
player
in
a
humid
or
dusty
location.
This
could
it
in
a
malfunction
or
accident.
Do
not
install
near
a
Kstove
where
the
player
could
be
affected
by
smoke,
im,
or
heat.
DID
SOURCES
OF
HEAT
not
put
the
player
on
sources
of
heat,
such
as
an
lifier.
When
installing
with
audio
components
on
a
rack,
d
components
that
generate
heat,
by
placing
the
player
w
such
components
where
there
is
adequate
ventilation
not
much
dust.
Avoid
placing
the
player
on
surfaces
|
aS
shaggy
carpets,
beds,
and
sofas
which
may
block
ilation
under
the
player
and
cause
damage.
AUTIONS
FOR
AUTOMATIC
LOADING
PERATIONS
nce
this
player
has
an
automatic
loading
construction,
sé
the
key
on
the
player
or
the
remote
contro!
unit
r
opening
and
closing
of
the
disc
table.
To
avoid
image,
be
careful
not
to
apply
any
force
to
the
oving
disc
table.
31039>
STRIPE
PATTERNS
APPEARING
ON
A
TV
PROGRAM
Stripe
patterns
may
appear
during
a
TV
program
if
the
player
unit
Is
turned
on,
depending
on
the
quality
of
reception
of
the
TV
station.
This
is
neither
a
malfunction
of
the
television
nor
the
player.
if
stripes
appear
while
watching
the
TV,
or
when
watching
the
TV
for
long
periods
of
time,
turn
the
player
off.
CONDENSATION
Moisture
will
form
in
the
Operating
section
of
the
player
if
the
player
is
brought
from
cool
surroundings
into
a
warm
room
or
if
the
temperature
of
the
room
rises
suddenly.
When
this
happens,
player's
performance
will
be
impaired.
To
prevent
this,
let
the
player
stand
in
its
new
surroundings
for
about
an
hour
before
switching
it
on,
or
make
sure
that
the
room
temperature
rises
gradually.
The
same,
symptoms
of
condensation
may
be
caused
during
summer,
if
the
player
is
exposed
to
the
breeze
from
an
air
conditioner.
In
such
cases
change
the
location
of
the
player.
POWER-CORD
CAUTION
Handie
the
power
cord
by
the
plug.
Do
not
putt
out
the
plug
by
tugging
the
cord
and
never
touch
the
power
cord
when
your
hands
are
wet
as
this
could
cause
a
short
circuit
or
electric
shock.
Do
not
place
the
unit,
a
piece
of
furniture,
etc.,
on
the
power
cord,
or
pinch
the
cord.
Never
make
a
knot
in
the
cord
or
tie
it
with
other
cords.
The
power
cords
should
be
routed
such
that
they
are
not
likely
to
be
stepped
on.
A
damaged
power
cord
can
cause
fire
or
give
you
an
electrical
shock.
Check,the
power
cord
once
in
a
while.
When
you
find
it
damaged,
ask
your
nearest
PIONEER
authorized
service
center
or
your
dealer
for
a
replacement.
CLEANING
CARE
Use
a
soft,
dry
cloth
for
cleaning.
For
stubborn
dirt,
soak
the
cloth
in
a
weak
detergent
solution;
wring
well
first
and
wipe.
Use
a
dry
cloth
to
wipe
it
dry.
Do
not
use
any
volatile
agents
such
as
benzine
or
paint
thinner,
as
it
may
damage
the
surface
of
the
player.
FEATURES
AND
FUNCTIONS
OF
THE
CLD-1580K
Rich
Variety
of
Karaoke
Functions
|
|
LD
{LaserVision
Disc)
Playback
Functions
Direct
Selection
Function
Enables
You
to
Directly
Select
the
Song
You
Wish
to
Sing
Using
the
MUSIC
SELECTORs
on
the
front
panel,
you
can
select
any
song
up
to
the
20th
song
by
simply
pressing
a
single
button.
Two
Independent
Microphone
Systems
Enable
You
to
Separately
Adjust
the
Sound
Volume
for
Each
Mike
Since
two
independent
microphone
systems
are
provided,
you
can
independently
adjust
the
level
for
each
microphone.
Vocal
Partner
Function
Replaces
the
Original
Vocal
Sound
with
Your
Own
Voice
If
you
press
VOCAL
PARTNER
and
sing
into
the
microphone,
the
original
vocals
will
be
cut
out
and
replaced
with
your
own
voice.
Vocal
Assist
Function
Allows
You
to
Practice
Singing
While
Listening
to
the
Original
Vocals
By
pressing
VOCAL
ASSIST,
you
can
listen
to
the
accompaniment
along
with
the
original
vocals
from
the
headphones,
One-Touch
Karaoke
Function
Allows
You
to
Enjoy
Karaoke
Using
Ordinary
Music
Discs
Press
ONE
TOUCH
KARAOKE
and
the
original
vocal
sound
of
an
ordinary
music
disc
will
be
played
at
low
volume,
enabling
you
to
use
the
disc
as
a
karaoke
disc.
Key
Control
Function
Changes
the
Pitch
of
the
Instrumental
Part
to
Match
Your
Voice
By
pressing
the
KEY
CONTROL
buttons,
you
can
change
the
pitch
within
an
8-step
range.
Magic
Voice
Function
Allaws
You
to
Freely
Change
the
Sound
of
Your
Voice
By
operating
the
KEY
CONTROL
buttons,
you
can
freely
heighten
or
lower
the
pitch
of
your
voice.
Once
More
Function
Enables
You
to
Quickly
Repeat
the
Section
You
Just
Sang
If
you
press
ONCE
MORE
once,
playback
returns
to
a
point
approximately
5
seconds
before
the
current
location
in
the
song.
QOne-Song
Pause
Function
Playback
automatically
pauses
after
one
song
selected
is
played.
Program
Playback
Up
to
24
chapters
can
be
selected
from
a
disc
and
played
in
any
desired
order.
Multi-speed
Playback
and
Still
Frame
Playback
(CAV
discs
only)
The
playback
speed
can
be
varied
in
9
steps
in
both
the
forward
and
reverse
directions.
Still
frame
playback
and
Frame
Advance
Playback
{forward/reverse)
are
also
available.
Repeat
Playback
Five
repeat
modes
-
Memory
Repeat,
1-chapter
Repeat,
One-side
Repeat,
Section
Repeat
and
Program
Repeat
-
are
available.
Time/Frame
Search
Any
desired
scene
can
be
searched
for
by
specifying
its
time/frame
number.
[
CD
(Compact
Disc)
Playback
Functions
Program
Playback
Up
to
24
tracks
can
be
selected
from
a
disc
and
played
in
any
desired
order.
Repeat
Playback
Five
repeat
modes
-
Memory
Repeat,
1-Track
Repeat,
All-
track
Repeat,
Section
Repeat
and
Program
Repeat
-
are
available.
Track
-
Time
Search
Any
desired
point
can
be
searched
for
by
specifying
track
time
on
a
specified
track.
CDV
(Compact
Disc
with
Video)
Playback
Functions
*
The
video
part
(the
section
of
the
disc
containing
both
video
and
audio)
is
played
first.
Video
Part:
The
same
functions
available
for
LD
(CLV)
playback
can
be
used.
Audio
Part:
The
same
functions
available
for
CD
playback
can
be
used.
Other
Features
Auto
Loading
and
Automatic
Disc
Discrimination
Functions
This
unit
has
a
built-in
motor-driven
auto
loading
mechanism
which
automatically
opens
and
closes
the
disc
table
and
makes
disc
loading
easy.
Also,
after
a
disc
is
placed
on
the
table
and
the
table
is
retracted
into
the
player,
the
player
automatically
detects
which
type
of
disc
(LD,
CD,
or
CDV)
is
loaded.
5
<VRB1039>
FEATURES
AND
FUNCTIONS
OF
THE
CLD-1580K
ero-Cross
Distortion-Free
D/A
Converter
with
Double-
tep
Noise-Shaper
igital-to-analog
conversion
is
smoother
than
ever.
In
articular,
this
converter
is
designed
to
ellminate
zero-cross
itching
noise
and
improves
linearity
in
lower
levels,
with
e
noise
shaping
technology
doubly
applied
at
digital
filter
id
digital-to-analog
conversion
steps,
all
for
smoother
and
ore
accurate
D/A
signal
conversion.
The
result
is
deep,
ear
sound
with
sharp
image
localization.
Compatibility
with
Many
Disc
Types
and
Sizes
In
addition
to
conventional
LDs
(12-inch,
8-inch},
CDs
(5
inch},
and
CDV
discs
(5-inch},
the
PLAYER
can
play
thin-
type
8-inch
LDs
and
3-inch
CD
singles
without
an
adapter.
ACCESSORIES
Wher
unpacking
the
player,
first
check
to
make
sure
that
all
of
the
accessories
listed
below
are
supplied.
@
Remote
control
unit
@
Size
“AAA”
(IEC
R03)
dry
cell
battery
x
2
e
Antenna
adaptor
(750/300Q
—»
75Q
F-type
plug)
Use
to
connect
a
VHF
antenna
cable
to
the
antenna
terminal
of
the
player.
@
Audio
cord
(Pin
plug
x
2
+-*
Pin
plug
x
2)
Use
to
connect
the
player
to
a
stereo
amplifier
etc.
@
Video
cord
{Pin
plug
+-—
Pin
plug)
Use
to
connect
the
player
to
a
color
monitor
etc.
@
RF
antenna
cable
(J-type
plug
~*
J-type
plug)
Use
to
connect
the
player
to
a
TV
set.
@
F-type
jack
~
IEC
plug
adaptor
e@
Operating
instructions
3B
1039>
TYPES
OF
DISCS
THAT
CAN
BE
PLAYED
WITH
THIS
UNIT
This
unit
isa
CD
VIDEO
SYSTEM
(*1)
compatible
player
which
can
play
CDs,
CDV
discs,
and
LDs.
The
five
disc
types
listed
in
the
table
below
can
be
played
with
this
unit.
*The
marks
shown
in
the
left
column
are
printed
on
the
labels
and
jackets
of
the
corresponding
discs.
Mark
Disc
Size
|
Number
of
|
Audio
recording
|
Video
recording
|
Other
recorded
system
system
sides
|
|
CD
(Compact
Disc)
3-inch
|
One
side
Digital
(20
TOC
(*2)
Single
minutes
max.)
COMPACT
r
DIGITAL
AUDIO
CD
(Compact
Disc)
5-inch
|
One
side
Digital
(74
TOC
minutes
max.)
CDV
(CD
with
Video)
|
5-inch
|
One
side
Digital
(20
CLV
(*3)
TOC
*
<—_s
cDvV
minutes
max,}
(5
minutes
max.)
CD
VIDEO
rt
LD
CD
VIDEO
LD
(*4)
12-inch,
|
Two
sides,
_
|
Digital/analog
CAV
{*5)
CLV
TOC
“2
CD
VIDEO
8-inch
|
one
side
Ls
_|
eet
=a
bee
a
A
|
iv
waseroiscy
12-inch,
|
Two
sides,
|
Digita/analog
("6)
|
CAV,
CLV
LaserVision
Disc)
8-inch
|
one
side
or
analog
only
LASER
DISC
|
taservision
L
“There
are
some
discs
marked
with
the
whe
mark
CDV/CD
GLOSSARY
instead
of
the
S$
mark.
Track
number
**
There
are
some
discs
without
the
SE
mark.
Track
numbers
indicate
the
boundaries
of
the
sections,
or
“tracks”,
on
a
disc.
Track
numbers
are
assigned
consistently
LD
GLOSSARY
throughout
the
audio
part
and
video
part
of
a
CDV
disc.
Chapter
number
Track
numbers
can
be
used
to
search
for
desired
tracks
Chapter
numbers
are
used
to
indicate
the
boundaries
of
(Track
Search).
the
sections
on
a
disc,
similar
to
the
“chapters”
in
a
book.
If
chapter
numbers
are
recorded
on
a
disc,
it
is
so
indicated
TOC
(*2)
on
the
jacket
of
the
disc,
etc.
Chapter
numbers
can
be
Every
CD/CDV-type
disc
is
provided
with
a
section
called
used
to
search
for
desired
chapters
(Chapter
Search).
TOC
(Table
Of
Contents)
at
the
beginning
of
the
disc.
The
TOC
section
is
just
like
the
table
of
contents
of
a
book,
and
Frame
number
contains
information
on
the
contents
(number
of
tracks,
Frame
numbers
are
the
numbers
assigned
to
each
picture
playing
time,
etc.)
of
the
disc.
frame
on
a
CAV
(standard
play)
disc.
Frame
numbers
can
®
Some
LD
discs
are
also
provided
with
a
TOC
section.
be
used
to
search
for
desired
frames (Frame
Search).
Time
number
Time
numbers
indicate
the
time
elapsed
from
the
beginning
of
a
CLV
(extended
play)
disc.
Time
numbers
can
be
used
to
search
for
desired
scenes
(Time
Search).
7
<VRB1039>
CD
VIDEO
SYSTEM
(*1)
The
CD
VIDEO
SYSTEM
is
the
standard
name
for
the
“optical
video
disc
with
digital
audio”
system
that
encompasses
both
LDs
and
CDV
discs.
The
following
mark
is
the
standard
mark
for
the
CD
VIDEO
SYSTEM
and
is
found
on
all
players
and
discs
which
conform
to
the
CD
VIDEO
SYSTEM
format.
The
following
systems
are
included
in
the
CD VIDEO
SYSTEM:
<—_>
CD
VIDEO
e@
CDV
(CD
VIDEO
CDV)
discs
@
LaserVision
Discs
(CD
VIDEO
LDs)
containing
digital
sound
with
sub-codes
@
Compatible
players
which
can
play
CDs
and
CDV
discs
@
Compatible
players
which
can
play
CDs,
CDV
discs,
and
LDs
CD
VIDEO
LDs
(*4)
A
CD
VIDEO
LD
is
an
LD
with
digital
audio
which
is
encoded
with
sub-codes
(data
such
as
TOC
and
track
number
data,
excluding
audio
and
video
signals).
LDs
(LASERVISION
DISCS)
With
this
unit,
only
play
LaserVision
discs
which
bear
the
following
mark.
LY.
LASER
DISC
a
LaservVision
This
mark
is
the
standard
mark
for
LaserVision
video
discs.
Players
and
discs
which
bear
the
LaserVision
mark
are
mutually
compatible
as
long
as
they
conform
to
the
same
television
system.
Two
types
of
standard
LaserVision
disc
are
available
—
standard
play
(CAV)
(*5)
discs
and
extended
play
(CLV)
(*3)
discs
—
which
differ
with
respect
to
their
signal
recording
systems.
CAV
(*5)
DISCS
The
jackets
and
labels
of
these
discs
are
marked
with
a
“Standard
Play
Disc
CAV”
or
“Standard
Play”
indication.
Frames
are
recorded
on
these
discs
at
a
ratio
of
one
frame
per
disc
revolution,
and
the
discs
are
played
at
a
fixed
rotational
speed
(CAV
=
Constant
Angular
Velocity)
of
1,800
rpm.
This
system
is
well
suited
to
special
playback
modes
such
as
still
frame
playback
and
multi-speed
playback.
One
side
of
a
CAV
disc
can
have
a
playback
time
of
up
to
30
minutes
{for
a
12-inch
disc),
which
is
equivalent
to
54,000
frames.
Each
frame
—
from
frame
1
to
frame
54,000
—
is
encoded
with
its
own
frame
number.
*
Playback
time
varies
according
to
the
contents
of
the
disc.
3
<VRB1039>
CLV
(*3)
DISCS
The
jackets
and
labels
of
these
discs
are
marked
with
a
“Extended
Play
Disc
CLV”
or
“Extended
Play”
indication.
Signals
are
recorded
on
these
discs
at
a
constant
linear
velocity
(CLV),
and
the
rotational
speed
during
playback
varies
from
1,800
rpm
for
the
innermost
track
to
600
rpm
for
the
outermost
track.
As
a
result,
one
side
of
a
CLV
disc
can
have
a
playback
time
of
up
to
60
minutes
(for
a
12-inch
disc},
which
is
twice
as
long
as
a
standard
play
(CAV)
disc.
CLV
discs
are
encoded
with
time
numbers
which
correspond
to
the
elapsed
play
time
from
the
beginning
of
the
disc.
*
Playback
time
varies
according
to
the
contents
of
the
disc.
LASERVISION
DISCS
WITH
DIGITAL
AUDIO
(*6)
The
jackets
and
labels
of
these
discs
bear
the
following
mark.
digitnl
,,
sia!
uo
These
are
LaserVision
discs
which
contain
digital
audio
signals
in
addition
to
conventional
analog
audio
signals.
This
feature
allows
the
high
image
quality
of
LaserVision
discs
to
be
enjoyed
together
with
the
superior
quality
of
digital
sound.
The
digital
and
analog
audio
signals
are
recorded
on
the
disc
using
different
frequency
bands.
LASERVISION
DISCS
WITH
DIGITAL
SOUND
AND
MULTI
AUDIO
The
jackets
and
labels
of
these
discs
bear
the
following
mark.
Higital
AUTTAUDIO
or
Sela
MUTT
AUDIO
These
are
LaserVision
discs
in
which
the
recorded
digital
and
analog
audio
signals
differ
in
content.
This
allows
the
user
to
enjoy
two
different
audio
soundtracks
by
switching
between
the
digital
and
analog
sound.
CDV
(COMPACT
DISC
WITH
VIDEO)
DISCS
These
are
compact
discs
which
also
contain
video
signals.
Of
the
total
25-minute
{max.)
playback
time
of
a
CDV
disc,
up
to
20
minutes
is
encoded
with
conventional
CD
digital
audio
signals
(the
“audio
part”).
The
remaining
up
to
5
minutes
is
encoded
with
both
video
and
digital
audio
signals
(the
“video
part”).
CARE
OF
DISCS
How
to
hold
discs
When
loading
or
removing
discs,
try
not
to
touch
their
playing
surfaces.
©)
2
Cleaning
Fingerprints
or
other
dirt
on
the
disc
may
affect
sound
and
picture
quality.
To
clean
your
discs,
use
a
soft
clean
cloth
to
wipe
them.
If
necessary,
moisten
a
soft
cloth
with
diluted
neutral
detergent
to
remove
heavy
dirt
of
fingerprints.
Gently
wipe
from
the
Do
not
wipe
in
a
circular
inside
toward
the
outer
direction
edge.
Discs
may
not
be
cleaned
with
record
cleaning
sprays,
or
static
prevertion
sprays,
etc.
Also
do
not
use
volatile
liquids
such
as
benzine,
or
thinner,
etc.
NEVER
PLAY
CRACKED
OR
WARPED
DISCS.
m
The
disc
revolves
on
the
player
at
a
high
speed
when
it
is
played.
Never
play
a
cracked,
scratched
or
warped
disc.
This
may
damage
the
player
or
cause
it
to
maifunction.
After
using
discs,
store
them
upright
After
playing
a
disc,
always
remove
it
from
the
player
and
return
it
to
its
jacket.
Then
store
it
standing
upright
away
from
heat
and
humidity.
:
e
Store
discs
carefully.
!f
you
store
discs
at
an
angle,
or
stacked
on
top
of
each
other,
discs
may
become
warped
even
when
in
their
jackets.
@
Do
not
leave
discs
in
locations
such
as
the
seat
of
car,
which
may
become
excessively
hot.
If
an
LD
disc
is
warped...
If
an
LD
disc
is
warped,
put the
disc
into
its
protective
envelope,
and
then
place
it
between
two
flat
plates
of
glass.
Then
place
heavy
books
on
top
of
the
plates
so
that
approximately
4
to
5
kgs
(10
Ibs)
is
applied.
Leave
the
disc
like
this
for
a
day
or
so.
This
may
correct
the
warp.
Heavy
books
4-5
kgs
(10
Ibs)
Giass
plate
Protective
envelope
Glass
plate
CAUTION
WHEN
USING
THE
DISC
All
rights
reserved.
Unauthorized
public
performance,
broadcasting
or
copying
is
a
violation
of
applicable
laws.
9
<VRB1039>
CONNECTIONS
USING
TELEVISION
WITH
AUDIO
AND
VIDEO
JACKS
|
CLD-1580K,
stereo
system,
monitor
television
alg
2S
0000
AV
amplifier
®)
eae
2
OY
wy
Audio
cord
Stereo
amplifier
eee
ent)
Ti)
ia
ATTENUATOR*
switch
Audio
cord
4s
¢
a8
Video
cord
es
4a
.
f
:
;
CD
CDV
LD
PLAYER
To
power
outlet
television
antenna
Video
cord
VHF
television
antenna
VIDEO
iN
a
»
Connect
the
VIDEO
OUT
jack
of
the
player
to
the
video
input
jack
of
the
monitor
television.
»
Connect
the
AUDIO
OUT
jacks
to
the
stereo
amplifier
AUX,
CD,
VDP
or
other
jacks,
except
the
PHONO
input
jacks.
The
television
speakers
can
also
be
used
by
connecting
the
television
audio
input
jacks
and
the
player
AUDIO
OUT
jacks,
however
connection
to
a
stereo
amplifier
is
recommended
to
obtain
superior
audio
Playback
quality
for
Compact
Discs
and
LaserVision
Discs.
Do
not
change
the
television
antenna
and
VCR
connections.
0
VRB1039>
Combined
system
control
is
possible
when
a
Pioneer
television
and
audio/video
stereo
receiver
are
connected.
Refer
to
page
14
for
an
explanation
of
the
connection
procedure.
*ATTENUATOR
switch
When
the
television
speakers
are
used,
the
sound
may
be
distorted.
In
this
case,
set
ATTENUATOR
to
ON
to
reduce
the
distortion.
USING
TELEVISION
WITHOUT
AUDIO
AND
VIDEO
JACKS
CLD-1580K,
regular
television,
stereo
system,
(VCR)
The
numbers
are
explained
on
the
next
page.
Make
the
connections
in
this
order.
(3)
CHANNEL
SELECTOR
switch
Set the
channel
to
a
vacant
television
broadcasting
channel
(page
13).
cocovto
RSS
PLAYER
Audio
cord
©?
©
Stereo
amplifier
VHF
television
antenna
8
VHF
input
UHF
input
#
eee
Ya
OTs
.="s
mminy
v
VHF
output
ANTENNA
®
VHF
OUT
UHF
television
antenna
UHF
output
¥
UHF
antenna
terminal
.
I
f
|
4
RF
antenna
cable
When
the
sound
from
a
LaserVision
Disc
or
Compact
Disc
is
output
from
a
television
speaker
it
becomes
monaural
sound.
(This
is
the
same
as
stereo
television).
NOTE:
®
Siripe
patterns
may
appear
when
a
LaserVision
Disc
is
played
on
a
television.
Move
the
antenna
cable
away
from
the
power
cord
to
avoid
this.
li
<VRB1039>
[1]
VHF
TV
ANTENNA
CONNECTION
Detach
the
VHF
antenna
cable
from
the
VHF
antenna
terminal
of
your
TV
set,
and
connect
the
cable
to
the
ANTENNA
terminal
on
the
player.
If
the
end
of
the
cable
does
not
match
the
ANTENNA
terminal,
attach
the
accessory
antenna
adaptor,
and
plug
the
adaptor
into
the
ANTENNA
terminal.
r——
Attach
the
antenna
adaptor
<For
75Q
coaxiai
cable>
@
Strip
off
the
end
@)
Remove
the
cover.
of
the
cable
as
shown
below.
@®
Remove
the
lead
from
the
slit
of
the
fork
terminal
and
insert
into
the
slit
of
the
case.
Lead
Fork
terminal
mall
Slit
in
the
case
Pry
open
both
latches
and
remove
the
cover.
@
Connect
the
cable.
Tighten
both
sides
with
pliers,
Tighten
both
sides
with
pliers.
<For
300Q
parallel
feeder>
@
Strip
off
the
insulation
of
the
feeder
wire
as
shown.
i
i
Woe
Unit:
mm
i?
mia
420
@®
Connect
the
wire
to
the
300Q
terminal,
Loosen
the
screws,
twist
the
wire
around
and
tighten
the
screws.
CONNECTING
TO
YOUR
TV
SET
Connect
the
VHF
OUT
terminal
of
the
player
to
the
75Q
VHF
antenna
terminal
of
your
TV
set
with
the
accessory
RF
antenna
cable.
If
the
VHF
antenna
terminal
of
your
TV
set
is
not
an
F-type
jack,
modify
one
end
of
the
cable.
NOTES:
@
Push
the
plug
in
firmly.
If
the
plug
is
not
properly
inserted,
it
may
result
in
snow
on
the
screen
or
noise.
e@
The
shape
of
the
VHF
antenna
input
terminal
and
the
method
of
connecting
the
antenna
cable
may
differ
from
one
TV
set
to
another.
For
details,
please
refer
to
your
TV
instruction
manual.
CD
CDV
LD
PLAYER
WHE
ANT
75Q
coaxial
cable
preparation
1.
Strip
the
end
of
the
cable
as
shown
in
step
1.
2.
Prepare
the
end
as
shown
in
steps
2
and
3.
3.
Loosen
the
three
screws
and
insert
the
cable.
4,
Tighten
the
three
screws
firmly.
VHF
ANT
aN
iN
750
UNBAL
:
4
!
H
Jnana
sfc
¥
=
7
5
he
4
k
ey
-
-
-
sn
1
|
1
Unit:
mm
if
the
VHF
antenna
input
terminal
of
your
TV
set
is
an
IEC
terminal,
install
the
accessory
F-type
jack-IEC
plug
adaptor
to
one
end
of
the
RF
antenna
cable
and
connect
it
to
the
TV
set.
RF
antenna
F-type
jack-IEC
cable
plug
adaptor
iG
ee
12
<VRB1039>
[3]
SET
THE
CHANNEL
SELECTOR
SWITCH
f
channel
3
is
not
being
used
for
broadcast
in
your
area,
set
the
channel
selector
switch
to
channel
3.
If
channel
4
is
not
being
used,
set
the
switch
to
channel
4.
The
setting
will
be
the
disc
playback
channel.
Set
this
switch
to
the
vacant
channel.
[4]
CONNECTING
TO
YOUR
STEREO
AMPLIFIER
Connect
the
AUDIO
OUT
jacks
of
the
player
to
the
AUX
or
CD
input
jacks
of
your
stereo
amplifier.
NOTE:
@
Do
not
connect
these
terminals
to
your
amplifier
PHONO
input
jacks,
PLUG
THE
POWER
CORDS
INTO
AC
OUTLET
Plug
the
AC
power
cords
of
the
player,
stereo
amplifier
and
TV
set
into
an
AC
outlet.
CD
CDV
LD
PLAYER
Stereo
amplifier
ponoo
BgDOA
HONE
BO0OR
C3
Siete
ee
ir
GHO-0+
o-Oie-O
OOO
im
Audio
cord
CD
CDV
LD
PLAYER
Stereo
amplifier
AC
outlet
13
<VRB1039>
SYSTEM
REMOTE
CONTROL
CONNECTION
WHEN
COMBINED
WITH
OPTIONAL
PIONEER
PROJECTION
MONITOR
(or
COMPONENT
DISPLAY)
Connect
the
VIDEO
OUT
jack
of
the
player
to
the
video
input
jack
of
the
projection
monitor
{or
component
display),
and
connect
the
AUDIO
OUT
jacks
of
the
player
to
the
audio
input
jacks
of
the
projection
monitor
{or
component
display).
System
Control!
By
connecting
the
CONTROL
IN
Gill
jack
of
the
player
to
the
remote
jack
of
the
projection
monitor
(or
component
display),
the
system
can
be
controlled
by
the
remote
control
unit
of
the
player
at
the
remote
control
sensor
of
the
projection
monitor
(or
component
display).
@
Use
a
commercially
available
cord with
mini-plugs
for
the
connection.
Please
also
refer
to
the
Operating
instructions
for
the
Projection
monitor
(or
component
display).
NOTE:
When
system
control
connections
have
been
made,
the
player
cannot
be
directly
controlled
by
the
remote
control
unit.
To
operate
the
player,
aim
the
remote
control
unit
at
the
projection
monitor
for
component
display).
PLAYER
Audio
cord
Video
cord
Audio
cord
ae
eel
Stereo
amplifier
Commercially
available
cord
with
mini-plugs
||
THE
fal
MARK
System
control
can
be
performed
when
the
player
is
combined
with
an
optional
AV
control center,
which
can
provide
centralized
control
of
Pioneer
products
with
the
Gl
mark.
Connect
the
VIDEO
OUT
jack
of
the
player
to
the
video
input
jack
of
the
AV
control
center
and
connect
the
AUDIO
OUT
jacks
of
the
player
to
the
audio
input
jacks
of
the
AV
control
center.
Connect
the
CONTROL
OUT
jack
of
the
AV
control
center
to
the
CONTROL
IN
i}
jack
of
the
player
using
a
commercially
available
cord
with
mini-plugs.
@
For
details
concerning
the
connection
and
operation
methods,
please
refer
to
the
operating
instructions
for
the
AV
control
center.
NOTE:
@
When
a
connecting
cord
has
been
connected
to
the
CONTROL
IN
jack,
direct
contro!
of
the
Player
with
the
remote
control
unit
is
not possible.
Operate
the
player
with
the
remote
control
unit
by
aiming
it
at
the
AV
control
center.
PERFORMING
SYSTEM
CONTROL
WHEN
THE
PLAYER
'S
COMBINED
WITH
A
PRODUCT
THAT
HAS
CD
CDV
LD
PLAYER
at
AV
control
center
Coramercially
available
cord
with
mini-plugs
14
<VRB1039>
TO
WATCH
A
TV
BROADCAST.
&
When
a
VHF
TV
antenna
has
been
connected
to
your
TV
via
the
player's
ANTENNA
terminal,
in
accordance
with
the
connection
example
given
in
these
instructions
(page
11),
TV
broadcasts
can
be
received
normally
by
proceeding
in
one
of
the
following
two
ways:
MM
By
switching
power
of
the
player
off
Before
switching
off
power,
press
STOP
to
stop
disc
playback.
MH
By
pressing
TV/LD
of
the
remote
control
unit,
TV
mode
can
be
selected.
*
To
return
to
disc
playback,
press
TV/LD
again.
In
either
case
the
signals
from
the
VHF
antenna
are
fed
to
the
TV
set
via
the
player.
VHF
antenna
beSeeasces
Hi
O-0
¢
o-H:i0-0
—
Press
TV/LD
of
the
remote
contro!
unit,
or
turn
off
power.
NOTE:
in
an
area
where
the
TV
broadcast
signal
is
weak,
slanting
Stripes
may
appear
on
the
TV
screen
when
TV/LD
is
pressed
to
receive
a
TV
broadcast.
This
does
not
always
indicate
a
problem.
The
stripes
should
be
eliminated
by
turning
power
of
the
player
off.
in
such
cases,
or
when
you
wish
to
watch
TV
for
a
long
period
of
time,
we
recommend
that
you
turn
off
the
power
Switch
of
the
player.
When
using
a
TV
set
with
video
and
audio
input
jacks.
When
using
the
video
input
jack
of
your
TV,
switch
to
the
broadcast
using
the
controls
of
your
TV.
15
<VRB1039>
NAMES
AND
FUNCTIONS
OF
FRONT
PANEL
COMPONENTS
@
Most
of
the
buttons
on
the
front
panel
are
used
for
Karaoke
play.
®
A
detailed
description
is
provided
on
the
indicated
page(s).
VOCAL
ASSIST
button
and
indicator
.......
p.
25
VOCAL
PARTNER
button
and
indicator.......
p.
25
MUSIC
SELECTOR
buttons........
p.
22
AUDIO
MODE
button
........
p.
22
Hi-Fi
MPX/STEREO
indicators
.......
p.
22
ONE
TOUCH
KARAOKE
button
and
indicator
.......
Pp.
22,
25
REMOTE
SENSOR........
p.
19
POWER
switch
Press
to
turn
the
power
on
and
off.
MIC
1
jack
and
MIC
VOLUME
control
.......
p.20
MIC
CONTROL
jack
........
p.
20
MIC
2
jack
and
MIC
VOLUME
control.......
p.
20
6
VRB1039>
He
Oi
"
aan
ie
ey
i
aa
=
REMOTE
ONE
TOUCH
SENSOR
KARROKE
auoi|
MODE
=
PAR
ASA
xshet
=
fa]
(es)
a
fats)
(es)
a
[steREo
|
Mic
vou.
Mic
Mi
MIC
VOL.
PHOS
POWER
vie
4
CONTROL
2
whe,
=I
C)-
©
“o
5
in
6-
Sore
«on
N
©
sane”
uae
EE
ware
EE
=
——————
<<
DISC
indicators
Door/Disc
table
.......
p.
21,31
TRACK
CHAPTER
NO./TIME
COUNTER
display
.......
p.
30
8S
20-8IT-OLC_
SOSEE
SNES
SRWAREOR
PLAY/PAUSE
STOP
I
|
——
aT
ee
EVEL
MUSIG
ECHO
MIC
ECHO
BALANCE
NORMAL
ECHO
SURROUND
KARAOKE®
© ©
AUX
INPUT!
ONCE
MORE
button.......
p.
25
OPEN/CLOSE
button
.......
p.
21, 30,
32
STOP
button
.......
p.32
PLAY/PAUSE
button
........
p.
31,
32
KEY
CONTROL/MAGIC
VOICE
buttons
sctics,
P.
22,
25,
26
Ds
G)—-C)-
5D:
(OA
KARAOKE/NORMAL/AUX
INPUT
selector
ec
Rorfoon
—warfaon
me
fo
max
mac
po
voc
MB
eaaaee
p.
20
BALANCE
control
.......
p.
22
MIC
ECHO
control
.......
p.
22,
24
ECHO
SURROUND
button.......
p.
22,
24
MUSIC
ECHO
button
.......
p.
22,
24
rr
nnn
PHONES
jack
and
LEVEL
control
.......
p.
30
17
<VRB1039>
NAMES
AND
FUNCTIONS
OF
REMOTE
CONTROL
UNIT
COMPONENTS
«
Adetailed
description
is
provided
on
the
indicated
pageis).
@
Remote
control
keys
with
the
same
names
or
marks
as
buttons
on
the
front
panel
of
the
player
control
the
same
operations
as
the
corresponding
front
panel
buttons.
e@
Most
of
the
keys
on
the
remote
contro!
unit
are
used
for
Disc
playback
explained
from
on
page
28.
PAUSE
key
...
p.32
EJECT
key
...
p.30,32
CX
key
...
AUDIO
MONITOR
key
...
MULTI
SPEED
keys
...
SCAN
keys
...
Digit
keys
...
DISP
(display)
key
...
p.32
p.33
p.37
p.34
p.35
p.28
CHP
{chapter)/FR-TM
(frame
time)/
TRACK/TIME
key
...
p.35,
36
18
<VRB1039>
r
(®)
PIONEER
6
COV
LOPPLAYER
tse]
si
STULL
STE
ll
REPEAT
A/B
keys
...
p.38
AUTO
DIGITAL/ANALOGUE
key
ws
P.33
TV/LD
key
...
p.15
When
the
VHF
antenna
is
connected
to
the
TV
set
via
the
player,
this
key
switches
between
disc
play
and
VHF
TV
broadcast.
STILL/STEP
keys
...
p.37
CHAPTER
SKIP/TRACK
SEARCH/PGM
CORRECT
keys
w.
p.35,
36,
41
PLAY
key
...
p.31
CLEAR
key
Used
to
clear
the
repeat
mode
or
program
mode.
This
key
is
also
for
use
in
correcting
input
digits.
SEARCH
key
...
p.35,
36
PGM
(program)
key
...
p.40
REMOTE
CONTROL
OPERATIONS
INSERTING
BATTERIES
INTO
THE
REMOTE
CONTROL
UNIT
1.
Open
the
battery
compartment
cover
on
the
back
of
the
remote
control
unit.
The
cover
should
open
easily
if
you
Press
on
it
with
your
thumb
while
sliding
it
in
the
direction
of
the
arrow.
2.
Take
out
the
two
accessory
size
“AAA”
(IEC
RO3)
dry
cell
batteries,
and
insert
them
into
the
battery
compartment
in
accordance
with
the
display
(@
©)
inside
the
compartment.
3.
Close
the
cover
of
the
battery
case.
Incorrect
use
of
batteries
may
cause
leakage
or
rupture.
Always
be
sure
to
follow
these
guidelines:
A.
Always
insert
batteries
into
the
battery
compartment
correctly
matching
the
positive
@®
and
negative
©
polarities,
as
shown
by
the
display
inside
the
compartment.
B.
Never
mix
new
and
used
batteries.
C.
Batteries
of
the
same
size
may
have
different
voltages,
depending
on
brand.
Do
not
mix
different
brands
of
batteries.
When
operating
the
remote
control
unit,
point
the
unit's
infrared
signal
transmitter
at
the
remote
control
receiver
REMOTE
SENSOR)
on
the
front
panel
of
the
player.
The
remote
control
unit
can
be
used
within
a
range
of
about
7
meters
(23
feet)
from
the
remote
sensor,
and
within
angles
of
up
to
about
30
degrees.
NOTE:
if
the
remote
contro!
sensor
window
is
in
a
position
where
it
receives
strong
light
such
as
Sunlight
or
fluorescent
light,
control
may
not
be
possible.
NOTE
FOR
USING
THE
REMOTE
CONTROL
UNIT
®
Ifa
plug
is
connected
to
the
CONTROL
IN
terminal
at
the
rear
of
the
player,
remote
contro!
operations
cannot
be
done
with
the
remote
control
unit
aimed
at
the
player's
remote
control
sensor.
Aim
the
remote
control
unit
at
the
AV
control
center
or
the
component
display’s
sensor
instead.
©
/f
there
is
any
obstacle
between
the
remote
control
unit
and
the
player,
or
if
the
unit
is
held
at
too
large
an
angle
relative
to
the
front
panel
of
the
player,
the
signal
from
the
remote
control
unit
will
fail
to
reach
the
remote
sensor.
©
if
the
player
is
operating
in
the
vicinity
of
other
appliances
generating
infrared
rays,
or
if
other
remote
control
devices
using
infrared
rays
are
used
near
the
player,
the
player
may
operate
improperly.
Conversely,
if
the
player's
remote
contro!
unit
is
operated
in
the
vicinity
of
other
appliances
which
use
an
infrared
remote
control
device,
the
other
appliance
may
operate
improperly.
ff
this
should
happen,
change
the
place
of
installation
so
that
improper
operation
does
not
occur,
e
/f
the
range
of
operation
of
the
remote
control
unit
becomes
too
short,
replace
the
batteries.
@
When
the
unit
is
not
to
be
used
for
a
long
period
of
time
(more
than
one
month},
remove
the
batteries
to
prevent
them
from
leaking
inside
the
compartment.
If
feakege
occurs,
wipe
up
the
liquid
inside
the
compartment
and
replace
the
batteries
with
new
ones.
e@
Do
not
place
books
or
other
objects
on
the
remote
controt
unit,
since
they
might
depress
the
keys
and
run
down
the
batteries.
19
<VRB1039>
BEFORE
STARTING
KARAOKE
PLAY
e
Turn
on
the
power
to
the
monitor
TV
and/or
audio
system.
@
Before
starting
karaoke
play,
carry
out
the
following
operations
in
the
sequence
indicated
below.
ooooo0
OL
When
using
separately’
sold
microphones
[a
Turn
on
the
power
to
the
player.
POWER
MOFF
mON
v7]
pa
2
Set
the
player
to
KARAOKE
mode.
NORMAL
KARAOKE
©
@
©
AUX
INPUT
For
karaoke
play,
always
set
this
selector
to
KARAOKE
to
set
the
piayer
to
KARAOKE
mode.
Connect
and
turn
on
the
microphone(s).
@
To
MIC
1
or
MIC
2.
@
To
MIC
1
and
MIC
2
for
duets.
About
microphones
When
using
a_
separately-sold
microphone
such
as
the
Pioneer
Microphone
OM-V161,
connect
the
control-use
miniptug
to
the
player’s
MIC
CONTROL
(\
MC)
jack.
20
<VRB1039>

Other Pioneer CD Player manuals

Pioneer SUPER AUDIO CD PLAYER PD-D9MK2-K User manual

Pioneer

Pioneer SUPER AUDIO CD PLAYER PD-D9MK2-K User manual

Pioneer CLD-D925 User manual

Pioneer

Pioneer CLD-D925 User manual

Pioneer CDJ 200 - Pro Cd/Mp3 Player User manual

Pioneer

Pioneer CDJ 200 - Pro Cd/Mp3 Player User manual

Pioneer Elite PD-F17 User manual

Pioneer

Pioneer Elite PD-F17 User manual

Pioneer PD-R555RW User manual

Pioneer

Pioneer PD-R555RW User manual

Pioneer PD-M427 User manual

Pioneer

Pioneer PD-M427 User manual

Pioneer CT-M66R User manual

Pioneer

Pioneer CT-M66R User manual

Pioneer DEH-2700R User manual

Pioneer

Pioneer DEH-2700R User manual

Pioneer PD-F1007 User manual

Pioneer

Pioneer PD-F1007 User manual

Pioneer X-CM56 User manual

Pioneer

Pioneer X-CM56 User manual

Pioneer DEH-1400 User manual

Pioneer

Pioneer DEH-1400 User manual

Pioneer CDX-FM121 User manual

Pioneer

Pioneer CDX-FM121 User manual

Pioneer PD-F906 User manual

Pioneer

Pioneer PD-F906 User manual

Pioneer PD-117 User manual

Pioneer

Pioneer PD-117 User manual

Pioneer X-CM56 User manual

Pioneer

Pioneer X-CM56 User manual

Pioneer DRM-7000 User manual

Pioneer

Pioneer DRM-7000 User manual

Pioneer DEH-P770MPXN User manual

Pioneer

Pioneer DEH-P770MPXN User manual

Pioneer DEH-P3000R User manual

Pioneer

Pioneer DEH-P3000R User manual

Pioneer PD-Z82M User manual

Pioneer

Pioneer PD-Z82M User manual

Pioneer PDR-609 User manual

Pioneer

Pioneer PDR-609 User manual

Pioneer LD-V4200 User manual

Pioneer

Pioneer LD-V4200 User manual

Pioneer LaserDisc CLD-D504 User manual

Pioneer

Pioneer LaserDisc CLD-D504 User manual

Pioneer PD-M406 User manual

Pioneer

Pioneer PD-M406 User manual

Pioneer PD-101 User manual

Pioneer

Pioneer PD-101 User manual

Popular CD Player manuals by other brands

Bergstrom K266 manual

Bergstrom

Bergstrom K266 manual

Integra DPC-6.1 instruction manual

Integra

Integra DPC-6.1 instruction manual

Marantz SA-10 owner's manual

Marantz

Marantz SA-10 owner's manual

Philips CD Soundmachine AZ1837 user manual

Philips

Philips CD Soundmachine AZ1837 user manual

Philips AZ9214 Specifications

Philips

Philips AZ9214 Specifications

Kenwood DP-R4080 instruction manual

Kenwood

Kenwood DP-R4080 instruction manual

Philips CDC735 owner's manual

Philips

Philips CDC735 owner's manual

JVC XL-Z431BK instructions

JVC

JVC XL-Z431BK instructions

Audiophase CD-330R instruction manual

Audiophase

Audiophase CD-330R instruction manual

DK Digital CDR-50 owner's manual

DK Digital

DK Digital CDR-50 owner's manual

Philips AZ1021 user manual

Philips

Philips AZ1021 user manual

Gemini CD-2000X instruction manual

Gemini

Gemini CD-2000X instruction manual

JVC CH-X350 instructions

JVC

JVC CH-X350 instructions

Sony Walkman D-NF421 Manual de instruções

Sony

Sony Walkman D-NF421 Manual de instruções

Aiwa XP-SP30 operating instructions

Aiwa

Aiwa XP-SP30 operating instructions

Sony CDC-X30MP operating instructions

Sony

Sony CDC-X30MP operating instructions

Blackweb BWA17AA003 Product guide

Blackweb

Blackweb BWA17AA003 Product guide

Sony CDP-XE200 Service manual

Sony

Sony CDP-XE200 Service manual

manuals.online logo
manuals.online logoBrands
  • About & Mission
  • Contact us
  • Privacy Policy
  • Terms and Conditions

Copyright 2025 Manuals.Online. All Rights Reserved.