manuals.online logo
Brands
  1. Home
  2. •
  3. Brands
  4. •
  5. Pitagora
  6. •
  7. Measuring Instrument
  8. •
  9. Pitagora TrueScan User manual

Pitagora TrueScan User manual

TRUESCAN
1
Introduction
7UXH6FDQ FRQVWLWXWHV WRGD\·V UHVSRQVH WR WKH HYHU JURZLQJ QHHG IRU KLJK
security and prompt verification of documents, banknotes and security
printing in general.
This simple, but sophisticated instrument, allows the user to safely and
quickly verify the authenticity of the document, passport, visa, permit,
banknote, check or other, by a few clicks from the mouse, achieving almost
the same results as with a complex forensic analysis station.
TrueScan conceals, under its unsuspected mouse appearance, a number of
features that enable the user to perform an in depth verification of
authenticity and possible adulteration of any document by analyzing the
SUHVHQFHRIPRVWRIWRGD\·VDQWL-counterfeiting technologies.
The philosophy behind TrueScan is the possibility to include as many
critical tests as possible into a simple yet powerful portable package,
containing most of the light spectrum analysis as well as invisible light
spectrum, together with the possibility to perform a surface integrity
analysis, including holograms, special OVI® inks, relief, cancellation
attempts, microsurgery, watermarking, threads, fibers, and others.
TRUESCAN CHARACTERISTICS
TrueScan resembles a simple three button mouse connected to its triple
adapter cable and to the necessary display which can be an LCD video
display, or surveillance monitor, a computer VGA Monitor by means of an
optional adapter, or directly to PC with another optional Video to USB
adapter, or frame Grabber board. We will describe these options in detail
on the options section of this manual.
P I T A G O R A S A
2
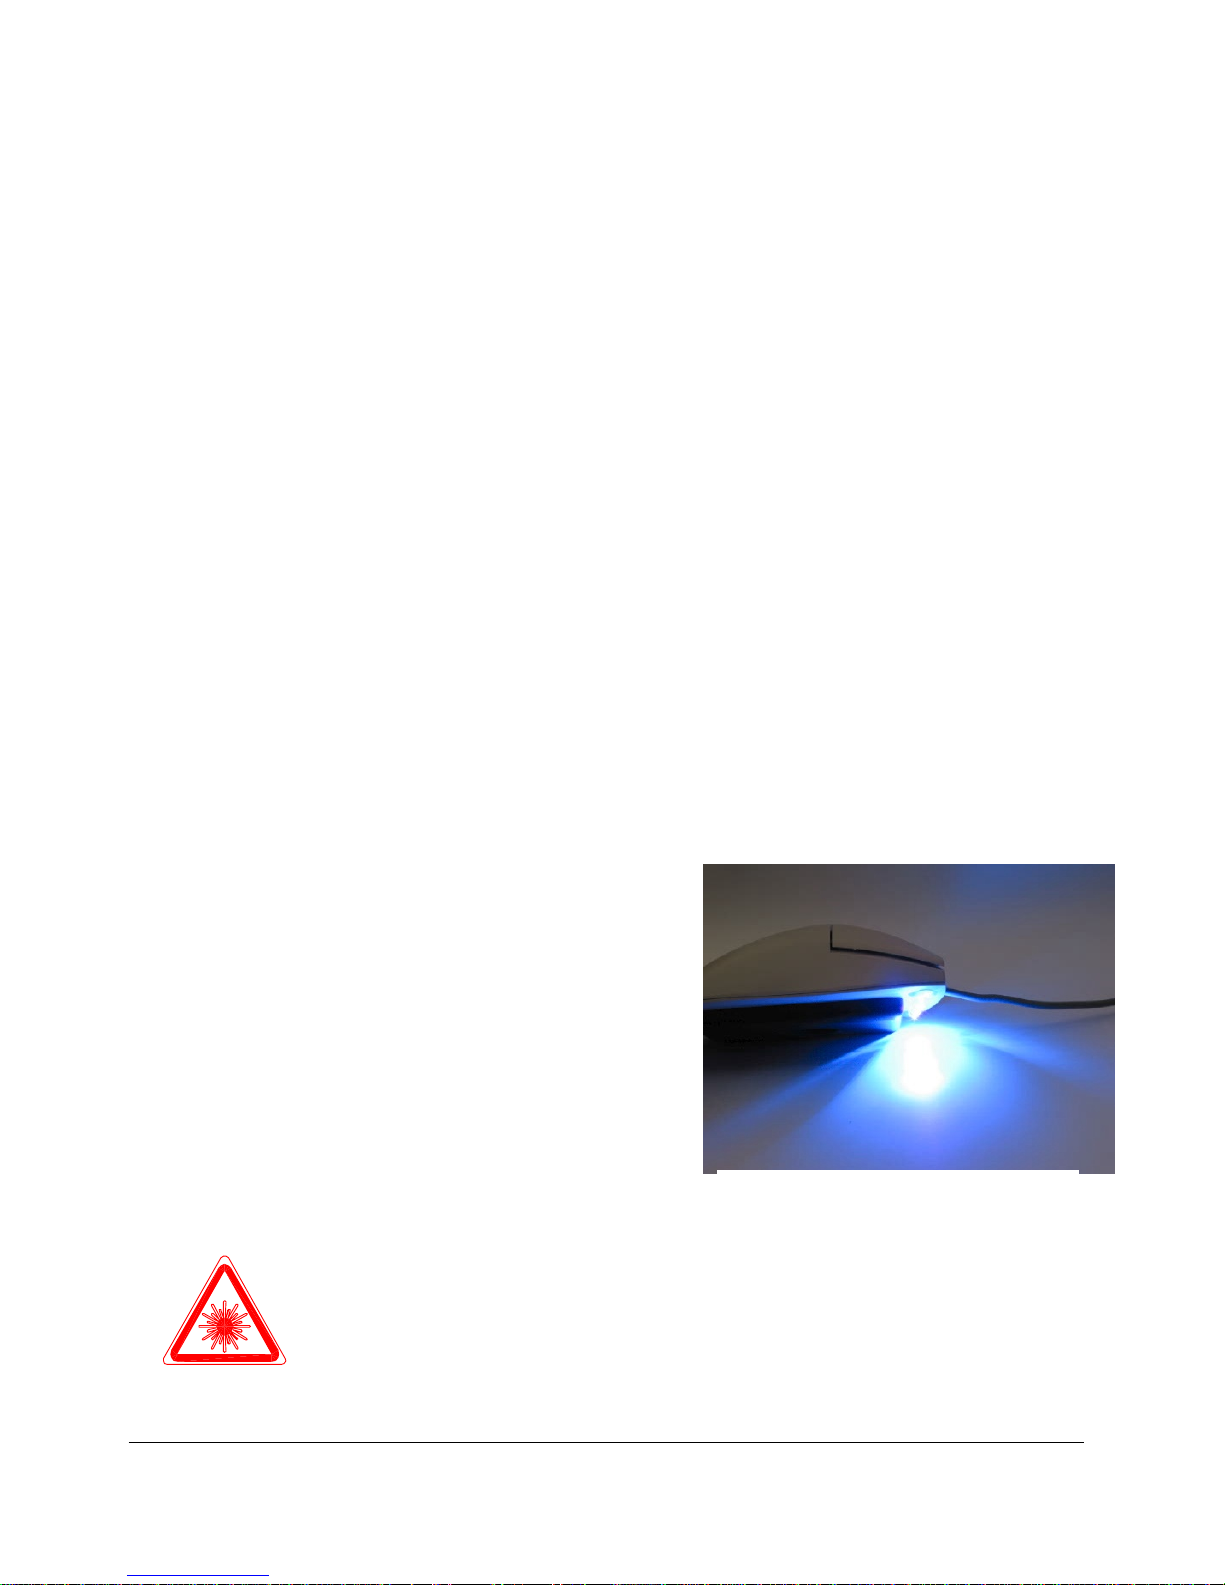
TrueScan provides a spectrum analysis of the object document by
generating seven visible colors of light plus two frequencies of infra red
light, and two frequencies of ultra-violet or UV light. The surface integrity
and relief analysis is achieved by shooting IR light from different angles
which allow the detection of minor imperfections due to mechanical
interventions or microsurgery, as well as the presence of a magnetic or
fluorescent thread, or even fibers embedded within the paper, confirming
the presence of Intaglio printing, micro-letters, nano-letters within a
hologram, and other anti-counterfeiting features explained latter in this
manual. The magnification produced by the miniature camera lens allows
the user to quickly verify a document and establish areas of interest or
doubt.
Careful attention will be devoted to the analysis of the security features
contained in the US Dollar, the Euro and the Swiss Franc. Another chapter
will be spent on adulteration attempts and the detection of ink residues
from corrections, micro surgery on numbers or data fields, and simulation
of metallic threads and watermarks.
Our difficult times require that we provide rapid, effective and inexpensive
solutions to the frontlines of banks, border posts, document check points,
and anyone having to verify the authenticity of printed material, being that
of banknotes or security printed documents in general.
TrueScan Installation
TrueScan is simple to install since it has a single triple adapter cable
between the mouse, a power adapter and the Video output connector that
can go to either an LCD video display, surveillance monitor, television,
SURMHFWRU EHDPHU«RU D FRPSXWHU 9*$ 0RQLWRU E\ PHDQV RI DQ
optional adapter, or directly to PC with another optional Video to USB
adapter, or Frame Grabber board.
TRUESCAN
3
STANDARD INSTALLATION INSTRUCTIONS
1. Place the TrueScan mouse on the table and connect the power adapter
to the wall outlet.
2. Connect the PS2 type mouse connector to the socket in triple adapter
cable.
3. Connect the Video cable to the Cinch Video output connector in the
triple adapter cable, if necessary use the adapter provided.
4. Connect the other end of the video cable with the RCA male connector
to the VCR or video input 1 on your monitor or display.
5. Connect the DC power adapter connector to triple adapter cable.
6. Upon power up, the mouse will run a self test sequence turning different
lights on and remains off in standby mode until a button is pressed.
Click any mouse button to start TrueScan analysis. The unit is now ready
to analyze a document.
Attention: never attempt to connect the mouse as a regular mouse to
the PS2 port on a PC
since this could cause
damage to both.
TrueScan only looks
and feels like a regular
mouse but it is not a
PS2 mouse. Instead it
LV´WKHZROIGUHVVHGDV
VKHHSµ 2Q WKH VDPH
token, never connect a
standard PS2 PC
PRXVH WR 7UXH6FDQ·V
triple adapter cable.
P I T A G O R A S A
4
TrueScan Operation
Once TrueScan has been connected to the monitor, Video display, PC
VGA monitor or PC frame grabber, and power is applied to the unit, it
performs the self test and remains in standby mode, (camera off), waiting
for any button to be pressed. We can then turn the TrueScan spectrum
analyzer on, by pressing any of the three analysis buttons and the light
source will be indicated by the external light indicators.
LEFT BUTTON UV OPERATION
The left button, with the UV indication for Ultra Violet light, turns the
camera and the UV light sources on (375 nm), under the camera, so as to
analyze the document visually for UV fluorescence from the so called
´LQYLVLEOHµ SULQWHG LQNV SDSHU HPEHGGHG 89 ILEHUV WKUHDGV RU EDQGV
which can be seen through the color monitor.
Pressing the left button again, the unit turns the camera off and the four
external UV light (385nm) on. The
instrument can then be lifted and used as a
manual torch or flashlight to hit the desired
document area under study.
In order to exit the UV mode, just press any
other button. Please refer to the following
page for the complete UV cycle diagram.
WARNING!!! Do not turn mouse upside down when
UV light is on. Avoid looking at UV lights directly
since prolonged exposure can be harmful to your eyes.
WARNING
UV
LIGHT
Figure 2.
T
rueScan UV lights
TRUESCAN
5
Figure 4 e 5 ²200.- Swiss Francs banknote
UV printed section.
Figure 6 e 7 ²MicroSoft® authenticity
certificate with UV print and fibers.
Figure 8 ²Date of birth under UV light.
P I T A G O R A S A
6
CENTER BUTTON
The center button with the VL indication for Visible Light spectrum, also
turns the camera on and shows the first color from the seven available
colors and frequencies. These colors are, white, red, yellow, green, cyan,
blue and magenta, after which the camera stays on without any lighting, for
transparency analysis.
Pressing the button repeatedly, changes the color to the next until the cycle
UHSHDWVLWVHOI7KHYLGHRLPDJHLVLQFRORUVDQGWKLVTXLFN´YR\DJHµWKURXJK
the visible spectrum, allows the user to eliminate colored backgrounds and
inks to better distinguish specific features in a document or to enhance a
specific color.
As previously mentioned, the final step in the VL cycle, turns all light
sources off leaving the camera on, so as to verify transparency effects. This
configuration requires a small light table (optional), where the document is
placed. Using TrueScan the watermark can be immediately verified, as well
DV´VHHWKURXJKµRUSHUIHFWUHJLVWHUIURP6LPXOWDQSULQWLQJERWKEHWZHHQ
different colors on the same side as well as between one side and the other .
In addition, demetalized hologram areas as well as bands or threads can be
easily verified for their particular details such as micro text or additional
designs such as in the Euro or US dollars threads.
Fi
g
ure 9
²
TrueScan on ma
g
enta li
g
ht.
F
igure 10.
T
rueScan on cyan, bottom
i
TRUESCAN
7
F
igure 11.
P I T A G O R A S A
8
Figure 12- Euro, disigns under white light. Figure 13 ²Euro, designs under white light.
Figure 14- Euro, designs with microletters. Figure 15 ²Euro, designs with microletters.
Figure 16- Euro, hologram with nano letters. Figure 17 ²Euro, holograms with 3D designs.
Figure 18- Euro, microletters under white light. Figure 19 ²Euro, OVI® print in VL mode.
TRUESCAN
9
RIGHT BUTTON
The right button with the IR indication for Infra Red light, turns the
camera on and shows all four external pink lights pulsating slowly,
indicating all four top IR lights of 780 nanometers are on, pressing the
button again changes to pulsating red, indicating all tangential IR lights (880
nm.) are on. Pressing again will lit only one of these four tangential lights at
a time circling the object from all four directions until it returns to the
original pulsating pink light.
F
igure 20.
P I T A G O R A S A
10
Figure 21 - Euro, intaglio relief in IR mode. Figure 22 ²Euro, watermark and UV fiber.
Figure 23- Euro, 2 colors intaglio under IR. Figure 24 ²Euro, 2 colors intaglio under IR.
Figure 25 - Euro, microletters under IR. Figure 26 ²USD intaglio relief on the back.
Figure 27 ²USD 100.- OVI® intaglio print. Figure 28 ²USD 100.- microletters in intaglio.
TRUESCAN
11
GENERAL OPERATIONAL NOTES
TrueScan can access any mode at any time from any position within a given
mode, therefore if the user is in the third step within the IR mode, and he
or she wants to change to the Visible Light mode, they can just click the
center mouse button.
Each menu is equipped with step position memory, to remember and
return to the last light in use in that menu. Therefore if you go from the UV
menu into IR, you enter the last step used in that menu. This improves
considerably the document analysis through comparison under different
lights. Specifically, we can verify the actual presence of UV fibers after
verifying their fluorescence we can move into IR and check their relief
within the paper surface; (no relief means counterfeited or printed fibers).
It is important to note that the unit will turn itself off after six minutes
without a button being pressed. If the user wants to turn the unit off, all
that needs to be done is to press any of the three buttons for more than
two seconds. To turn the unit back on press any of the three buttons again.
Careful attention has been given both to the number of steps and to the
practical aspects, so as to obtain the best possible analysis within the least
available time, yet providing an in depth study of the document without
compromising the effectiveness of the verifications performed.
P I T A G O R A S A
12
Disclaimer
Pitagora SA does not assume any responsibility for eventual losses of data,
tardiness on the delivery to a customer or other direct or indirect expenses
caused by an eventual malfunctioning of the proprietary products or any
other product mentioned within this manual.
Pitagora S.A. does not assume any responsibility whatsoever regarding
physical or moral damages caused directly or indirectly by any of the
products or operations described within this manual, be that due to
defective malfunctioning equipment or due to improper use.
All commercial products mentioned within this manual are the exclusive
property of their respective companies: microperf®, iridescent®,
Kenogram®, Orlof®, Simultan®, MicroSoft®, OVI®, and others.
Options
TrueScan offers maximum flexibility regarding its hardware configuration,
either as a single standalone unit with its optional LCD monitor, or in a
more complex environment, connected to the PC by means of a Video
USB adapter, or a Video VGA converter. TrueScan can also be connected
to the PC by means of a Video frame grabber board where video input
from TrueScan can be either saved as video files or snap shots can be taken
and stored in JPG or BMP formats, to create personal reference libraries.
The unit also works in conjunction with a light table in order to improve
the image on demetalization elements, threads and watermarks.
TRUESCAN
13
STANDARD TRUESCAN STANDALONE SYSTEM
As previously explained on this manual, under TrueScan Installation, we
RIIHUDQRSWLRQDOµ/&'PRQLWRUFRPSOHWHZLWKSRZHUDGDSWHUDQG
remote control which can also be used on board a vehicle.
Figure 29 ²7UXH6FDQZLWKRSWLRQDOµ/&'Monitor.
This optional monitor is a solid state flat monitor which can
be used as either a color or Black and
white unit in either NTSC or PAL
system in standard size or wide size display modes. It
also comes with aFDUSOXJWRUXQIURPDYHKLFOH·V
battery and a power adapter to be used as a desktop
unit. The monitor can be operated with its remote
control for mode, brightness, contrast or other
settings.
Figure 30 ²2SWLRQDOµ/&'
Monitor.
2SWLRQDOµ
LCD Monito
r
P I T A G O R A S A
14
TRUESCAN PC CONNECTION
This option allows the user to directly connect TrueScan to a
portable or desktop PC by means of the USB port. The unit
also comes with the necessary driver and image capture
software which allows the user to record a video inspection session, or to
record snap shots from particulars during
the inspection of a document. The user can
create its own library or catalog of images, to
be edited or printed accordingly. It is not our
purpose to explain in detail the use of this
option since the unit has its own installation
and instructions manual, please refer to that
information or contact our support
department for additional information.
Figure 31 ²Optional Video to USB adapter.
The optional light table is particularly useful when inspecting
watermarks or demetallized holograms or even threads, always
in transparency mode. Although most light tables will work,
many can present soft interference lines
traveling vertically due to the difference in
frequencies between the light table and the
camera, however, this does not represent a
major problem. The unit can operate with
batteries or with its power adapter.
Figure 34 ²Optional Light table.
Optional
Video to UBS
Adapter
Optional
Light
table
TRUESCAN
15
P I T A G O R A S A
16
Technical Specification
Enlargement: WLPHVRQµPRQLWRUILQDOVL]HGHSHQGVRQRXWSXWPRQLWRUVL]H
Video output: Composite video signal NTSC color; resolution 510x492 pixels; 380 TV
lines.
Light sources:
W
hite; red 615 nm.; yellow 575 nm.; green 528 nm.; cyan 510 nm.; blue 470
nm. Magenta 410 nm.; UV1 375 nm.; UV2 385 nm.; IR1 780 nm.; IR2 880
nm.
Standby time: 2 minutes for UV and 4 minutes for the other lights (after which the unit
turns itself off; any key will turn it on again).
Manual turn off: Pressing any key for more than two seconds turns the unit off; (any key will
turn it on again).
Key type: High resistance micro switch keys (40 grams key pressure).
External power
supply:
Universal switching supply; Input voltage 100-240 AC, 50/60Hz; Output
voltage 12 Volts DC./1.5 A.
Power
requirements:
A
ctual TrueScan 8 to 14 Volts DC, 400 mA, maximum consumption 3
Watts. Also available on 12 Volts DC for vehicle installation and usage.
Operating
temperature:
²23°C a +50°C (-10°F a +122°F)
Storage
temperature:
²30°C a +70°C (-22°F a +158°F)
Humidity: 0% to 90% (from 0°C to 35°C or from 32°F to 95°F).
0% to 70% (from 35°C to 50°C or from 95°F to 122°F)
External
dimensions :
Length 130 mm.; width 70 mm.; height 50 mm.
Weight: 110 grams.

Popular Measuring Instrument manuals by other brands

KERN MLS 50-3...N series Service manual

KERN

KERN MLS 50-3...N series Service manual

Rosemount P330 Installation and operation manual

Rosemount

Rosemount P330 Installation and operation manual

Keithley 7999-4 instruction manual

Keithley

Keithley 7999-4 instruction manual

METER GROUP ATMOS 14 GEN 2 manual

METER GROUP

METER GROUP ATMOS 14 GEN 2 manual

HACH LANGE sensION+ EC7 manual

HACH LANGE

HACH LANGE sensION+ EC7 manual

Kaiweets HT206B user manual

Kaiweets

Kaiweets HT206B user manual

Conrad 100609 operating instructions

Conrad

Conrad 100609 operating instructions

ABB AC211 installation guide

ABB

ABB AC211 installation guide

Bushnell Chuck Adams Rangefinder owner's manual

Bushnell

Bushnell Chuck Adams Rangefinder owner's manual

MEGAlink ML2000 user manual

MEGAlink

MEGAlink ML2000 user manual

Forward SCM-6000 user manual

Forward

Forward SCM-6000 user manual

BRUEL & KJAER 2211 Instructions and applications

BRUEL & KJAER

BRUEL & KJAER 2211 Instructions and applications

LOVATO ELECTRIC DME D300T2 MID instruction manual

LOVATO ELECTRIC

LOVATO ELECTRIC DME D300T2 MID instruction manual

77 ELEKTRONIKA DocUReader 2 PRO user manual

77 ELEKTRONIKA

77 ELEKTRONIKA DocUReader 2 PRO user manual

Geosense TP-1 instruction manual

Geosense

Geosense TP-1 instruction manual

Zeiss AURA user manual

Zeiss

Zeiss AURA user manual

Ista ultego III perfect Installation instruction

Ista

Ista ultego III perfect Installation instruction

Konica Minolta CS-2000 brochure

Konica Minolta

Konica Minolta CS-2000 brochure

manuals.online logo
manuals.online logoBrands
  • About & Mission
  • Contact us
  • Privacy Policy
  • Terms and Conditions

Copyright 2025 Manuals.Online. All Rights Reserved.