Pitney Bowes DL460 User manual

Quick Reference GuideQuick Reference Guide
DL460/550DL460/550


This machine allows the user to perform various functions when it is equipped with
different options.
This booklet gives you a quick overview of the procedures to follow to use some of
the basic functions the machine offers.
For greater details, see Operator’s Manual, available separately.
Contents
◆It’s Easy!
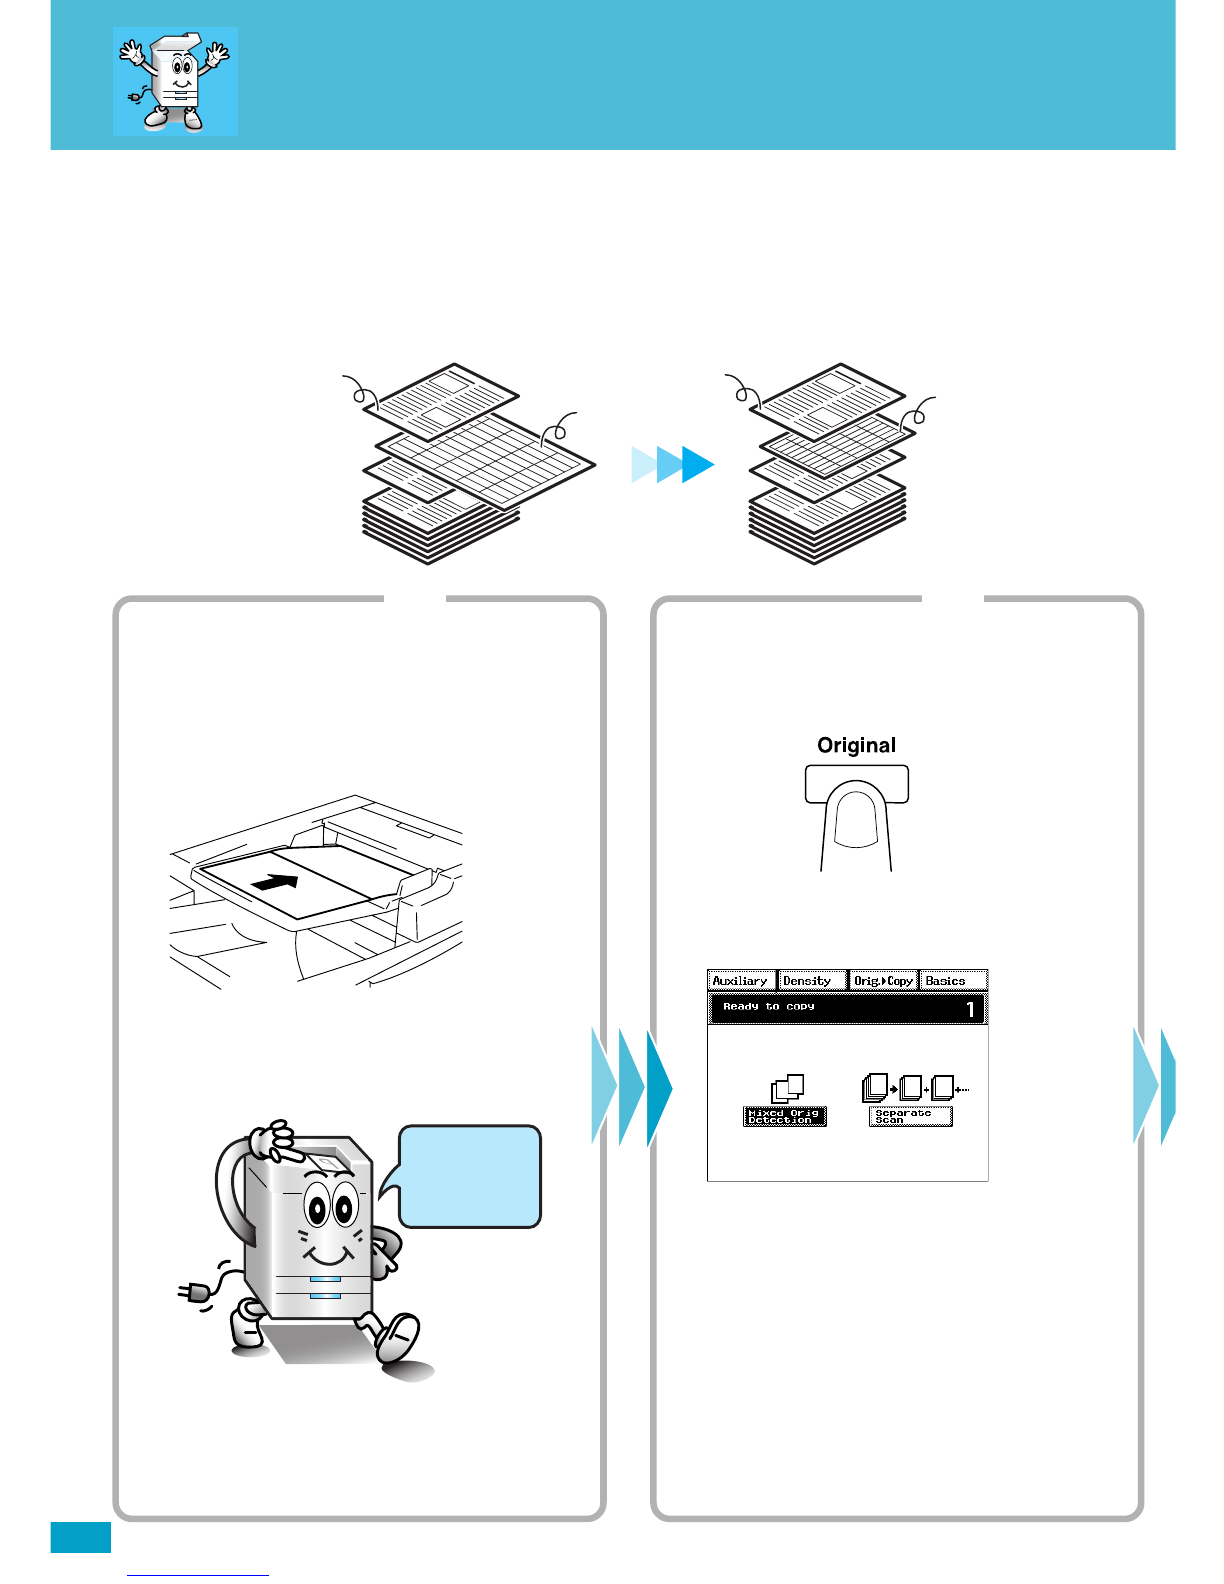
Making a Copy Set/Stack of One Size .................................. 2
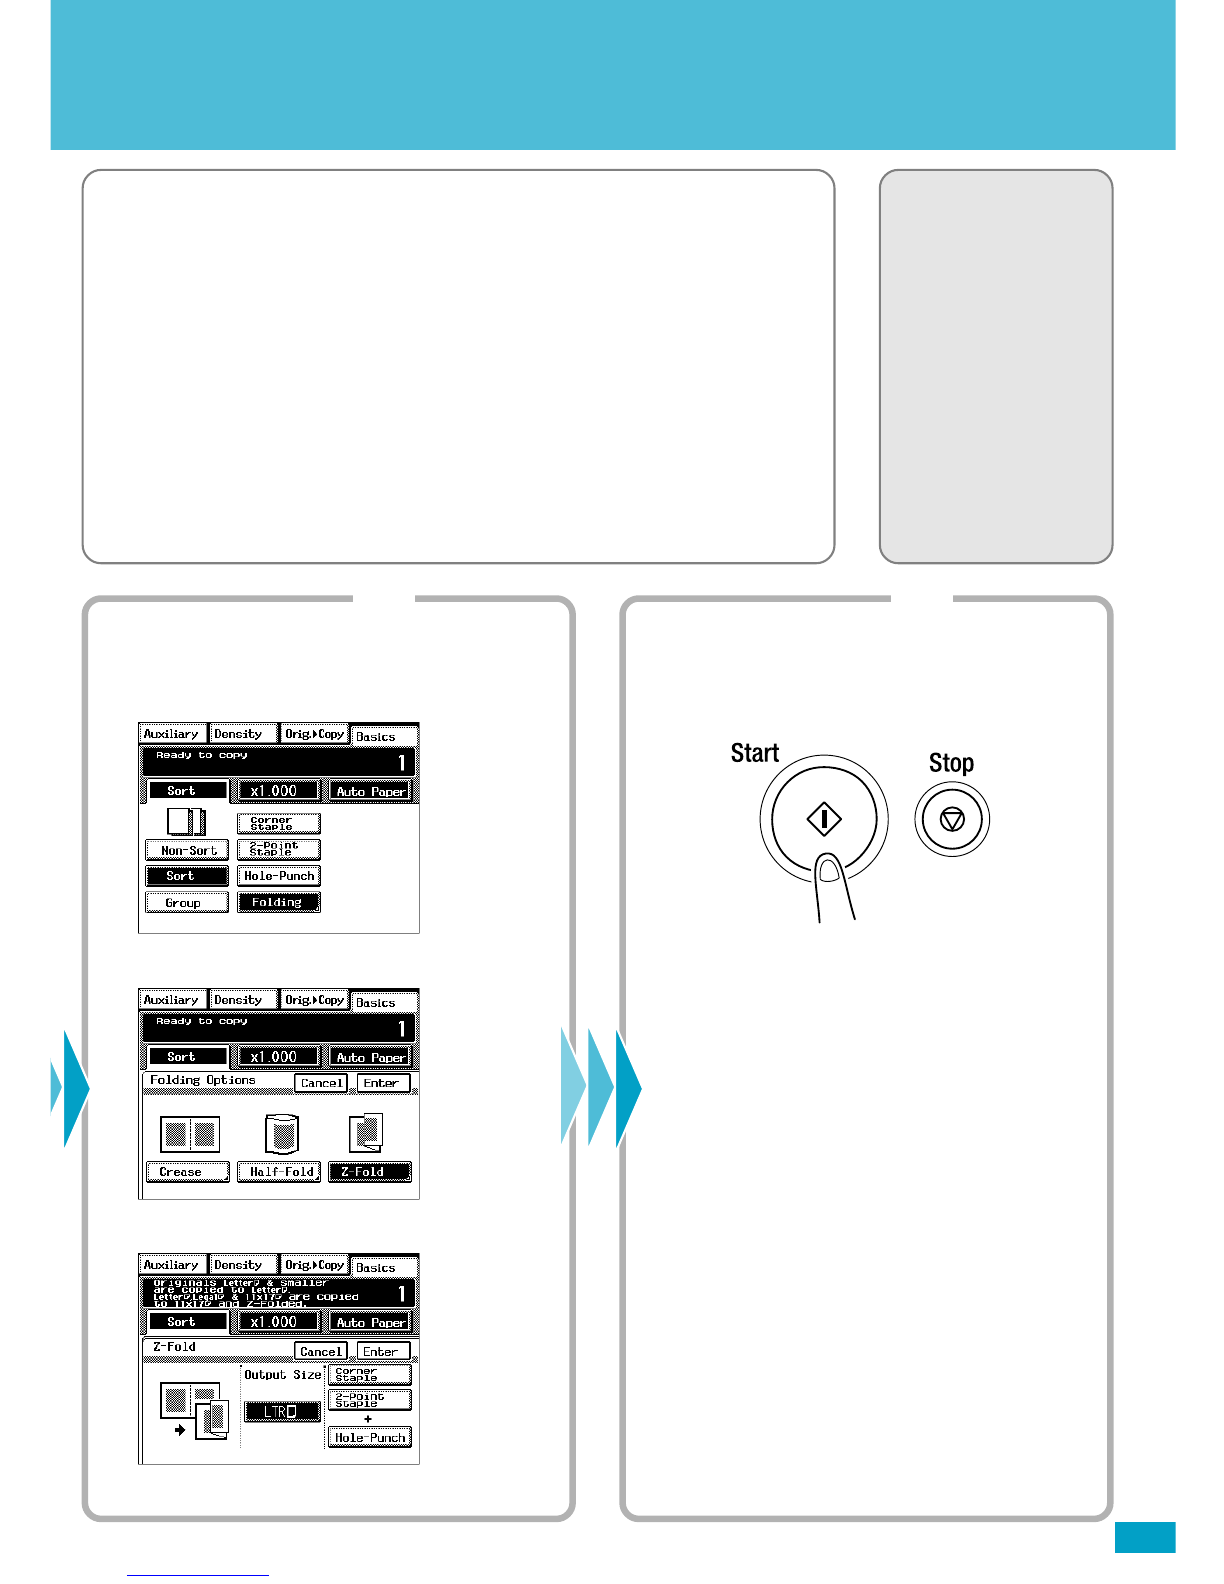
Using Z-Fold ......................................................................... 4
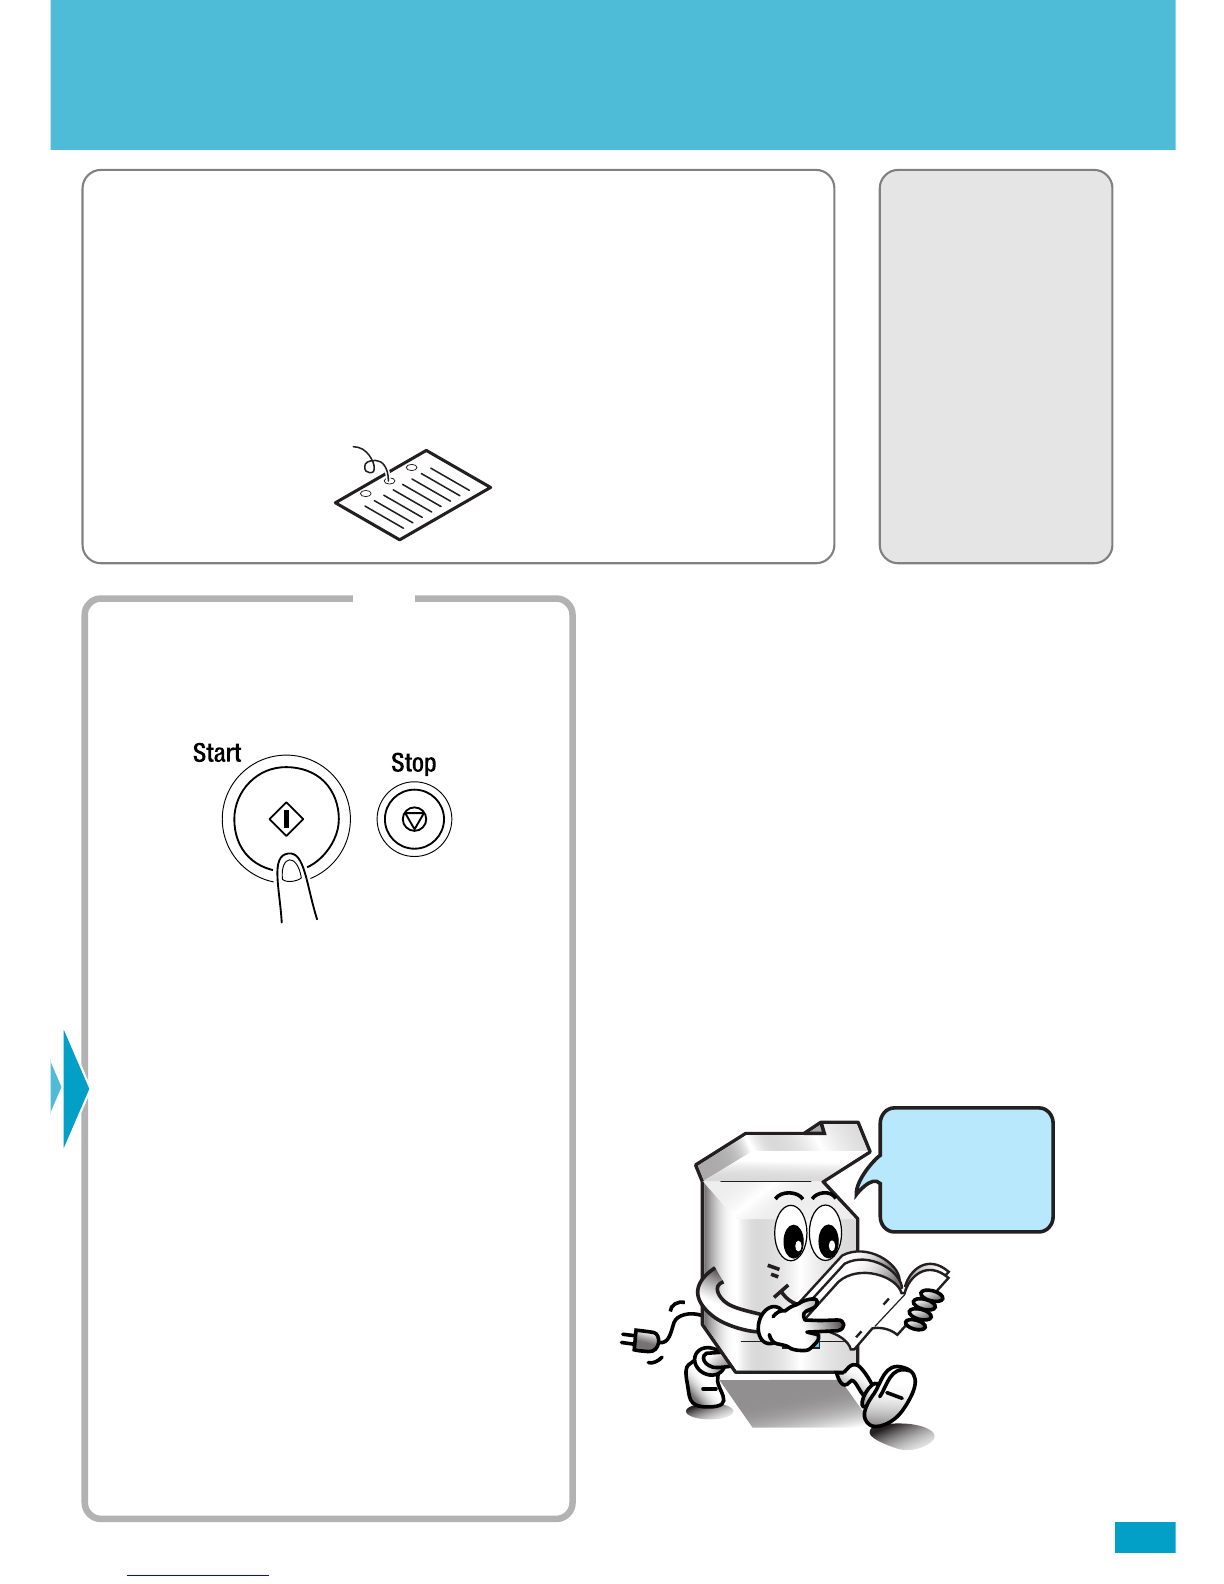
Making Stapled Copy Sets/Stacks ........................................ 6
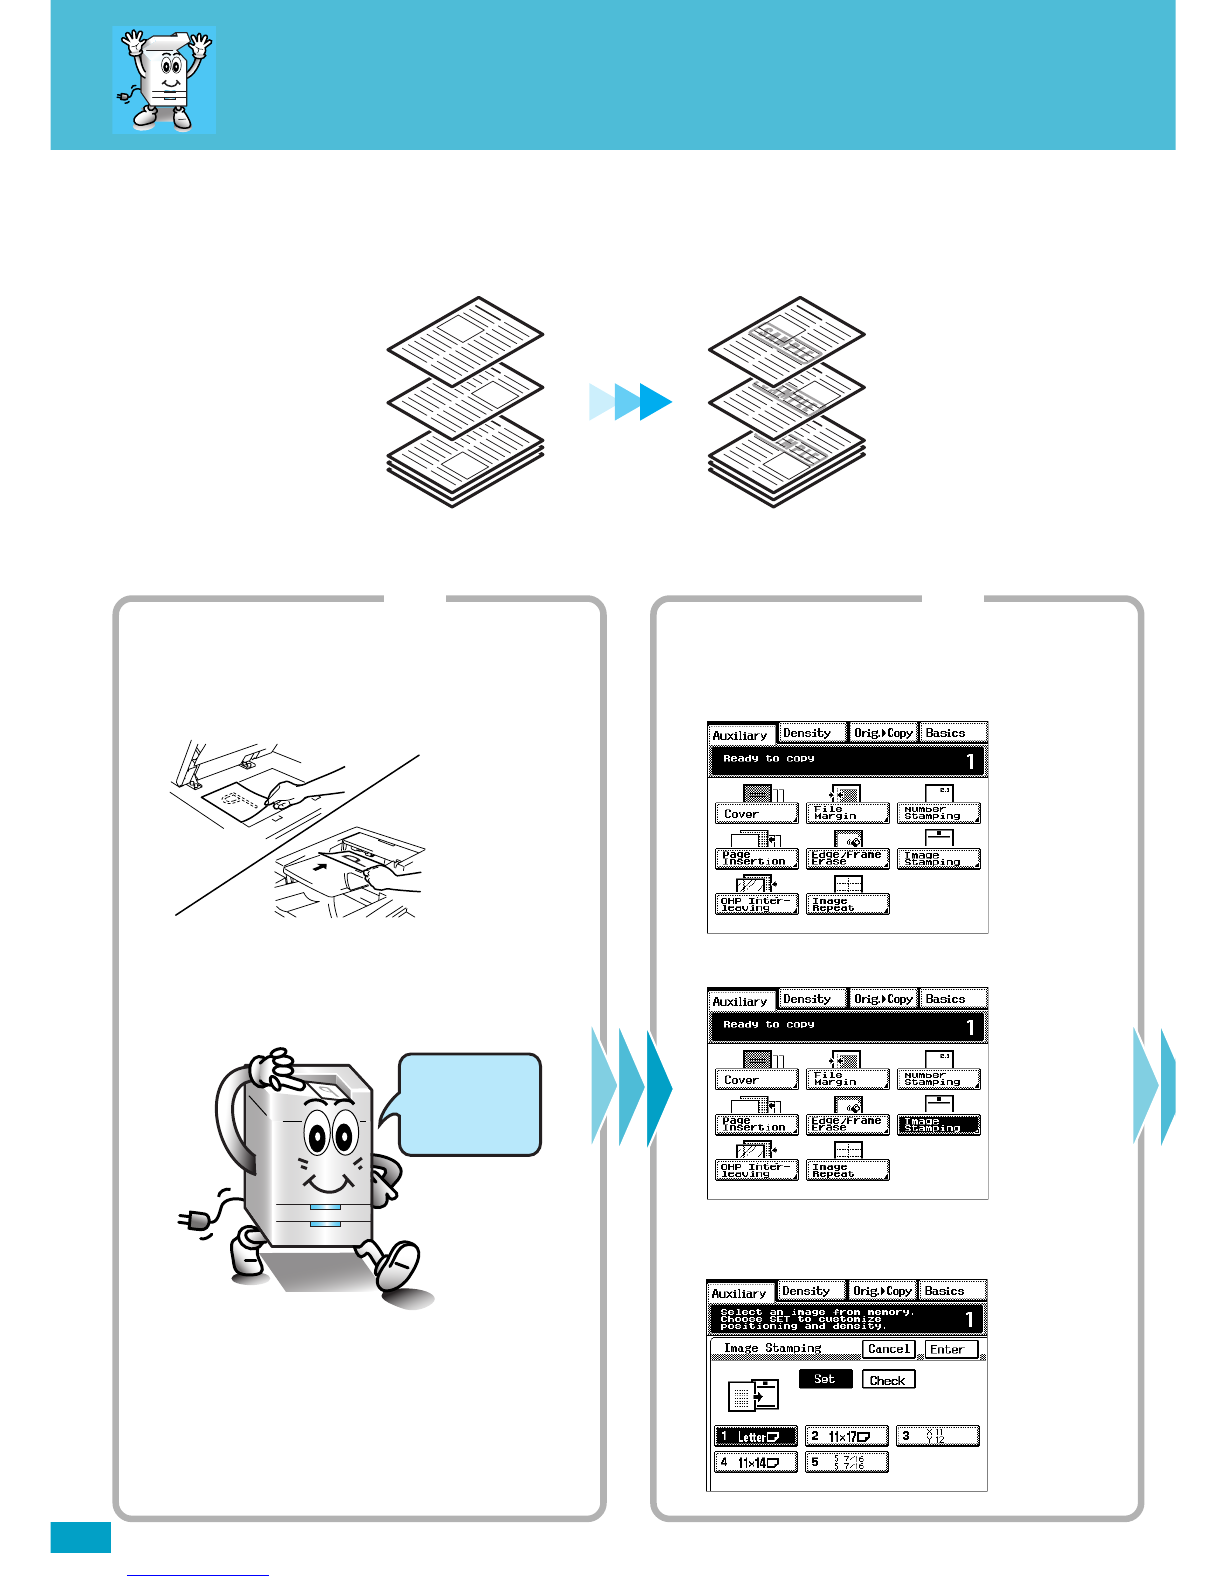
Stamping an Image on Copies.............................................. 8
Storing an Image................................................................. 10
◆What
To Do?
Making Copies on Post Cards............................................. 12
Making Copies from a Book ................................................ 14
◆Ecology
Making a Booklet ................................................................ 16
Saving Paper ....................................................................... 18
Saving Power Consumption ................................................ 20
◆Trouble!
Running out of Paper .......................................................... 22
Paper Misfeed ..................................................................... 24

2
Printing a letter size
Suppose you have an orignal document of varying page sizes and would like to create an
8.5” x 11” copy set. The DL460/550 can do just that.
4002O081AA
Originals
Letter
11x17
Letter Letter
Step 1
Loading the originals
1. Load your originals.
You can load originals of varying sizes at one
time.
4002O147AD
4002O092AA
Load your
originals
here!
Step 2
Setting the Mixed Orig. Detection function
1. Press the Original key.
4002O294CA
2. Touch [Mixed Orig. Detection].
4003P117CA
Copies

3
copy of a mixed original
❏NOTE
·You will need an Electronic Document Handler mounted on your
machine.
✍Useful Tip
·The machine can also automatically select the appropriate size of paper,
according to each original, and make full-size copies.
Operator’s Manual
Reference Pages:
Auto Paper☞p.3-9
Selecting the Zoom
☞p.3-14
Auto Size☞p.3-14
Mixed Orig. Detection
☞p.3-66
Step 3Step 4
Making the Touch Panel settings
1. Touch [Zoom].
4003P001CA
2. Touch [Auto Size].
4003P316EA
3. Select the paper size.
4003P306EA
Starting the copy cycle
1. Press the Start key.
4002O280CB

4
Using Z-Fold
4002O323AA
Originals
Letter
11x17
Letter 11x17 Z-folded
Step 1
Loading the originals
1. Load your originals.
You can load originals of varying sizes at one
time.
4002O147AD
4002O092AA
Load your
originals
here!
Step 2
Setting the Mixed Orig. Detection function
1. Press the Original key.
4002O294CA
2. Touch [Mixed Orig. Detection].
4003P117CA
Copies
Make your 11”x17”pages fit neatly into an 8.5”x11”Letter size document without changing
the actual page size by using Z-Fold.

5
❏NOTES
·You will need an Electronic Document Handler and a 9708 Finisher
mounted on your machine.
·Make sure that [Auto Paper] is selected. If [Auto Paper] is not selected,
touch [Auto Paper] to highlight it.
✍Useful Tip
·You can also combine this function with Staple or Hole Punch.
Operator’s Manual
Reference Pages:
Auto Paper☞p.3-9
Hole Punch☞p.3-23
Staple☞p.3-24
Folding☞p.3-28
Mixed Orig. Detection
☞p.3-66
Step 3Step 4
Making the Touch Panel settings
1. Touch [Finishing] and then [Folding].
4003P039CA
2. Touch [Z-Fold].
4003P045CA
3. Touch [LTR] of Output Size.
4003P346EA
Starting the copy cycle
1. Press the Start key.
4002O280CB

6
Machine Sort and Sta
You may find it troublesome to sort and/or staple copy sets or stacks.
Let the machine take care of these chores.
4002O082AA
Copy SetsOriginals
Stapled
Step 1Step 2
Loading the originals
1. Load your originals.
4002O122AC
4002O092AA
Load your
originals
here!
Making the Touch Panel settings
1. Touch [Finishing].
4003P001CA
2. Touch [Sort].
4003P330EA
3. Touch [Corner Staple] or [2-Point Staple].
4003P334EA

7
aple Multiple Sets
❏NOTE
·You will need an Electronic Document Handler and a Finisher or Mailbin
Finisher mounted on your machine.
✍Useful Tips
·The machine can also staple a copy set or stack which has previously
been removed from it.
·Holes can also be punched in your copy sets or stacks.
Operator’s Manual
Reference Pages:
Finishing Function
☞p.3-20
Sort☞p.3-22
Hole Punch☞p.3-23
Staple☞p.3-24
Manual Staple☞p.3-26
4002O077AB
4002O305CA
Hole Punch
Step 3
Starting the copy cycle
1. Press the Start key.
4002O280CB
Looking good!

8
Pasting an Image on a
Characters or illustrations of your choice may be programmed in memory so that you can
put them on the finished copies like a stamp.
4002O301CA
CopiesOriginals
Step 1Step 2
Placing the original(s)
1. Place the original(s).
4002O149AC
4002O092AA
Load your
originals
here!
Making the Touch Panel settings 1
1. Touch [Auxiliary].
4003P004CA
2. Touch [Image Stamping].
4003P111CA
3. Touch [Set] and then the number key in which
your image has been stored.
4003P414EB

9
Finished Copy
❏NOTE
·You will need a Hard Disk Drive Kit and 32MB Memory mounted on
your machine.
✍Useful Tips
·Page number can be printed.
·Reference number can be printed.
·The date can also be printed.
Operator’s Manual
Reference Pages:
Image Memory Input
☞p.5-6
Number Stamping
☞p.3-60
Date☞p.3-61
Page☞p.3-62
Distribution☞p.3-63
Image Stamping
☞p.3-64
Step 3
Making the Touch Panel settings 2
1. Select the image stamping position.
4003P115CB
2. Touch [Enter].
4003P243CA
Step 4
Starting the copy cycle
1. Press the Start key.
4002O280CB

10
Storing an Image
Image samples: Make a copy and cut out the image of your choice to use as the source of
image to be stamped.
4002O306CA
Step 1Step 2
Making the Touch Panel settings 1
1. Press the Utility key.
4002O282CA
2. Touch [Job/Image/Scan Input].
4003P142CA
3. Touch [Image Memory Input].
4003P152CA
Placing the original
1. Place the original for the image to be stamped
on the Original Glass.
Make sure that it is placed in the direction
shown.
4002O316AB
2. Select the direction of the image.
4003P162CB

11
4002O307CA
Step 3Step 4
Making the Touch Panel settings 2
1. Touch [Input], then touch the desired image
number key, in which you want to store the
image. (The number marked with is
available for storing an image.)
4003P453EC
2. Touch [Auto Detect] and then [Enter].
4003P455EB
Storing the image
1. Press the Start key.
4002O280CB

12
Making Copies on Post
Not sure which way to feed postcards into the machine?
Save time and money by printing your data on the correct side of the postcards every time.
4002O302CA
Step 1Step 2
Placing the original
1. Place your original face down on the Original
Glass. Make sure that it is placed in the
direction shown.
4002O300AB
2. Touch [Orig. Copy].
3. Touch [Original Direction] and select .
4003P246CA
4. Touch [Enter].
Loading post cards
1. Load the post cards in the Multi Bypass Tray.
Note the correct direction of the post card for
loading.
* Be sure to face up the post cards.
4002O303CB
Up to 20 post cards can be loaded.
When you have loaded your post cards, a
new screen will appear.
4003P308EA

13
Cards
❏NOTE
·These pages give an example of making copies on 4x6 post cards.
For any other sizes, take measurements of the particular post card for
your own use.
✍Useful Tip
·When using the Multi Bypass Tray as the paper source, be sure to
place post cards face up on the tray.
Operator’s Manual
Reference Pages:
Manual Bypass☞p.3-11
Step 3Step 4
Making the Touch Panel settings
1. Touch [Paper Type] and select [Card/Vellum].
4003P544EA
2. Touch [Enter].
3. Touch [Custom Size]. A new screen will
appear.
4. Touch [X] and, using [ ] or [ ], show “6.”
4003P545EA
5. Touch [Y] and, using [ ] or [ ], show “4.”
6. Touch [Enter].
Starting the copy cycle
1. Press the Start key.
4002O280CB
This will produce a copy as shown below.
4002O304CA

14
Making Copies from a
How do you cope with the need to make copies from a book or magazine?
Do you make a two-page spread copy straight from an open book?
Have you sometimes needed to make copies in ascending order of the original pages?
4002O087AA
Original Copy
1st Page 1st Page
2nd Page 2nd Page
Step 1Step 2
Placing the original
1. Place the bound original on the Original Glass
in correct alignment with the book mark as
illustrated. (Make copies in ascending order
of the original page.)
1155O697AA
4002O079AA
Book Mark
BOOK
Place your
original
here!
Making the Touch Panel settings 1
1. Touch [Orig. Copy].
4003P002CA
2. Touch [Book].
4003P056CA
3. Touch [Standard Book] or [Right Bound] and
touch [Separation]. Then, touch [Enter].
4003P058CA

15
Book or Magazine
✍Useful Tip
·You can use the erase function to erase shadows at the center and/or
edges that would otherwise appear on the copy.
Operator’s Manual
Reference Pages:
Select Book☞p.3-40
Step 3Step 4
Making the Touch Panel settings 2
1. Touch [Double-Sided].
4003P257CA
2. Touch [Page arrange].
4003P065CA
3. Select [Book-Order] and touch [Enter].
4003P066CB
Starting the copy cycle
1. Press the Start key.
4002O280CB
2. If the message as shown below appears, turn
to next page and press the Start key again.
4003P242CA
3. Repeat step 2 until the last page is scanned.
Then touch [Finish] and press the Start key.

16
Creating and Binding a
The DL460/550 will create and bind a booklet out of your original sorted
8.5”x11”documents.
4002O324AC
Original
Step 1Step 2
Loading the originals
1. Load your originals.
4002O122AC
4002O092AA
Load your
originals
here!
Making the Touch Panel settings 1
1. Touch [Orig. Copy].
4003P002CA
2. Touch [4in1/Booklet].
4003P050CA
3. Touch [Booklet Creation] and then touch
[Enter].
4003P565EA
Copy

17
Booklet
❏NOTE
·You will need an Electronic Document Handler and a 9708 Finisher
mounted on your machine.
✍Useful Tip
·The paper size and zoom ratio can be set according to your need.
Operator’s Manual
Reference Pages:
Finishing Functions
☞p.3-20
Staple☞p.3-24
Selecting the Original
Copy Type☞p.3-36
Step 3Step 4
Making the Touch Panel settings 1
1. Touch [Finishing] and then [Folding].
4003P566EA
2. Touch [Crease].
4003P567EA
3. Touch [2-Point Staple] and then [Enter].
4003P568EA
Starting the copy cycle
1. Press the Start key.
4002O280CB

18
Conserve Paper
Use both sides of the paper to print a document.
4002O088AA
Originals
2-Sided Copies 2in1 Copies
Step 1Step 2
Loading the originals
1. Load your originals.
4002O122AC
4002O092AA
Load your
originals
here!
Making the Touch Panel settings 1
1. Touch [Orig. Copy].
4003P002CA
This manual suits for next models
1
Table of contents
Other Pitney Bowes All In One Printer manuals
Popular All In One Printer manuals by other brands

Konica Minolta
Konica Minolta bizhub 554E Specification & installation guide

Konica Minolta
Konica Minolta bizhub C554 user guide

Xerox
Xerox WorkCentre Pro 65 Network installation guide

Kyocera
Kyocera KM-8030 Advanced operation guide

Oce
Oce VarioLink 5022 quick guide

Xerox
Xerox WORKCENTRE 5735 Information guide